• Welcome to The Truck Stop! We see you haven't REGISTERED yet.

    Your truck knowledge is missing!
    • Registration is FREE , all we need is your birthday and email. (We don't share ANY data with ANYONE)
    • We have tons of knowledge here for your diesel truck!
    • Post your own topics and reply to existing threads to help others out!
    • NO ADS! The site is fully functional and ad free!
    CLICK HERE TO REGISTER!

    Problems registering? Click here to contact us!

    Already registered, but need a PASSWORD RESET? CLICK HERE TO RESET YOUR PASSWORD!

Time for some rust repair on the Tahoe.

With all that sandblasting I'm curious what your using for an air compressor and blaster?
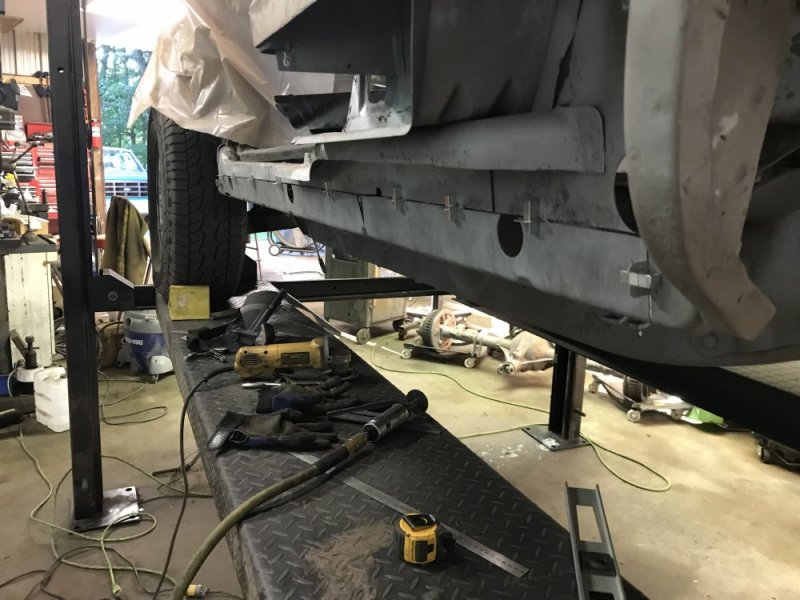
The blaster is a Clarke pressure pot unit. I think it’s discontinued now. The compressor is an old Speedaire 5hp 2-stage unit with an 80 gallon tank. Sorry, I don’t have any pics of the compressor right now.
32953D60-54BE-49FD-93EA-2FBA2FBDEA03.jpegE19B6424-2314-4752-85E3-E3C16C70F8D7.jpeg2E049EE3-7B3A-4D20-8AD0-451FB4DB54A5.jpeg
 
Probably gave that compressor a pretty good work out
Yes indeed. With a new 3.0mm nozzle it kept up pretty well, but it still ran continuously. Once the air got cooler it was actually able to keep up and shut off, much to my surprise (actually it scared me and made me think I had seized it!). This is the first time I wished I had a larger compressor. If I do this again, I'm thinking about getting a small gas-powered air compressor to supplement this compressor so I can gain so overall volume. It would be handy to have a gas powered one anyway.
 
Are you going to remove the rear side windows? Our '94 Suburban developed rust there and I would have never guessed it as clean as the rest of the truck was. Far less rot than yours has. You have a lot of time in this.
 
Are you going to remove the rear side windows? Our '94 Suburban developed rust there and I would have never guessed it as clean as the rest of the truck was. Far less rot than yours has. You have a lot of time in this.
No I hadn't planned on it. Where specifically was the rust located so I can start inspecting?
 
It was on the driver side (salt side) on the bottom horizontal edge, about a foot or so back from the front, vertical edge of the window, if I remember right.
 
It was on the driver side (salt side) on the bottom horizontal edge, about a foot or so back from the front, vertical edge of the window, if I remember right.
I was able to take a good look up into the quarter because I have the wheel arch removed and there’s no sign of rust. Thank you for the tip though!!
 
Got to start some metal work tonight. They don’t make an inner rocker panel for a 2 door Tahoe, so I had to make some pickup truck ones work. I cut out what would work and trimmed it until it fit decent.

0A30108D-E1FE-49B1-845F-76D2F8F58FA9.jpeg6D5B10D1-EE11-43F7-9FE6-9121303979AF.jpeg

There are still a couple spots that need some work to match the Hoe, but not a big deal. Of course one of the drain bumps interfered with the running board bracket so I have to do a little swapping there.

BE4ADBE5-4F8C-4FFB-BC91-C290DFB73F5F.jpeg3FBAF0CC-0203-4EDA-8B76-602EF695C238.jpeg12CE3435-65A2-47EE-A95B-75259C91BE18.jpeg6CEFEDB5-4A07-4B2F-A47A-A4EDDBDE548F.jpeg

This is what’s leftover.

06BC0ACE-A061-4D6B-B233-DA654CE0A862.jpeg56E63C6C-3832-4190-8C27-946C91436704.jpeg

I’m happy to be doing this sheet metal work finally! I’ve never done it on a lift like this before - man is it nice working at standing height!! Oh and it’s cooled off - upper 70s with reasonable humidity....I don’t want to go inside, but dinner calls.
 

Attachments

  • FF5F24EA-CFD1-44EB-A265-AA4967DF12F6.jpeg
    FF5F24EA-CFD1-44EB-A265-AA4967DF12F6.jpeg
    125.7 KB · Views: 6
Those era trucks are a dime a dozen in the vineyards of California and can be had for $500 to $1000. Most will have some sort of front end damage, but you can find clean ones and there will be no rust.
 
I got the inner rocker patch panel finished and ready for installation.

I got the mods done to the front. The bump is now further forward and out of the way of the running board bracket.

20A2D218-D7BF-4ECA-8E52-0B54CA96CD36.jpegCFE879B5-F623-411C-8918-A651B1DA7B3D.jpeg

And to the middle. I added a bump up to accommodate the multiple layers of sheet metal where the rocker and quarter panels stack. Also joined the two panels into one piece.

C254043F-6EA2-4D79-9ED1-2B464EFCA342.jpegE12974E1-60A1-4105-A9B4-299BFE582A5A.jpeg

Here it is all installed and ready to weld. I’m really liking these panel clamps.
C58A6AE3-5B86-4073-ABDE-18697264440E.jpeg48B39A23-272F-45C0-BA25-2FBDE7F84CDA.jpegCCD93B6C-0B36-4671-8356-550E0629F3ED.jpeg
 
Friday night I finished welding out the driver side inner rocker panel. It isn’t the prettiest since it’s basically a series of tack welds to keep the sheet metal from warping, but there’s good penetration through to the back. Since it isn’t visible once the outer rocker is in place, I didn’t worry about grinding the welds down.

AD17AAB4-3FC5-40CB-98E0-563B27DF791F.jpeg18A44432-6C87-4CA9-84DC-84F513028D37.jpegC2AC5633-5D57-4657-B1EA-FC3A8EE5AC9C.jpeg

Today I used a template to complete the access circles in the metal. Then I used a carbide burr to cut the metal out.

89CB5290-763A-4100-BAD8-0D7336773029.jpegC5245E86-B965-46F3-823B-2F6884156C15.jpeg

I opened up the drain hole for the body crossmember as well.

DDBFB7D6-0D8E-47A0-AA08-EB083853C205.jpeg

Then it was time to work on the passenger side. It went faster with all of the learning I did on the driver side. I got it all done today even though I had to actually relocate two of the drain bumps due to interference with the running board brackets.

9CA9A641-E11B-402F-A9B6-1A1CD8ED4829.jpeg5DBA837C-A266-441B-876B-F5D13C606916.jpeg6B0F5F88-BA2A-4E7B-849A-DCA26100C0A5.jpeg
 
More progress this week. There’s a weird piece of structure between the inner and outer rockers on a 2 door Tahoe. It’s hard to tell what it does, but I guess if the factory thought it important enough to make it I better try to reproduce it. It isn’t the prettiest thing since I made it out of multiple pieces and didn’t really have a good guide to go by. I started fitting a couple pieces and then I applied some paint before welding them in. I used KBS Rust Seal for most of the surface, but masked off where the weld areas would be. Then I sprayed Seymour weld-through primer at all of the weld areas.

227EBE51-DD2C-4018-A14C-A8EC7B6A04CE.jpegB00D5960-4871-4E54-B9C8-921BA978D97D.jpeg6AEFE946-3EBD-4A9A-A59C-CF3B5F7F56EB.jpeg68FBF6D8-BBA8-4685-ADFB-78D9813B7FB7.jpeg

775B2016-F146-4D8A-AD44-7FB88903BDE0.jpeg
EB3E8D07-0361-4506-8E01-271EF0B7A652.jpeg3AEDB02B-A1C0-483E-AD6A-142ACC175130.jpegF36679DC-B1F8-42B5-B8C6-E14CB26CE47C.jpeg49E9EA0F-025F-4810-925A-AFE34CB884B6.jpeg
 
Now I’m working on behind the driver side rear wheel. Most of the original panel was toast both due to rust and someone backing into that corner a couple years ago. That last body cut I did a few weeks ago is really coming in handy here. If I had tried to make this from scratch it would have been pretty sketchy.

50828B52-3CAF-467C-BBBE-EC2729815E33.jpeg2B32D59F-D653-4B0B-AB02-1640DD3BD602.jpeg360A4F49-A9FD-40E9-BC99-D1C47B79A322.jpeg97E8552F-6BEC-41EB-B444-527A169D5FD5.jpeg41544387-44DD-40EE-B9F4-44404322D286.jpeg92DC0B8A-4633-4EDC-B083-9D43040B9FB0.jpeg11245D64-7F4F-44D6-BD12-F0CD9EAA73F9.jpeg60DB253F-FC7A-4F18-B241-8F6A7193B577.jpeg
 
Back
Top