• Welcome to The Truck Stop! We see you haven't REGISTERED yet.

    Your truck knowledge is missing!
    • Registration is FREE , all we need is your birthday and email. (We don't share ANY data with ANYONE)
    • We have tons of knowledge here for your diesel truck!
    • Post your own topics and reply to existing threads to help others out!
    • NO ADS! The site is fully functional and ad free!
    CLICK HERE TO REGISTER!

    Problems registering? Click here to contact us!

    Already registered, but need a PASSWORD RESET? CLICK HERE TO RESET YOUR PASSWORD!

Upgrading To A Larger CS144 Alternator.

Heres a pic of mine finished,,, done last year,, it is Always, on 14v and I love it,,, I used a fence type turn-buckle for a rear bracket. Bent both ends a bit,, to match the manifold/alt angles,, and used turnbuckle and jamb nuts, to adjust the belt riding angle till it all lines up, then tightened it all down.
 

Attachments

  • 010.jpg
    010.jpg
    84.8 KB · Views: 42
Heres a pic of mine finished,,, done last year,, it is Always, on 14v and I love it,,, I used a fence type turn-buckle for a rear bracket. Bent both ends a bit,, to match the manifold/alt angles,, and used turnbuckle and jamb nuts, to adjust the belt riding angle till it all lines up, then tightened it all down.

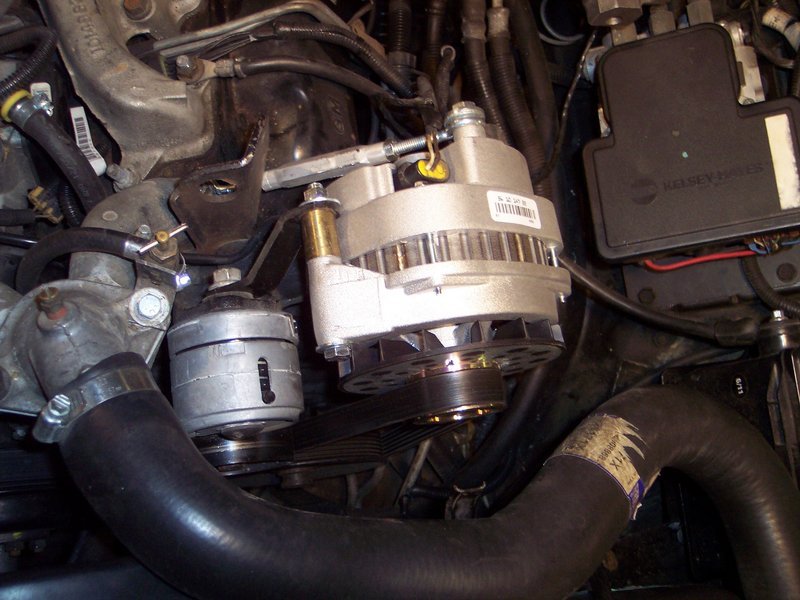
Very nice job on the install. I thought about using a spacer, so I could reuse the OE upper bracket, but I already had some 1" strap laying around, so I went that route. I also like your turn-buckle rear support. Great idea! :)

Matt
 
Heres a pic of mine finished,,, done last year,, it is Always, on 14v and I love it,,, I used a fence type turn-buckle for a rear bracket. Bent both ends a bit,, to match the manifold/alt angles,, and used turnbuckle and jamb nuts, to adjust the belt riding angle till it all lines up, then tightened it all down.
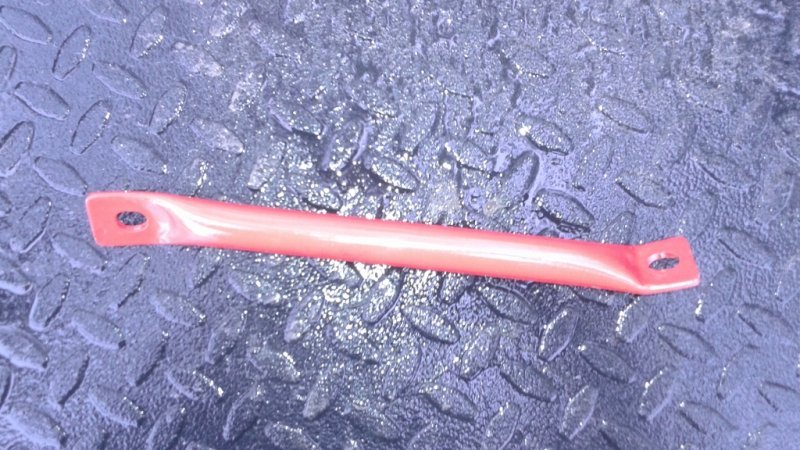
My Suburban would slowly bend the turnbuckles. It also broke the tensioner to alt bracket. SO make sure you get a strong one and check it now and then.
 
I got my rear alternator brace from Leroy today, and it looks, and fits like it came straight from GM! Nice work Leroy. :)
While it did come in a nice shade of red, it wasn't my shade of red, so it got stripped, and repainted black. :D

Matt
 

Attachments

  • 20150102_142535 (1024x576).jpg
    20150102_142535 (1024x576).jpg
    97.8 KB · Views: 27
  • 20150102_153103 (1024x576).jpg
    20150102_153103 (1024x576).jpg
    60.4 KB · Views: 27
  • 20150102_153113 (1024x576).jpg
    20150102_153113 (1024x576).jpg
    54 KB · Views: 27
  • 20150102_153123 (1024x576).jpg
    20150102_153123 (1024x576).jpg
    54.6 KB · Views: 28
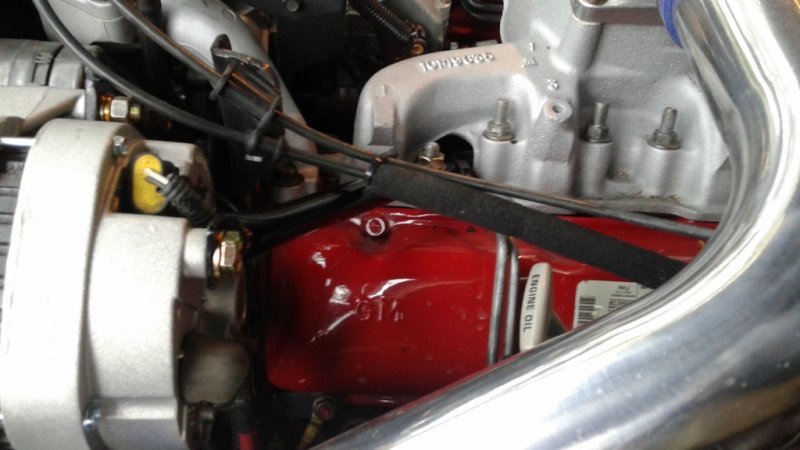
Here is a couple pics of the bracket Leroy Diesel will sell with some serious arm twisting. I wish he would offer this unique needed item on his site... As well as a flat bar for the front mount that is stronger than the factory one flipped around...

We bought this and it broke. I need that camaro rod you recommend.
 
@Big T Uh-ho! It was a rod from a smog pump my buddy had in his garage. No other details that I recall. And that ride was sold.

Where did it break? I will have to inspect mine.
 
@Big T Uh-ho! It was a rod from a smog pump my buddy had in his garage. No other details that I recall. And that ride was sold.

Where did it break? I will have to inspect mine.

It broke at the connection to the engine, right were the pinched tubing ended.
 
@Big T Uh-ho! It was a rod from a smog pump my buddy had in his garage. No other details that I recall. And that ride was sold.

Where did it break? I will have to inspect mine.

We need a solution for this. The crimped Leroy tube did not hold up. It needs to be a solid forged rod like the one I remember you had from the Camaro. Unfortunately, I cannot find that part (yet) online.
 
If you have the hollow tube still that broke, copy it with some colled roll steel and flatstock welded to the ends. Do you weld or anyone near you? I have my mig but no decescent metal on hand.

See @n8in8or, here is that tig calling you...
 
If you have the hollow tube still that broke, copy it with some colled roll steel and flatstock welded to the ends. Do you weld or anyone near you? I have my mig but no decescent metal on hand.

See @n8in8or, here is that tig calling you...

I have the current part at my welder. He's going through end of life issues with his father, so not bothering him to get this done.
 
Heres a pic of mine finished,,, done last year,, it is Always, on 14v and I love it,,, I used a fence type turn-buckle for a rear bracket. Bent both ends a bit,, to match the manifold/alt angles,, and used turnbuckle and jamb nuts, to adjust the belt riding angle till it all lines up, then tightened it all down.
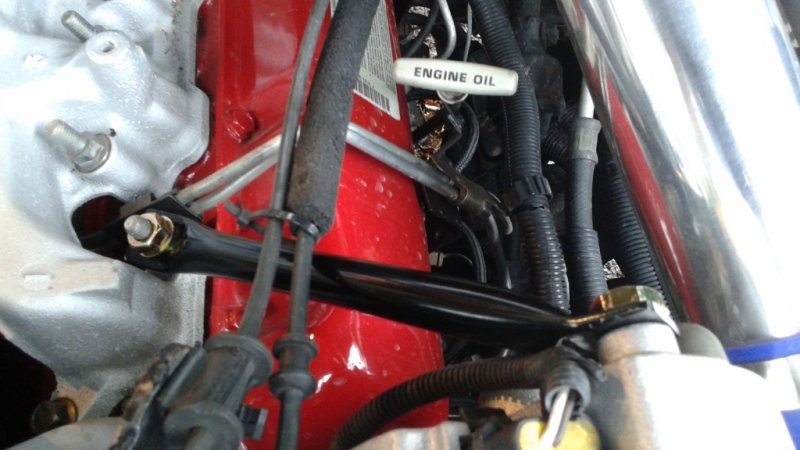
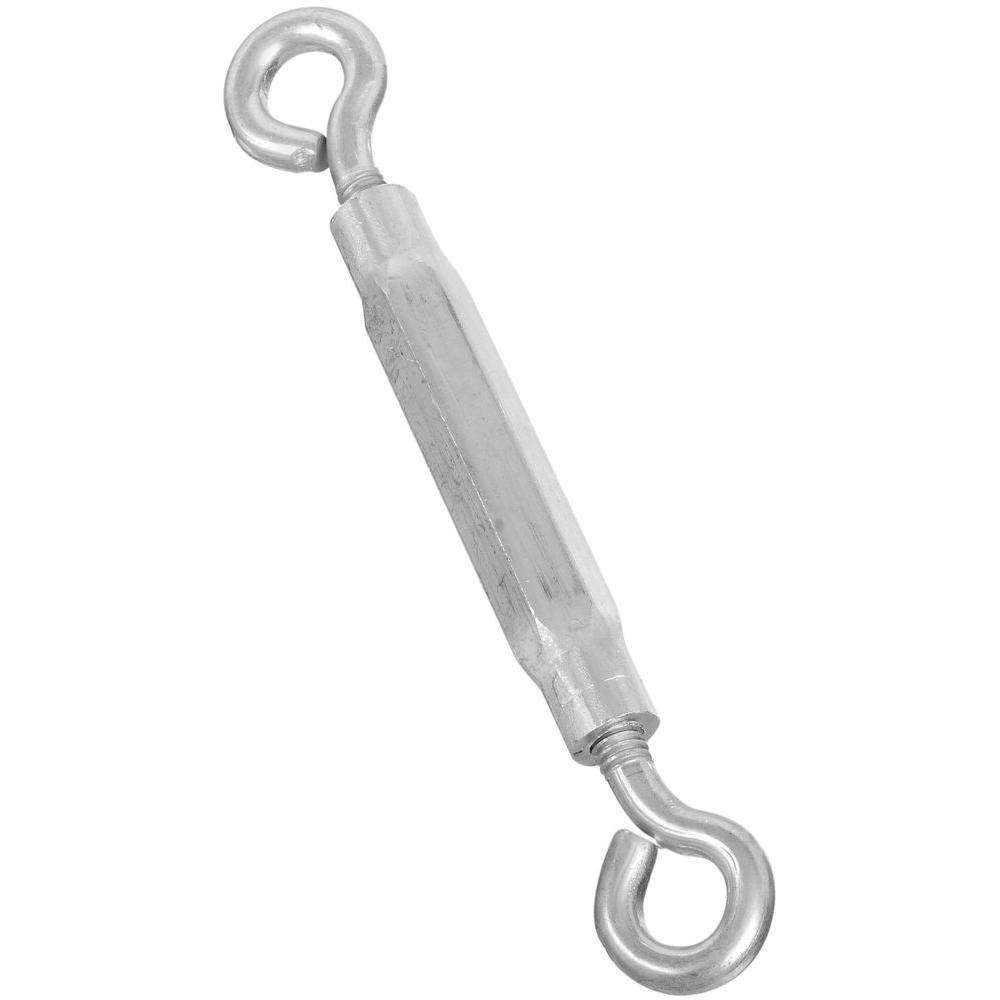
Would you source that turnbuckle at a Home Depot? If not, where?
 
Heres a pic of mine finished,,, done last year,, it is Always, on 14v and I love it,,, I used a fence type turn-buckle for a rear bracket. Bent both ends a bit,, to match the manifold/alt angles,, and used turnbuckle and jamb nuts, to adjust the belt riding angle till it all lines up, then tightened it all down.
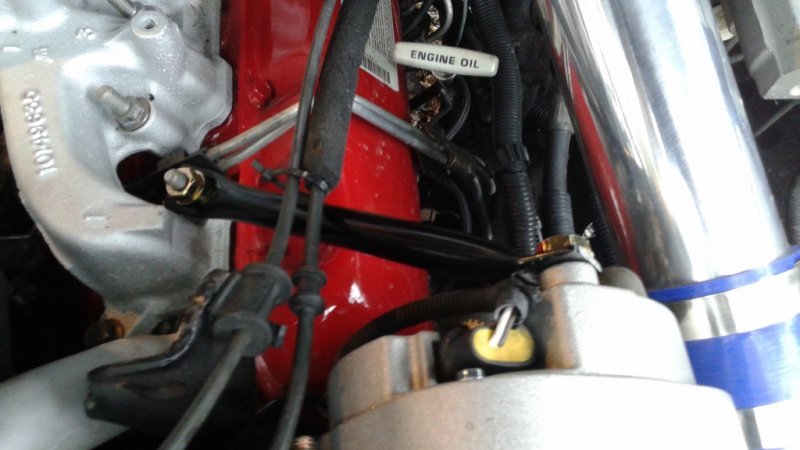
Where would you source the turnbuckle parts? Home Depot?
 
If you have the hollow tube still that broke, copy it with some colled roll steel and flatstock welded to the ends. Do you weld or anyone near you? I have my mig but no decescent metal on hand.

See @n8in8or, here is that tig calling you...
Yep! I need to start saving my nickels and dimes for one.
 
Most hardware stores have turnbuckles, but locking them down from vibration loosening is a must. On engines I have used some, i would red loctite the threads and wire tie the buckle from turning. Nowdays I would go for NordLock washers at the jammnuts.

Also DON’T use harbor freight ones here. Their’s the body breaks from vibration easy.
 
Something like this from HD:

https://www.homedepot.com/p/Nationa...e-Turnbuckle-2170BC-5-16X9-TBKL-E-E/204590266

national-hardware-turnbuckles-2170bc-5-16x9-tbkl-e-e-64_1000.jpg
 
Yeah, but that is to use on a fence or something where no vibration exists. So you remove the eye bolt, add a jam nut on and screw it back in. Then when you adjust the turnbuckle you “jam” the nut against it holding the body with one wrench and another wrench to tighten the nut, applying thread locker under the nut threads. To make it more secure install the NordLock between the nut and turnbuckle.
 
If you use AD244, you will not need that turnbuckle.
Just the stock bracket cut on the far bolt and still use the Alt bottom bolt.
The alternator is thinner and easier to hold since it is the same thickness as the CS130/CS130D alternator.

Just saying.
 
Back
Top