• Welcome to The Truck Stop! We see you haven't REGISTERED yet.

    Your truck knowledge is missing!
    • Registration is FREE , all we need is your birthday and email. (We don't share ANY data with ANYONE)
    • We have tons of knowledge here for your diesel truck!
    • Post your own topics and reply to existing threads to help others out!
    • NO ADS! The site is fully functional and ad free!
    CLICK HERE TO REGISTER!

    Problems registering? Click here to contact us!

    Already registered, but need a PASSWORD RESET? CLICK HERE TO RESET YOUR PASSWORD!

1996 K2500 “Krovvy”

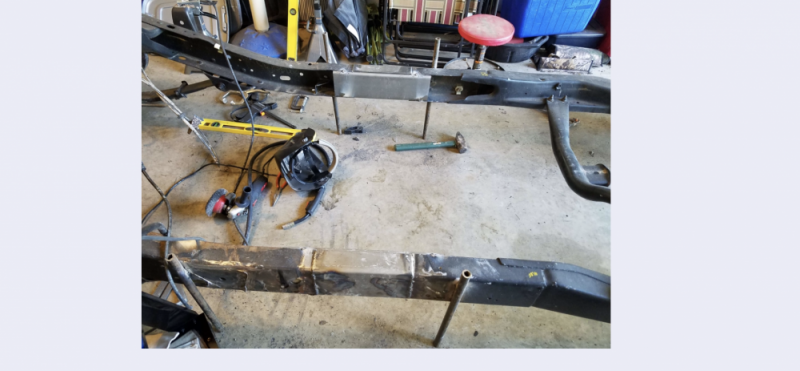
After heat and beating the crossmember repair piece(s) into shape, did you temper it (them) before welding up the new end, Nate? Just curious.
 
After heat and beating the crossmember repair piece(s) into shape, did you temper it (them) before welding up the new end, Nate? Just curious.
I did not. After the first bend I did quench it in water just so I could handle it, but the rest of the piece just cooled naturally. I hadn’t considered tempering parts in repairs like this.
 
I was thinking from the standpoint that frames are made of tempered steel (part of the current towing capacity wars among the Big Three is the steels used to get their frame strengths and rigidity) and that you are supposed to use special techniques when welding them if making a splice to extend them, are shortening them or repairing them.

I was just thinking along the lines of if they got red hot for shaping, oil quenching them would ensure grain uniformity and harden the steel and make the repair pieces less susceptible to deformation from load stresses - and possibly preventing later frame/cross member alignment issues due to load, terrain or drivetrain stresses.
 
With the age and rust of that frame, idk if I would play with heat treatment. In the truck equipment shop I have seen it go wrong even with well trained guys that has been at it for years. You get more strength with gloving it than re tempering because getting the entire frame tempered is insanely hard. And only getting part of the area just creates a new weak spot. Doing a full frame re temper on a semi was often 1/3 the cost of a new frame - running our big kiln is expensive (Chris could probably testify to that

When going to the edge of a flange, that is a weak spot. So is the beginning and end of a bead. So take a piece of scrap flat bar or plate, tack it on as if extending the flange like a shelf. Then make the full penetration weld and weld past the end of the flange into the scrap shelf piece as a single bead, no stitching. Now is when you re peen. Then using thin wheel grinder, cut of that scrap piece back to the original dimensions. This is how to get full strength weld through the flange. Make sure the bead is in one pass linear and another pass longitudinal; and the thickness of the frame. After it has fully cooled, you can take down the excess weld to proper dimensions, be patient and don’t heat the metal grinding it.

All that said, what you have done now will outlive the rest the frame. That entire frame is fatigued so far that the only thing I would do that you may not have : peen it.

WHAT? Everyone doesn’t own a $15,000 ultrasonic laser guided tunable peener? Oh, then go to harbor fraud and buy a welders needle scaler. The cheap scalers have soft needles that die soon. So as with ALL harbor friggin air tools, the first thing you do is pull it apart and clean out the mass production trash left behind. Oil the things like orings as it goes back together and it will work better and last longer. You can harden the needles while apart if you want, but $25 - meh...

Now reassemble and put in ear plugs. Then put ear muffs over them. Maybe duct tape a pillow over that. And blipity blapity, ping pang pong, ratatattat the livin dog snot out of it.

You want a fully micro dimpled area the entire weld and twice the width of the weld into the metal. it relieves all the stress in the metal. Yes the harbor freight method does not look showcar pretty like the ultrasonic or micro shot peen gun method. But you can dress up the dimples.

Several years back a few guys were arguing if the needle scaler did anything at all to help. So when the xray guys came out for testing a bunch of high pressure high heat piping stuff, we took a few scraps and did samples for the guy to test and compared it to ones we did using the ultrasonic peener. It was about 80% as effective as the best thing at any price on the market for strength- but it isn’t as pretty. Dont get the wrong idea- nothing an extra coat or two of paint wont hide. Nothing as dramatic as the rust pits in that frame.
 
Just curious. Why not hydro blast instead of all the time to attack with the needle gun?

The quoted price on hydro blasting my rustoration frame is far cheaper than the expected labor to needle it.
 
@Will L. thank you for the idea on extending the weld. That was the one thing that concerned me about my patch - the end of the welds. I think I'll go back and do that.
 
Just curious. Why not hydro blast instead of all the time to attack with the needle gun?

The quoted price on hydro blasting my rustoration frame is far cheaper than the expected labor to needle it.
I haven't seen an update on your rustoration project. Are you making progress? Are you having to make any frame repairs or was it all surface rust?
 
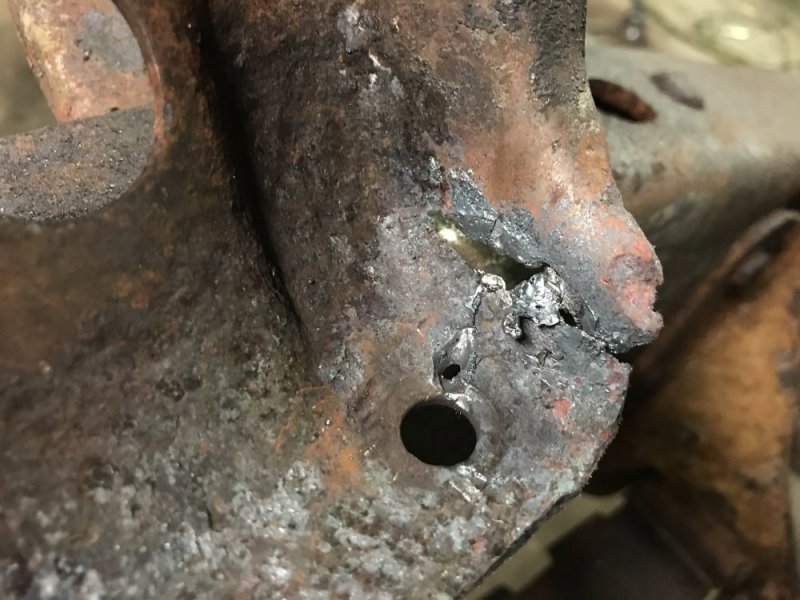
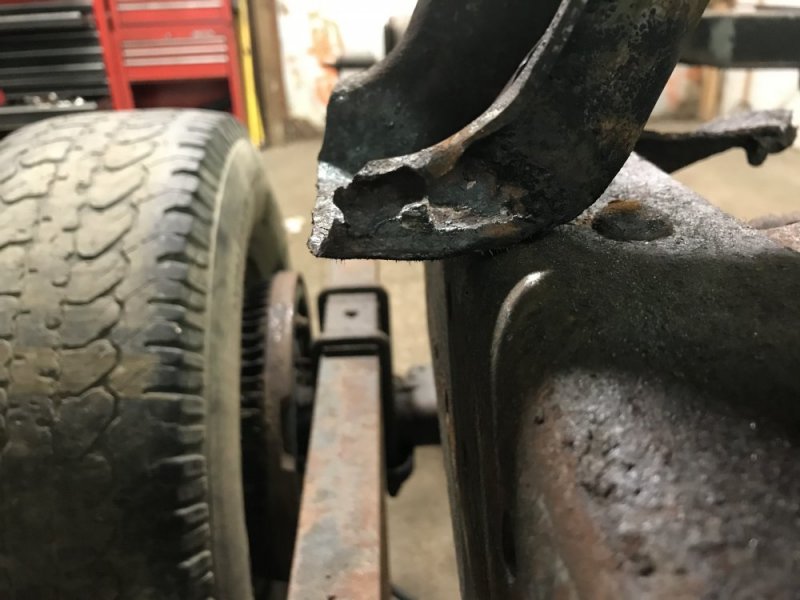
Frame rust is mostly surface. There is one spot (visible in the photos) just aft of the PS front wheel with more extensive rust. Turns out that it is common for the Ford's to get heavy rust at that spot.

To the project in general, it is a slow roll of taking a step forward, deciding what parts we want for the next step, gathering parts, ect...

We just solved the shop's storage limitations. Their primary customer is a business whom needs the money-maker vehicle back on the road ASAP. So, the physical lay-out was all lifts and scarce shelves as any new parts went directly into a vehicle. Along comes my vehicle and they had to scramble to find space for my truck's needs versus all the in-and-out jobs. Another benefit to more storage is that now they are able to more easily work on my truck between the money-makers. Sure, this slows down my project, but I'm good with that as everybody wins.

With the storage challenge fixed, we are back into parts gathering for the motor. For the frame, we are near 100% likely to hydro-blast and let that vendor paint the frame as the hydro-blast folks claim their home-brew paint is as good as all the other reputable stuff out there. If it turns out that any spot needs shoring-up, we will find a good welder.

Might have to delay body work on the cab and bed to just band-aid repairs as it turns out there is a downside to living in a metropolitan area: there are so many collisions, that body shops only fix dents / scrapes and no longer train for true body restoration. This is not a total set-back as it makes the total project more wallet friendly by spreading out the work. Bummer is that it will create some extra cost by way of extra cab & bed installation / removals along with eventual transpiration to wherever the body shop exists.
 
The needle gun suggested is for poor mans peening the weld - not rust removal.

Yes be could temper and deal with the repaired area alone. And if the frame wasn’t rusty I would think it couldn’t hurt. But I get sheepish tempering rusted frames.
The General rule is keep heat to a minimum and in as little area as possible when not gloving the frame. And since his repair required not following the 45° Angle rule, its even more so.

If it weren’t Nate the super star here, I would say consider an inside glove. But he is SO meticulous, he will inspect it often for issues. If the crack starts again it will be on the bottom flange, easily see. And repaired in place and add an inside glove only if needed.
Many repairs like this are made and last decades under abuse without the glove.
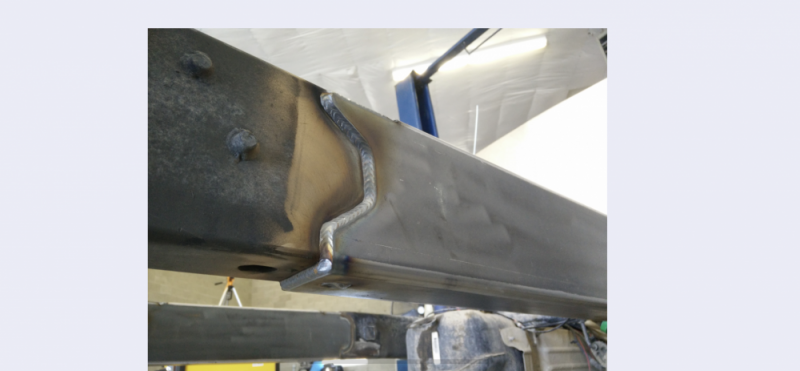
 
I would say consider an inside glove. But he is SO meticulous, he will inspect it often for issues. If the crack starts again it will be on the bottom flange, easily see. And repaired in place and add an inside glove only if needed.
Many repairs like this are made and last decades under abuse without the glove.

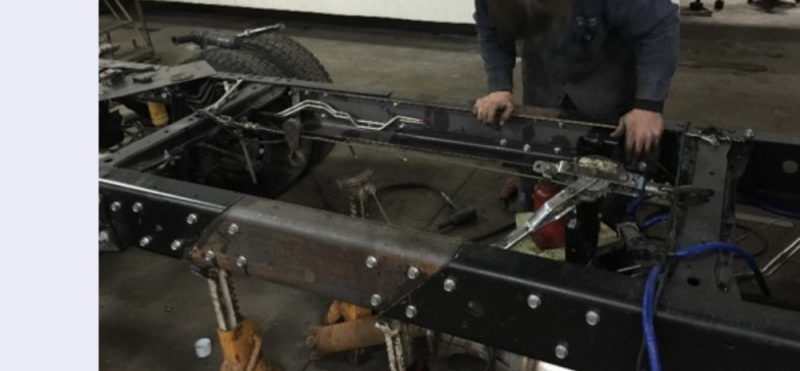
When I get the suspension off the frame I’m going to flip it over and look at it really well. I was considering adding some additional steel from underneath that would overlap the other seams - I guess that’s called a “glove”?
 
Doing welding test so We would be certified for welding hitches and bridges, do not allow the temp of the steel to get over 400 degrees. When I did My test, I would try to not allow the steel to get over 300 and mostly in the 250 degree range.
400 degrees and the properties of the steel changes and becomes brittle on areas.
 
2D8FDC65-A610-48CB-AF6D-692C7C6E51E4.pngDA38C227-F5EF-42D3-8E27-C7A95C02D14A.png

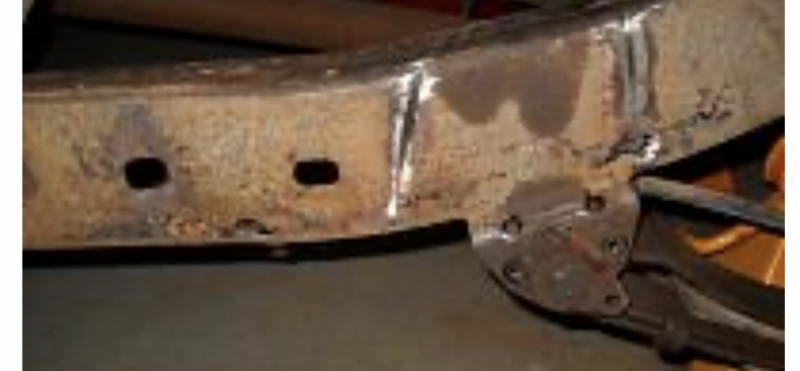
First pis is a 2/3 Outside glove welded in place. Full outside glove would be a 1 piece bent piece on the outside.

Second pic (on the side the guy is standing) is inside glove that is bolted in place. Again, should always be 1 solid piece bent into the shape, not welded flat bar. The bends are crucial.

how you see in the second pic on the driver side, the frame is being extended by the piece in the middle. Note the 45° angles. You never want to go more vertical than 45° if it all possible to fight the cracking. Sometimes cutting out a vertical crack by doing two 45° Angle cuts in front and and behind the damaged area is better. If this were a 2 ton or more truck I would do that, but regular pickup is fine.

Many semi trucks we did had both inside and outside gloves. The gloves generally go 18” either side of the weld on 2 ton and up. A single weld like yours 12” long would be enough to withstand more than the rest of the frame can.

a fishplate is a similar term but generally applies to only the side rail of the frame and is usually diamond shaped with all corners rounded and always welded.

The choice of welding gloves vs bolting them on gets determined by the manufacture. If the frame experiences a lot of twist, bolting is usually the answer.

it is important to note, NONE of these repairs are legal if it is in between or at the leaf spring hangers on the frame rails. That requires frame section replacement. Same for front. Suspension wether leaf or coil springs. Memory fails, but 8” from coil reinforcement area sounds familiar, but research is worth it if that ever comes up.
 
These frames would be red tagged by Hiway Patrol and not even let you drive it home. Tow it home and suspend registration until frame is replaced. Improper frame repair does not allow for re-repair when done this way. These would make the owner install a complete different frame. Real world- probably fine so long as they never get in a high speed crash or never load the trucks overweight. But overweight or freeway crash- people gonna die theory.
383C108D-4224-439D-8D1D-C3B8829AC998.png322B870D-563D-4646-8837-BB53D18140C9.png
 
Weekend recap:

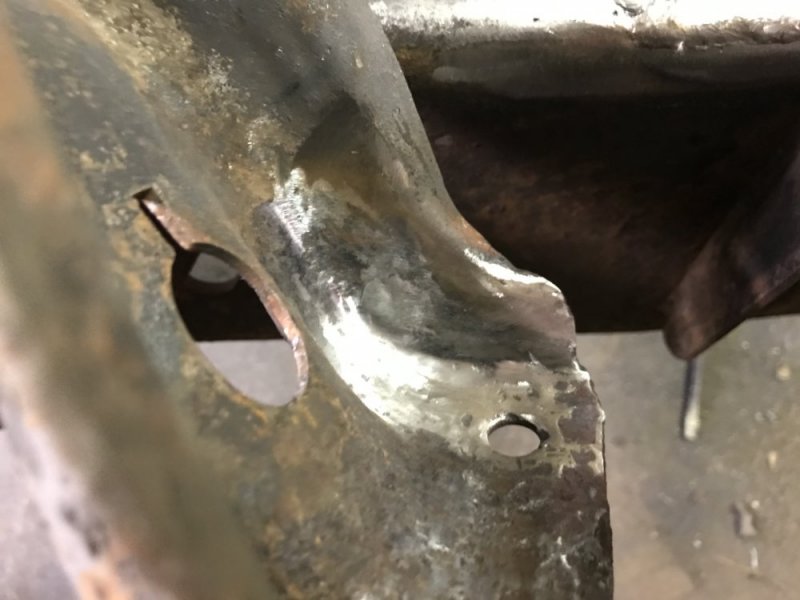
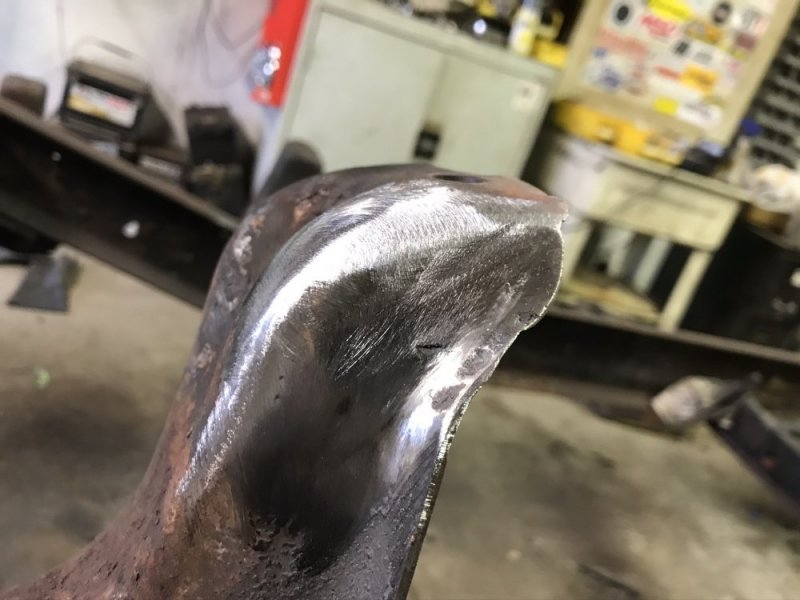
Friday night I fixed the rust on the other end of the crossmember. It wasn’t as extensive so it was a much easier fix.

DE7EAF27-268F-4824-BC49-E912127206AD.jpegEFC52BED-0751-4BDB-960D-3F3718899F8E.jpegD39C64F0-6A53-40CB-A266-B16CF7984E66.jpegFB9445F8-CCD8-4290-80F0-60A8E3B22F05.jpeg

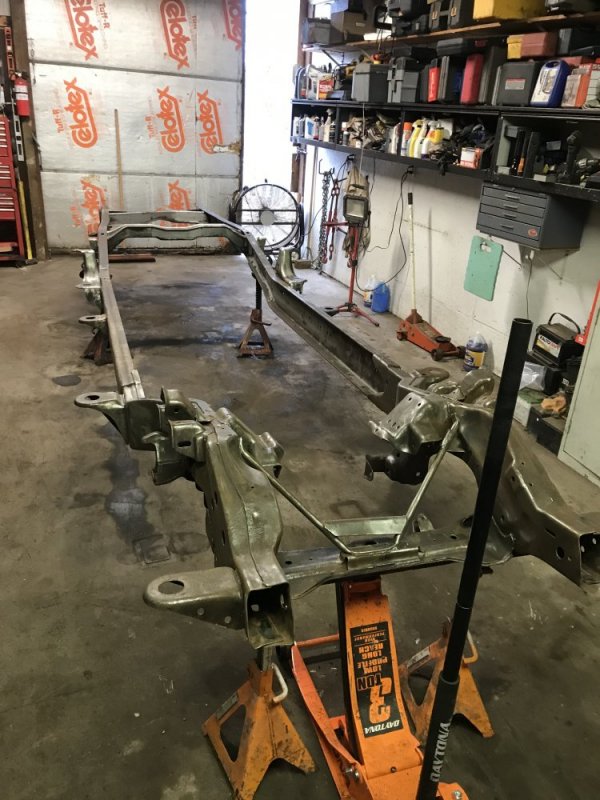
Saturday I hit the frame with a braided wire wheel cup on the angle grinder. I found some goop on the frame when doing the patches that hadn’t come off with the pressure washer. And in fact there was a lot of it inside the C section of the frame rails. So while the frame was off the ground since the wheels and suspension were still on I decided to go all over the frame with it to get that and any other crusty stuff that hadn’t come off before.

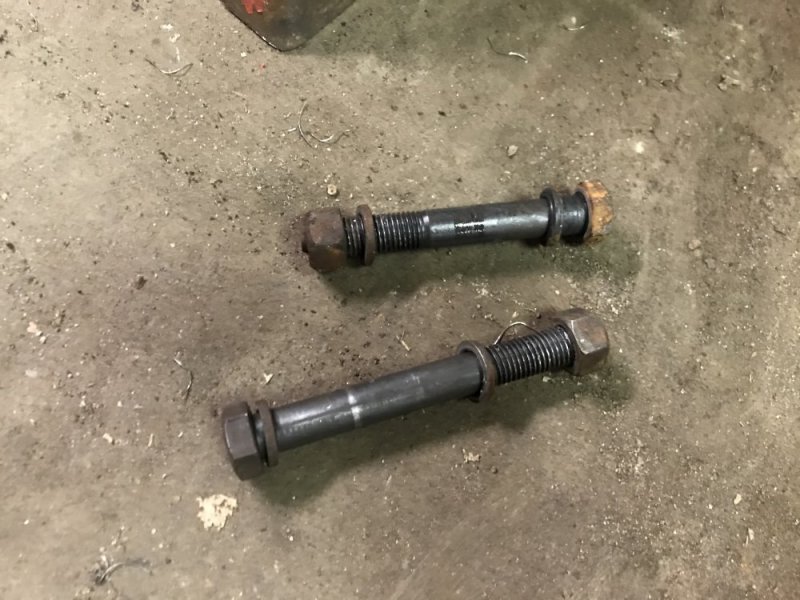
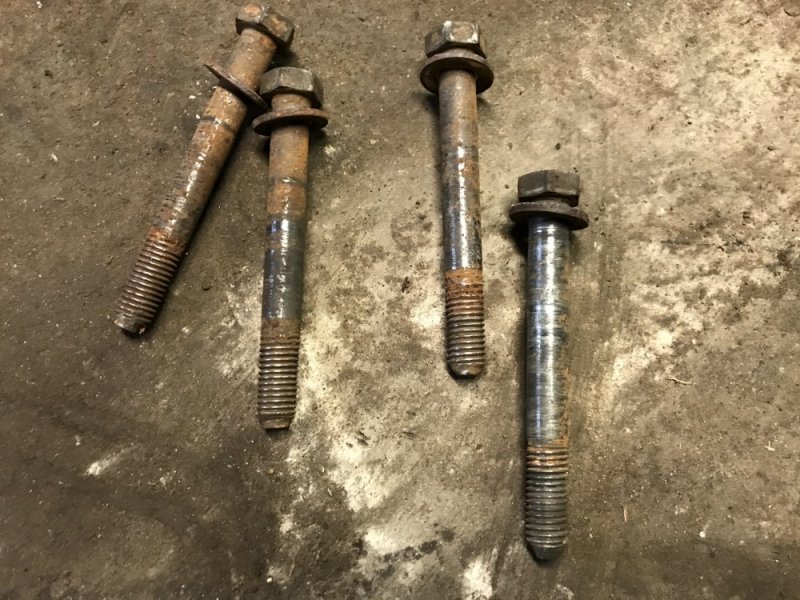
After that I removed the suspension. To my surprise, all of the control arm bolts came right out! I remember the lower ones on the Tahoe being a real mother when I did those. They even looked really fresh!

B6B4C05B-333D-40B7-8144-D0078A22DB94.jpeg

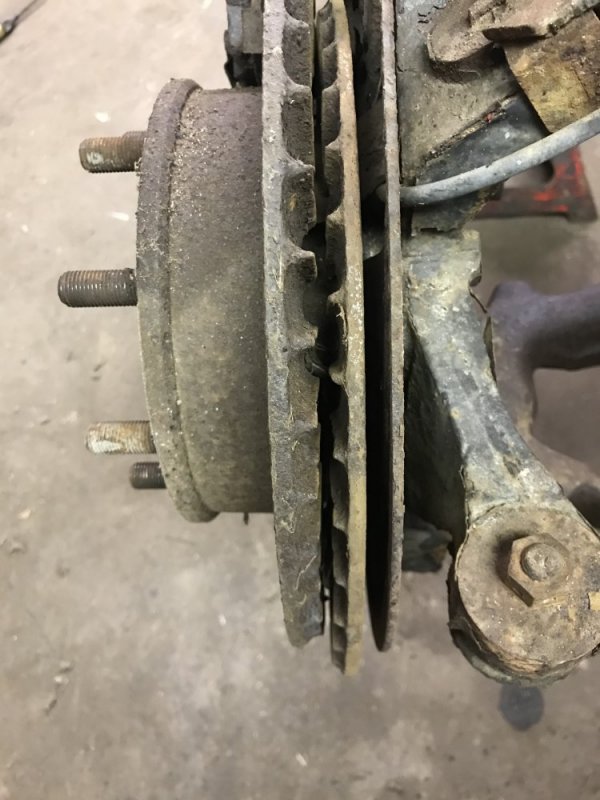
Oh and I found that weird noise I kept hearing when I’d roll the truck around!

71E9922A-6081-4402-972A-86BF65B425BD.jpeg

I wasn’t as lucky with the leaf spring bolts. One actually did come out just with the air impact, but the other 3 were stuck. Then I got an idea: while running the impact on the head of the bolt, whack the end of the bolt with a hammer to try to knock it free.....it worked! The other 3 came out with a handful of hammer whacks. And they also look reusable.

8CCE4E9B-7814-40A2-8518-1D0919155417.jpeg

Then I looked at the frame some more. All the wire wheel had done with that gooey stuff was spread it around, it hadn’t ground it off like I hoped. And the more I looked the more of it I found. So I got out some xylene and heavy paper towels and started wiping.....it took it off, but it took a lot of wiping. I finished Saturday with a small area of the frame done.

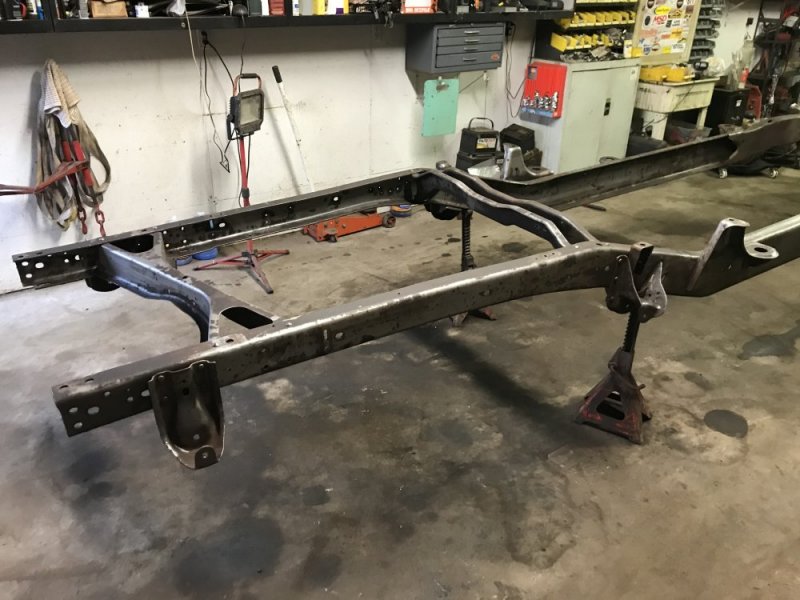
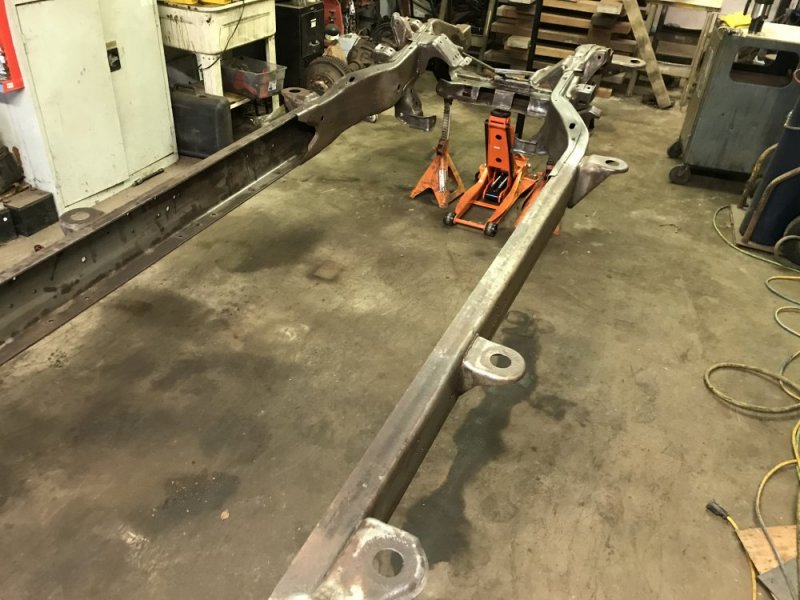
Sunday I only had a couple hours to work so I picked up where I left off - taking this black, tar-like coating off. I used scrapers of various sizes, a house siding scraper brush and lots of paper towel. I ran out of xylene so I switched to gasoline - since gas prices are low right now, it’s actually a somewhat economical solvent. I got it all stripped from the back of the frame all the way up to the front suspension. Here is how it looked when I finished.

1EDB3E52-DAC0-44B4-9FBA-6736891530EF.jpeg07ED3054-CD1E-45A7-8380-4903530C90C1.jpeg85B46ADA-3468-4317-B53B-3FD83C6476EA.jpeg

There are a couple spots in the front I’m going to tend to and then I’ll flip the frame over and attack with the wire wheel and stripping stuff. I’d guess I have it about 3/4 of the way ready for paint. But then I still have to prep crossmembers, control arms and other bits. I’m hoping to get it painted next weekend, but we’ll see. In hindsight, I’m not sure if it made sense to do the pressure washer since I ended up going after it with the wire wheel anyway. I was really hoping to just power wash it and then be able to paint after that, but having all the undercoating or whatever all over it just didn’t seem like a good base for painting. Why go just 90% when I’m already here? I guess for a truck I want to keep for a while this is just my new normal - strip them down and then build them back up. When I do the dually I’ll just take the frame out to have it sandblasted and save myself this headache
 
Last edited:
Back
Top