• Welcome to The Truck Stop! We see you haven't REGISTERED yet.

    Your truck knowledge is missing!
    • Registration is FREE , all we need is your birthday and email. (We don't share ANY data with ANYONE)
    • We have tons of knowledge here for your diesel truck!
    • Post your own topics and reply to existing threads to help others out!
    • NO ADS! The site is fully functional and ad free!
    CLICK HERE TO REGISTER!

    Problems registering? Click here to contact us!

    Already registered, but need a PASSWORD RESET? CLICK HERE TO RESET YOUR PASSWORD!

What did you do with your GMT400 today...or yesterday....

Got the new FFM with the FTB coming from Leroy.
Now to see if I can find the proper size AN fitting. Male one end, female the other then 1/8th pipe tap a hole in it for a fuel pressure gauge sender unit.
I tried to order the one from MM and their website would not accept the CC info. Tried calling, left a message, no call back so I’ll just make my own. If I can find the fitting.
I think it is a 6 AN.
 
I recently found that the fuel screen where the factory hose clamped to will separate into two pieces. the hose barb will unscrew from the screened portion and is threaded the same as a #4 boss hydraulic fitting. if you can get a #4 male boss to #6 JIC straight or 90deg. there might be enough meat in the hex section to drill and tap an 1/8" pipe thread in there for a gauge. if not maybe a local hydraulic shop would have a tee fitting that would work. of course, you will have to drill out the opening in the #4 fitting so that the flow won't be restricted to 1/4" ID. that part is the easiest.

here at my work we have made all kinds of adapter fittings like this where we drill and tap a side hole in the hydraulic fittings.
I see some in fleabay for about $13.00 or so. Blue aluminum 6AN to AN6 Plenty stout for the FP these lift pumps run.
Of course though, it would shorten the fittings greatly if a ORB with the No. 6 JIC straight fitting that is drilled and threaded for 1/8th pipe could be obtained, then Leroys curved fitting could be screwed right onto it.
 
Last edited:
The stainless pipe fittings arrived todays mail.
I did not like the look of the weld on the pipe adapter to the top of the jack nut.
Ground all that off and did a much nicer weld job of it.
I will wrap that weld for the just in case it does leak.
Might even give the inside a healthy layer of JB-Weld too.
That should seal up any doubts. 😹😹😹
I don't know that JB weld is chemical safe.
They said I couldn't use it on a no pressure spot on a hydrostat differential.
They said they didn't have a product that would hold up to the tractor fluid or transmission fluid
 
I don't know that JB weld is chemical safe.
They said I couldn't use it on a no pressure spot on a hydrostat differential.
They said they didn't have a product that would hold up to the tractor fluid or transmission fluid
Hhhmmmm, I used some to plug a hole in an aluminum housing. That stuff set up and seems as hard as steel.
I thought it was some kind of a chemical reaction that it turned to a steel like substance. That round bore hole I olugged, that JB-Weld was shiny like steel too. 🤷‍♂️
Maybe I’ll just do the leather/tin wrap and see what it does.
A no leaker would be nice.
But then, there is this article.
Be nice if it could get placed in the sticky subjects.
This is where I got the epoxy we used on the hydrostat differential

 
Well that just plain sux for our rigs. I had been thinking about ordering one of those upgraded idler arm brackets for my truck and discovered that Supersteer discontinued it for the GMT400 platform. part number SS170. not that I need one right now, but something I just discovered.

maybe in the future I can have something fabbed up using the old one I still have laying in my garage. I had wanted to cut it open to see why it failed so quickly and possibly see what can be improved in it. I'm sure it has plastic bushing inside.
 
Got the left side valve/rocker cover installed.
Had the right side all gooped and setting on the head.
Was letting it set for a while before tightening it down a little.
After a while was going to snug it slighty then let it set over night before torquing, noticed some of that Honda Bond had dripped out onto the head.
OH 💩. If it dripped out like that whats the inside of the head look like ?
Pulled the RC back off. None had dripped inside the head.
Pulled off the rocker cover gasket, Cleaned off the honda bond, and also noticed that oil had seeped from under the breather cover inside the rocker cover. That oil had seeped across the gasket and the Honda Bond so pulled the gasket and cleaned off the RC and the head.
The RC is now setting in the back of the truck, right side up, gasket sealer side down, and now waiting for the oil to finish drooling out from under that breather plate before I smear on some right stuff and make another run at it.
Lesson learned, if ever pulling the right side RC, let it set upright so that the oil can drain from those breather plates.
Oh yeah, covers going back on now with only a smear of the right stuff. No gaskets.
 
they make a version of the right stuff that is quick setting
Now that I did knott know. 😧😹😹😹
After I get this engine most the way back together, I will fire it up and be checking for leaks before finishing it up.
Probably at least an hour run time at the upper level of the high idle option, 1350 or some such.
Cant get the home made injector tester pump to build enough pressure. About 500 PSI was about the max and there was one very small pin hole of a leak the I may have got fixed.
I think maybe I came to the realization why it wont build pressure. I believe that the threads between the jacks top nut and the tube inside needs to be sealed. At least I am hoping thats the problem. I give the threads a real nice smear of Loktite thread sealant. Letting that cure, see how it functions in duh morning.
 
Iirc on the videos that I have seen these testers made. the inside tube was threaded on the inside with a 1 inch pipe tap and a 1" reducer put there. the top nut only is there to seal between the inner tube and the outer housing where the fluid is held.

I've also seen where the inner tube was removed and a smaller diameter piece of steel pipe was used in it's place, then you could leave the top nut off and have a open area to refill the fluid without needing a funnel attached

I may try to look around online and see which video I saw, but there was one someone did that required no welding to build it. It's been a while since I have watched them. I might have forgotten something within those steps I mentioned!
 
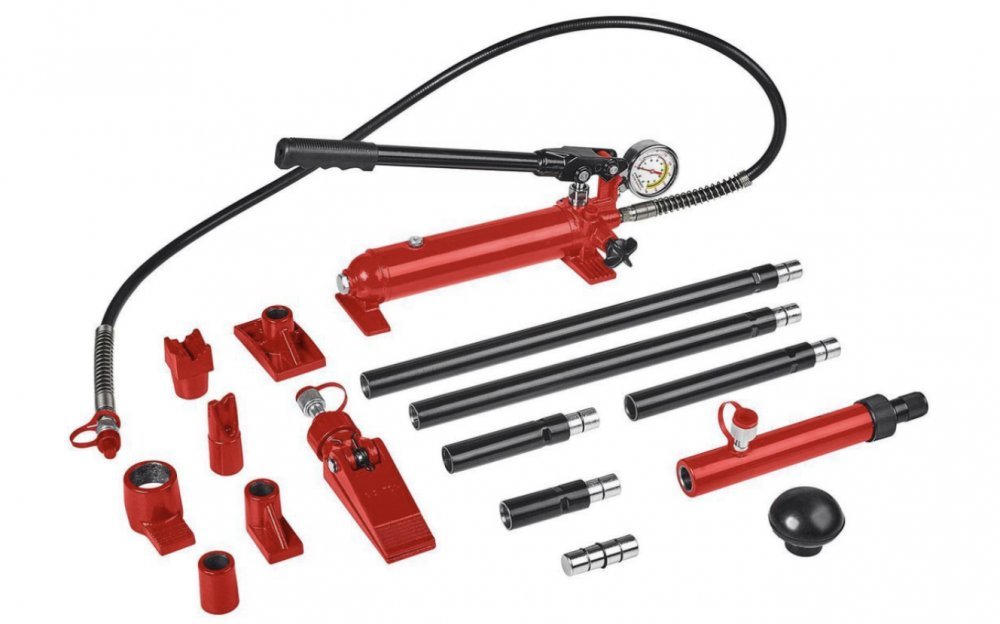
Just an fyi on the pop tester: for guys that have a port-a-power laying around-
That is all you really need besides the gauge, and adapter for the injector line.
All your really doing with the bottle jack is turning it into porta power pump unit.
Just drain the hydraulic oil, use one of the disconnects off on of the tool ends.
Pump the hydraulic oil into a clean container for later use and add diesel, flush it until it’s clean. I prefer to buy non taxed red diesel because it’s easier to see.
When you go back to the hydraulic oil- you’ll need to flush out the diesel so use that old hydraulic oil for that and top off with some new oil.
The fill plug on all I have seen is threaded unlike jacks that are a rubber plug. So just thread in a fitting and rig your diesel bottle or refill it with a tiny funnel between injectors.

Make sure to wear a paint respirator or something. An old pickle jar is great to use to see the pattern and not breathe the fuel. 4ABACCC1-5BA8-4A0A-B9D1-66EF89ECA223.jpeg
 
that is probably the best and safest to use. I think Harbor Freight sells just the pump portion for fairly cheap.
Them, ebay, etc. Some have a pressure gauge already mounted so just swap the gauge for the 3,000 psi liquid filled one. Ones that dont you just have the same plumbing T for gauge and injector line. Then just put the T in a vice or something to hold it. You just need the injector not flopping around so you can see the pattern.
 
Now that I did knott know. 😧😹😹😹
After I get this engine most the way back together, I will fire it up and be checking for leaks before finishing it up.
Probably at least an hour run time at the upper level of the high idle option, 1350 or some such.
Cant get the home made injector tester pump to build enough pressure. About 500 PSI was about the max and there was one very small pin hole of a leak the I may have got fixed.
I think maybe I came to the realization why it wont build pressure. I believe that the threads between the jacks top nut and the tube inside needs to be sealed. At least I am hoping thats the problem. I give the threads a real nice smear of Loktite thread sealant. Letting that cure, see how it functions in duh morning.
A lot of times at high pressure, thread sealant does not cut it.
 
Not on my truck, but installed pedal extensions on my wife's festa. first time she has ever driven with the seat all the way back!! HAHA

Now she's not driving with the steering wheel in her belly lol.
She warned me that the car is almost due for an oil change again, I had to look when I last changed it... Feb 11th, only 32 days ago and it's less than 100 miles till it hits another 5k miles. not sure if I should consider starting to push it out a little longer or just keep changing it every 5k with the mobil 1 5w30 oil. looked at the onboard GPS we use to track mileage and she's gone almost 10k since the first of the year.
A thought:
Buy the $35 engine oil electrical analysis thing.
Do oil sample and send in- compare real test with electronic deal to learn how accurate electronic thing is after a few real samples.
Then do oil changes based on it. Used to be an oil sample was affordable enough to set the oil changes by it. Now its too pricey. Then again- $120 oil change isn’t uncommon now…

My long term plan is oil Centrifuge to maximize life. Then when done mix that oil in with other wmo to Centrifuge clean and mix with gasoline to make fuel for the db2 6.5 😉
 
Back
Top