• Welcome to The Truck Stop! We see you haven't REGISTERED yet.

    Your truck knowledge is missing!
    • Registration is FREE , all we need is your birthday and email. (We don't share ANY data with ANYONE)
    • We have tons of knowledge here for your diesel truck!
    • Post your own topics and reply to existing threads to help others out!
    • NO ADS! The site is fully functional and ad free!
    CLICK HERE TO REGISTER!

    Problems registering? Click here to contact us!

    Already registered, but need a PASSWORD RESET? CLICK HERE TO RESET YOUR PASSWORD!

Project "Johnny Cash"

With the vanes open in the back, maybe it is moving a lot more volume and doesn’t need the tighter clearance like the newer Delco ones?

Without any heads up testing there is really no way to tell. This has me really wanting to make a plate for testing them, ut I can’t get to half my other stuff still. Adding a second test of a piece of plexiglass to see how the difference is when there is no flow (closed thermostat so see about turbulence for cavitation damage to the waterpump backing plate would be interesting also. That is one of the weak points in the single stat system vs the dual stat. I mean- it takes a few hundred thousand miles to tear one up, but it happens.

How about it Rockabilly- feel like playing lab-tester-man if I send you a pump or two then you ship them back? I’ll cover shipping both ways. My plan is to still use the spin on but if it can be shown for everyone else which way to go on Delco vs flowkooler?

I don’t really have a spare backing plate to weld nipples onto, or else I would weld that up too.

See, this is why I wished a few of us lived close to each other...
 
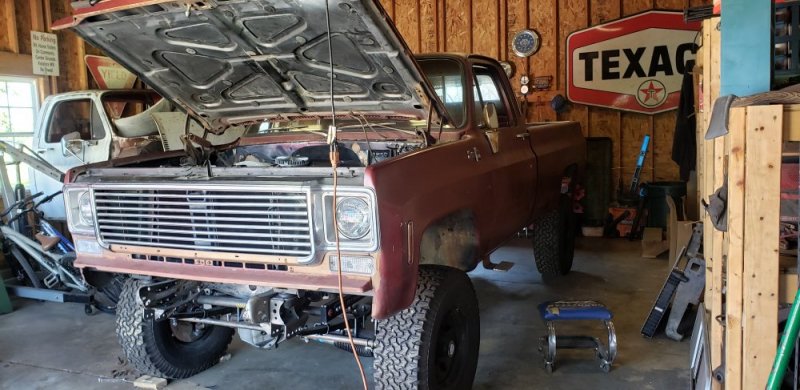
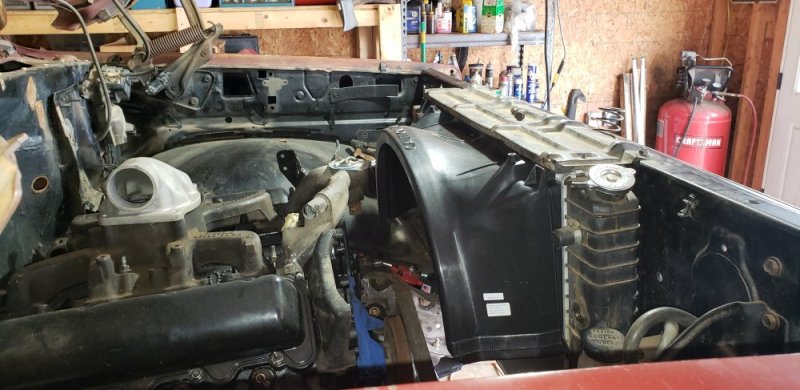
I finally found some time to get back into the garage today. My goal was to check the fan clearance at the crossmember and also see how it fits the shroud. Then pull the motor so I can dress it and start the centermount build.

First things first, I wanted to mount the doors and hood to confirm the body is properly aligned before checking fan clearance. With the duramax fan I dont have alot of room for mistakes. So I want to make sure everything is in the right spot. Luckily everything lined up great.The extra time I spent with the measuring tape when I mounted the body really paid off.

20210501_151641.jpg

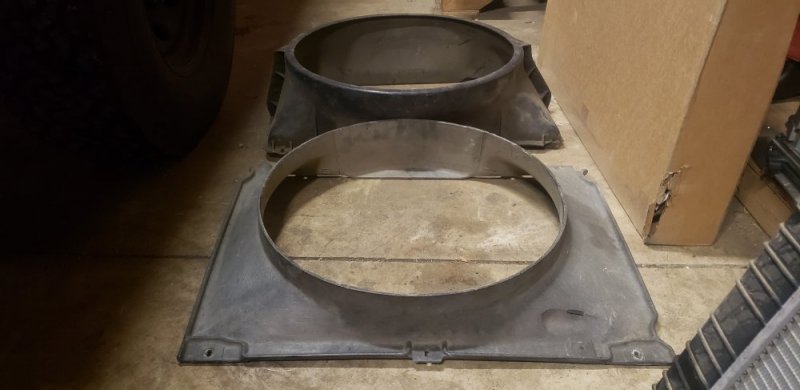
Next I put in the new 4 core champion radiator. The 80 being a factory diesel truck it had the taller 19" core. So that was a nice bonus. But no one makes an aluminum 6.2 radiator. So I went with the normal SBC/BBC width. The fan shroud that was in the truck is a BBC style, I put it back in just see how it looked since I dont have a SBC HD cooling package fan shroud (19" core vs standard 17" core) here at the house.

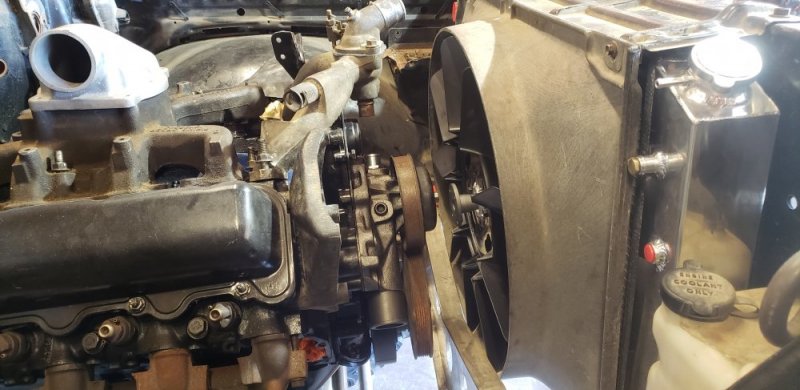
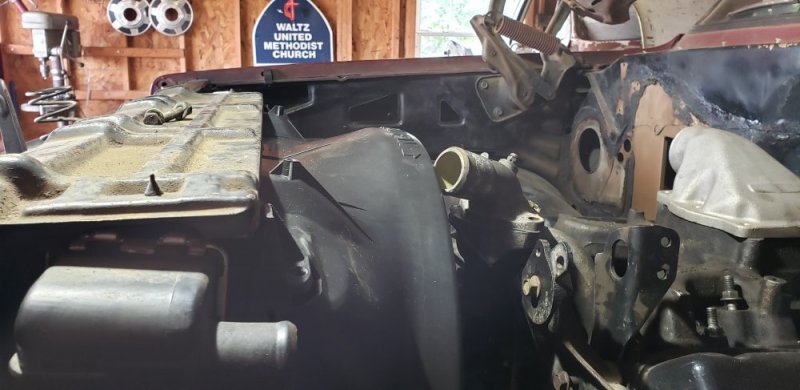
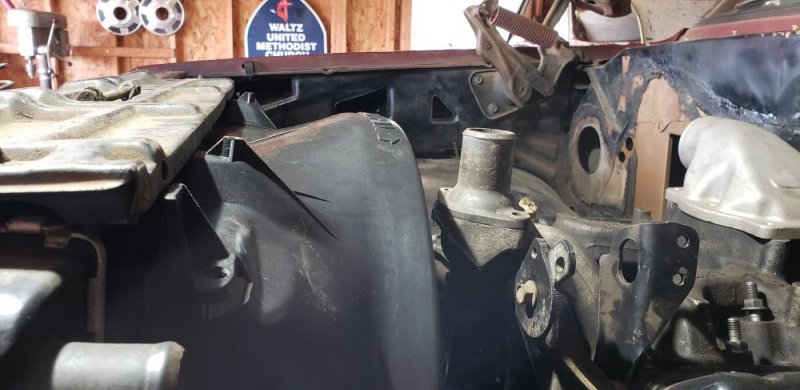
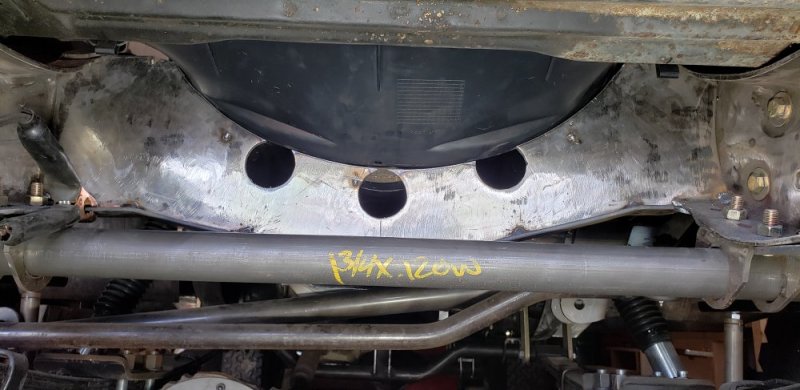
I hung the flowkooler pump next, and thats where my parts hanging stopped for the day. Unfortunately the fan does hit my custom front crossmember. And even if it did clear it would be set to far back for the BBC fan shroud. So I figured I have two options.

20210501_111629.jpg

1. Make a fan spacer to move it past the crossmember and properly into the BBC shroud
2. Get a 19" core SBC fan shroud and modify the crossmember to fit it properly.

The spacer seemed like a good option but I measured the opening of the BBC fan shroud vs the standard SBC fan shroud I had laying around. And it turns out with some trimming I can open the SBC style shroud to 23". With the BBC shroud Im stuck with 21.5" because of the way its designed I can't open it up anymore. Thats just too close for comfort on the 21" duramax fan. That and the BBC shroud dosen't fit the champion radiator that nicely. Even though it said on their website it works with BBC trucks🤷‍♂️

20210501_212108.jpg
20210501_124202.jpg

So since no one makes a 73-80 SBC HD fan shroud. I ordered a 81-87 style instead. Hopefully the opening is the same as the 17" shroud and I can open it up to help clear the duramax fan a little better. Once I know where that sits I can modify the crossmember. Luckily it looks like I can save the one I made and just modify the upper half. That will at least save me time on having to do a complete redesign and build of that crossmember.
 
With all the chassis modifications to this truck I'm trying to take my time and not get ahead of my self. Im getting the fan clearance figured out now so when I pull the engine back out I will have tons of room to fix the crossmember.
 
Measure twice, three times, then cut once. Hopefully further modifications will be minimal to achieve your desired results. Always be aware of strength/safety of your final frame member modification, including starting all over from scratch if that's what's warranted instead of trying a 'hack and fit' modification to get everything to line up and clear.

Just my two cents worth.
 
I think this build has shown I'm not a "hack" and make work kinda guy. The crossmember is a 1/4" steel I beam. So it will be plenty strong after I trim the top to clear the fan shroud. I left it tacked together for this reason just in case I had to go back and modify it. Its all part of the fun that comes with a vehicle with this many modifications
 
I think this build has shown I'm not a "hack" and make work kinda guy. The crossmember is a 1/4" steel I beam. So it will be plenty strong after I trim the top to clear the fan shroud. I left it tacked together for this reason just in case I had to go back and modify it. Its all part of the fun that comes with a vehicle with this many modifications
Never said you were a "hack", nor implied it. Was just commenting on how projects like this always seem to have something jump up and bite you that you didn't anticipate at the beginning and that sometimes that urge to get it done so you can turn the key can affect the judgement of the decisionmaking process. Glad to hear that things were just tacked together for a 'just in case' such as this, it does make modifications/reconfigurations so much easier and less stressful than a 'why in the h*ll did I weld it all together and now I need another half inch and have to cut it all apart and start all over' scenario.

It'll be neat to see that beast take to the road and with a frame stout enough to drive it off a cliff with minimal damage (but, as the commercials say in their fine print, don't try that at home) or twist under way more torque than the factory engineers ever planned for.
 
I know you weren't calling me a "hack" directly. More using it to describe a just cut it so it works kind of repair. Im in no rush so I'm going to take my time and fix it correctly.

I have purposely left everything tacked together on this project just in case something came up on assembly. LIke how I neglected to think about fan clearance on this crossmember. Once the truck is completely together it will come back apart for finish welding and paint.

Oh and we expanded into body work at my job. We just put in a paint booth and hired one of the best painters in NE Ohio. Needless to say I will be having him paint my truck for cost of supplies 🙃
 
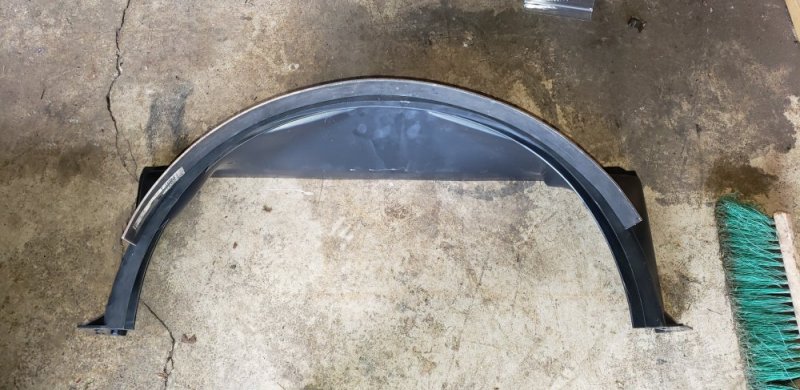
My 81-87 fan shroud showed up Friday, so that allowed me to move forward with the duramax fan fitment. I got the shroud from LMC because it was the only place I could find one for a A/C truck. The 81-87 SBC A/C shroud uses the two individual mounts and wraps over the top of the radiator core. Unlike the 73-80 that uses the one piece top mounting plate.
20210508_101146.jpg

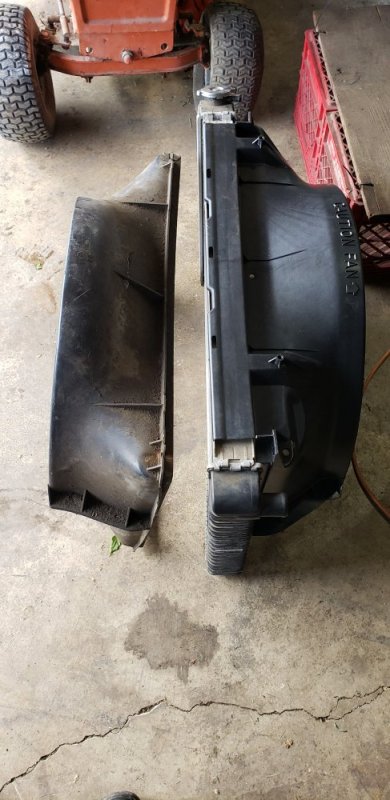
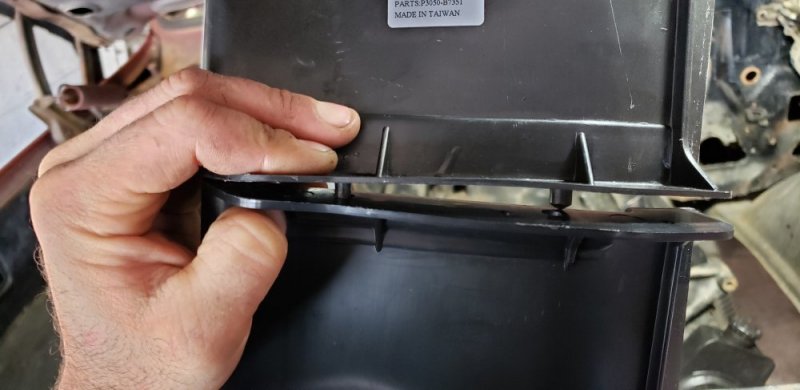
I was unhappy with the fitment of the new fan shroud halfs I got from LMC. The alignment tabs are slightly off from one another. I redrilled the holes to fit the issue but there should be no need for that.
20210508_101343.jpg

So after a few cans a thinking juice I had a plan to make this fit. I put the old radiator back in so I didn't beat up the new champion. Then I'm going to mount the 81-87 upper shroud to the 73-80 upper mounting plate. Its going to take some trimming, but it looks possible.
20210508_100731.jpg

I did notice there was going to be an issue with the thermostat housing clearing the fan shroud. But a found out a 6.2 housing fits on the 6.5 lower. I have plenty of room with the hood shut to run a 90* hose so that was a easy fix!
20210508_100917.jpg
20210508_100900.jpg

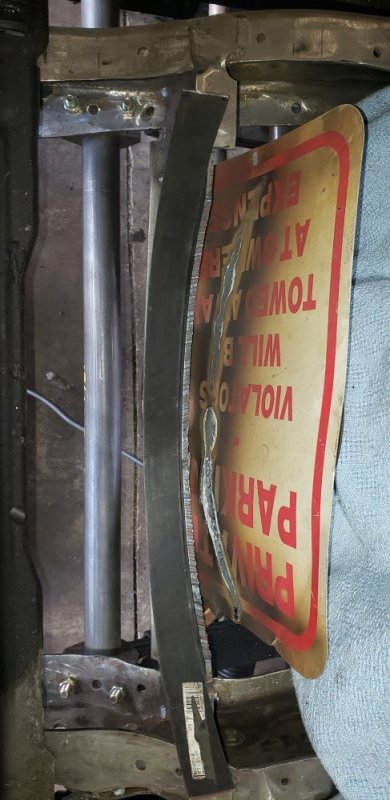
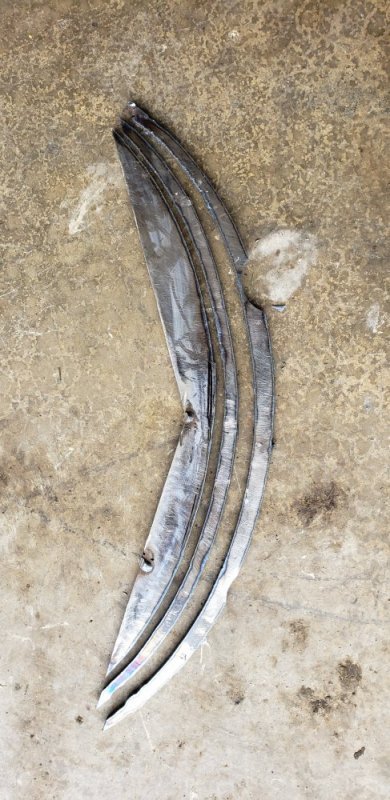
The next step was to cut the crossmember to clear the lower shroud. It took me nearly an hour to lay out these cuts. And even then I took a little at a time to make sure it fit correctly. The shroud is actually offset in the truck a little. So when I laid out the cuts I kept thinking they where off. So I rechecked a million times it felt like. Sure enough its definitely offset. I made a guide from some flat steel so I could make a nice cut with the plasma cutter. Unfortunately I had to take off more than I thought so I will have to completely redo this crossmember. But I can use this one to trace out a duplicate so I know it will fit nice. Im going to take off a little more on the final piece to give it more clearance for body flex, and to clear the 1/4 I beam top I will be adding back on.
20210508_121153.jpg
20210508_121012.jpg
20210508_141315.jpg20210508_141053.jpg
With the lower in I put everything back on and tested fan clearance again.. getting closer, but it still rubs..... time for more thinking juice.
20210508_141239.jpg
 
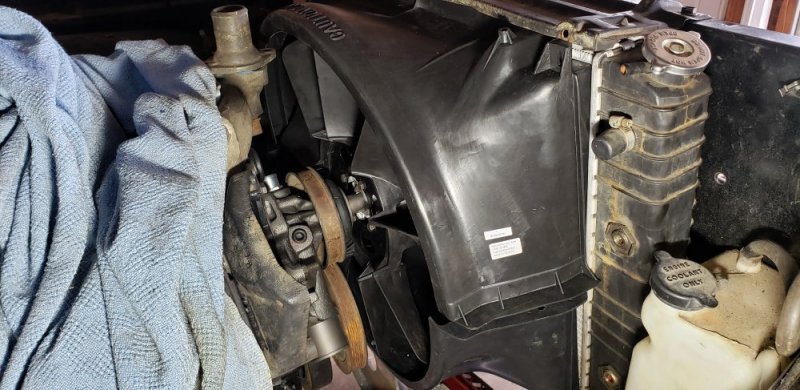
The fan will clear the opening of the shroud. But its too far in and hits the taper of the lower shroud. So I spaced the fan back on the clutch with a few nuts and washers. About a 1/2" worth, and with that the fan just clears the lower shroud! I have room to move it back a little more. So I ordered some 3/4" spacers for mock up. Down the road I will have my father machine me a piece that fits the fan clutch and does a better job of centering the fan. For now this will work. The 3/4 spacers should give the fan plenty of room to allow for body and engine movement. And I still have enough clearance at the engine pulleys.

Sorry no pictures 🤦‍♂️

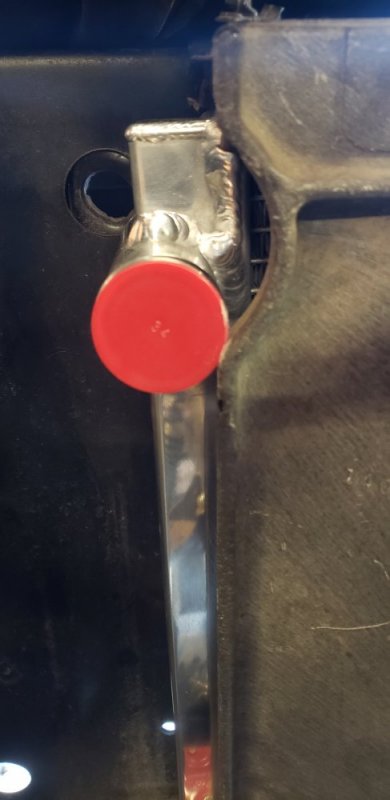
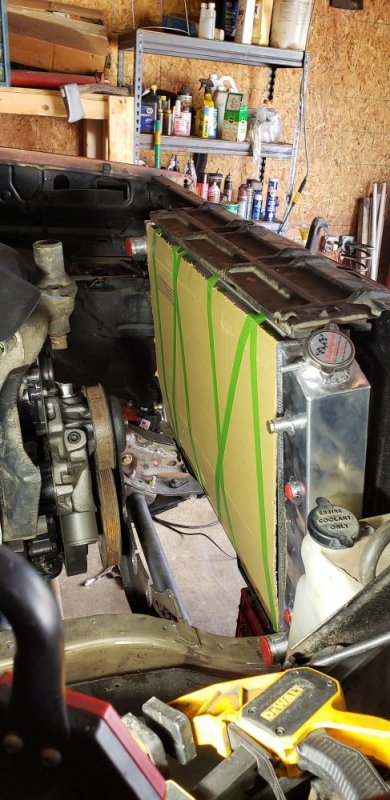
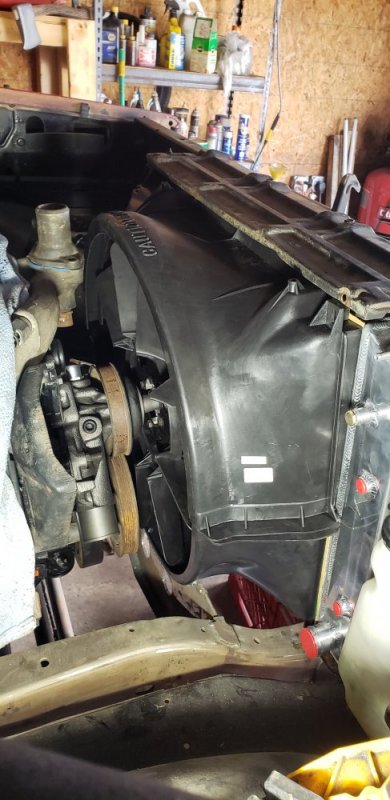
Without trimming the upper shroud it doesn't fit correctly yet. But I want to wait till the proper champion rubber mounds come it before I touch it. The champion radiator is slightly shorter so I had to order their special rubber mounts to make it fit better. Once thats figured out I can trim the upper shroud to fit properly. But for now I worked on the lower. I reinstall the champion radiator with some cardboard protection. Because this is a 4 core radiator I had to trim the lower shroud to give room for this huge radiator. My electric hot knife did the trick. I have to clean it up a little, but it fits perfectly 👌. So once I get the radiator mounted properly i can trim the upper shroud and hopefully this whole thing will work. Who knew it would be so much work to fit a duramax fan in a 6.5 swapped 73-80 square body. But I'm one step closer to making this work.

And the first guy that brings up electric fans is getting a lead salad🔫
20210508_144032.jpg
20210508_150454.jpg
 
Lookin good. That fan sure sits in there a ways.
as to electric fans- my wife has one, in the living room where they belong. I suppose one in a truck is ok, so long as it is blowing either a/c or heat through my vents.
 
It sure does. I haven't found any info on anyone running a dmax fan in a square. Most people run the 6.2 stuff since it came from the factory. But I'm set on running the early serpentine belt set up along with the full by pass single thermostat housing. Doing everything possible to keep this engine cool.

If I space the fan back 3/4" it will sit in the shroud nicely. Just sticking out the back a little bit, but its centered nicely so fingers crossed I can make it work.

Electric fans would have been much easier to install.. but a mechanical fan looks better in my opinion. I was just making a joke because I figured someone would say "why not do an electric fan?"
 
Problem with electric fan on any 6.5 is they simply don't make one big enough. The efficiency as high as it is in the platform, comes from the precup design and all that head living in there. Needing all that heat means there isa ton of heat going in and out of them thar heads with every stroke of the piston. So the btu output is ridiculously high. Think of what you hear and feel in a 6.5 running down the road when the fan kicks in. That is some mega power loss- it takes some serious hp to turn a fan big enough. Fan blades too small, or too few of them and we know she will overheat.


Something I would like to do is measure its power consumption. So take a fan that is big enough tk do the job properly like the dmax fan or the “AKDD cooling mod” (I still wanna name it after him, maybe the “Les is more mod”?) and get it set up pulling air through a radiator so it is working under load on electric motor w/vfd and you could see exactly the hp draw it is and find the peak from 1,000 through 4,500 rpm.
Another way would probably more likely is if someone would do a few dyno runs. Set a base line with fan unlocked on a old junker clutch. Then run a screw through it to have 100% lockup like one does in an emergency situation with bad clutch, or if the AK DD mod simply turn it on. Do a couple runs. Take the averages and POW! We know exactly what hp is required to drive the fan.

Next with that info in hand, ya want an efficient 12v motor- just like engines there are better and worse efficiency, same for electric motors. Powermaster starters are a good example. It is not just the gearing that makes them better and last longer, its the motor. We talk to their awesome customer support engineers and see if they make a starter motor that can run continuously- if not maybe they could then point us in a direction. Then it is some brackets to build and a spacer plate adapter to go from motor shaft to fan.
Now that electric fan is king kong for cooling and could even use a modern controller to run only as fast as needed for cooling at the moment under different speeds. Remember ALL dc motors are variable speed motors by nature. So even though at 4,000 rpm it might draw say 15 hp, if it only needs 1600 rpm for maintaining constant cooling under normal conditions, then it may only draw say 4hp.
I know, I’m building Swiss watch again here when a simple Casio would do. But man I have thought about this forever and just knowing how much hp it would cost at least is worth it imo. So tired of the flippin sundial watch gm gave us...

there is no accurate all wheel drive dynos here or I would have done this long ago.
 
What about eliminating the fan clutch assembly completely and use a direct drive hydraulic motor on the fan powered by the hydoboost/power steering pump (possibly upgraded in flow/pressure) like is done in rear-mounted engines such as found in buses and pusher motorhomes? A simple on/off solenoid to control flow to the motor, controlled by a temperature switch.
 
The hydraulic has been done- it consumes way more power and adds heat. Both electric and belt driven is better. Even hmmwv tried it and uses a complicated gear driven off the harmonic balancer set up. Every time you change energy you loose efficiency and add heat mechanical to hydro pump to liquid flow to hydro motor to mechanical motion. Huge loses. Would need a powersteering pump and another radiator of it’s own.

Best guess in volume of air needed is 15,000-17,000 so if a radiator was big enough to fit 3 side by side...
This horse has been beat on numerous threads, which is probably why he said don’t ask- but I don’t follow social que well.
 
Last edited:
Back
Top