ebay will be off shore heads, I can get GEP heads as well, but yes they are costly..

Navigation
Install the app
How to install the app on iOS
Follow along with the video below to see how to install our site as a web app on your home screen.
Note: This feature may not be available in some browsers.
More options
-
Welcome to The Truck Stop! We see you haven't REGISTERED yet.
Your truck knowledge is missing!
- Registration is FREE , all we need is your birthday and email. (We don't share ANY data with ANYONE)
- We have tons of knowledge here for your diesel truck!
- Post your own topics and reply to existing threads to help others out!
- NO ADS! The site is fully functional and ad free!
Problems registering? Click here to contact us!
Already registered, but need a PASSWORD RESET? CLICK HERE TO RESET YOUR PASSWORD!
You are using an out of date browser. It may not display this or other websites correctly.
You should upgrade or use an alternative browser.
You should upgrade or use an alternative browser.
P400 in the Burb install
- Thread starter spdgofast
- Start date
Military use only, up armored humvees.
Will L.
Well-Known Member
No civilian Hummer. There are people who replaced the factory engine in their hummer with p400. The p400 was designed and built after civilian Hummer production ended.
are you on the Hummernetworkforums.com ? What screen name if so? There is a few Hummer owners from Russia on that forum- one guy does AMAZING rebuilds and fabrication. He sells bulletproof windshields almost as cheap as regular windshields. Makes all kinds of stuff.
the head crack like that comes from one thing-heat. The manual is WRONG about acceptable high temperature. Keep the temp under 220f at all costs. Even 210f is damaging over the long haul.
Our hummers are garbage for getting rid of heat. The aluminum radiators help a little but not enough. I had a custom radiator built, and a friend that I met on the other forum had his built the same way. He has a ton of miles on his now both on road and offroad and the radiator does great.
4 row dimple core. Before that he had a secondary radiator in the bed to get rid of heat and is much happier with this.
You seem to have some descent rebuild skills knowing how to deal with rusted in glowplugs and such. The expense of p400 heads is painful but if you can afford...
You also might look into of you get them from TwistedSteel, he does the porting, coating, etc. obviously more money on top of the cost but it is wise to know your options.
Otherwise get new optimizer heads and do the steam pocket inserts would be my next suggestion. That is my current game plan unless I accidentally fall into enough money to buy fully done p400 heads from him. I doubt it, but I can dream- right?
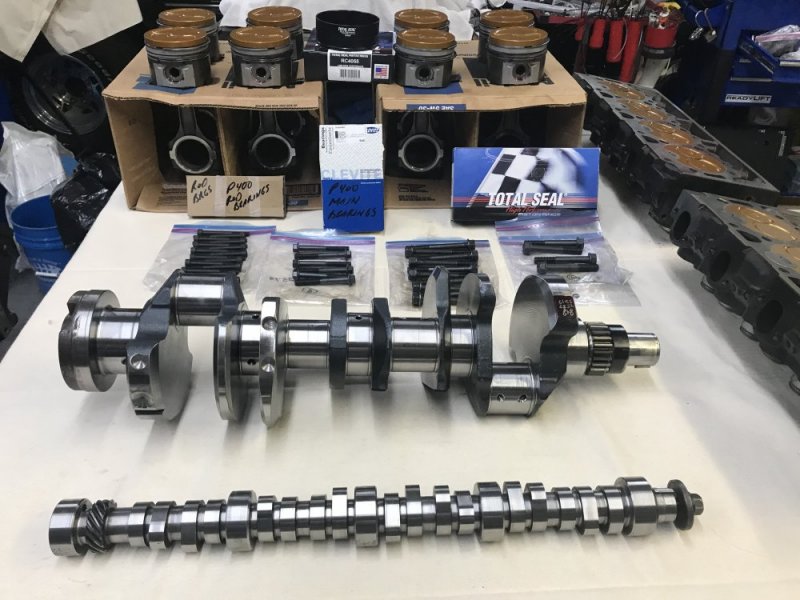
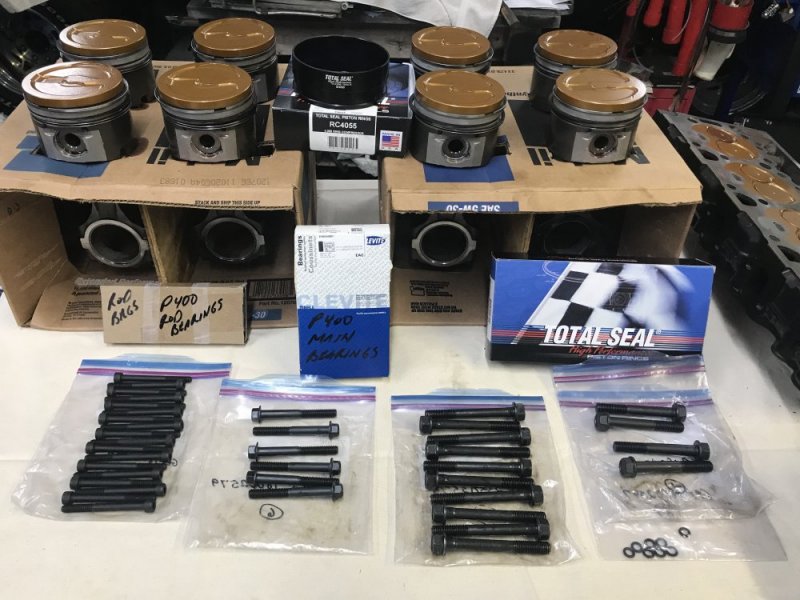
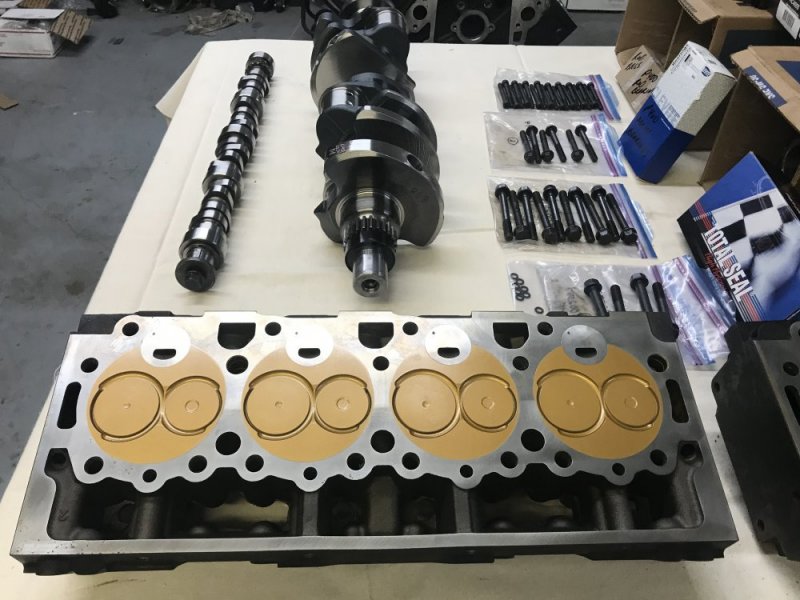
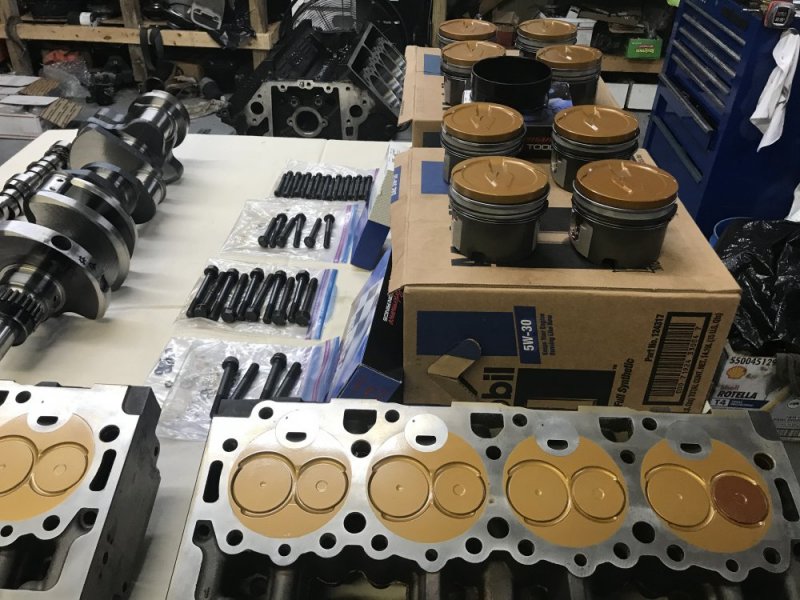
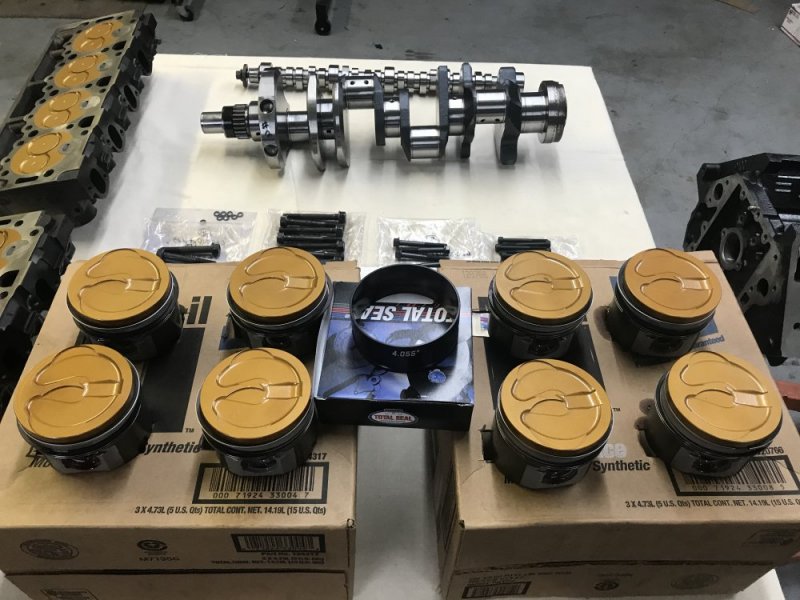
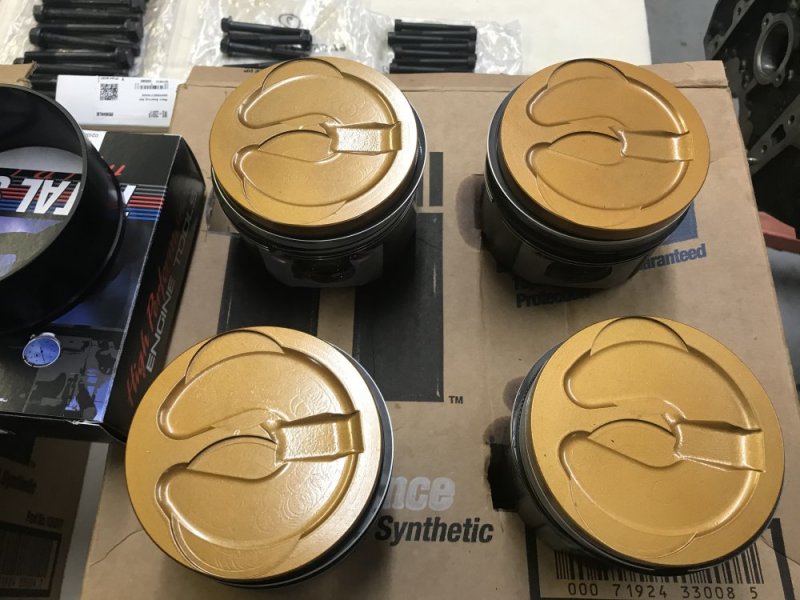
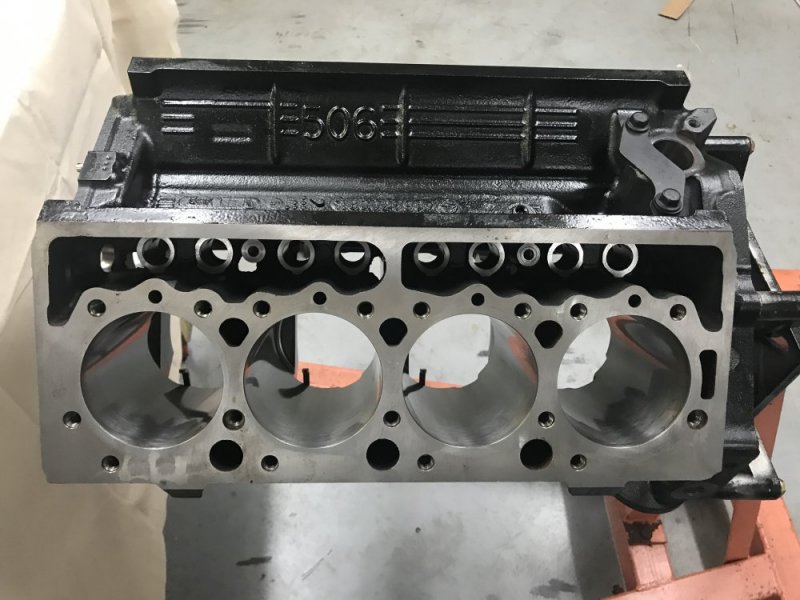
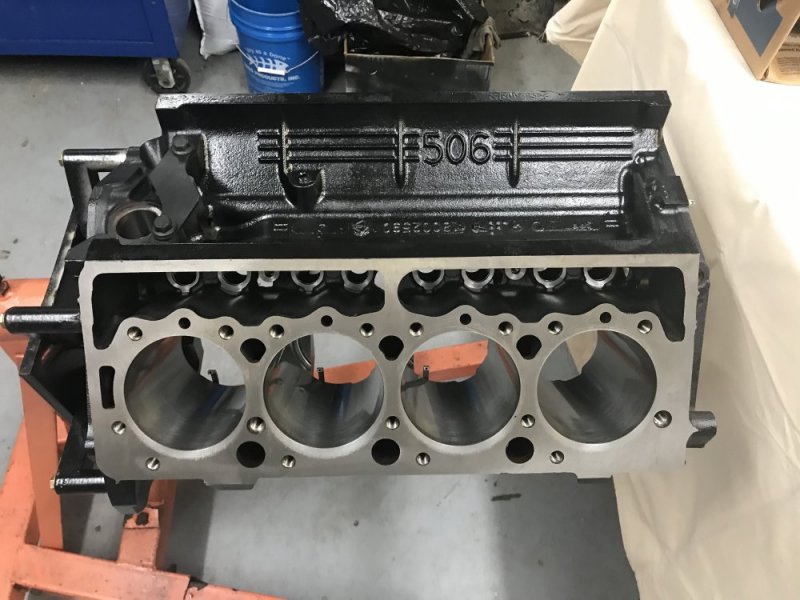
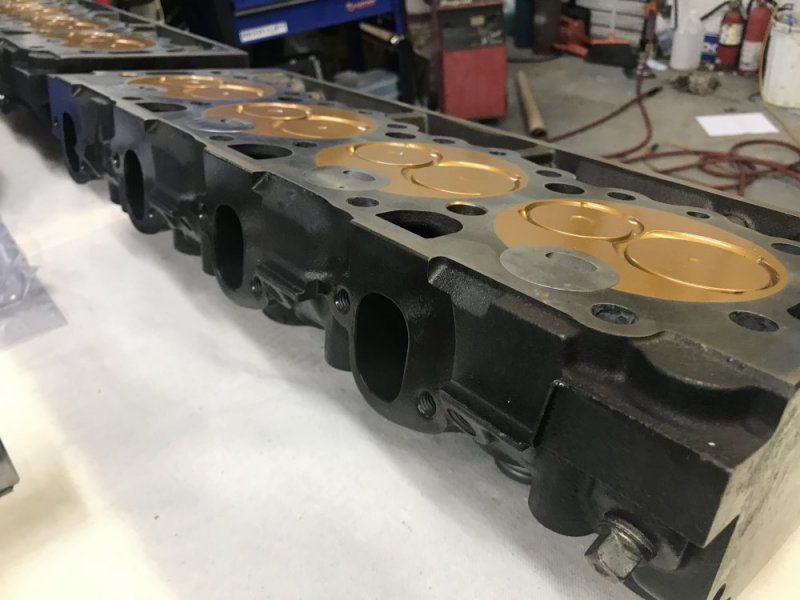
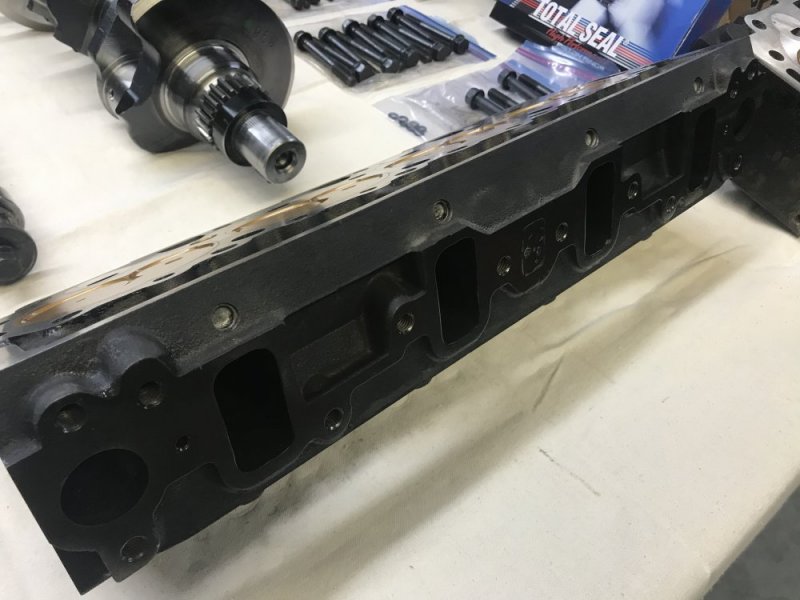
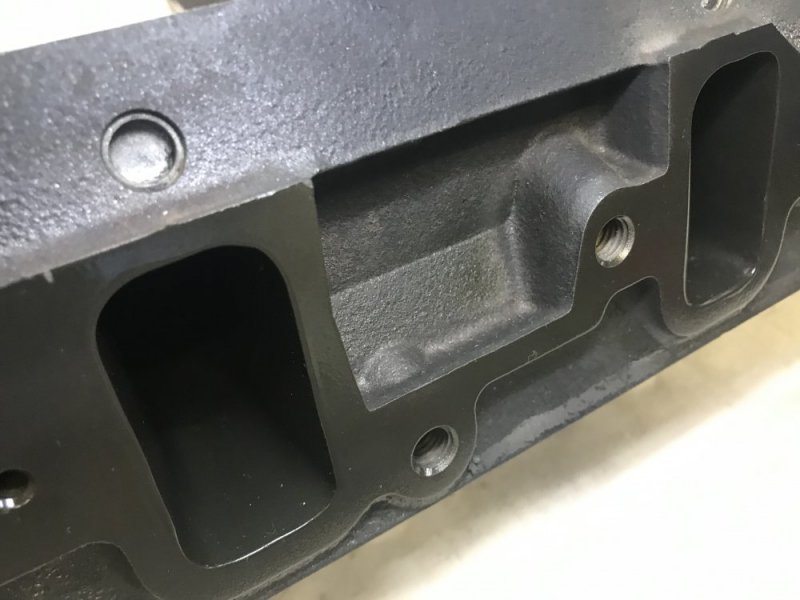
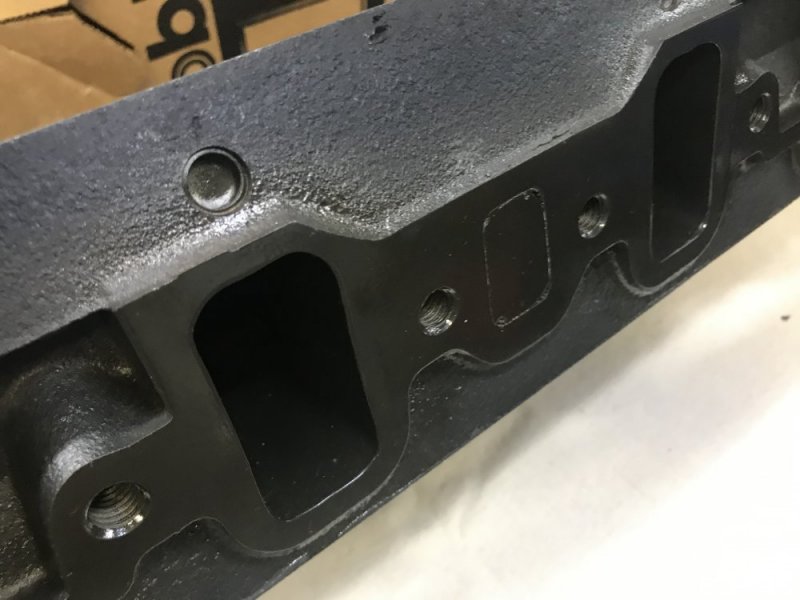
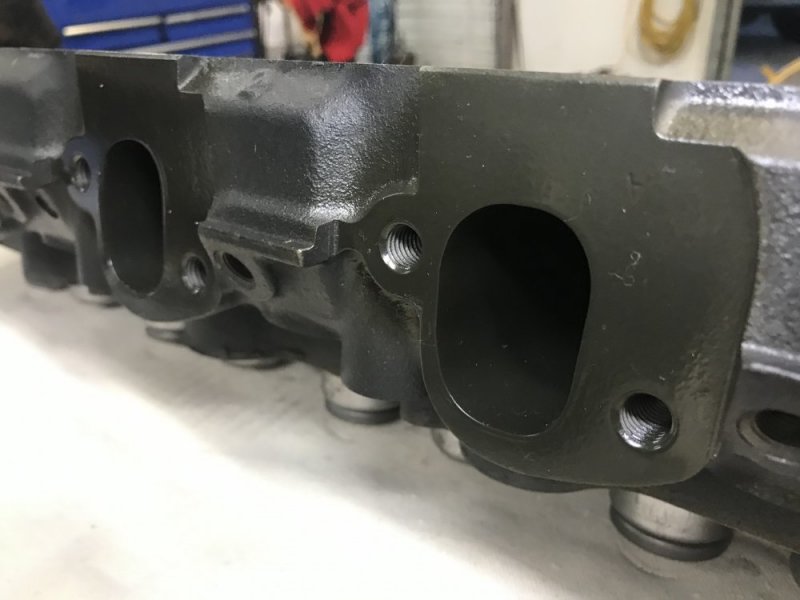
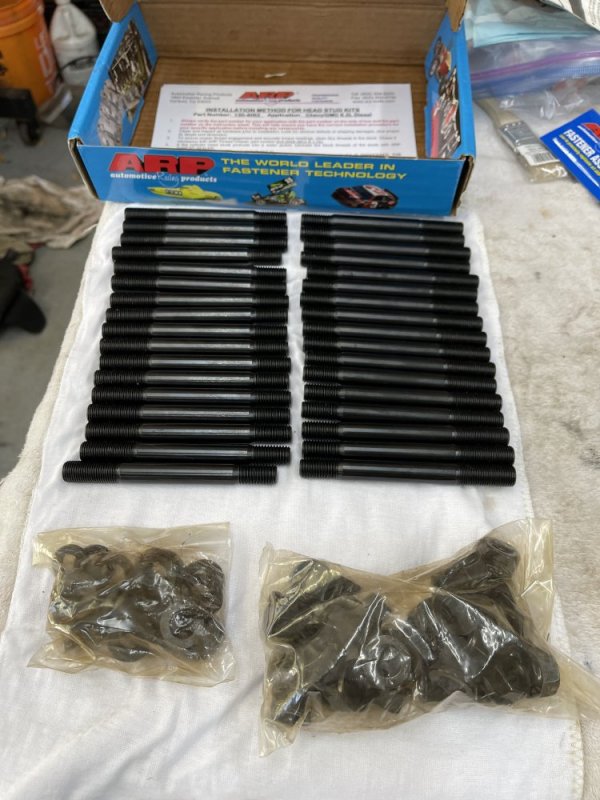
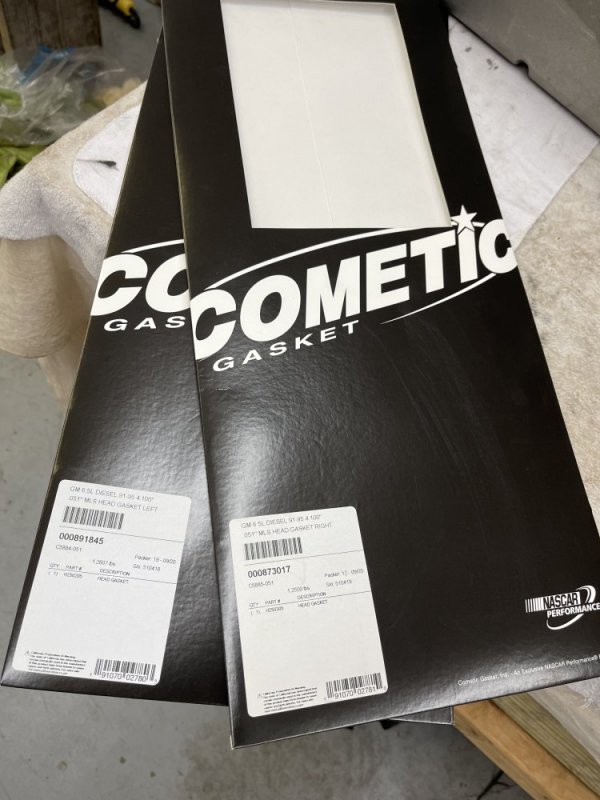
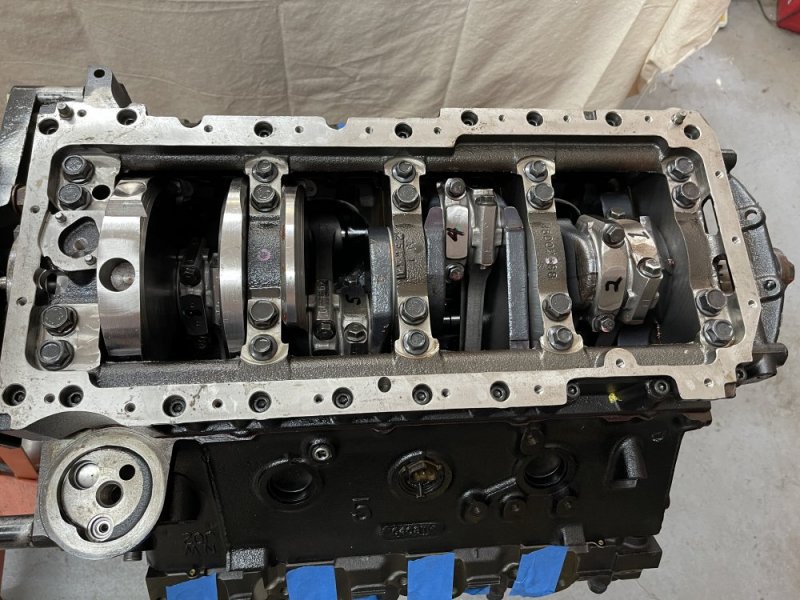
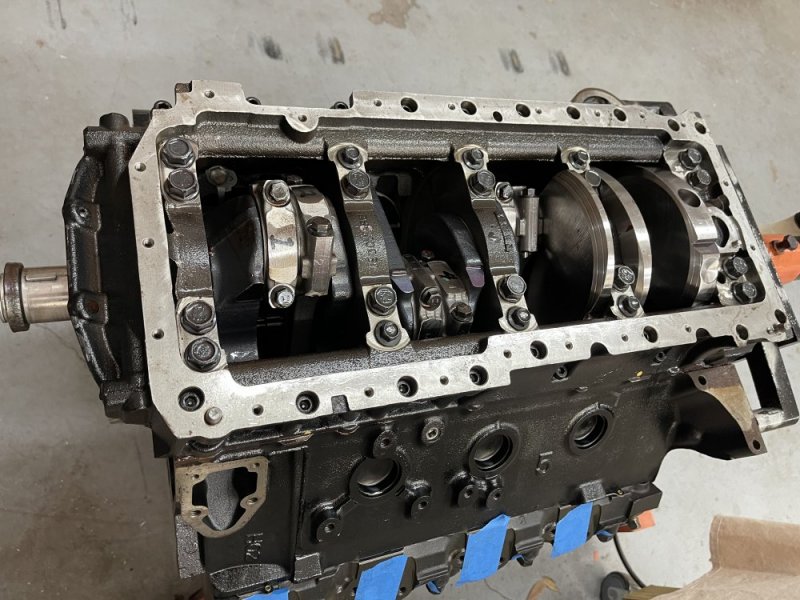
Ok folks, I have finally had some time to start putting together the P400 that I have been throwing tons of money at since I had to pull it due to the inferior valve work that I had done on the new engine before I installed it back in the fall of 2014. Unfortunately, life takes different turns and we all have different priorities and this is one of those instances. I bought this highly customized truck from an NFL football player back in 1994 with only 12000 miles on it and have just shoveled $ into it since then due to my strive to perfection personality just to give you a little insight of the vehicle history for those who have not followed along over the years of my thread. This new P400 motor has only been ran 119 miles by the trip odometer on the truck since I installed it back in 2014. Any way here we go again, I will try and document and post photo’s as much as I can. So, in January of this year I took the heads and pistons to Chris @ Twisted Steel Performance to get a completely new valve job, and full heat coatings of the heads, valves, intake & exhaust runners along with head resurfacing (preparation for Cometic HG’s) and a set of his 300lb valve springs. Keep in mind these heads have had previous extensive port work and the larger 6.2 valves installed along with the EGR ports filled with aluminum. My exhaust manifolds have been match ported to these heads along with extrude honed so these heads are drivers side and passenger side specific. I also had him machine the pistons for 18:1 compression along with machining valve reliefs for the larger 6.2 valves that I have installed in the new P400 heads along with his full heat, friction & oil shed coatings as well. I have had the entire rotating assembly balanced at a local speed shop along with the block deck machined to square up for use of Cometic Head gaskets. Obviously I will be using ARP head studs. I also have installed a set of Total Seal piston rings (already installed in the photos). And I will be replacing all of the bottom end bolts using original AMG P400 fasteners which are in the photos along with AMG P400 connecting rod bearings. I will be using Clevite main bearings and the machine shop installed new Clevite cam bearings in the block. So the next move will be to assemble the bottom end with the pistons. The cylinders have also been honed in the photos. I will continue to document the build with photo’s and description the best I can.
Attachments
-
 IMG_2627.JPG132.2 KB · Views: 15
 -
 IMG_2628.JPG141.3 KB · Views: 19
 -
 IMG_2629.JPG129.5 KB · Views: 19
 -
 IMG_2630.JPG155.1 KB · Views: 18
 -
 IMG_2631.JPG138.8 KB · Views: 18
 -
 IMG_2632.JPG126.4 KB · Views: 18
 -
 IMG_2633.JPG126.9 KB · Views: 17
 -
 IMG_2634.JPG118.4 KB · Views: 16
 -
 IMG_2635.JPG121.5 KB · Views: 16
 -
 IMG_2636.JPG136.1 KB · Views: 15
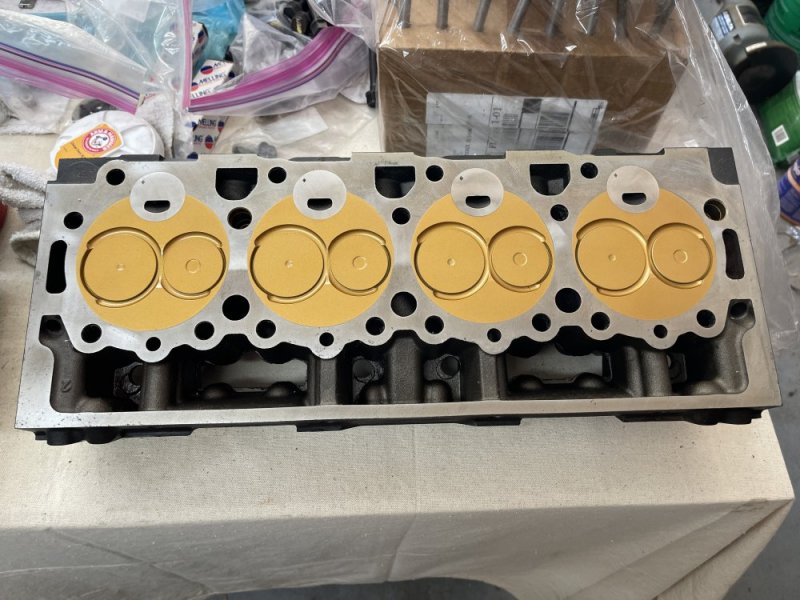
Well folks I finally got somewhat caught up so I could update my progress. The heads are installed with new studs and Cometic head gaskets but I forgot to take pics of the heads on the block.
Attachments


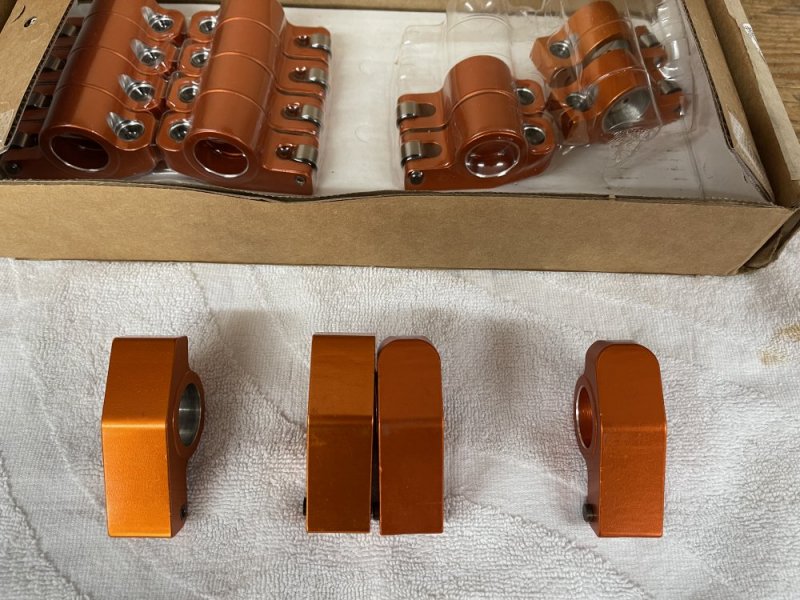
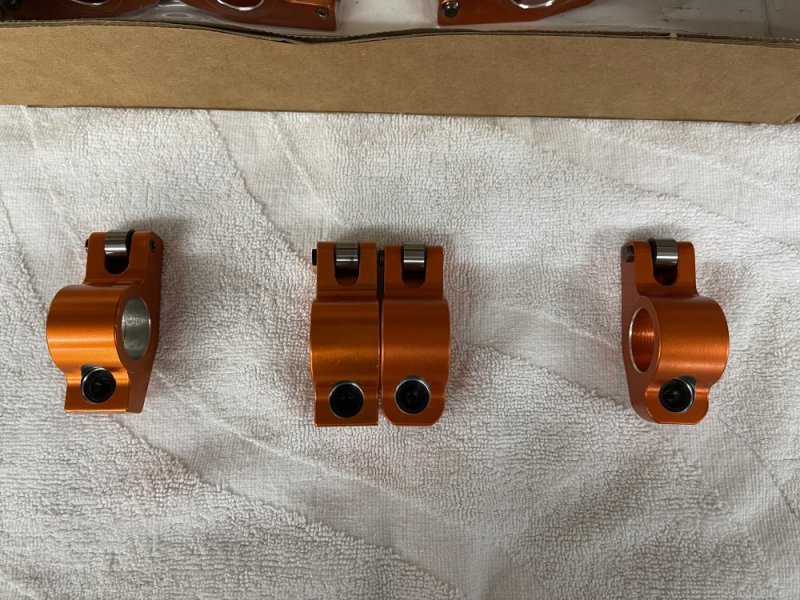
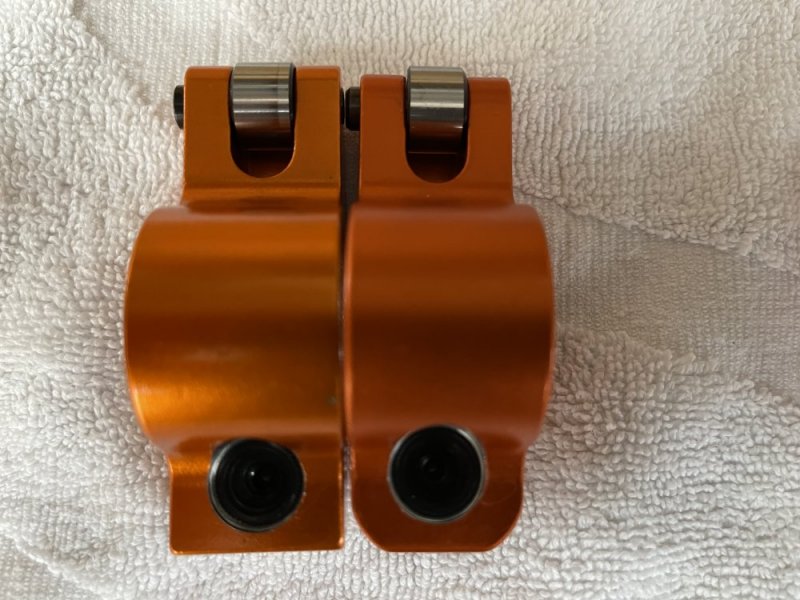
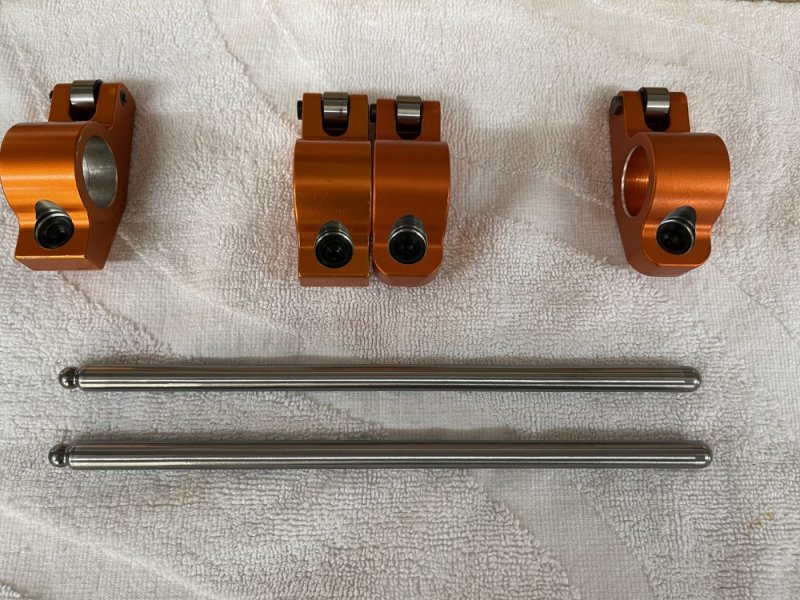
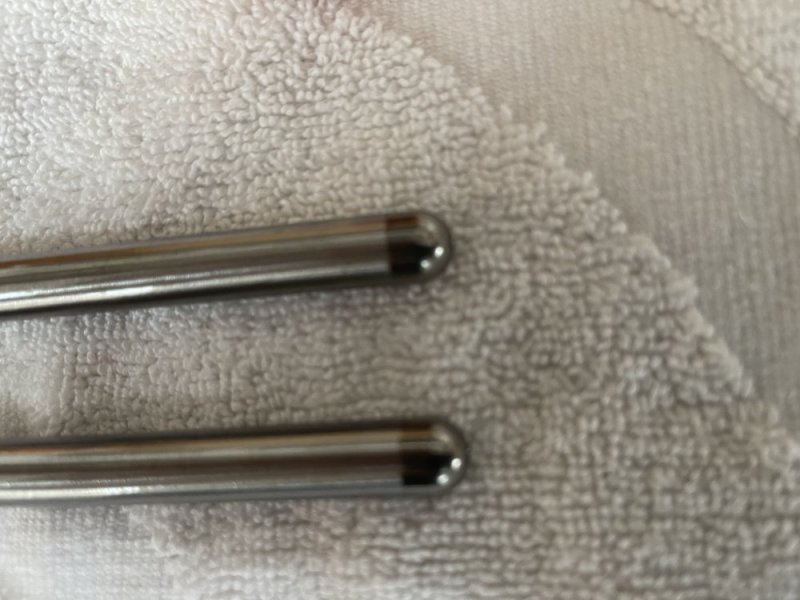
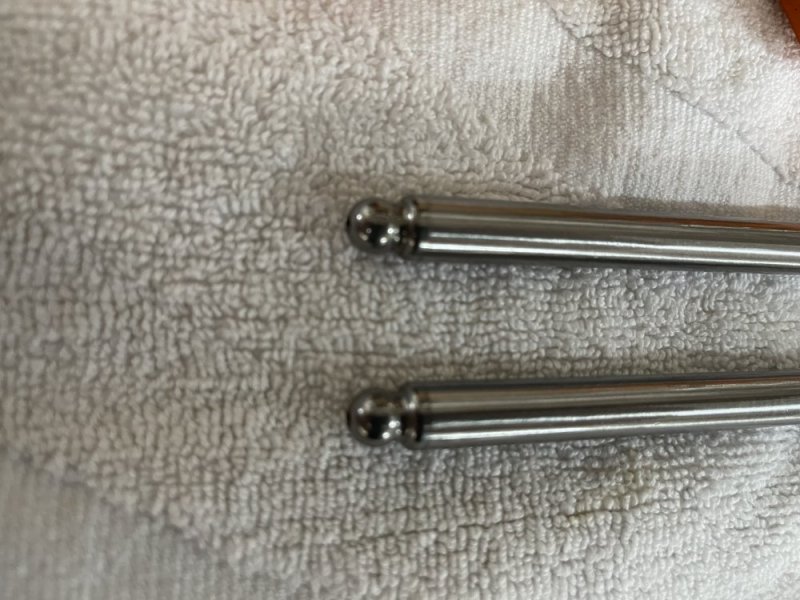
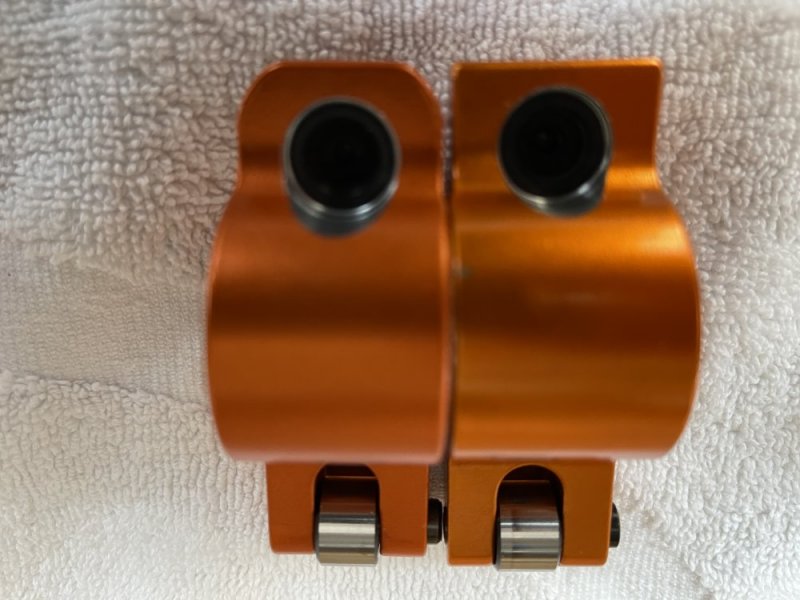
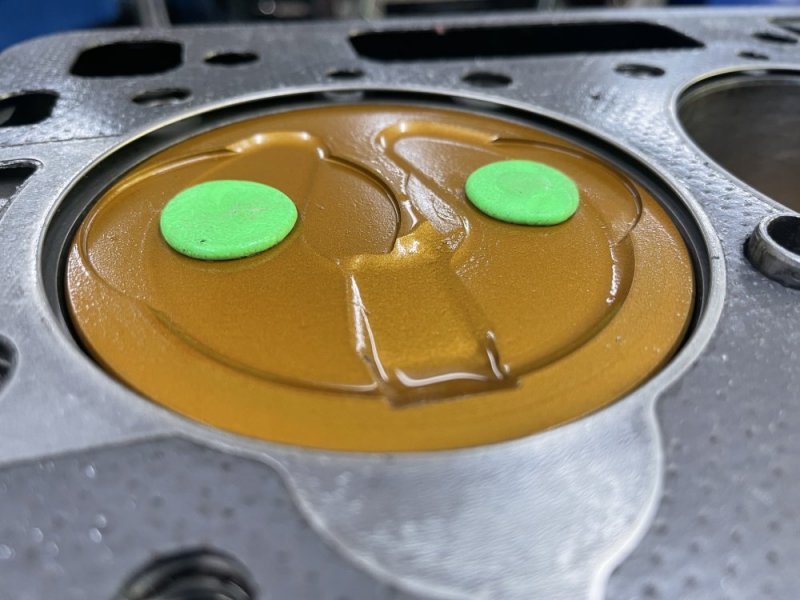
So here are some pics of the new Harland Sharp 1.7:1 ratio rockers (radius corners) compared to the 1.6:1 ratio rockers that I initially installed in the motor. Also pics of my new pushrods, FYI the Harland Sharp rockers have cups for 5/16 pushrods. Not say you can't use 3/8 end pushrods but they are built for 5/16 ball end pushrods, see pics. The last two pics are clay piston to valve clearance tests done with .045 thick Felpro head gaskets, the first one with the clay on the valves is with the 1.6:1 rockers, the ones on the piston is with the 1.7:1 rockers.
Attachments
-
 IMG_3308.JPG173.4 KB · Views: 10
 -
 IMG_3309.JPG196.5 KB · Views: 10
 -
 IMG_3310.JPG125.1 KB · Views: 10
 -
 IMG_3311.JPG197.7 KB · Views: 10
 -
 IMG_3312.JPG193.6 KB · Views: 10
 -
 IMG_3313.JPG97.5 KB · Views: 9
 -
 IMG_3314.JPG131.6 KB · Views: 9
 -
 IMG_3315.JPG99.5 KB · Views: 11
 -
 IMG_2982.JPG83.9 KB · Views: 13
 -
 IMG_3177.JPG108.9 KB · Views: 14

Will L.
Well-Known Member
Nice.
So I was trying to see how close the clay is to the piston original height but can’t tell, but looks like that extra clearance doesn’t hurt your feelings any.
Plans for the 1.6 rockers? I keep wishing but can’t swing them as of yet. Those and a couple tiny issues are part of my excuse yet.
So I was trying to see how close the clay is to the piston original height but can’t tell, but looks like that extra clearance doesn’t hurt your feelings any.
Plans for the 1.6 rockers? I keep wishing but can’t swing them as of yet. Those and a couple tiny issues are part of my excuse yet.
Big T
Well-Known Member
Ok folks, I have finally had some time to start putting together the P400 that I have been throwing tons of money at since I had to pull it due to the inferior valve work that I had done on the new engine before I installed it back in the fall of 2014. Unfortunately, life takes different turns and we all have different priorities and this is one of those instances. I bought this highly customized truck from an NFL football player back in 1994 with only 12000 miles on it and have just shoveled $ into it since then due to my strive to perfection personality just to give you a little insight of the vehicle history for those who have not followed along over the years of my thread. This new P400 motor has only been ran 119 miles by the trip odometer on the truck since I installed it back in 2014. Any way here we go again, I will try and document and post photo’s as much as I can. So, in January of this year I took the heads and pistons to Chris @ Twisted Steel Performance to get a completely new valve job, and full heat coatings of the heads, valves, intake & exhaust runners along with head resurfacing (preparation for Cometic HG’s) and a set of his 300lb valve springs. Keep in mind these heads have had previous extensive port work and the larger 6.2 valves installed along with the EGR ports filled with aluminum. My exhaust manifolds have been match ported to these heads along with extrude honed so these heads are drivers side and passenger side specific. I also had him machine the pistons for 18:1 compression along with machining valve reliefs for the larger 6.2 valves that I have installed in the new P400 heads along with his full heat, friction & oil shed coatings as well. I have had the entire rotating assembly balanced at a local speed shop along with the block deck machined to square up for use of Cometic Head gaskets. Obviously I will be using ARP head studs. I also have installed a set of Total Seal piston rings (already installed in the photos). And I will be replacing all of the bottom end bolts using original AMG P400 fasteners which are in the photos along with AMG P400 connecting rod bearings. I will be using Clevite main bearings and the machine shop installed new Clevite cam bearings in the block. So the next move will be to assemble the bottom end with the pistons. The cylinders have also been honed in the photos. I will continue to document the build with photo’s and description the best I can.
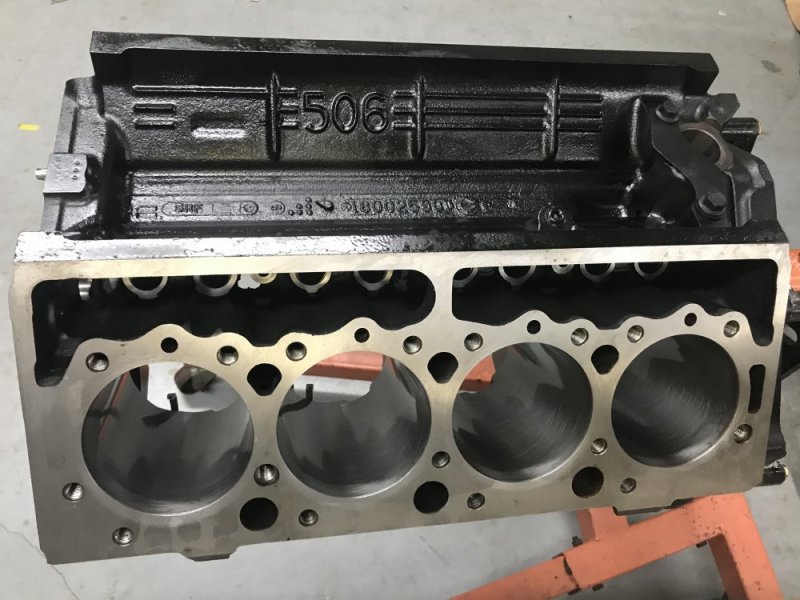
Looks like a 506 block to me.

What length pushrods did you end up with?
8.800 Length on the pushrods Chris. I just realized after looking at my photo's of the clay on the piston top I didn't get an accurate valve to piston clearance due to the clay not on the valve relief. So I'll be installing checker springs on a couple of valves and using a dial indicator to get an accurate valve to piston clearance measurement. See the pic, what a dumb ass. The heads are torqued down with studs and new Cometic head gaskets. Just as well, this should be done on any build just to be safe anyhow.
Attachments
Last edited:
yea I saw that but figured you would already have things bolted down...
the pic looks like a smiley face with a broke nose lol.....
I think I have the clearances figured out... but let me know what you measure...
n8in8or
I never met a project I didn’t like
In case you’re concerned about the gaskets......when I built my LS, Cometic said it was ok to reuse their head gaskets after they had been torqued as long as the engine hadn’t been run yet.
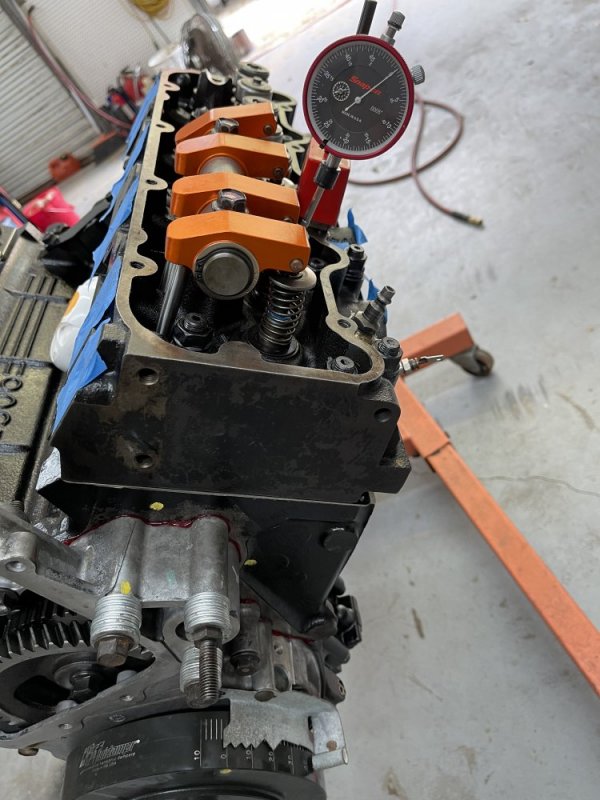
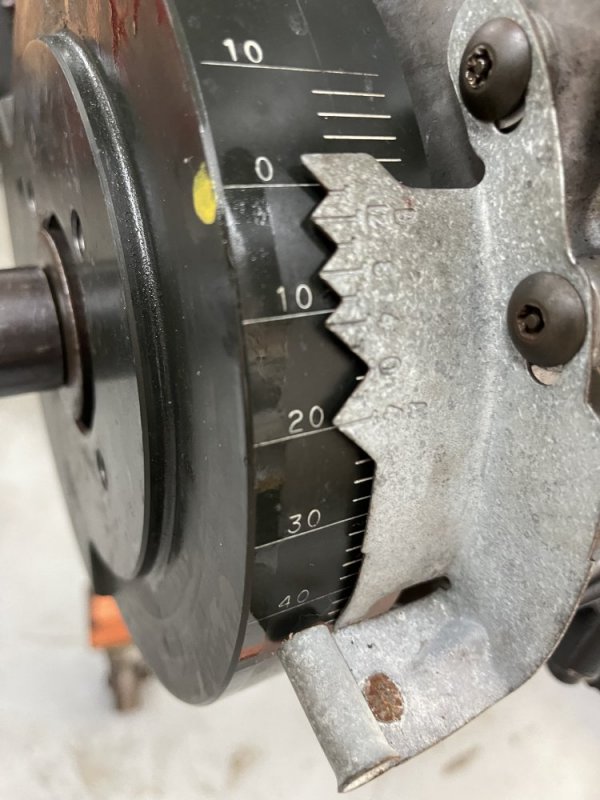
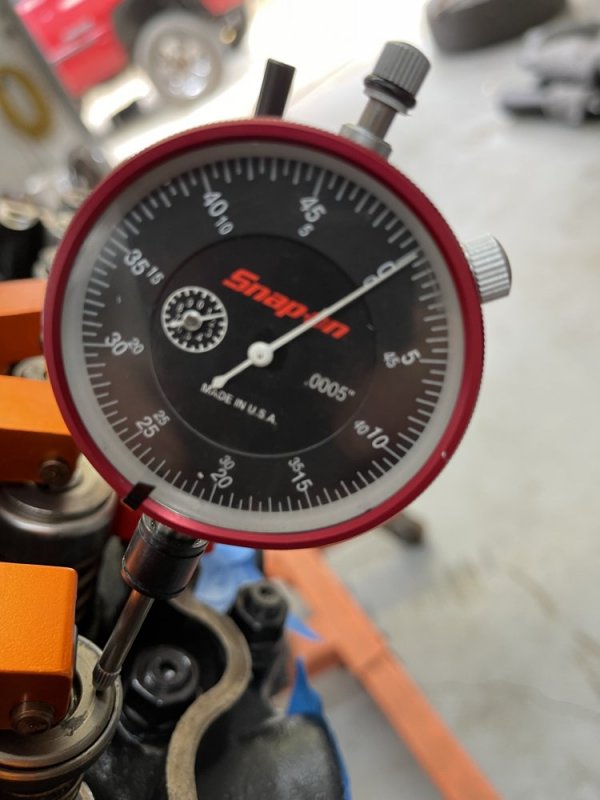
Ok guys, I measured my valve to piston clearances the best I could. As far as I know the proper way to do this on a engine with none adjustable rockers is with solid lifters (lifters that won't shorten in any way) and pushrod length set at zero lash. So adjustable pushrod checkers along with low pressure checker valve springs would work. I am using pushrods with .050" lifter preload built into them and lifters that can compress a little from checker valve spring pressure. Also I am using the degree indicator on my fluid dampner instead of a degree wheel set at TDC. Here are the results with a couple of photo's.
VALVE TO PISTON CLEARANCES
EXHAUST -------------------------------------------- INTAKE
20* BTDC .275” -------------------------------------------- 10* BTDC .105”
15* BTDC .210” ---------------------------------------------5* BTDC .080”
10* BTDC .170” ----------------------------------------------0* TDC .075”
5* BTDC .142” --------------------------------------------- 5* ATDC .065”
0* TDC .135” --------------------------------------------- 10* ATDC .080”
5* ATDC .149” ----------------------------------------------15* ATDC .115”
10* ATDC .180”
Attachments
Last edited: