• Welcome to The Truck Stop! We see you haven't REGISTERED yet.

    Your truck knowledge is missing!
    • Registration is FREE , all we need is your birthday and email. (We don't share ANY data with ANYONE)
    • We have tons of knowledge here for your diesel truck!
    • Post your own topics and reply to existing threads to help others out!
    • NO ADS! The site is fully functional and ad free!
    CLICK HERE TO REGISTER!

    Problems registering? Click here to contact us!

    Already registered, but need a PASSWORD RESET? CLICK HERE TO RESET YOUR PASSWORD!

Blow by

Second question... I started pulling fuses from the under hood box and realized that the top cover has a different layout that what’s in the box. The diagram shows an aux fan with a 30 amp fuse and two diodes. My box doesn’t have those

would someone have a photo of their 95 model?
 
Oh crap! I might have just discovered a problem
I just pulled the glows from the drivers head. Three we’re just snug. No sign of carbon leakage from the bevel on them but still only snug!
 
So question on the compression test.... do I need to wait until morning to run the test?

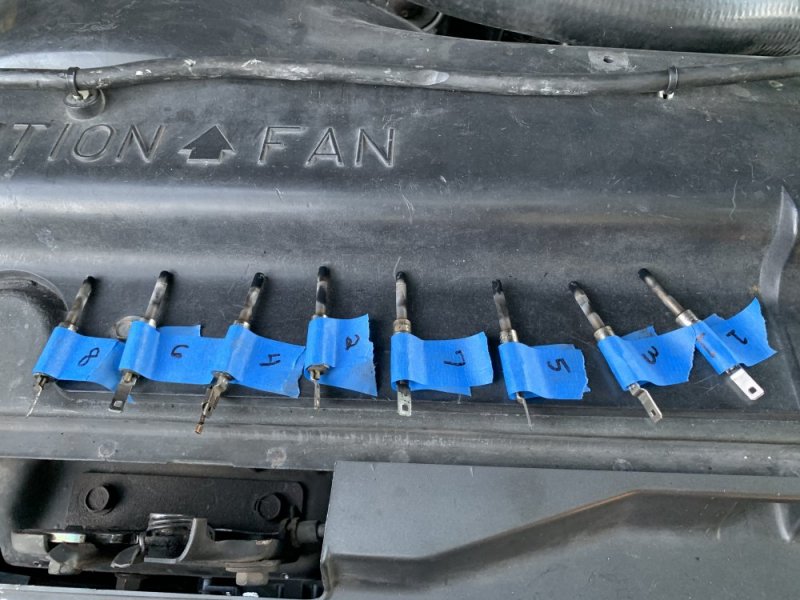
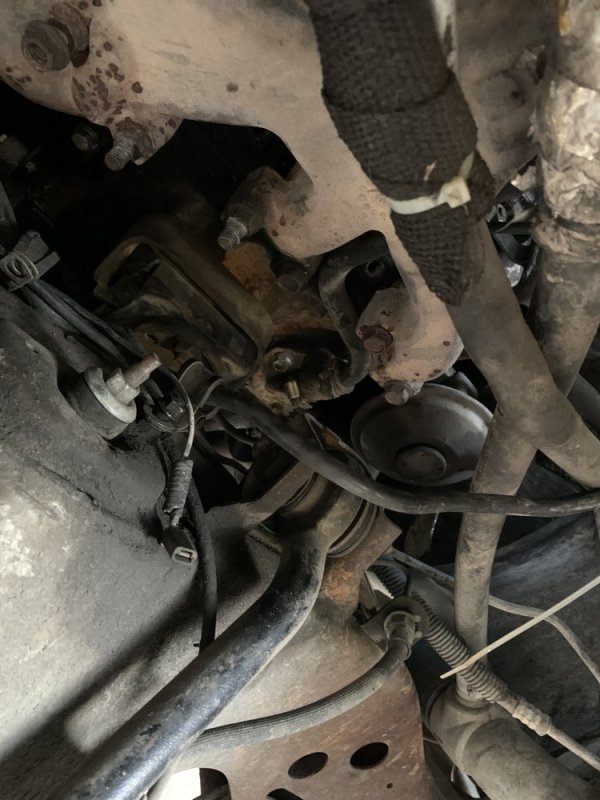
I’m pulling everything down now. Removing the inner fender and getting everything ready at the moment
I’m not sure what the book says. I believe that most times its preferred to do CT with engine at operating temp.
Ratherly difficult to do with these trucks. With everything ready, engine at op temp, by the time the GPs is removed, engine is well on its way to cooling back down. Thats how I’d do it though. With enjun as warm as possible.
 
You probably better get a 10mm thread chaser, not tap. And clean out the threads before putting them GPs back into the holes.
The enjun in my truck, carbon leaked through the threads and new GPs was going in quite tough. Got a thread cleaner/chaser and cleaned the threads. They then screwed right back in with fingers.
Only thread chaser in town that size was from NAPA and it was an adjustable unit for diameter. Took a little to get it adjusted but worked great after that.
 
And there out! All were just snug with #4 and #8 being snugger But I was able to break them all loose with my hand grasping the head of the ratchet!

they all spun out like the threats were fine in the head
 

Attachments

  • 467109DD-F138-4CD6-AC16-61E63E84C798.jpeg
    467109DD-F138-4CD6-AC16-61E63E84C798.jpeg
    135.2 KB · Views: 5
Looking at the passenger side of the block. I’ve got a rather perquelier spot above and to the front of the motor mount. Almost looks like there once was a coolant leak but I’m not loosing any coolant would this be something of concirn ?
 

Attachments

  • D84CD192-9174-4D30-AF3C-1089B22B2B95.jpeg
    D84CD192-9174-4D30-AF3C-1089B22B2B95.jpeg
    131.7 KB · Views: 12
  • 9690B7DE-999F-4291-AFD5-3965AC381783.jpeg
    9690B7DE-999F-4291-AFD5-3965AC381783.jpeg
    95 KB · Views: 12
  • image.jpg
    image.jpg
    126.3 KB · Views: 12
So I got suckered into being his secretary so he can report back to y’all lol 🤦🏽‍♀️ At least I think that’s why all I need to do is write down numbers as he calls them out to me 😆
 
There’s gonna be a delay. The valve core isn’t sealing in the tester. Trying to dig around to find a replacement valve core!
 
Well I got the numbers. The valve core in the adapter is shot so it bleeds down as it stops cranking I tried replacing it but couldn’t get it out! But here they are the needle was bouncing so I took the lowest and highest that I saw on the gauge

cyl #1 350-400
Cyl#2 325-375
Cyl#3 325-375
Cyl#4 375-400
Cyl#5 325-375
Cyl#6 325-350
Cyl#7 350-400
Cyl#8 300-350
 
What sucks is that gauge bouncing so much. I suppose I can retest the lower ones in the morning. I read on another thread that minimum is 380.
 
There’s an adapter in the set that the card says it’s for smaller diesels but has the same thread and shoulder but is overall shorter. I would have used it but the gauge hose has a 90 on the quick connector that wouldn’t go in there with the manifold on!
 
Here’s the set. It shows for the 6.2 and 6.5 to use the TU-15-2A (top one in the photo). The shorter one (bottom one in the photo) shows to be for 4.3 to 5.7 gm diesels
 

Attachments

  • 9F184687-0211-40CA-AD49-09F9A7A78878.jpeg
    9F184687-0211-40CA-AD49-09F9A7A78878.jpeg
    85.6 KB · Views: 2
  • 2DC7A11C-3E21-449F-9C75-5B49EE17E26A.jpeg
    2DC7A11C-3E21-449F-9C75-5B49EE17E26A.jpeg
    139.5 KB · Views: 2
  • D222F5EB-11B6-480D-B306-AEEAFFF19B27.jpeg
    D222F5EB-11B6-480D-B306-AEEAFFF19B27.jpeg
    117.6 KB · Views: 2
  • B89B1D36-DD30-4396-B42B-30A1FF6D2FBD.jpeg
    B89B1D36-DD30-4396-B42B-30A1FF6D2FBD.jpeg
    74.4 KB · Views: 1
Press the valve stem in. Give a shot of some penetrant or even some solvent or BBQ lighter fuel into where the schrader valve is. In hopes that if there is a speck of carbon stuck in the schrader valve, it might dislodge it. Brake and parts cleaner might be good too, it just evaporates quick.
Gotta try something.
 
I screwed around and got the schrader valve out. The spring was broken! Swapped out with one in another fitting and tried it. #1,#3, and #5 held at 400. With cranking up up 6 puffs. Went to #7 and it was bleeding down before I could read it. Pulled the valve and it popped the spring! I have a schreader from a tire stem. Can I use that ?
 
I screwed around and got the schrader valve out. The spring was broken! Swapped out with one in another fitting and tried it. #1,#3, and #5 held at 400. With cranking up up 6 puffs. Went to #7 and it was bleeding down before I could read it. Pulled the valve and it popped the spring! I have a schreader from a tire stem. Can I use that ?
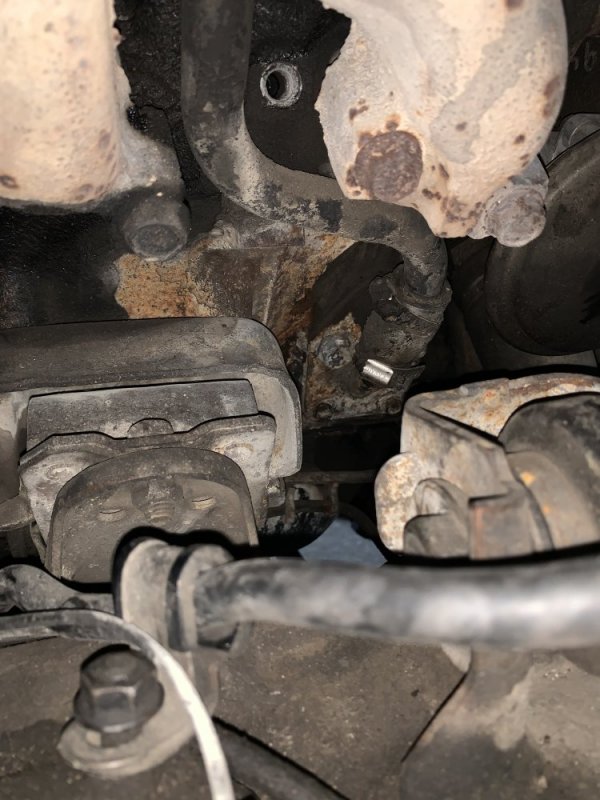
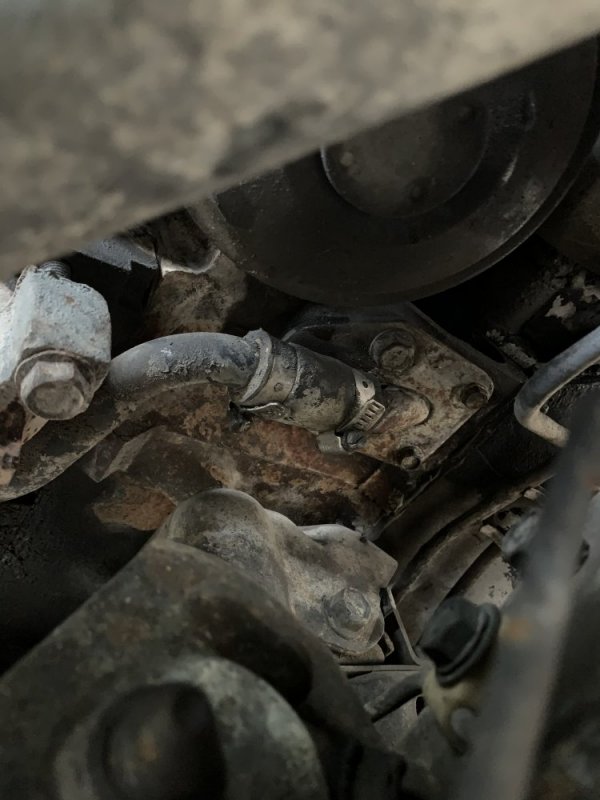
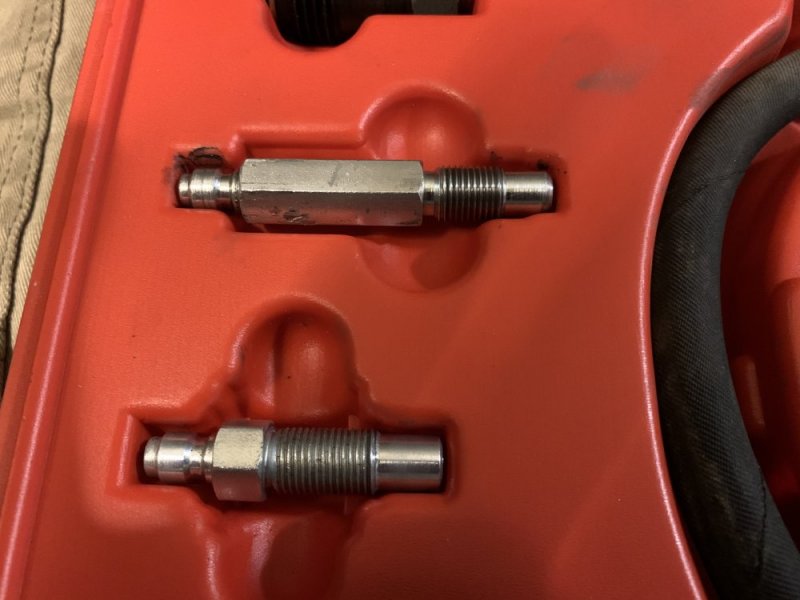
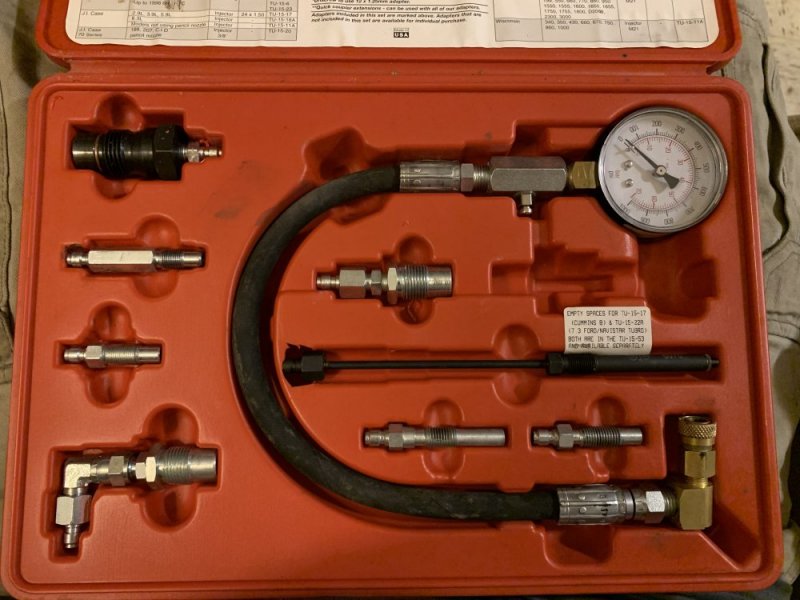
I think so. Guess only one way to find out, screwdge it into the hole and see if it fits good. After all, its just a check valve, rather it be for a tire or for a compression tester.
 
Back
Top