• Welcome to The Truck Stop! We see you haven't REGISTERED yet.

    Your truck knowledge is missing!
    • Registration is FREE , all we need is your birthday and email. (We don't share ANY data with ANYONE)
    • We have tons of knowledge here for your diesel truck!
    • Post your own topics and reply to existing threads to help others out!
    • NO ADS! The site is fully functional and ad free!
    CLICK HERE TO REGISTER!

    Problems registering? Click here to contact us!

    Already registered, but need a PASSWORD RESET? CLICK HERE TO RESET YOUR PASSWORD!

95 Yukon Rebuild Thread

renaissance

Member
Messages
54
Reaction score
24
Location
Lakeland, FL
95 Yukon 2 door 4WD VIN S 115,000 miles on the dash, but probably closer to 185,000. Carfax shows a service record at 170,000 miles. This truck is a daily driver for the 100 miles commute to work. Donor is a 94 2500 HD 2WD VIN F.

Tracked down a full set of factory service manuals and purchsed GMTDTech Scan software and cable. Set of injectors and single thermostat cooling kit with fan on the way from Heath's.

Replaced lift pump with one from the donor that was less than 1 month old and found some creative wiring. Lift pump power was wired into trailer light circuit and OEM connector was toast. New connector from Pep Boys got the wiring back in place.

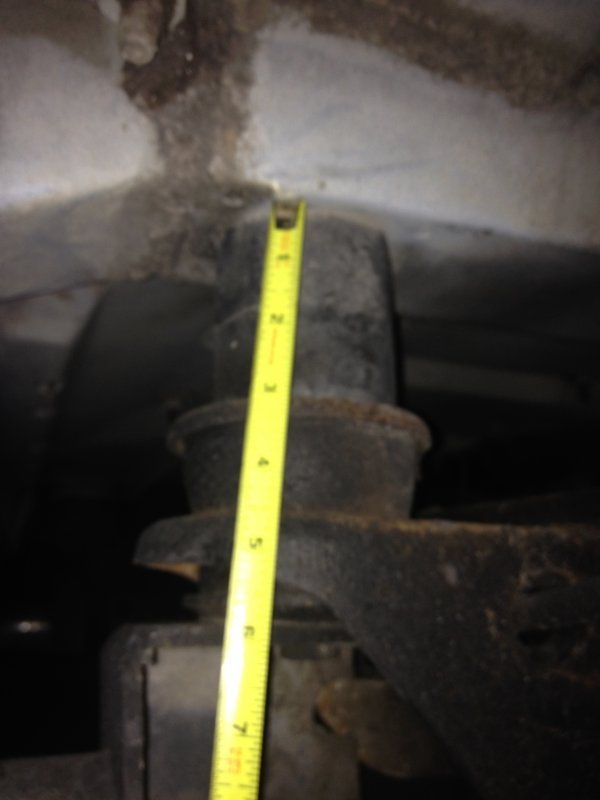
New steering box, pitman arm, cooler and all new lines installed. Wouldn't start after steering work. Frayed wiring to crankshaft position sensor dropping 5 VDC on that circuit down to < 1 VDC. Metal clip broke off sensor at the block when I tried to replace it. Lots of fun removing alternator, power steering pump and bracket to get to the broken sensor. Ended up drilling the sensor and using a lag bolt through a box end wrench to pull it out.

Manual recommends TDC learn after replacing crankshaft sensor. TDC offset was +0.26 (seems a bit off from what I've read on this site ) before TDC Learn. After TDC Learn -1.41, but got a DTC 56 code. Previous owner had done a PMD relocate, and when I checked there was no calibration resistor on the PMD. Local NAPA store had a #9 resistor.

Questions for members:

When I did the TDC Learn, engine speed did not increase to 1,000 rpm as expected ( it stayed right around 680 rpm ). I could see the timing changing on the screen as it went through the learn, and TDC Offset went from +0.26 to -1.41. Does this sound right?

Is a #9 resistor OK or should I order a #5? I'm not pulling anything, just driving 70 mph on flat Florida highways to work.
 
IME they all act differently some stumble, some speed up, some I can't tell anything happens. You'll be fine with your #9
 
The RPM's don't increase during the TDC offset learn in my experience, it is in time set that they can increase(but not always).
 
When I did the TDC Learn, . . . I could see the timing changing on the screen as it went through the learn, and TDC Offset went from +0.26 to -1.41. Does this sound right?

The computer adjusted from its last known IP orientation to what it now sees, so from this point forward it will compensate for the fact that the IP is now -1.41.

There is a lot of discussion regarding the PMD resistor and IP orientation in terms of benefit or not to an OBD system. Seeing as the goal is for highway cruising, consider just letting the ECM do the work:
> Use a #5 resistor.
> If you have the time, move the IP back to the OE TDCO position of -0.75 as I'm not convinced that having it 'advanced' really buys anything in the drive-by-wire system. Leaving the IP at -1.41 TDCO will work as the ECM will just deal with it.
 
#5 resistor installed. PMD is the grey Standyne 39405 with the new calibration resistor profile. Trimmed the tabs off the end of the old style profile and it fits perfectly. DTC 56 code is gone. Going to leave the injection pump where it is with a TDC offset of -1.41 for now.

I'm using GMTDScan Tech software, and the boost pressure was very low. Checked vacuum pump and it had 25-26" Hg, but only 4-5" Hg at the waste gate actuator at idle. Bypassed EGR with vacuum lines directly from vacuum pump to waste gate solenoid and actuator. With direct lines had 20" Hg at the actuator at idle. Voila! I now have some boost, but there was a problem. Rev'd engine and built some boost, but when I let off , and engine dropped to idle, I still had 3.6 lbs (reading calculated boost with GMTDScan Tech software) of boost. It took about 2 minutes for boost to drop with the engine at idle. Disconnected vacuum line from actuator and moved the actuator by hand. It moved freely, but would not return. Looks like the internal return spring in the actuator has failed. Thought this might be helpful to pass on when checking waste gate actuator.

Injectors and high flow water pump and fan due to arrive today.

Question for members:

What coolant should I use? Currently looks like Dex cool in the system, but judging from color, it's mostly water. Should I stay with Dex, go to traditional green or use something else. In the old truck, I used Sierra Non-Toxic for 250,000+ miles without any problems. I've seen Redline Water Wetter recommended of some forums and vendor sites. Does anyone have any experience with this?
 
Discaimer: Dexcool vs green is a equivalent to which religion is better.

I say this: thousands of people lost $ over problems with first 2 types of dexcool, currently 3rd type is out. I ran huge fleets, 1 for a fuel company that while there we worked with GM engineers on a weekly basis. Give me a bottle of it for free and I will throw it in the trash.

Water wetter works well (scrable scores "w" high). It increases surface tension so it gets more coolant in contact with engine and radiator to get rid of heat better. It also causes less pitting from boil pitting and low nitrates. Ancient Chinese secret- water soluble machinist oil is much cheaper and does same thing.
 
#5 resistor installed. PMD is the grey Standyne 39405 with the new calibration resistor profile. Trimmed the tabs off the end of the old style profile and it fits perfectly. DTC 56 code is gone. Going to leave the injection pump where it is with a TDC offset of -1.41 for now.

I'm using GMTDScan Tech software, and the boost pressure was very low. Checked vacuum pump and it had 25-26" Hg, but only 4-5" Hg at the waste gate actuator at idle. Bypassed EGR with vacuum lines directly from vacuum pump to waste gate solenoid and actuator. With direct lines had 20" Hg at the actuator at idle. Voila! I now have some boost, but there was a problem. Rev'd engine and built some boost, but when I let off , and engine dropped to idle, I still had 3.6 lbs (reading calculated boost with GMTDScan Tech software) of boost. It took about 2 minutes for boost to drop with the engine at idle. Disconnected vacuum line from actuator and moved the actuator by hand. It moved freely, but would not return. Looks like the internal return spring in the actuator has failed. Thought this might be helpful to pass on when checking waste gate actuator.

Injectors and high flow water pump and fan due to arrive today.

Question for members:

What coolant should I use? Currently looks like Dex cool in the system, but judging from color, it's mostly water. Should I stay with Dex, go to traditional green or use something else. In the old truck, I used Sierra Non-Toxic for 250,000+ miles without any problems. I've seen Redline Water Wetter recommended of some forums and vendor sites. Does anyone have any experience with this?

There is no internal return spring in the vacuum actuators that I am aware of. And you should never drive it with full vacuum to the actuator. Sounds to me like you have a bad boost pressure sensor if it is showing boost when you have none. Also since this is a nS engine, you could have a problem with the baro pressure sensor. And messing with the vacuum lines while it is running will cause problems with the readings as teh ECM monitors vacuum to the system via the baro sensor on an S engine. As to which anti-freeze, soembody could have put the universal prestone crap in in it which looks very watered down. Personally I would go back with a good green low silicate anti-freeze. I prefer ZEREX myself as I have yet to have a water pump fail running it.
 
What coolant should I use?

As Will mentions, it depends on preference of faith.

If you have the up-front budget, and plan to keep the Yukon, consider going with waterless. There is a lot of passionate discussion on the topic of waterless coolant, so recommend searching and deciding whether this is a good decision for you. Bonuses are no water to promote rust, less prone to cavitation (boiling at a hot-spot), 0 psi cooling system (drill a hole in the relief cap), indefinite service life, re-usable when repairs are necessary, lower long term costs. Down sides are the up-front cost, it cannot mix with the traditional stuff, and a leak can get expensive. One of our supporting vendors sells waterless coolant.
 
Thanks for the feedback. When testing vacuum, stopped the truck before each change. When isolating the waste gate system, I ran a line from the vacuum pump to the waste gate solenoid and line from the solenoid to the actuator. I got the 20" Hg reading at the actuator with vacuum running through the waste gate solenoid. I'll be more specific with my descriptions in the future.

Going to install isolated Boost Pressure Gauge using one of the fittings from Leroy's Diesel to make sure I'm getting a good boost measurement.

Just got the truck back from the transmission shop. Everything operating within specs, real clean inside and nothing in the pan. That was a pleasant surprised - I was expecting a rebuild due to age a mileage. Replaced shift solenoids as a preventative maintenance measure.

Question For Members

I've ordered a Walbro FRC10 and pump harness from Leroy's Diesel, but I'm not sure about a body lift on this truck. The standoff's on the body mounts don't look like stock to me, but this is my first Yukon so I'm not sure what stock actually is. I've attached a photo of the mounts, and I could use some help from members so I can let Leroy know what I've really got.
 

Attachments

  • 075.JPG
    075.JPG
    37.6 KB · Views: 8
New injectors and glow plugs installed. I've read some discussions on how long it takes to replace injectors. My hat's off to everyone who did it in a few hours - I had to use a calendar.....

I pulled the turbo and passenger side inner fender well and passenger side battery box. Big surprise when I pulled the air filer box. Inside the fender was a rat's nest and a massive mud dobber wasp nest. The opening into the air filer box was only about the size of a golf ball - maybe less !!!

I used one of the posted startup recommendations posted. I used an manual push button on the lift pump - 3 times at 30 sec for the supply side of injection pump. With glow plugs OUT, I cranked the engine 4 times for 15 sec and had easily visible spray coming out of glow plug holes. Installed glow plugs and put everything back together on the engine. Started right up on the first turn of the key, and it ran nice and smooth.

If your going to crank the engine with the turbo off, it's really important to make sure the oil supply line for the turbo is zip tied into the oil return pipe for the turbo! I didn't do this for the first couple of cranks, and some guys from an oil exploration company showed up....

Definite improvement in driveabilty. Imagine that - the engine isn't trying to suck ail through a straw, and the injectors are working properly. I'm starting to think I might be onto something with this maintenance stuff.

Next step is lift pump relay harness and fuel and boost bolts from Leroy's Diesel.

Question For Members:

I'm looking at using AutoMeter gauges for fuel pressure to injection pump and boost pressure. The Z-Series gauges have an electric 0-15 psi for fuel, a little expensive, but it keeps fuel in the engine bay. For boost, they have a 0-15 psi mechanical fuel gauge. I've been in touch with their custom shop, and they can make one the reads BOOST for a $25 upcharge. Is a 0-15 psi a good range for the boost gauge? I really don't want to used a gauge with a 0-35 PSI range to monitor low boost levels.
 
Glad to hear you got it. As for the oil exploration team, I scared my dogs from laughing so loud while they were sleeping. 0-15 is good for boost IF YOU KEEP IT ALL STOCK. Little hint here, you are being bitten by the improvement bug and you probably won't keep it stock. What turbo are you running, gm? If so you won't to too long when you learn the better turbo will pay for itself in fuel savings and the added power is then free.

As for the fuel pressure gauge you want one that reads into a vacuum if at all possible. When you have problems in the future it tells you the difference between a plugged filter, a dead lift pump and a blocked line. I'm betting WarWagon will testify to his experience as well...
 
Thanks for the feedback Will L.

This truck is my daily commuter to work. Just under 100 miles with 75 miles flat highway cruise at 70 mph. The goal for this project is reliability, longevity and economy. Non-stock items on the agenda are: upgraded air filter and exhaust system to increase economy, Walbro Lift Pump and relay lift pump harness I bought from Leroy's Diesel to keep the injection pump supplied with fuel and extend it's service life, a lift pump pre-filter (probably on from Leroy's but I'm thinking about maybe a CAT filter), high performance water pump and fan I got from Heath's, conversion from VIN S to VIN F (using parts from the old truck), Feed The Beast fuel manager mod with fuel pressure port on outlet side.

For fuel system troubleshooting, I was planning on adding some T fitting (pre and post). Parker makes some nifty quick disconnects fittings that that we use in the plant where I work, and the seals are rated for diesel. I was think when I see a pressure drop at the injection pump, it would be pretty easy to use a mechanical gauge at the quick disconnects to isolate the problem.
 
Did you get the parts yet? PO was closed yesterday. For economy and ROI my 195* tstat is something to consider.
 
Burning Oil - I received the parts last week. Very nice service - it took me longer to make up my mind on the harness configuration than it did for you to build the harness and ship all the parts. I had them within 2 days once I decided on the harness.
 
First oil change this weekend, and I should have known something was up....

This is my first 4WD, and when I grabbed the oil filter, one of the sides was crushed in. It took a little wiggling to get the wrench on the filter, and there wasn't much room to turn the wrench, but I finally got it loose. That's when I discovered, with hot oil running down my arms, that you can't get the filter out. Drive shaft U-joint is in the way on the bottom and exhaust manifold is in the way front and back. After a little profanity, I finally got the oil filter past the u-joint - that's what the crushed in side of the filter was for...

Disconnected the u-joint and rotated the drive shaft side out of the way to get the new filter in.

Question for members: Am I missing something here, or is disconnecting the u-joint the way to go? It's not a big deal with the u-joint, just 4 bolts on two of the caps, but if I shouldn't have to do this I know I've got another problem.
 
I never dropped the shaft. It's not the easiest, but it will come out. I know I had to turn mine, and I believe I had to slide it back and out.
 
Back
Top