SnowDrift
Ultra Conservative. ULTRA!
I gathered up some brackets to take to a local small business for sandblasting and powdercoating.

Follow along with the video below to see how to install our site as a web app on your home screen.
Note: This feature may not be available in some browsers.


What kind of a venting system does He have there, doesnt look to be a pro-vent.This guy has a setup for replacing his CDR, I assume, which uses the factory passenger side valve cover. I've been on the fence about what to do and seeing this makes it seem as if I can keep the factory cover and if I want to change from the tuna can to a different setup, it could be simpler.
View attachment 80170
As an update, I picked up my engine from the originally scheduled builder a few days back. Rather than badmouth the guy, I'll chalk it up to "miscommunication".
By this past Monday it had arrived in South Carolina in a crate of parts, ready for it's next (probably last) caretaker.


Yes, for 1 piston.Is this with the Total Seal ring set?
I have always liked the bare aluminum look on engines and whatnot. if you can get your hands on some dip to prevent corrosion and protect it I would do that. when I worked at my grandmother's shop where they rebuild all kinds of small aircraft accessories, they would always dip the aluminum parts in some kind of water based solution for this. the one they had would turn it to a golden color. I am sure there's some that leaves the bare color around. I have no idea what chemical it was they used.I thought we had sand in the blast cabinet all these years, but it turns out it was glass. I was able to blast the lower intake and waterneck crossover pipe to prep for paint. Injector lines are next.View attachment 80577
 www.eastwood.com
 www.everbritecoatings.com
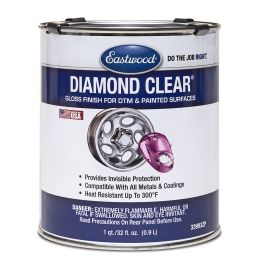
I wonder if this joint would have something.I like the bare aluminum also, but after some age, it doesn't look so good. If I knew of a reputable clear for aluminum, I might try it. This Eastwood product is out until late May.
Eastwood Diamond Clear for DTM & Painted Surface Gloss Quart
Add depth and protection to your project with Eastwood Diamond Clear
 www.aircraftspruce.com
For reference the Total Seal ring set is 2.2gr heavier than stock per piston, and no it's not contributed to the thin 2nd ring alone.Is this with the Total Seal ring set?
Clear powder coat?I like the bare aluminum also, but after some age, it doesn't look so good. If I knew of a reputable clear for aluminum, I might try it. This Eastwood product is out until late May.
Eastwood Diamond Clear for DTM & Painted Surface Gloss Quart
Add depth and protection to your project with Eastwood Diamond Clear


