• Welcome to The Truck Stop! We see you haven't REGISTERED yet.

    Your truck knowledge is missing!
    • Registration is FREE , all we need is your birthday and email. (We don't share ANY data with ANYONE)
    • We have tons of knowledge here for your diesel truck!
    • Post your own topics and reply to existing threads to help others out!
    • NO ADS! The site is fully functional and ad free!
    CLICK HERE TO REGISTER!

    Problems registering? Click here to contact us!

    Already registered, but need a PASSWORD RESET? CLICK HERE TO RESET YOUR PASSWORD!

‘94 Transfer Case

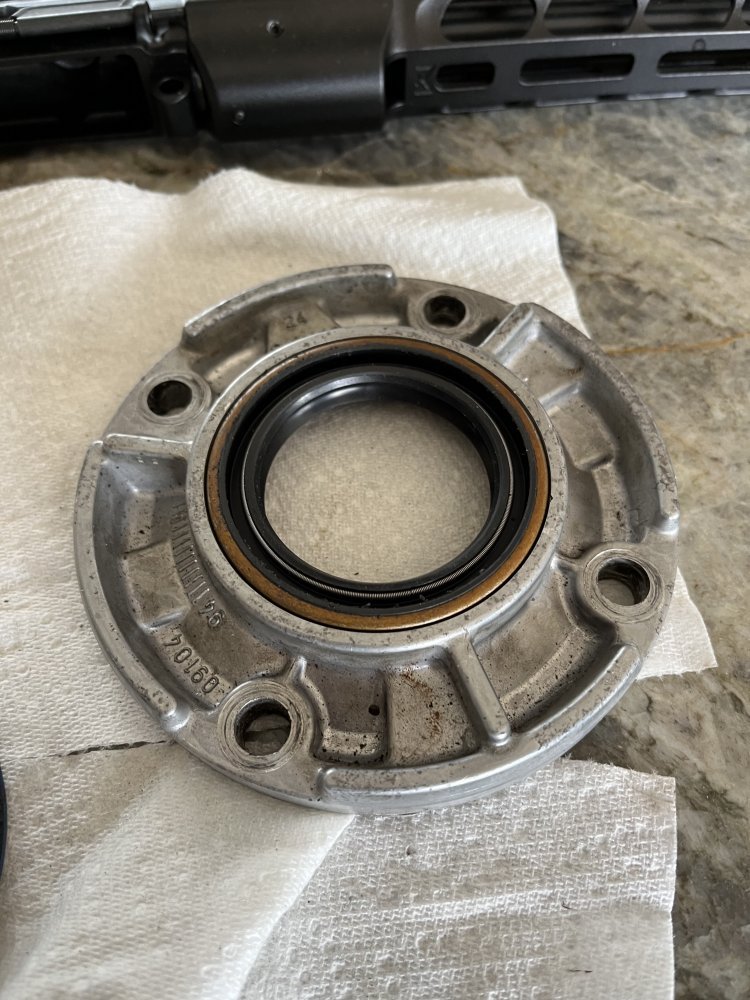
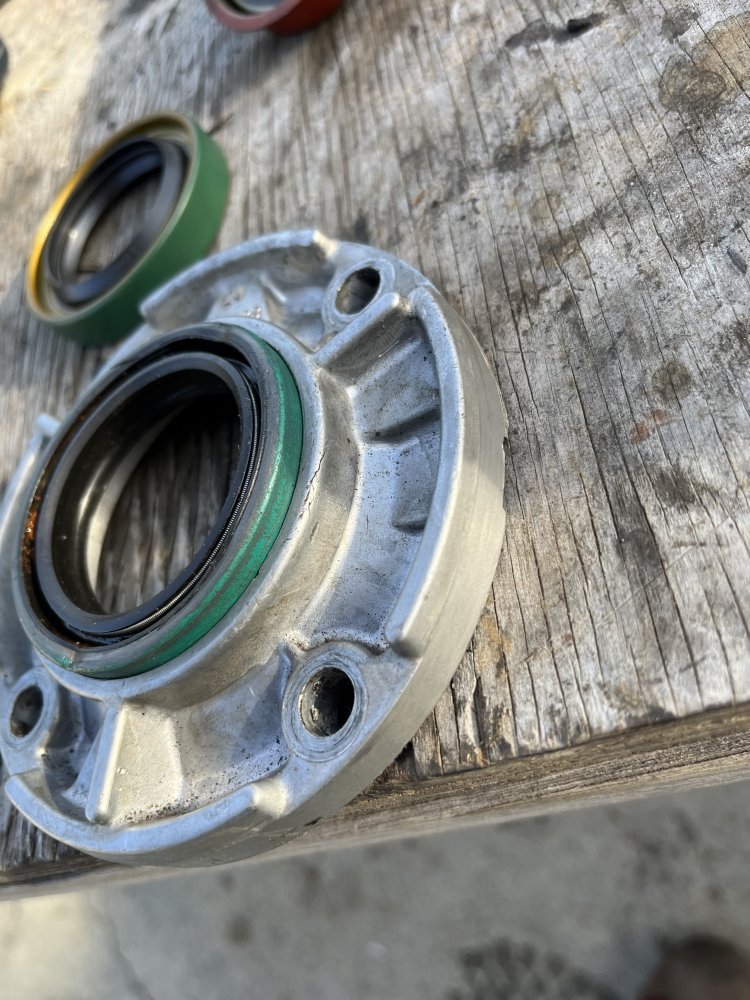
A retainer that holds in a bearing that fits within a flange housing or within the case itself.

Yep, it went behind the front output bearing. So that eliminates the mystery part. Need to check the shifting rings against pics and diagrams to make sure they are installed directionally correct.

I measured the seals, old vs new, confirming the incorrect size:

Input Seal (green): 68.1mm Original; 70.05 for the two possible new seals, both green.

Rear Output seal (red): 68.12mm Original; 77.05mm for the new one, both red.

Front Output (blue): Original was blue and got somewhat egged out yielding a range of 69.9mm to 70.04mm; 68.88mm for the new one which drops right in with no resistance.

So I am going to need 3 new seals plus the shorter front input bearing. Also need recommendations for anaerobic sealant.
Search here. I remember asking or posting the sealant info when I was working on the 96 or 94
 
How do I pull this bushing out and press the new one in?

View attachment 80722View attachment 80723
From one or the other of the local parts stores, I got this universal seal driver set. Made of steel and some plastics and quite tough.
I have had to use it to drive out similar.
Or find a thicker washer thats slightly larger OD and grind it until it is very slightly smaller OD than the bushing.
Then use a piece of all thread as a punch, a nut threaded onto one end, the washer and pound away.
 
Thats quite a kit.
If there is a machine shop in the area they can probably spin one up right quick.
If You are careful, set a nice flat punch against the top or bottom of the bushing and start tapping it out.
If it does slightly wound the housing it should not damage it. Work down any high spots along the wound and drive in the new bushing.
Why it would be nice to have a set. Not so much a chance of damaging the bushing when installing the new bushing.
 
Last edited:
Jeez sorry to hear all the seals were incorrect, what a mess. X2 on cleaning it up and sending back for the right parts.

I recommend Pertmatex Optimum Black for sealing the case halves. Have it on my case, rear diff cover and PTO cover plates, no issues to date

I also have a bushing/ race driver kit that I got off Amazon for around $50, really handy to have. I can't remember exactly what I used to drive out that bushing but I think I used an impact socket, see if your 36mm axle nut socket works. For installing put the new bushing in the freezer and use a dab of gear oil to smooth up the surface when driving it in
 
Thats quite a kit.
If there is a machine shop in the area they can probably spin one up right quick.
If You are careful, set a nice flat punch against the top or bottom of the bushing and start tapping it out.
If it does slightly wound the housing it should not damage it. Work down any high spots along the wound and drive in the new bushing.
Why it would be nice to have a set. Not so much a chance of damaging the bushing when installing the new bushing.
Yeah I will check the machine shops in the area tomorrow. Kit doesn’t make sense for just one or two job.
 
Jeez sorry to hear all the seals were incorrect, what a mess. X2 on cleaning it up and sending back for the right parts.

I recommend Pertmatex Optimum Black for sealing the case halves. Have it on my case, rear diff cover and PTO cover plates, no issues to date

I also have a bushing/ race driver kit that I got off Amazon for around $50, really handy to have. I can't remember exactly what I used to drive out that bushing but I think I used an impact socket, see if your 36mm axle nut socket works. For installing put the new bushing in the freezer and use a dab of gear oil to smooth up the surface when driving it in
Can’t send it back. 30 day time limit and all the correct parts have been installed. I’ll just have to order the three seals and the thinner 16mm bearing.

I never did figure out where the large needle bearings go. None of the YouTube videos on the NP 241C show them.
 
leave the seller a bad review with pictures. I did that once and was messaged by the seller offering to compensate me financially if I changed my bad review.

I think some of the Dodge NP241s had different internals, so you may have been sent a mislabeled kit which may explain the extra bearings and incorrect seals

sounds like the rest of it went relatively smoothly for ya, nicely done :)
Yeah it’s not that hard of a job. I complicated it by tearing it apart back on New Year’s weekend, but not far enough to get at the input bearing to measure it. I got the links on the chain counted. I am stunned that the 3 seals are the wrong size, but I’ll get them ordered tomorrow. I ordered Permatex Grey as that was recommended.
 
I think I got the seal thing figured out. First pic is the front output seal in place. Not intuitive as the old one had a flange and was painted blue, while the new had no flange and was gold anodized.4BBD84D3-5FB4-4B42-ADB4-4B10409D1442.jpegE4F1BD46-ED5D-4062-B9CD-3AF3A6421259.jpeg88D95B0E-FFE6-4C24-ABCC-99BB9151C7F4.jpeg
 
Same thing with the transmission input seal which was gold while the original was green.
 

Attachments

  • 143B33A6-9B24-40E3-96A1-221C3D136E1F.jpeg
    143B33A6-9B24-40E3-96A1-221C3D136E1F.jpeg
    143.8 KB · Views: 0
  • A3BC9CB0-0E73-4158-8297-CC8909222B71.jpeg
    A3BC9CB0-0E73-4158-8297-CC8909222B71.jpeg
    155.6 KB · Views: 0
  • 3986B732-6331-47B2-B636-D3EBC851A114.jpeg
    3986B732-6331-47B2-B636-D3EBC851A114.jpeg
    159.8 KB · Views: 0
The head scratch is the rear output seal. Old came with a rubber boot. There was a new one with a rubber boot, but it was too big to fit. There is a red seal with a flange that will fit, but it does not have the boot.

488EB642-C003-48D5-B549-800EC223CC4F.jpeg076B8EB6-C67B-480F-95B8-C9CF3B093D07.jpeg0D8EE8DD-2B8A-4349-B1C7-E6F7467B37A2.jpeg
 
I still need to order the thinner 16mm input bearing. I will call and confirm on the rear seal at the same time. So it seams like they throw every possible seal and bearing for every scenario into the kit. There may be one needle bearing I missed on the gear inside the planetary gear, but that is easily addressed.
 
PVC pipe and fittings makes for real good seal drivers.
I failed to mention, on the inside portion of the seal, where the tension spring lays in, fill that cavity with grease to keep that spring from bouncing out.
Then thoroughly coat the OD of the seal with No.1 permatex gasket sealer. The Permatex that comes in the bottle with the brush attached to the cap.
I have had seals leak, especially the ones with that enamel looking sealer painted to the OD of the seal. I also coat the ID of the seal bore with the No.1 also too.
Just added insurance.
 
Back
Top