• Welcome to The Truck Stop! We see you haven't REGISTERED yet.

    Your truck knowledge is missing!
    • Registration is FREE , all we need is your birthday and email. (We don't share ANY data with ANYONE)
    • We have tons of knowledge here for your diesel truck!
    • Post your own topics and reply to existing threads to help others out!
    • NO ADS! The site is fully functional and ad free!
    CLICK HERE TO REGISTER!

    Problems registering? Click here to contact us!

    Already registered, but need a PASSWORD RESET? CLICK HERE TO RESET YOUR PASSWORD!

What did you do with your GMT400 today...or yesterday....

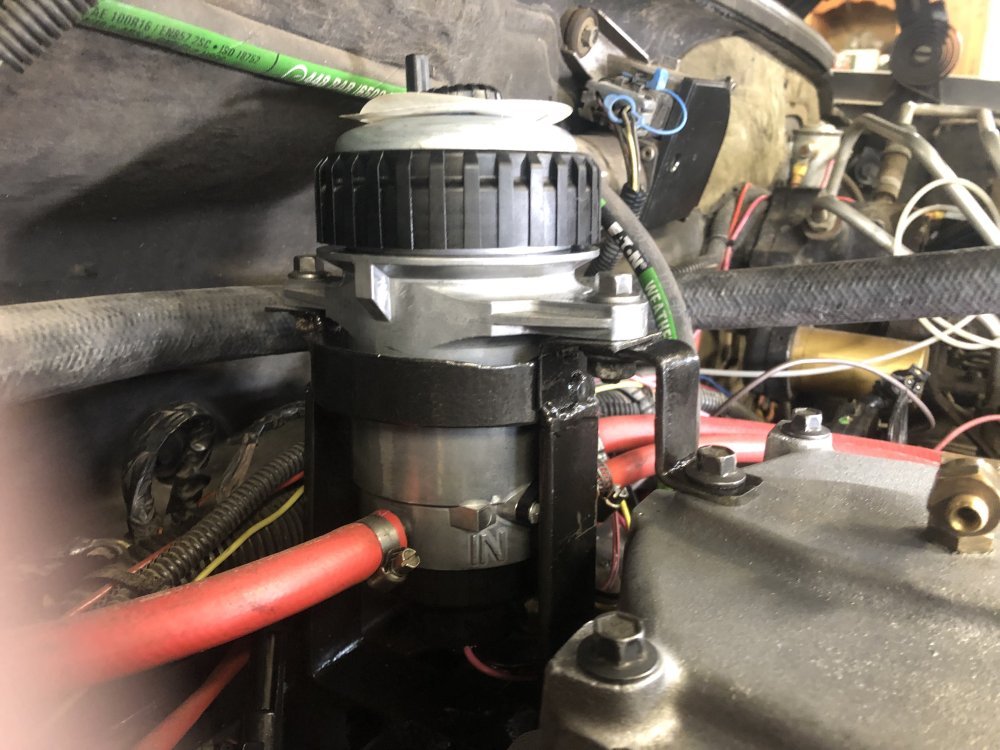
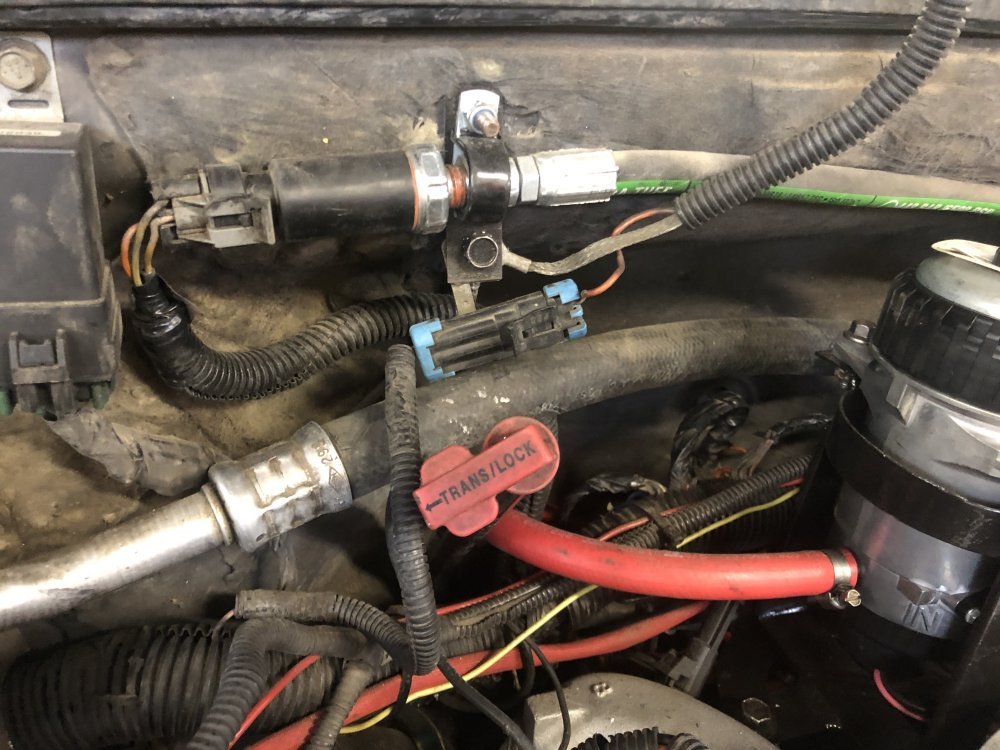
Got a double L bracket made for the FFM mounting device.
Also drilled and cut a tab to drop the hood lamp terminal connector, then used the same stud for that drop tab and also for the wiring P clamp to secure the remote oil pressure sensor/hose. I did have to extend the harness about a foot so the wires could reach.
I have part of a harness I robbed from an old truck several years back so I was able to snip wire and do it all in color code.
IMG_6351.jpeg
 
So, hummers have cv joint at all 4 wheels. Because of the portal hub being almost 2:1 and the tires being so big (heavy) those cv joints/axle is a common death point. (Hummer/hmmwv it is called a half-shaft)

But there are companies that make NiCr balls and cages. They cost about 1.5 times as much, but they last a lot longer for wear and are very hard to break. The disadvantage in hummers is that is the known weak link so it always breaks first saving the more expensive components in the portal (geared hub- another name change for no reason-haha).

But in regular cars and the gmt400 trucks - not having the portals and ridiculous heavy wheels (165 lbs ea) the cv cage doesn’t protect anything. So just something for you guys to think of in rigs that tend to eat cv joints.

Btw sounds like @Big T doesn’t drift his Honda enough! That or you are not doing hard enough burn outs!
 
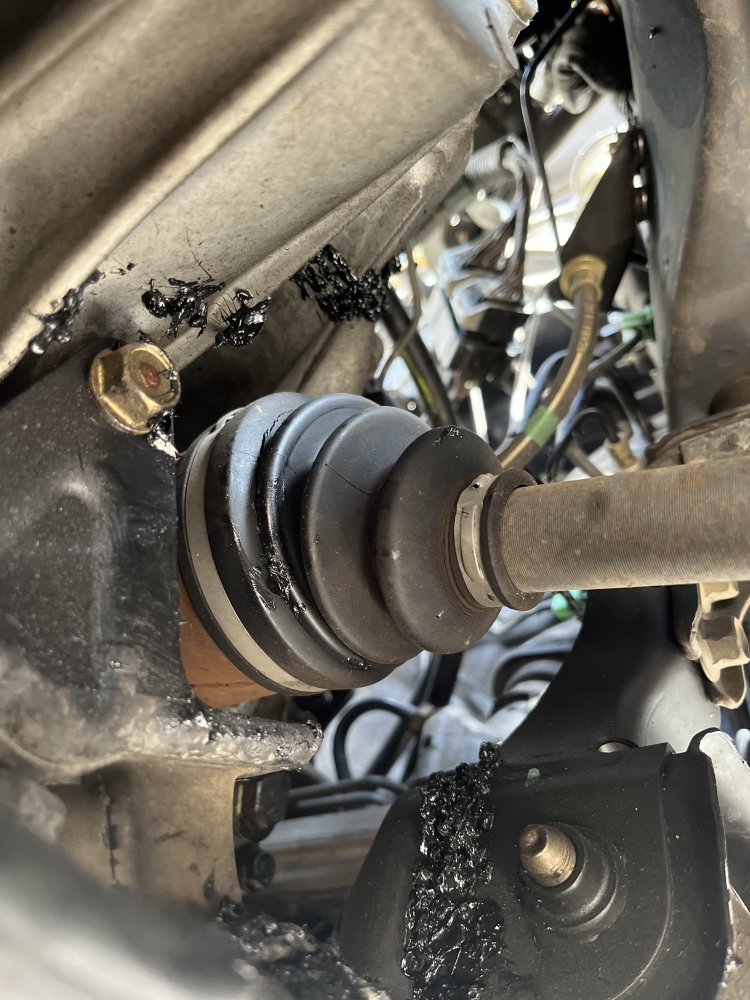
Not my GMT-400 Suburbans, but my 2005 Honda Accord. Found the source of the groaning sound at speed. Driver’s side CV axle, inside boot is cracked and split. This will be the 2nd time replacing this one:

View attachment 81436
In how many miles ?
Reminds Me.
Years ago, Carquest Store. Saturday close to noon closing time.
I get there, people lined up from the counter to the door, probably about 18 people. Manager is the only one on shift.
Finally I’m about the third person from the counter, more people came in and the line had not shrunk down. Only parts store in town that was open on Saturday mornings.
The guy that the manager waiting on needed brake shoes for a Jeep. Rick looks them up, goes in back and brings them to the counter, the guy asks, how much are they ? Rick replies $38.??. That guy went ballistic, I holler, real loud, Hey ! ! ! ! He turns, I kindly ask, how many miles you got on this Jeep ? He puffs up peacock proud, I have 8?,??? Miles on this Jeep. I step up, get in his face, You have over 80,000 miles on this jeep and your bitching about spending $38.?? On a set of brake shoes ? Pay the man or get the f*^# out of the way so Rick can get out of here and be with his family.
The entire audience started cheering and clapping.
I got to the counter, Rick whispers, You dont know how many times a day I want to do that. 😹😹😹
No @Big T , You are not one of those types of people. You are one that is willing to pay the price for dependability. I believe all of us in this forum is that way too.
I just tossed out that story as I think it is funny. That man with the Jeep, His face got red, he was so embarrassed He couldnt get the shoes paid for, get his receipt and get out of there fast enough. 😹😹😹
 
So, hummers have cv joint at all 4 wheels. Because of the portal hub being almost 2:1 and the tires being so big (heavy) those cv joints/axle is a common death point. (Hummer/hmmwv it is called a half-shaft)

But there are companies that make NiCr balls and cages. They cost about 1.5 times as much, but they last a lot longer for wear and are very hard to break. The disadvantage in hummers is that is the known weak link so it always breaks first saving the more expensive components in the portal (geared hub- another name change for no reason-haha).

But in regular cars and the gmt400 trucks - not having the portals and ridiculous heavy wheels (165 lbs ea) the cv cage doesn’t protect anything. So just something for you guys to think of in rigs that tend to eat cv joints.

Btw sounds like @Big T doesn’t drift his Honda enough! That or you are not doing hard enough burn outs!
Purely a commute car. It goes to the train station twice a week, which is 6 miles round trip. Then grocery runs. Fed pays for the train. So I may fill this car up every 6 to 8 weeks. It has 156.5K miles on it. 5 speed manual transmission.
 
In how many miles ?
Reminds Me.
Years ago, Carquest Store. Saturday close to noon closing time.
I get there, people lined up from the counter to the door, probably about 18 people. Manager is the only one on shift.
Finally I’m about the third person from the counter, more people came in and the line had not shrunk down. Only parts store in town that was open on Saturday mornings.
The guy that the manager waiting on needed brake shoes for a Jeep. Rick looks them up, goes in back and brings them to the counter, the guy asks, how much are they ? Rick replies $38.??. That guy went ballistic, I holler, real loud, Hey ! ! ! ! He turns, I kindly ask, how many miles you got on this Jeep ? He puffs up peacock proud, I have 8?,??? Miles on this Jeep. I step up, get in his face, You have over 80,000 miles on this jeep and your bitching about spending $38.?? On a set of brake shoes ? Pay the man or get the f*^# out of the way so Rick can get out of here and be with his family.
The entire audience started cheering and clapping.
I got to the counter, Rick whispers, You dont know how many times a day I want to do that. 😹😹😹
No @Big T , You are not one of those types of people. You are one that is willing to pay the price for dependability. I believe all of us in this forum is that way too.
I just tossed out that story as I think it is funny. That man with the Jeep, His face got red, he was so embarrassed He couldnt get the shoes paid for, get his receipt and get out of there fast enough. 😹😹😹
I believe I replaced both CV axles at about 115K to 120K miles and the car now has 156.5K miles. I was getting wheel shimmy/steering pulse under hard acceleration at 50+ mph. Replace the CV axles cured that. Of course Honda wants $570 per OEM axle, so I went with Cardone after market for $70. The neoprene boots just give it up as a function of age. Though not a lot of miles, the axles are about 9 to 10 years old. So another Cardone axle is on order from Rockauto for $77 with CA tax and shipping. This will take less than an hour to replace.
 
Oh and I'd be working on the '94 Suburban, but the replacement strainer for the oil pump pick-up in the transfer case will not arrive until Monday. I was missing doing car work, so I did a few things on the Honda and then got under it to check things out and found the CV axle issue.

I have an Echo SRM 2409 motor on a weed trimmer that I need to replace crank shaft seal and a carburetor that I need to work on. Also need to sharpen some chains and cut up the rest of the eucalyptus stump. Finally, wire brush and paint the GMT-800 14 bolt full floater axle with disc brakes.
 
Oh and the big news is I checked on the Lithia Toyota of Missoula website and they had an Off-road Premium 4Runner in Lunarock color in transit. Had my wife call her rep at the dealer and her name is now on it. Should be there in 4 to 6 weeks:

IMG_3856.png

Her 2014 4Runner SR5 is still going strong at 330K miles. Nothing but impressed with the 4Runner.
 
Just knocking out punchlist items and stomping out emerging stuff.
- Driver’s seat rocks, roller missing. Sourced replacement at Pull It yard. FAIL. This one isn’t for a reclining seat. Didn’t notice till after de-rusting, treating and painting. Found a perfect condition, color matching hood there though. Will go back on Monday.
- Remove excess add on electrical wiring crap:
The rebuilt Leroy High Intensity Discharge tail lamp housing melting reverse lamps
Remote Starter Switch
Air Dog Harness
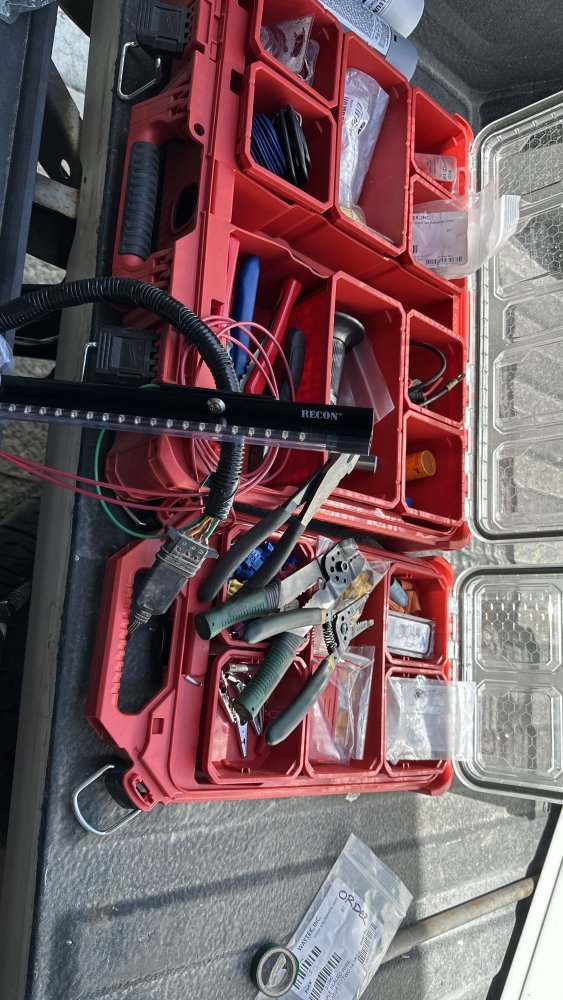
- Restored Trailer Harness with new 4-Pin connector, extended the reverse light lead for future upgrade to a 7-Pin set up.
68A85DBE-DC30-4480-BD28-3569856CFB8A.jpeg

- Removed the old busted Tailgate light bar, and install replacement RECON Light Bar saved for the eventuality.
Ran two power leads from front to rear. One for RECON power to Under Hood Relay Box w/ Add a Circuit. The other, rear facing LED Work Lights maybe? Keep the other two factory lines for trailer brakes and whatnot.
- Emergent Issue, Replace Headlight switch (Spare on hand). Been teaching my 7yr old grandson about Schematics. I dubbed them ‘Google Maps on paper’ for all the electrical stuff. He’s fascinated as I’ll explain something like the wire runs, show him continuity, circuit tester lamps and then wire in something. Check it out afterwards and it works. That’s how I discovered the tail lights themselves were out. Switch was wonky and it’s too long to post up w/o a separate thread. Suffice it to say, we did the tests and discerned it was the switch and I had a spare ‘for just such an emergency’ on the shelf that I was miraculously able to locate without turning the garage upside down.
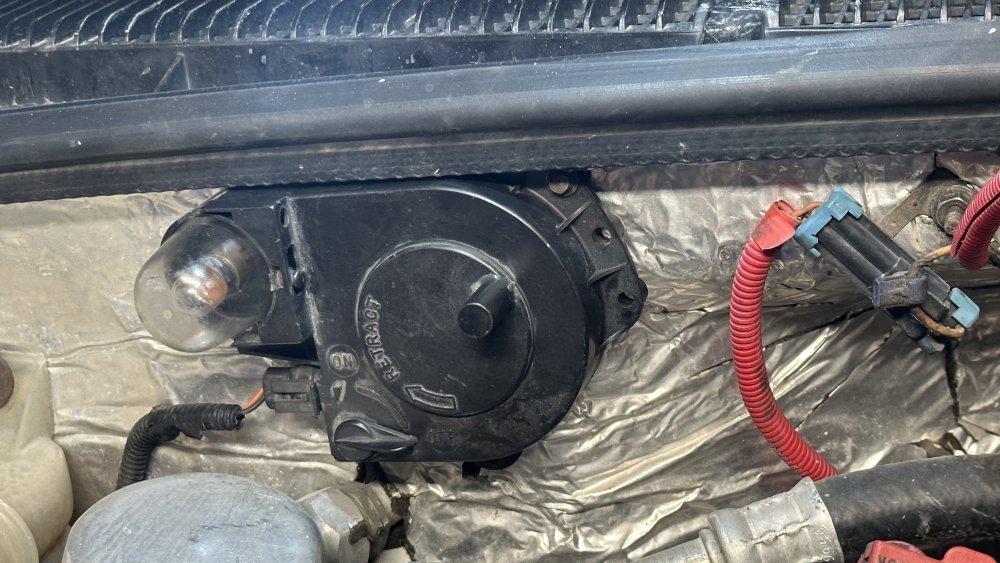
- While searching for the Headlight Switch I found a couple of Under Hood Reel Lamps. Took one apart, cleaned it up, corrected contacts that had stopped contacting, did a continuity check, reassembled and installed.
DECE8C73-36F8-4358-8071-E490F633489D.jpeg
- Another time killer this morning; I noticed the right headlight was out. Figures. Been ridiculing all the Utah ‘one-eyed-Jacks’ lately and, as it turns out, I R 1 2.
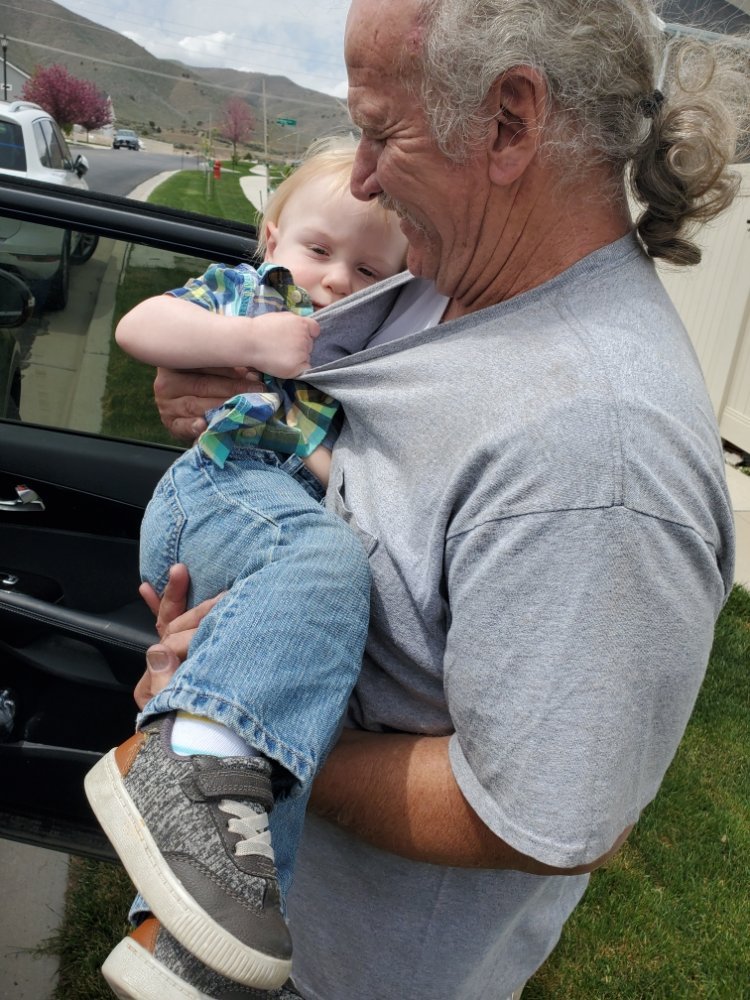
Grandson 3 dropped in and when it was time to go home he wasn’t having it. He even braced against me, the roof and the seat. Normally that behavior of someone getting tossed in the back of a patrol car who doesn’t think the law of the land applies to them (Karens).
9B38BDBA-2EB9-404D-A5D9-FE0ECF62B23A.jpeg
 
Yeah, @Paveltolz, my 4 Y.O. grandson can be like that at times, too. Of course, you know that grandchildren are revenge on your own kids. You spoil the heck out of your grandkids, then give them back at the end of the day to your kids with the admonishment of, "Have fun, now you'll know what it was like for me to deal with you at that age."
 
Just knocking out punchlist items and stomping out emerging stuff.
- Driver’s seat rocks, roller missing. Sourced replacement at Pull It yard. FAIL. This one isn’t for a reclining seat. Didn’t notice till after de-rusting, treating and painting. Found a perfect condition, color matching hood there though. Will go back on Monday.
- Remove excess add on electrical wiring crap:
The rebuilt Leroy High Intensity Discharge tail lamp housing melting reverse lamps
Remote Starter Switch
Air Dog Harness
- Restored Trailer Harness with new 4-Pin connector, extended the reverse light lead for future upgrade to a 7-Pin set up.
View attachment 81448

- Removed the old busted Tailgate light bar, and install replacement RECON Light Bar saved for the eventuality.
Ran two power leads from front to rear. One for RECON power to Under Hood Relay Box w/ Add a Circuit. The other, rear facing LED Work Lights maybe? Keep the other two factory lines for trailer brakes and whatnot.
- Emergent Issue, Replace Headlight switch (Spare on hand). Been teaching my 7yr old grandson about Schematics. I dubbed them ‘Google Maps on paper’ for all the electrical stuff. He’s fascinated as I’ll explain something like the wire runs, show him continuity, circuit tester lamps and then wire in something. Check it out afterwards and it works. That’s how I discovered the tail lights themselves were out. Switch was wonky and it’s too long to post up w/o a separate thread. Suffice it to say, we did the tests and discerned it was the switch and I had a spare ‘for just such an emergency’ on the shelf that I was miraculously able to locate without turning the garage upside down.
- While searching for the Headlight Switch I found a couple of Under Hood Reel Lamps. Took one apart, cleaned it up, corrected contacts that had stopped contacting, did a continuity check, reassembled and installed.
View attachment 81447
- Another time killer this morning; I noticed the right headlight was out. Figures. Been ridiculing all the Utah ‘one-eyed-Jacks’ lately and, as it turns out, I R 1 2.
Grandson 3 dropped in and when it was time to go home he wasn’t having it. He even braced against me, the roof and the seat. Normally that behavior of someone getting tossed in the back of a patrol car who doesn’t think the law of the land applies to them (Karens).
View attachment 81449
Pony tail!
 
Oh yes and @denata
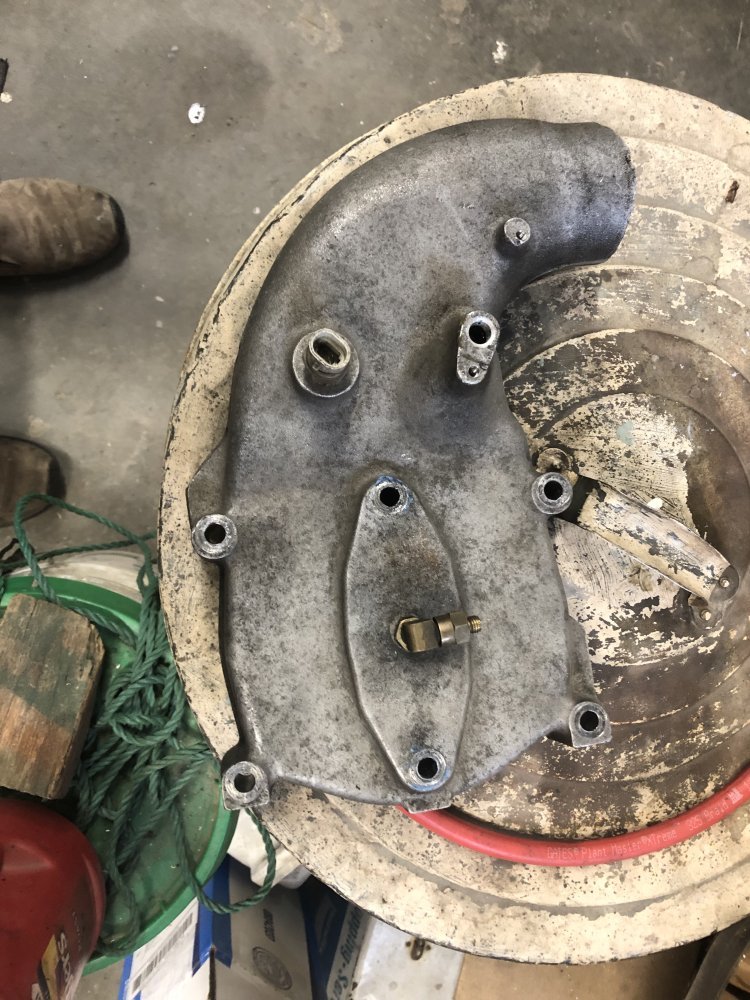
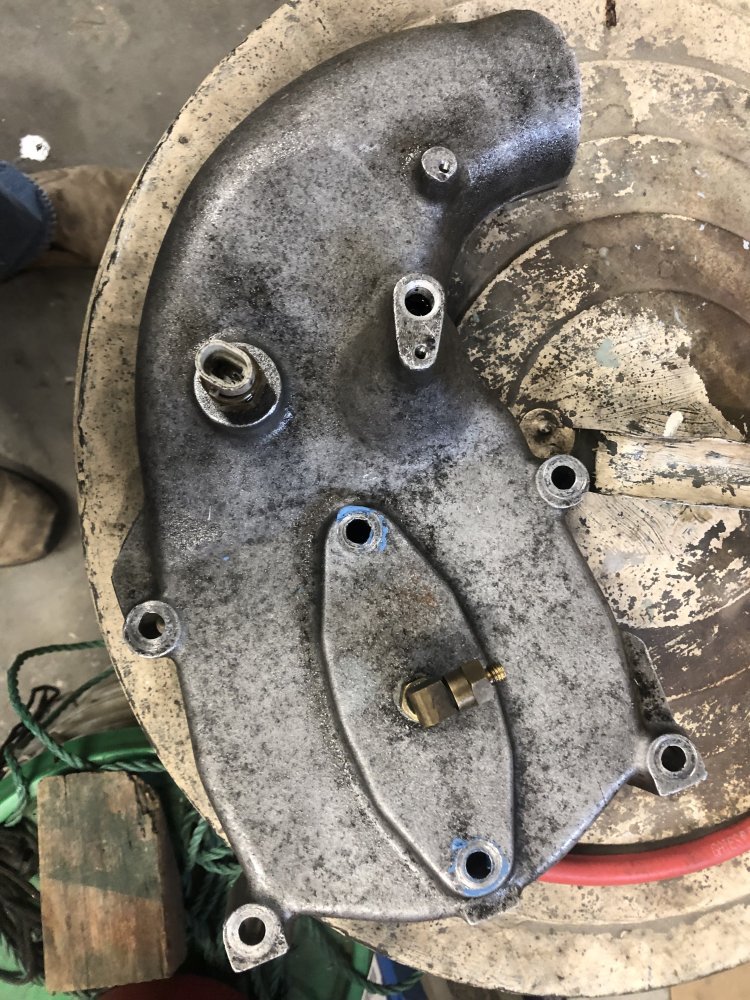
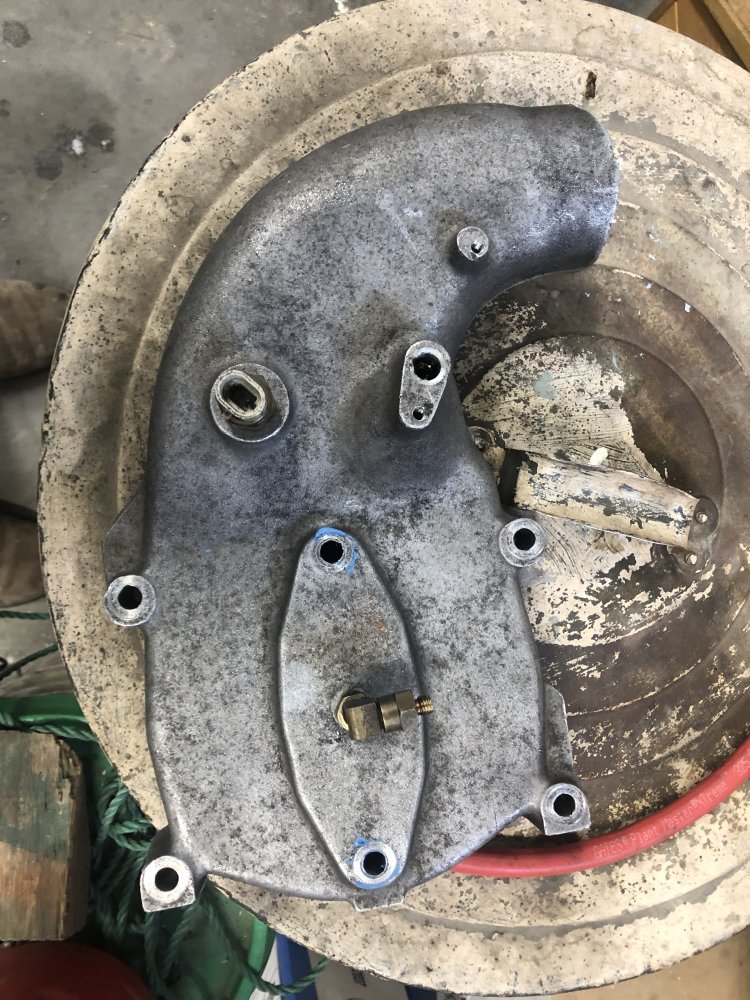
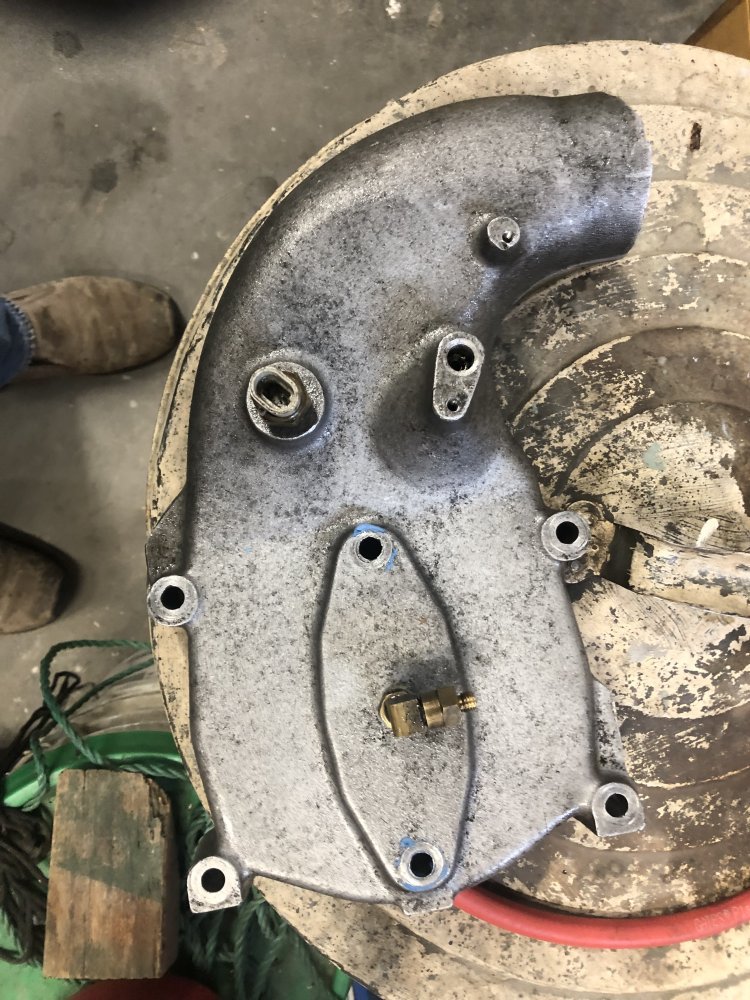
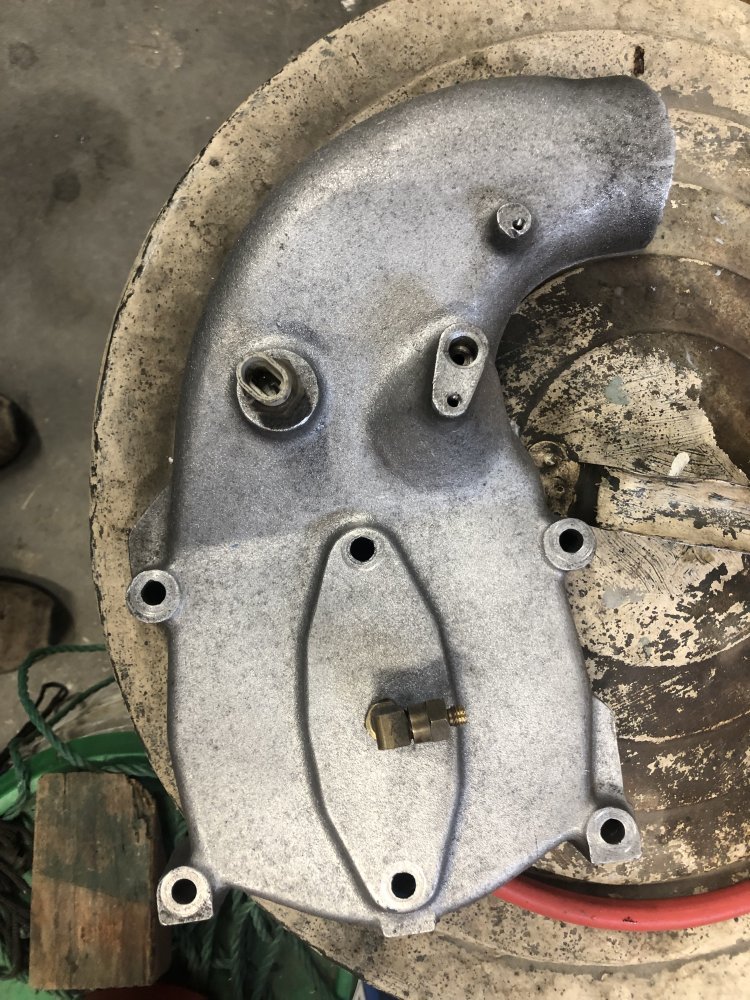
WARNING ! ! ! ! Be sure to use some parts cleaning gloves if attempting any cleaning using DMSO.I used some of that DMSO solvent to clean the upper intake manifold cover.
The manifold cover was heavily stained and so I tried several chemicals for cleaning it.
Before any cleaning attempts.
IMG_6371.jpeg

Mineral spirits, same as parts cleaning solvent and wiped dry.

IMG_6372.jpeg

Sprayed with B&P cleaner and blowed dry.

IMG_6373.jpeg

About five minutes of lightly brushing using DMSO.

IMG_6374.jpeg

About four hours soaking in DMSO then a light wire brushing using one of those tooth brush size wire brushes.
IMG_6379.jpeg
 
@Big T Yup, Ponytail and, it was a few inches longer until Mrs. Pavel got ‘helpful’ cleaning off the neck-mullet and the un-evenness of the length. Then there was the creeper wheel it got stuck under Thursday….

@Husker6.5 Great bumper sticker “If I’d known Grandkids were this much fun, I’d have had them first.”

@MrMarty51 Good work. That’s a lot of effort and I get it. I was using wire wheels on drills and drummers for a while. Then I learned I was fortunate my buddy has a small media blaster that the intake and exhaust manifolds could be cleaned in. Saved a lot of time pre-powder coating. The coated said he’d have blasted them for a ‘small’ fee. Rather do it myself.
I do have a small HF bead blast cabeeenut. The gloves is shot and the plexiglass is trying to fall in.
Maybe when I get the truck finished and before starting on the gyro glider I’ll drag that critter away from the wall, get it out into the open and see about maybe getting a real glass cut for the window. Maybe see if the glass shop might have some kind of a static stick on clear lens devices I can put on the inside, stick and peel clear things.
I did have a small shop vac hooked to it and a 12 volt LED light but I needed the light for other purposes so removed it. The light inside made it real nice.
Better take a look at and see what it uses to hold the gloves to the cabinet and try to duplicate that but with a much better set. HF gloves was ok while they lasted but they was some much too small for My meat hooks. 😹😹😹
 
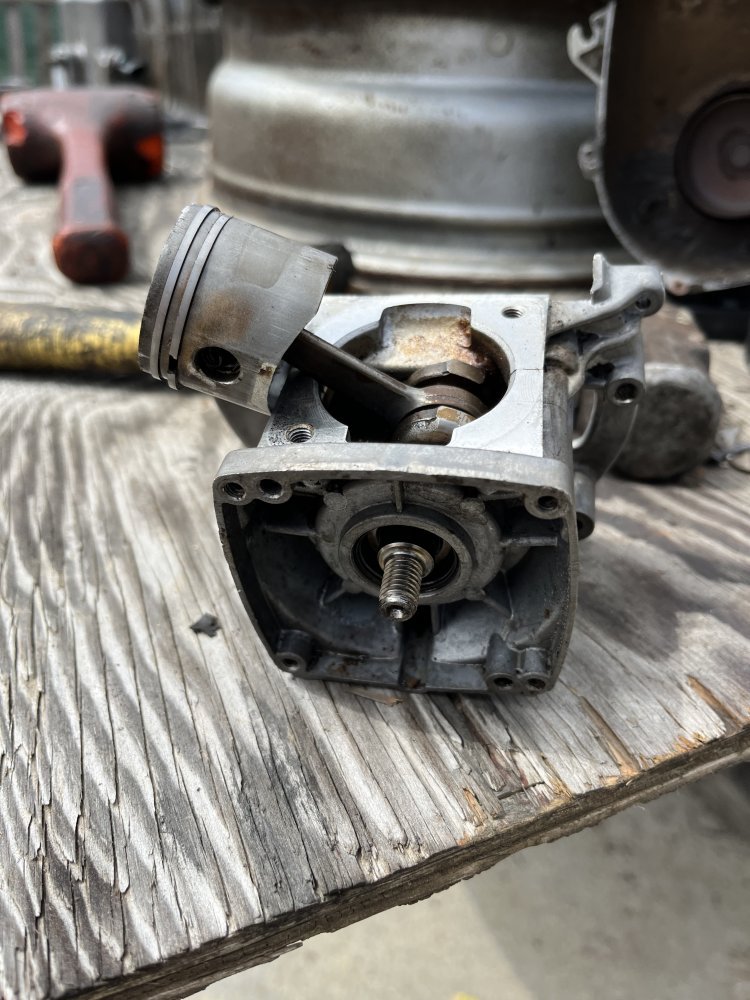
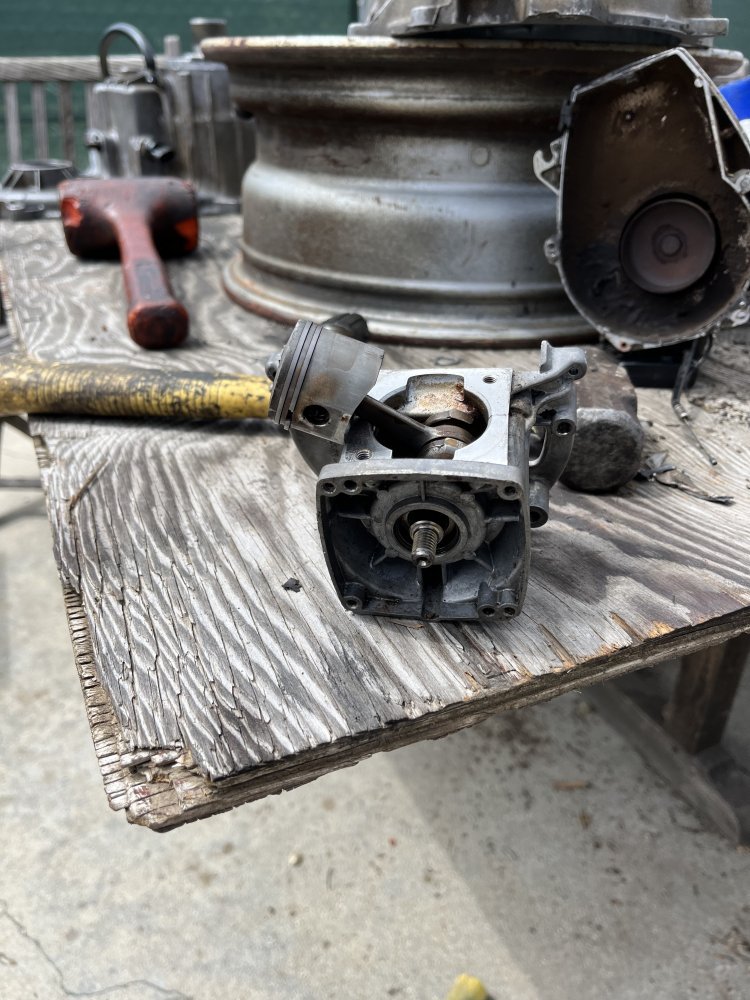
Not a GMT-400, but an Echo SRM-2400 1E. Replacing the oil seals on the crankshaft, a number of gaskets, carburetor and a new fuel tank. Unfortunately, work is stalled as I wait for some of the gaskets.

I split the case halves after these pics and cleaned the hell out of everything including that caked on grease in the clutch housing in the background. Everything was fresh and minty before I put the case halves back together and installed the oil seals. So I am stalled at installing the cylinder/head as I need that base gasket.
IMG_3869.jpegIMG_3870.jpeg
 
Last edited:
Back
Top