• Welcome to The Truck Stop! We see you haven't REGISTERED yet.

    Your truck knowledge is missing!
    • Registration is FREE , all we need is your birthday and email. (We don't share ANY data with ANYONE)
    • We have tons of knowledge here for your diesel truck!
    • Post your own topics and reply to existing threads to help others out!
    • NO ADS! The site is fully functional and ad free!
    CLICK HERE TO REGISTER!

    Problems registering? Click here to contact us!

    Already registered, but need a PASSWORD RESET? CLICK HERE TO RESET YOUR PASSWORD!

Resurecting New Engine

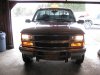
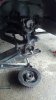
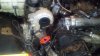
That's the setup I put in for my powered mirrors. I only found the drivers side in the pick-n-pull, so my passenger side is still as it came from the factory.

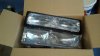
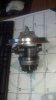
The stock door panel can be easily modified to accept the Burb switches. The metal inner door panel already has the slots for the metal clips. All you will need to do is put the clips in place. The switches will need to have the wires put into the Burb connectors as the pickup connectors do not interchange. It really isn't hard to do.

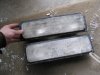
I did have to get some plastic paint since I needed grey and the panel parts were tan.

Don

So the connectors are the same on the end of the pigtail wires? All you have to do is install the pigtail wires from the old plastic housing to the new ones? Or do you need to cut the wires and add new ends? I didn't look into this project real close yet.
 
I have the heated/power/signal mirrors on my 94 pickup. Unless your pickup is already wired for power mirrors it most likely has no wiring in it for any kind of power mirrors. That is how my pickup was. I did a complete wiring harness for mine. It takes some time and a real want-to to do it. If you are competent with automotive wiring and want the challenge then let me know and I can give more details.

Don

ps: I did put some of the info in some of the mirror threads. At this moment I don't remember the name of the thread.

My truck is not wired for power mirrors. So like you did i will have to creat my own harness. But i was wondering if the wires that go to the old style truck switches need to be cut and have new ends spliced on to fit the burb buttons? Or if that part was a direct plug and play? Thanks!
 
Got this package deal off Ebay. Two new headlights and two new parking lights. This will brighten my front end up big time! The head lights even came with HB3 & 4 bulbs installed! $58 dollars free shipping.
 

Attachments

  • facelift1.jpg
    facelift1.jpg
    64.9 KB · Views: 6
  • facelift01.jpg
    facelift01.jpg
    36.8 KB · Views: 6
My truck is not wired for power mirrors. So like you did i will have to creat my own harness. But i was wondering if the wires that go to the old style truck switches need to be cut and have new ends spliced on to fit the burb buttons? Or if that part was a direct plug and play? Thanks!

Somehow I missed your previous question about the wire ends, my apologies.

It's been two years, almost, since I did this project and I'm struggling with my memory about that. At the moment I'm not remembering having to change the wire ends, just swap connectors and make sure the wires were put in the correct location in the "new" connector. I changed so many wires/ends when doing this project that one part of the project flows into another.

What I found was that the connectors that the mirrors came with were the same as about 99 and up GM pickups/Burbs. I scavenged through pick-n-pulls to get both drivers and passenger side vehicle connector ends. I ended up getting the complete under dash loom out of a 93/94 Burb to strip for wires, convenience center connectors, and rear window defrost switch.

All the regular stock under dash wires and the power mirror wires were in one loom. I made up a secondary loom for just the power mirrors and mirror heat and put it under the dash along with my stock under dash loom. Placing that loom was a lot of work, but you could easily just pull your carpet and run the new mirror loom under the firewall portion of the carpet.

I kept stock wire schematics, my wire diagrams, and notes about the mirror function/wire colors. As soon as I can get either my son or daughter to help me (tell/show me how to do it) I can scan them and e-mail them to you if that would be helpful to you.

Don

^^Thanks!
 
Got the new headlights and parking lights in! I still need to fine tune the aiming of the headlights as they favor the passenger side of the road. But man they are definitely brighter! They look a ton better too! Cant wait to clean it next time and see how much it brightened the front end up.

The old parking lights were bought about 5 years ago. They have been on 3 different trucks I have owned. One tab was cracked off and the light actually broke in half (i glued it back together for a temporary fix).
 

Attachments

  • IMG_0232.jpg
    IMG_0232.jpg
    79.4 KB · Views: 5
  • IMG_0224.jpg
    IMG_0224.jpg
    93.2 KB · Views: 5
  • IMG_0225.jpg
    IMG_0225.jpg
    90.7 KB · Views: 6
  • IMG_0227.jpg
    IMG_0227.jpg
    89.4 KB · Views: 6
  • IMG_0230.jpg
    IMG_0230.jpg
    79.1 KB · Views: 6
  • IMG_0231.jpg
    IMG_0231.jpg
    80.6 KB · Views: 6
Well got some work to do on the truck again, putting aside the Mustang for this weekend. On March 3rd i will be going to Bel Air MD. My brother is going to buy a 1986 Mustang GT. Since its still winter we are going to trailer the car to reduce salt exposure.

Truck needs front brakes bad, and has a loud clunking in the steering system. So far i have purchased 2 new front wheel bearing assemblies, rotors, calipers and pads. Also picked up an oil change since I am almost due. So hopefully weather permitting i can polish this off this weekend and find out whats clunking in the front end.Im sure the backs will need attention also this year, but i cant swing it at the moment.
 
Got some work done over the weekend. Replaced the hub assemblies, rotors, pads and calipers. Also found out where the clunking/play is in the steering system. The idler arm to the tie rod link. Going to have to replace those again, not to far back in this thread i replaced both already, after i replaced them when i rebuilt the engine.
 

Attachments

  • Feb 21 2013 brakes 1.jpg
    Feb 21 2013 brakes 1.jpg
    47.3 KB · Views: 17
  • Feb 21 2013 brakes.jpg
    Feb 21 2013 brakes.jpg
    60.5 KB · Views: 17
Well i did some more work on the truck Tuesday afternoon (got lucky with a cancelled class). Replaced the idler arm and bracket and changed the oil. I pulled off the elbow to the turbo to see how much oil was pooling from the CDR (I am due for a replacement).

I also took it upon myself to wiggle the shaft of the turbo... All went down hill from there. The turbo had a serious amount of play in it, this is the WH1C i installed a few months back. So either the main shaft is so worn the rebuild bought me some time, or i still did something wrong, which i had double checked my self the second time i took it apart. Its now bad enough that if you spin the shaft and press down the blades just scrape the housing! I took it all apart and the blades look good, and the housing has no score marks. I caught this just in time. When oil pressure i built up there must be enough oil between the bearings and shaft that it floats higher as to not touch the housing yet.

Im supposed to be towing with my truck this weekend on an 8 hr trip! So i went into high gear looking for a replacement turbo. Nothing within 200 miles, and i need it by tomorrow! Found a shop called Naples Turbo (In FL). They hooked me up with a new CHRA, I splurged and spent serious money to keep my turbo all OEM. You can get a chinese unit for $185, but the genuine one was $399. Then i spent the cash to 2 day ship it, so it will arrive tomorrow before the trip. I know i could have bought an HX40 for that cost, but i needed a solution ASAP. Plus after this weekend there is snow in the schedule. SO plowing will need to be done. Will post some pictures this weekend.

We are going to Bel Air MD to pick up a 1986 Mustang GT for my brother. While we are down there we are going to visit Assateague island in Ocean City. I hope it all works out..
 
That sucks, I wonder why the bearings went so quick.

Very good possibility i did something wrong, but i followed the Holset manual. Could have been a cheap rebuild kit too? I change the oil every 3-3500 miles religiously and added oil to the bearings before first fire..
 
No antifreeze or fuel getting in the oil?

The 98 in my sig had a new center cartridge put in by the previous owner. I bought it with about 2k miles on the new cartridge and it is worn out. It had antifreeze in the oil as well a fuel.
 
No antifreeze or fuel getting in the oil?

The 98 in my sig had a new center cartridge put in by the previous owner. I bought it with about 2k miles on the new cartridge and it is worn out. It had antifreeze in the oil as well a fuel.

Just changed the oil right as I pulled the turbo back apart. No contaminants in oil at all.
 
Got the CHRA. Kinda disappointing, but not sure if i should be. The turbo shaft does have a small amount of play. I know it can have up to a said amount, but i cant remember that. Also the CHRA housing doesn't say Holset on it, just a big R as seen in pictures. I asked the person if this was an OEM Holset unit and they said yes. I also didn't get a receipt with the package which i am going to email about. I think it has a 1 year warranty and im going to get screwed on the warranty because you have to have paper proof of a certified mechanic, and i can't afford that crap. :mad2:

Whats your opinions?
 

Attachments

  • turbochra2.jpg
    turbochra2.jpg
    28.7 KB · Views: 7
  • turbochra1.jpg
    turbochra1.jpg
    47.7 KB · Views: 8
Got it all replaced, this unit is NOT OEM casting, the oil in port is a tad bit different from the Holset. Made it tough to get one of the bolts in from the CHRA to exhaust housing. But it did just pull a good 800 miles round trip without a hitch.
 

Attachments

  • replaceCHRA.jpg
    replaceCHRA.jpg
    69.2 KB · Views: 8
Pictures from our trip to Ocean City Maryland. We visited Assateague Island while we were in the vicinity.
 

Attachments

  • IMG_0284.jpg
    IMG_0284.jpg
    93.9 KB · Views: 7
  • IMG_0271.jpg
    IMG_0271.jpg
    61.2 KB · Views: 5
  • IMG_0272.jpg
    IMG_0272.jpg
    71.3 KB · Views: 6
  • IMG_0273.jpg
    IMG_0273.jpg
    51.9 KB · Views: 5
  • IMG_0274.jpg
    IMG_0274.jpg
    55.5 KB · Views: 5
  • IMG_0275.jpg
    IMG_0275.jpg
    65.4 KB · Views: 7
  • IMG_0276.jpg
    IMG_0276.jpg
    66.1 KB · Views: 5
  • IMG_0277.jpg
    IMG_0277.jpg
    91.8 KB · Views: 6
  • IMG_0278.jpg
    IMG_0278.jpg
    74 KB · Views: 5
  • IMG_0279.jpg
    IMG_0279.jpg
    91.3 KB · Views: 7
  • IMG_0280.jpg
    IMG_0280.jpg
    91.1 KB · Views: 6
  • IMG_0281.jpg
    IMG_0281.jpg
    86.8 KB · Views: 7
  • IMG_0282.jpg
    IMG_0282.jpg
    50.2 KB · Views: 7
  • IMG_0283.jpg
    IMG_0283.jpg
    91.2 KB · Views: 6
Back
Top