• Welcome to The Truck Stop! We see you haven't REGISTERED yet.

    Your truck knowledge is missing!
    • Registration is FREE , all we need is your birthday and email. (We don't share ANY data with ANYONE)
    • We have tons of knowledge here for your diesel truck!
    • Post your own topics and reply to existing threads to help others out!
    • NO ADS! The site is fully functional and ad free!
    CLICK HERE TO REGISTER!

    Problems registering? Click here to contact us!

    Already registered, but need a PASSWORD RESET? CLICK HERE TO RESET YOUR PASSWORD!

Project Frankensquare

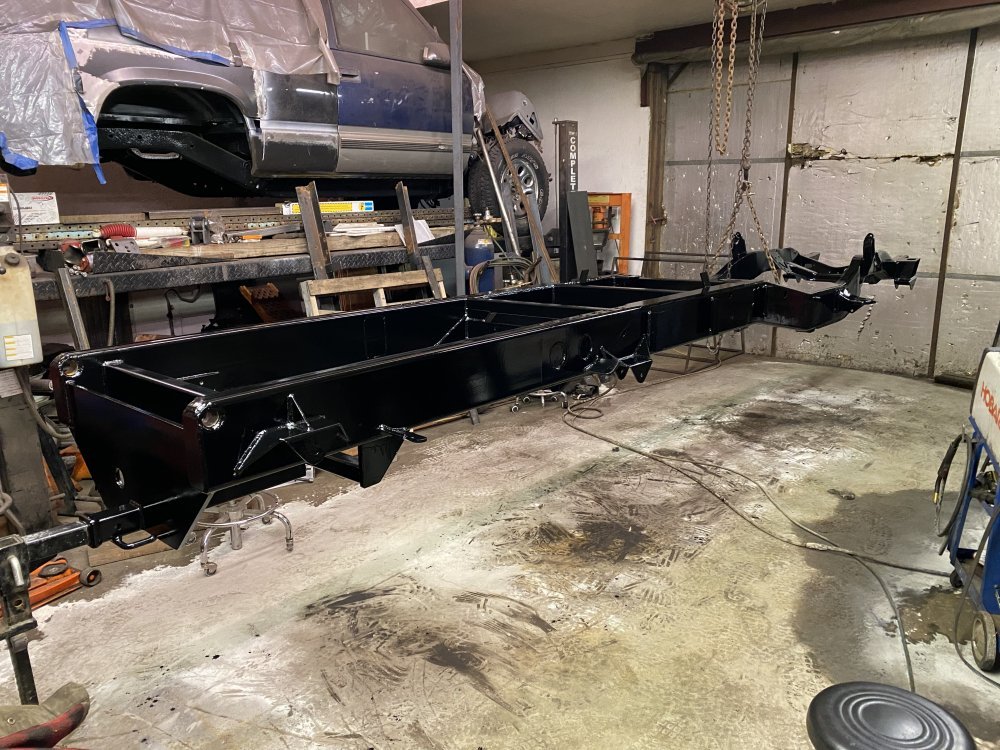
Looked at the frame for the first time since painting all day yesterday…..and I do mean ALL day - I started the first coat at 6:15 in the morning and that took 3 hours to apply, second coat was at 1:30 and took 2 hours, the final coat was at 7:30 and only took 1 hour because it was KBS Black Top that only needed to be applied to the surfaces that would see UV. So from 6AM to 8:30PM with some breaks in between. I thought using a brush and roller would be good for this frame since it’s boxed, but there were still a lot of nooks and crannies to deal with - if I was to do it again I would spray it and deal with the extra prep and cleanup associated with that instead of the brush and roller. The paint turned out ok, with the typical runs that I can’t seem to get away from. I think what my problem is with these large projects, and the way this paint flows out, is that there won’t be a run at first, but when I get back to the earlier section I cut in with the brush there is now a run and it’s too late to smooth it out. Guess I won’t be winning any concours shows with this truck….
5A48D4A3-5169-4823-A161-B7178AF8BB28.jpeg
 
A piece of masking tape is good for lifting runs as they are happening.
Just lay it flat, lightly, on the run and pull it away. Run gone.
The problem is I don't see the runs until it's too late because of how long it takes to get from one of the frame to the other, so then it can't be addressed with any method, other than maybe trying to shave it with a razor.......but I'm not trying that, 6 hours of painting was enough already. I will however keep that trick in mind for other applications in the future, thanks.
 
Honestly on a frame, most aren't gonna be looking at the frame for runs. it will eventually be covered up with the body and bed. Plus dirt and grime when it's used. the thicker paint will also help with sealing it from rust cancer too!
 
I'm glad I'm not the only one that's picky... :happy:

Have you used the KBS products on anything hot, such as exhaust manifolds?
Not manifolds, but I have used their exhaust paint on the exhaust pipe on my dually and it has held up ok, but it hasn't really run that long. I've used DEI exhaust paint and that holds up really well. I used it on the the downpipe adapter that I made for my HX40 and it's still going strong 6 years later. I also used it on the header I made and the manifold......it didn't hold up well on the manifold, but I'm guessing that's a prep thing since it was an old, rusty manifold, but it has held up well on the header.
 
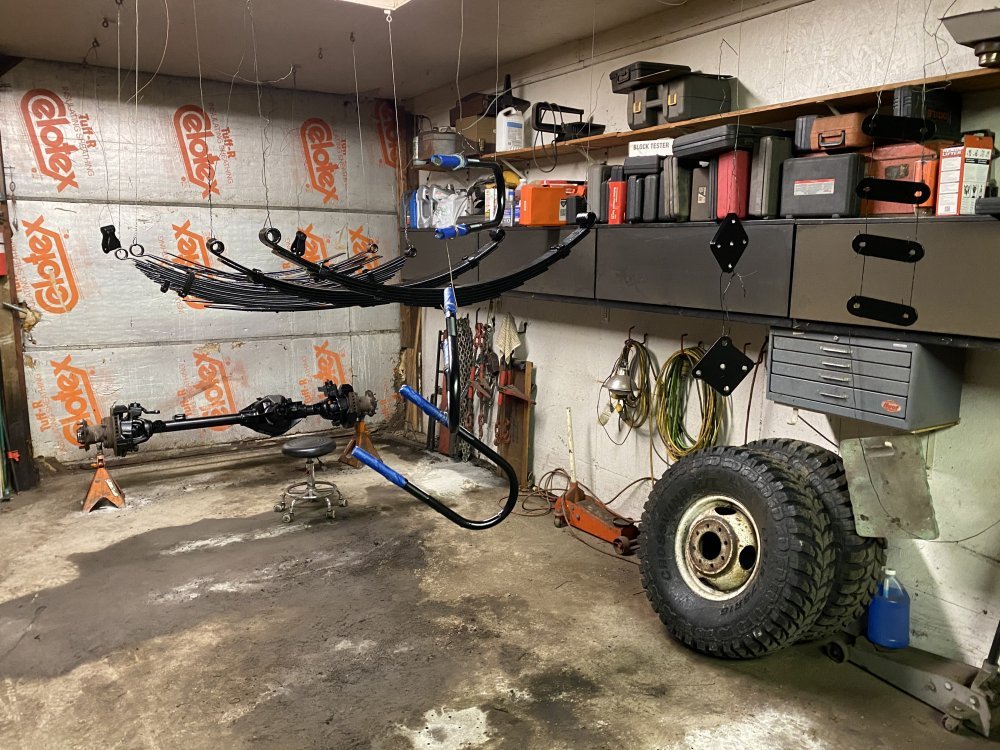
Yesterday I got all the springs, the front axle and the front axle hardware painted.

94960FA8-B6C7-461D-8965-A4CEF03FE224.jpeg

This week I’ll be swapping the gears in the rear axle and welding on the rear spring perches and shock tabs so I can paint the rear axle next weekend. Once that is done, I can reassemble the chassis and then move on to cab rust repair.
 
As we say of minor imperfections in the construction trade, can't see it from my house! Looks great as always 🤘

Did you paint the individual springs, or just the sides and top/ bottom/ exposed parts of the assembly? Thought I read somewhere that it's not actually good/ proper to paint each individual leaf but the details escape me
 
Looking real good Nate!!
Thanks Chris! Unfortunately, the paint isn't as nice as I'd like....but it's definitely good enough for what this project is - it just sucks having nice metal work covered by inferior paint work.
As we say of minor imperfections in the construction trade, can't see it from my house! Looks great as always 🤘

Did you paint the individual springs, or just the sides and top/ bottom/ exposed parts of the assembly? Thought I read somewhere that it's not actually good/ proper to paint each individual leaf but the details escape me
I just did the outside surfaces of the springs. I had considered taking the packs apart and painting each leaf individually, but I did some reading online that it isn't a good idea to do that - the biggest problem being that as the paint wears off, you get additional clearance in the pack and then over time everything ends up loose. I did take the pack apart and wire wheel the exposed surfaces and then of course put new center bolts in them.
 
Correct. You should NOT paint between the springs. Saturate w/ oil if needed but dont paint.
I remember that back some years ago, factory installed nylon shim between each of the springs.
I think those were a good idea.
If a person could find some of that kind of material they could cut out enough for them spring packs.
 
I've seen them on sites like amazon and summit, if the leafs have small holes in each end, those nylon spacers have a small protruding thingy that fits into the holes to keep them in place. they help keep the pack from rubbing each leaf as weight changes
 
I've seen them on sites like amazon and summit, if the leafs have small holes in each end, those nylon spacers have a small protruding thingy that fits into the holes to keep them in place. they help keep the pack from rubbing each leaf as weight changes
I forgot about the holes.
I dont remember, it seemed that maybe the holes was more like an indent and the nylon shims had the same to fit the indent.
Could be an endmill in a milling machine, or drill press, could duplicate the indent in the springs.
It seems that I remember seeing those nylon shims about 1988, give or take ten or twenty years. 🤷‍♂️😹😹😹
 
Back
Top