• Welcome to The Truck Stop! We see you haven't REGISTERED yet.

    Your truck knowledge is missing!
    • Registration is FREE , all we need is your birthday and email. (We don't share ANY data with ANYONE)
    • We have tons of knowledge here for your diesel truck!
    • Post your own topics and reply to existing threads to help others out!
    • NO ADS! The site is fully functional and ad free!
    CLICK HERE TO REGISTER!

    Problems registering? Click here to contact us!

    Already registered, but need a PASSWORD RESET? CLICK HERE TO RESET YOUR PASSWORD!

Pilot bearing and clutch opinions and feedback '97 NV4500

I searched my helm manual and did not see a spec or that special tool listed in the transmission or clutch replacement sections. I could not find a spec on Alldatadiy either. Both just mention installing the pilot bearing.

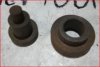
From the picture on ebay of that special tool it appears it would stick out of the crank by the depth of the chamfer on the id of the guiding diameter of the "squaring block or guide bushing". I am guessing its about 0.060 x 45 deg chamfer which is a typical call out on a print. So that would increase my input shaft penetration depth into the bearing by about 1/8" so I was probably on the right track. From my measurements I might let it stick a bit more than 0.060 and hope my eyeball was pretty close on measuring the depth I set the bronze bushing at last time. It appears I have a bit of clearance to play with.

The transmission shop said LuK did not have a spec for pilot depth. I guess next I'll try and google for that tool and go back to alldatadiy and search that tool number. Maybe just maybe I can find a drawing or gleam some info from somewhere.

Thanks.
 
So it doesn't get lost and is saved to the thread I clipped a picture from the ebay ad. IF the bottom picture is "bottomed out" I believe the driver portion will leave the bearing or bushing out about 0.060 or what ever the chamfer is on the guide which I think will fit flush to the crankshaft.
 

Attachments

  • pil-installtool-J-34140.JPG
    pil-installtool-J-34140.JPG
    24 KB · Views: 47
  • pilot-tool2.JPG
    pilot-tool2.JPG
    20.5 KB · Views: 7
I bought an install tool off ebay because I was so curious about this depth spec and I don't want to do this job again for a long while. Wow! the tool installs the pilot bearing at about 0.200 - 0.210 out of the counter bore measured probing with caliper so give or take a couple of thou depending on how straight I held the calipers. The install tool bottoms out on the end of the crank. It pilots in the counter bore but doesn't hit the bottom of the counter bore. That is a big difference from what I had and thankful for the forum and GM Guy for posting.

I should have pretty good coverage of the rollers now. I bet there have been a few bearings set too deep and fail due to bad roller engagement. And why some people have better luck with the solid bushing. Who knows there may be different stack ups depending on DMF vs SMF and different bell housing etc. Not that DMF or SMF should change crank dimensions but GM might have spec'ed the bellhousing or input shaft different or other. So I would measure your particular stack up to double check it. I should have in the neighborhood of about 0.060-0.100 +/- clearance before the spline face hits the bearing face.

If anyone wants to borrow the tool let me know. Or I can make a drawing of it and anyone with a lathe can make one.
 

Attachments

  • tooldpthset.jpg
    tooldpthset.jpg
    9.8 KB · Views: 45
  • toolbore.jpg
    toolbore.jpg
    8.3 KB · Views: 43
$15 is hard to beat, but like all special tools will one day not be available. If you post a measured drawing to this thread, chances are someday someone will really appreciate it...
 
$15 is hard to beat, but like all special tools will one day not be available. If you post a measured drawing to this thread, chances are someday someone will really appreciate it...

Good point. I've got one ordered. I've always just used my bearing / seal installer kit. Has a bunch of different stuff in it for seating a bunch of different stuff.
 
OK mostly back together except front driveshaft, boot on shifter, clean up and test drive. I cranked it up still on stands and it shifts good and spins down for reverse. The throw out bearing is a bit stiff and I think it spins the spring on the slave and or rubs on the pressure plate diagram "fins" instead of on the bearing rotating. It made this same noise for a little while last time too. It quit pretty soon then would still occasionally make the sound at high rpm shifts then quit and was quiet. Is there anyway to avoid this? Have ya'll experienced it?

I had the transmission and transfer case rebuilt (wanted to make sure it was done right the first time and a bit over my head plus tools). I put in a new clutch, flywheel, pressure plate, slave & master cylinders, throw out & pilot bearing. Man the transmission feels tight and sweet. I think the book calls out 6 hours for a clutch job but man that has to be pretty fast wrenching. It was way more than that for me but I am a home garage without a lift so lots of crawling around back and forth to see if everything is lining up ok. The little things like cleaning up the bolts for easier install is time consuming. Being one person on my back I am not going to risk a gummy gritty bolt while I have the transmission lined up and holding it one handed on the jack. That is one heavy SOB.
 
I have had excellent luck and outstanding service from American Powertrain. They helped me out when I smoked the clutch in my land speed car (which was a zoom). Then on the trip home, the clutch in the truck exploded (pioneer). Darn 45mph head winds while pulling a 48 foot inclosed. Gray at APT set me up with a very nice sintered iron disc set up. I've got the part number around here somewhere.... or you can call Gray. They make their own products also. Oh, they're in Tennessee, http://americanpowertrain.com/
 
for everyone involved, the tool is officially a Kent Moore J-34140.

At the point when I bought mine (for 16 dollars, I might add), I saw like 10 of these on ebay at one time. As I type, there is two.

keep an eye out and check back, I am sure more will pop up. maybe check other sale sites, as I doubt they are in that high of demand.
 
I will have to keep these guys in mind. What all types of work do they do?


I have had excellent luck and outstanding service from American Powertrain. They helped me out when I smoked the clutch in my land speed car (which was a zoom). Then on the trip home, the clutch in the truck exploded (pioneer). Darn 45mph head winds while pulling a 48 foot inclosed. Gray at APT set me up with a very nice sintered iron disc set up. I've got the part number around here somewhere.... or you can call Gray. They make their own products also. Oh, they're in Tennessee, http://americanpowertrain.com/
 
So it doesn't get lost and is saved to the thread I clipped a picture from the ebay ad. IF the bottom picture is "bottomed out" I believe the driver portion will leave the bearing or bushing out about 0.060 or what ever the chamfer is on the guide which I think will fit flush to the crankshaft.

Just for clarification, this pic shows two pieces for this tool. The ebay ad I looked at shows just one piece, the large outer sleeve. I am assuming that the pilot bearing sets on the smaller diameter tip of the inner piece, then this inner piece with bearing sets inside the outer sleeve. The outer sleeve then sets against the end of the crankshaft, holding the inner piece square to the crankshaft while the bearing is driven into the crankshaft. Am I close on this description?

If the ebay ad is selling just the outer piece then it is an incomplete tool. I have sent a question pertaining to this to the ebay seller.

Don
 
Yeah, Don that sounds about right. You need to have both pieces. The larger diameter piece guides the smaller piece and will together set the depth on the pilot bearing. I think the important thing about the tool is it sets the depth idiot proof and can't over sink it into the crank. It will help hold bearing square starting it but it is not all that big and could use longer Length to diameter engagement. It does have some screw threads in the back for maybe a handle or striker bump but I used a big hammer that could cover the entire face.
 
schiker;465222The throw out bearing is a bit stiff and I think it spins the spring on the slave and or rubs on the pressure plate diagram "fins" instead of on the bearing rotating. It made this same noise for a little while last time too. It quit pretty soon then would still occasionally make the sound at high rpm shifts then quit and was quiet. Is there anyway to avoid this? Have ya'll experienced it? [/QUOTE said:
Nope it was the sheet metal cover over the bottom of the bell housing / flywheel cover. The back of the flywheel would just rub it and when the engine was shaking it would occasionally hit and rub and made a spring like rattle noise. Last time I glued and taped a piece of solid cardboard to it to bump it out and tighten it up. I crawled under today and pried a screw driver behind it and bent it away a little. Also put a washer under the screw and its now quiet. It shifted and worked too good to be something major.

That little sheet metal cover is a pain and can make a aggravating sporadic noise.
 
drawings pdf's measurement in inches. I did not draw corner breaks, chamfers, or fillets.
 

Attachments

  • pilottool1.pdf
    127.4 KB · Views: 11
  • pilottool2.pdf
    133.4 KB · Views: 5
I also did not draw the threads in the back of the driver. I assume they are for a handle that you can hammer it into place. OR There could be other pieces that screw to the crankshaft and have a mechanism to screw press the pilot bearing into place instead of hammering it ?????
 

Attachments

  • End1.jpg
    End1.jpg
    48.5 KB · Views: 7
  • end2.jpg
    end2.jpg
    38.2 KB · Views: 7
Back
Top