• Welcome to The Truck Stop! We see you haven't REGISTERED yet.

    Your truck knowledge is missing!
    • Registration is FREE , all we need is your birthday and email. (We don't share ANY data with ANYONE)
    • We have tons of knowledge here for your diesel truck!
    • Post your own topics and reply to existing threads to help others out!
    • NO ADS! The site is fully functional and ad free!
    CLICK HERE TO REGISTER!

    Problems registering? Click here to contact us!

    Already registered, but need a PASSWORD RESET? CLICK HERE TO RESET YOUR PASSWORD!

My clutch mod

Twisted Steel Performance

Anything worth doing is worth overdoing.
Messages
3,986
Reaction score
7,597
Location
Pauline, SC
I am so sick of poor quality parts these days it's not funny anymore, not that it ever was....

In the last 5 years I have had to remove the manual tranny & transfer case a couple times due to poor parts. Most of the time the clutch fork is bent. This could be due to a cheap pressure plate, warn pivot ball, poorly made fork, etc. Not once has it been the master or slave..

Well the dually has been down for a few months now, yep, clutch won't work, so with a new tranny on the way it's time to fix this stuff, or attempt to...

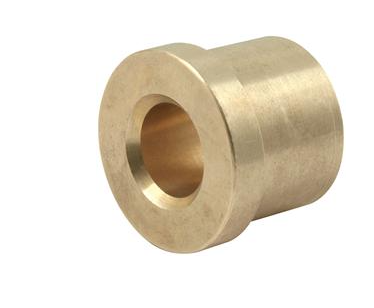
I ordered a new master, slave, braided stainless steel flex line from a custom shop in TN, I already have a adjustable push rod for the master cyl, I have a new South Bend clutch here and I use the bronze pilot bushing and a new one will be going in..

With the p400 almost finished it's time to get other things ready as well.

So I got the "new" clutch fork from rockauto, they all are made somewhere else, go figure, it arrived and had a really thick coat of paint or something on it, I know where the forks bend so I took a good look, saw what looked like a small notch in the metal under the paint, so I burnt it off and sure enough, cracked in a bend....

So I cleaned it up and decided to mod it and see if I could "fix" it and get it to last a bit longer.. I took a couple pieces of 1"x1/4" flat bar, shaped it and welded it to strengthen the fork.

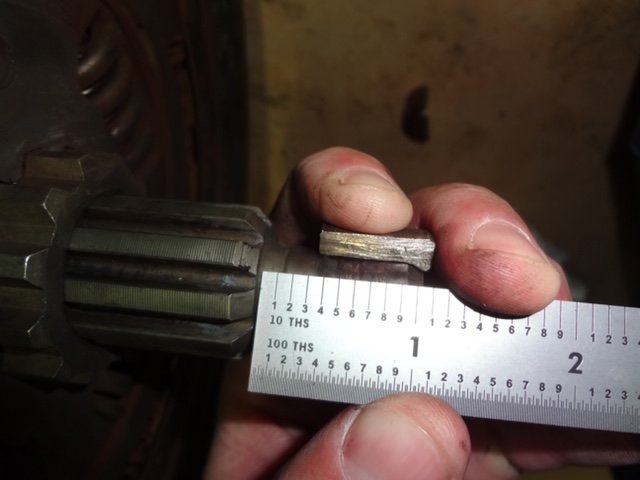
Next was the throw out bearing, years ago you could buy them in different length"s to get the correct 1/16" clearance to make everything travel to give a good clutch release and lock up.. Theirs a way to measure things before mating the tranny back to the motor, but I'll leave that out for another time unless someone wants to know...

I bough a "adjustable" heavy duty bearing from Novak, this will enable the clutch to be fine tuned to give the correct travel in the pressure plate..

I'll have the tranny in a couple weeks, once I get things replaced I'll update how the plan turned out..

A few pics of my fork mod...

clutch mod 001.JPG
clutch mod 002.JPG
clutch mod 003.JPG
clutch mod 004.JPG
clutch mod 005.JPG
 
Well, now that ya have to fix the raw metal- maybe some super slickem coating on the fork end for less friction on the throw out bearing? Haha.

Funny, as you said that I was thinking “you know how to weld- beef that up like it should have been”

We feel the pain of cheap crap. Walmart style low price leader world.
 
So, can used components be coated, like a radiator ? Just curious. Checking to see if I should buy a fairly new brass/copper unit from a member.
 
Does the clutch fork being bent cause the pedal to be hard to push in. My mama can’t drive daddy’s 95 C1500 because she can’t hardly push the clutch in. I have drove it several times and it is harder to push than it use to be.
 
@MrMarty51
For Hummer people I tell them only use the copper 4 row dimple core custom radiator. There is no company that makes aluminum ones that withstand the abuse and last 10 years with even a 75% success rate. But could be because of the high quality alcohol that the engineers got drunk on while smoking the meth and snorting cocaine during the recovery from brain trauma the morning they started designing hmmwv and hummer cooling system while obviously being distracted by dancing girls on the left and violent flaming mutilations on the right. Then combine that with no semi trucks, no heavy equipment, no life dependent power generators, etc ever use aluminum radiators because aluminum simple is not physically as strong and never last as long. That disclaimer out of the way...

80’s square body, gmt400, gmt800, yada yada have absolutely no problem with aluminum radiators. The copper will give you 20 years and aluminum 15 years. So, Get a quality built unit like the one Chris sales (not so subtle hint) and have him coat it from new. Buy once cry once. in 15-20 years when it does die try the chase again. Maybe some electronic wazoo thing will suck the engine heat out and make electricity to power the overlord robots. Or ya start the search again because Chris will be cruising the country in his fifth wheel by then.

btw, one huge mistake many people make is copying the racing world with aluminum radiators being bare aluminum. They are usually oversized for most engines heat output in momentary mega power application. So when the raw aluminum oxidizes (Aluminum equivalent to rusting) it just makes the aluminum look dull. This is actually a layer of aluminum-oxide and is a HORRIBLE thermal conductor. It can lower heat output by 20%. but for most engines- so what. For overheating prone ones- look out. If a person can’t afford to have one coated, at least paint it flat black. The very best is 3M #9560. For the techno nerds it’s spectrum of 8-12 um and emissivity of 0.99 and it will stop any external oxidation.

Also be sure to use an anode. One in the radiator and another in the crossover isn’t a bad idea.
Not using an anode will cause the aluminum to be eaten away From the inside like steel rusts. The Zinc gets eaten away instead and becomes an additive to your coolant. This is not a good addition but far better than holes in aluminum parts. The added zinc is especially bad for those who believe the concept of 60,000 mile or longer coolant. Zinc and nitrates are the one two punch to plug the heck out of dry sleeve diesels like we have. Wet sleeve engine is a different story, calm down cummins boys.

So, now that that train is 1.5 miles off the track and shining on the beach with the ocean view...

@Twisted Steel Performance are you going into the transmission/ transfer case at this time? Maybe coating all the gears with that super slick’em stuff to reduce the drag? That rear axle in their video that shows how much drag is reduced is super impressive. One day when I’m rich and famous my transfer case, differentials and geared hubs (portals) would love it. I think that is where at least 10% of the mpg loss is in hummer vs pickups.
 
No I'm not the tranny builder and they wouldn't send me the parts to coat to build it, so I opted for a cryo treated unit as a replacement. Couldn't beat the warranty, full 2 yr 24K miles on their builds no matter the HP or use, and I don't have the time to find out what mine may need and get the parts and so forth....
 
Update to this thread...

I found a cast iron bellhousing, it's like new, they have the cooling holes similar to the late aluminum housing, 2 at the top & 3 in the bottom.

I got the southbend flywheel, disc, pressure plate installed. As stated above, I opted to go with a adjustable t/o bearing, it turns out that was a VERY good idea, see pics, the only t/o bearing that can be purchased now is a one fits all item, well it might fit but it is WAY too short, in my case 1/2" short.. what that does is it removes travel from the slave.. Now I fully expect to have a smooth clutch without needing to depress the petal all the way to the floor to disengage the clutch. My mod to the fork didn't work, the braces need to be on the inside of the fork to clear the bellhousing, I found a nos gm fork so I removed the braces and installed them on the gm fork..

I'm not quite done yet so I don't yet know for sure how the clutch will work, but with everything being new I'm hopeful ... and ya know this is a hard job for one old person without a lift....

I broke a bolt off in a mannie so if I can get that out tomorrow I should be able to button things up and see if my theory is good...

003.JPG
004.JPG
 
Very cool Chris!

This is the first I've heard of adjustable throw out bearings. If you want to share here how to calibrate everything before mating the tranny back to the motor, I'd love to have that info on file here 🙃

I pulled my tranny back in April to do the clutch and all other internals, sure is a bear to do by yourself! Can you get it installed with the t-case on? I had to do the tranny first, then connect the t-case as the torsion bar xmember and transmission mount unbolted and moved all the way back were in the way. And once the trans was in the truck there was no way to get to the top bolt to connect the t-case to tranny. Hope it works out better for you than me!

I never ran a temp gauge on my NV4500 before installing my pto cooling fins so I can't compare before and after. But for what it's worth I've never had the trans go much over 150* when towing 10k behind the truck. And the bolt on cooling fins come with a port for a temp probe. Couldn't hurt to throw a set on since you couldn't give it your custom ceramic coating treatment.
 
Peter, I couldn't do the t/case at the same time, wouldn't fit all at once. I do have 2 cooling fin things and I have a temp probe to install as well. And it wasn't a easy job..

The adjustable bearing is from Novac, and their are instructions on their site, you mount the disc & pressure plate, hold a stright edge across the fingers on the plate and measure to the block where the housing bolts.. then install the fork and bearing on the tranny and measure the face of the bearing to the face of the bellhousing, adjust for a 1/16" clearance ..
 
GM clutches suck. Thanks for sharing. I would like to know how this all comes out.

I put a couple of clutches in my truck and need to redo it yet again. The first time I just reassembled it as I had taken it apart. The original owner also had the factory clutch replaced. This wasn't as apparent the first time as the needle bearing pilot bearing had disintegrated.

For my '97 I was surprised how far out my pilot bearing stuck out of the crank when I used the GM pilot bushing install tool. The wear on the bushing when it was installed flush with the crank left some bearing surface on the table. I think if my bushing is worn excessively I might mod one to look like this. Pic is from summit racing. The description says it is for racing applications to take up any extra space in the "stackup".

IIRC I used a swivel socket to get to the top bolt on the transfer case/transmission bolt. It is one of those you just have to be ready for the pain and deal with it the best you can.

I thought hydraulic clutches sorta self adjust travel and take up space in the stack up but I can see some loss of angle and best mechanical advantage with self-adjusting. Have you put the bellhousing on transmission and fork in position to see the angle when the components are in the "stack-up position" with new bearing? Did it look better?
 

Attachments

  • ext-pilot-brg.PNG
    ext-pilot-brg.PNG
    18.6 KB · Views: 8
  • bushinginstalledflush.JPG
    bushinginstalledflush.JPG
    28.5 KB · Views: 10
  • bushinginstalledwtooling.JPG
    bushinginstalledwtooling.JPG
    48.8 KB · Views: 9
Yes the angle is a steeper angle, the fork isn't straight so to speak it is further forward towards the motor, the instructions say to install the fork & bearing on the bellhousing and slid the bearing all the way back till it bottoms out on the retainer and measure it their. Once I had everything mated I moved the fork a bit and their was 1/16 - 1/8" play.. and the bearing is pined in 2 places and i put loktite on the threads..

The slave & master will adjust for some gap, but I always noticed towards the end of travel in the petal that it seemed to bind or not really move as it should, going past the fulcrum point, I have used the adjustable bearing before on the other truck a number of years ago and it was a major improvement in the clutch feel... with the fork further forward the pivot point is maximized and less travel in the slave & master to get to the point of disc release ...
 
I don't know are you worried about stroking too much? I have sorta googled some over the years trying to learn as much as I can and saw this thing that is to help adjust hydraulic pedal stroke.

I wonder if now that you have taken out all the slack space in the stroke of the system will the master stroke maybe disengage the pressure plate more than necessary? Was any of the binding you may have felt the system self adjusting to the slack then the master stroke then deadheading against the pressure plate travel or excessive travel or even slave travel???

Or do I have it backwards at least on the slave with slack taken out its pushed inward all the way and you will self adjust to the stroke of the master. As long as there is travel for the master stroke you shouldn't ever pressure dead head.

Were you planning on using something like this device?
 

Attachments

  • pedalheightadjuster.PNG
    pedalheightadjuster.PNG
    97.6 KB · Views: 9
Last edited:
I once installed a crate 4.3 into a 95 Chevrolet S10. What a bear. After getting it all together with new clutch system and new fulcrum, it would grind going into gear. Took the clutch plate, disk, TO bearing and flywheel all back to Clutch Masters in Billings and had them go through it all again. After getting it all back together, it was okay but nothing to brag about.
After the owners ran it for about six years it once again was back to grinding going into gear and impossible to pull out of gear once the vehicle had come to a stop while in gear. I had quit mechanicing by then so they took it to a shop, I never did hear what that shop did to deal with the problem.
All I can say is, an adjustible T O bearing system would have lrobably made a nice difference on that unit.
 
I am surprised at the clutches offered by SBC for a 6.5 diesel. @schiker I would look closer at the pilot bearing they use and see if it's any better than a bushing or needle bearing. They make a larger pilot ball bearing for the Cummins flywheels.

 
Back
Top