• Welcome to The Truck Stop! We see you haven't REGISTERED yet.

    Your truck knowledge is missing!
    • Registration is FREE , all we need is your birthday and email. (We don't share ANY data with ANYONE)
    • We have tons of knowledge here for your diesel truck!
    • Post your own topics and reply to existing threads to help others out!
    • NO ADS! The site is fully functional and ad free!
    CLICK HERE TO REGISTER!

    Problems registering? Click here to contact us!

    Already registered, but need a PASSWORD RESET? CLICK HERE TO RESET YOUR PASSWORD!

Another 2 door Tahoe for me

I wish my truck got that cold during the day! it will make it to 50 but takes a good while to cool that big cab! does yours have rear air?

I have oftin been curious about taking the rear air unit from a burb in the pick a part yard and modding it to fit under the rear seat in my truck. it would have been a really nice option to have rear air on a crew cab in hot climates.
Do the ceiling mount like in some of the burbs I seen.
Dont know if it is a doable thing or not.
 
Could be done with some fabrication. The rear A/C evaporator, heater core and blower unit is behind the interior panel behind the right rear wheel well and the air is blown up a duct that runs up the C pillar, over the door opening and across the underside of the roof to the ceiling vent console on a Burb. If he put the evaporator, heater, blower assembly under the crew cab's rear seat in a custom housing (or modified Burb housing), he might be able to use all/most of the Burb ductwork and definitely use the overhead console to have rear air/heat! He would, of course, have to use the Burb rear air and heat Tee lines and run custom lines back to the rear seat under the floor pan. It would be a neat project to do, and of course, LOTS of pictures!
 
Could be done with some fabrication. The rear A/C evaporator, heater core and blower unit is behind the interior panel behind the right rear wheel well and the air is blown up a duct that runs up the C pillar, over the door opening and across the underside of the roof to the ceiling vent console on a Burb. If he put the evaporator, heater, blower assembly under the crew cab's rear seat in a custom housing (or modified Burb housing), he might be able to use all/most of the Burb ductwork and definitely use the overhead console to have rear air/heat! He would, of course, have to use the Burb rear air and heat Tee lines and run custom lines back to the rear seat under the floor pan. It would be a neat project to do, and of course, LOTS of pictures!
For some reason I was thinking that the evaporator and all was ceiling mounted. 🤷‍♂️😹😹😹
 
I'm going off the information in the description of this video. If you scroll down to the bottom it says the gauge is calibrated with "dampening fluid" so I misspoke when I called it calibration fluid.


I know you're a project wizard @n8in8or so if you can figure out how to rebuild the gauge let us know when you're taking customer rebuilds! 🤣

Here's a rebuild service


and new aircore motor

This is great info, thanks for sharing!
 
I wish my truck got that cold during the day! it will make it to 50 but takes a good while to cool that big cab! does yours have rear air?

I have oftin been curious about taking the rear air unit from a burb in the pick a part yard and modding it to fit under the rear seat in my truck. it would have been a really nice option to have rear air on a crew cab in hot climates.
Nope, just the front AC in the dash. My black Tahoe always cooled pretty well also. I made sure to have the larger condenser on these trucks, so that may make the difference if you just have the thinner one installed.
 
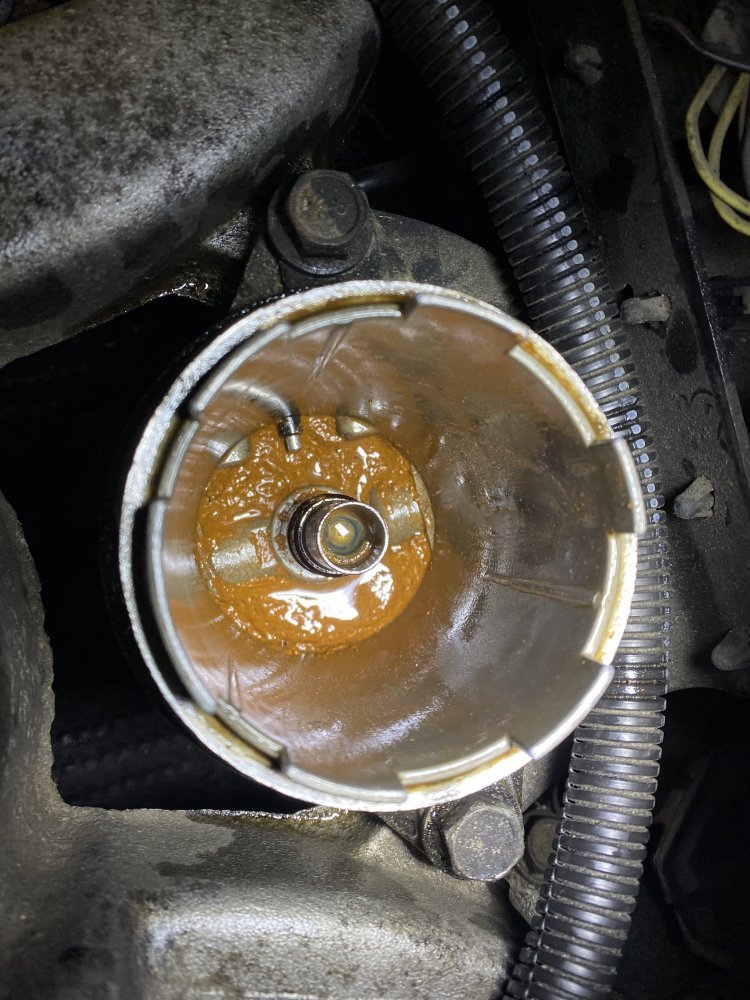
I decided it would be simple to replace the filter in the FFM to see if that helped the fuel pressure situation. I had replaced the filter when I got the truck running earlier this year, but maybe it had caught a bunch of junk since then? I took the filter out and noticed the fuel in the ffm was kind of brown. I decided to soak it up with some paper towel. I couldn’t believe what I saw after soaking up the fuel. GROSS!!

B9F20D2E-3E44-4041-8075-58E0030CAB8B.jpeg

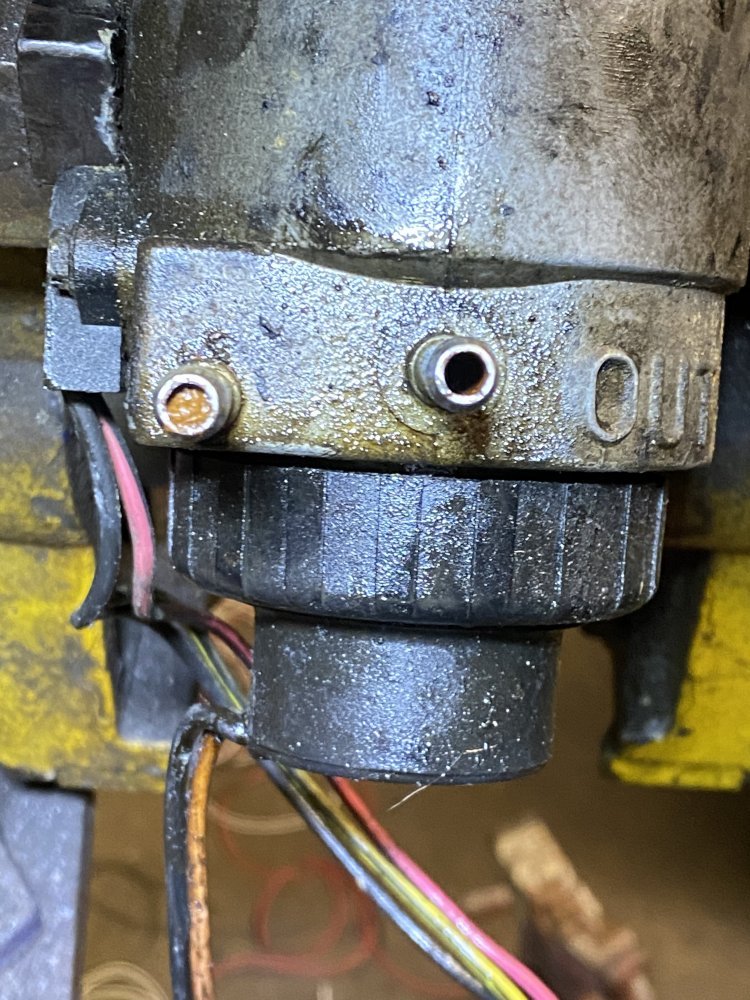
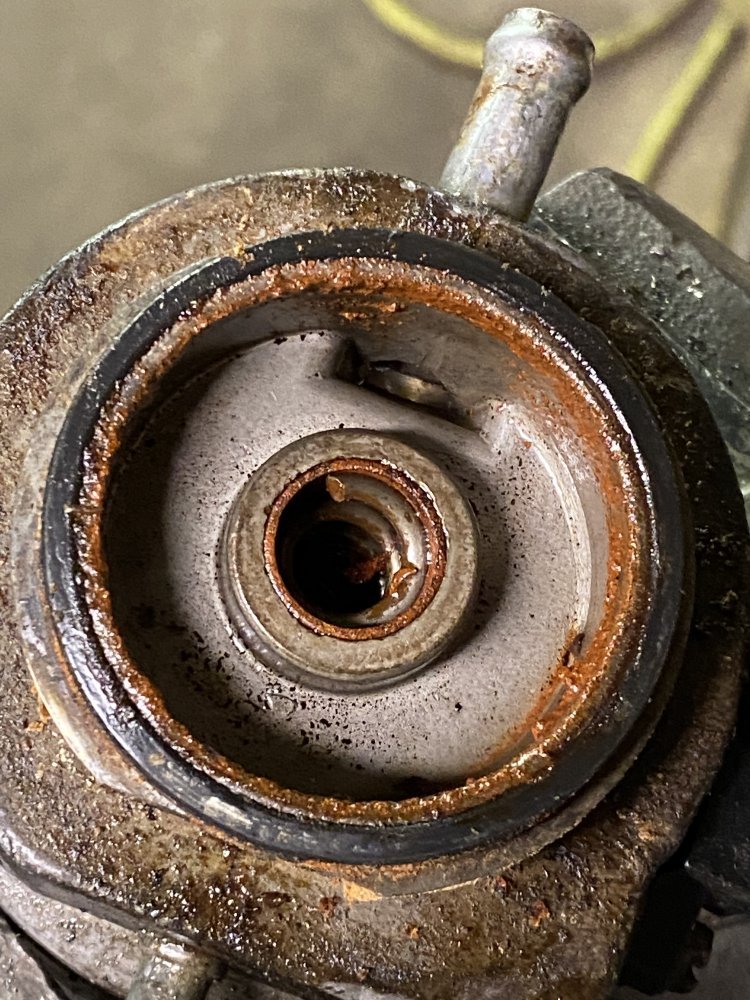
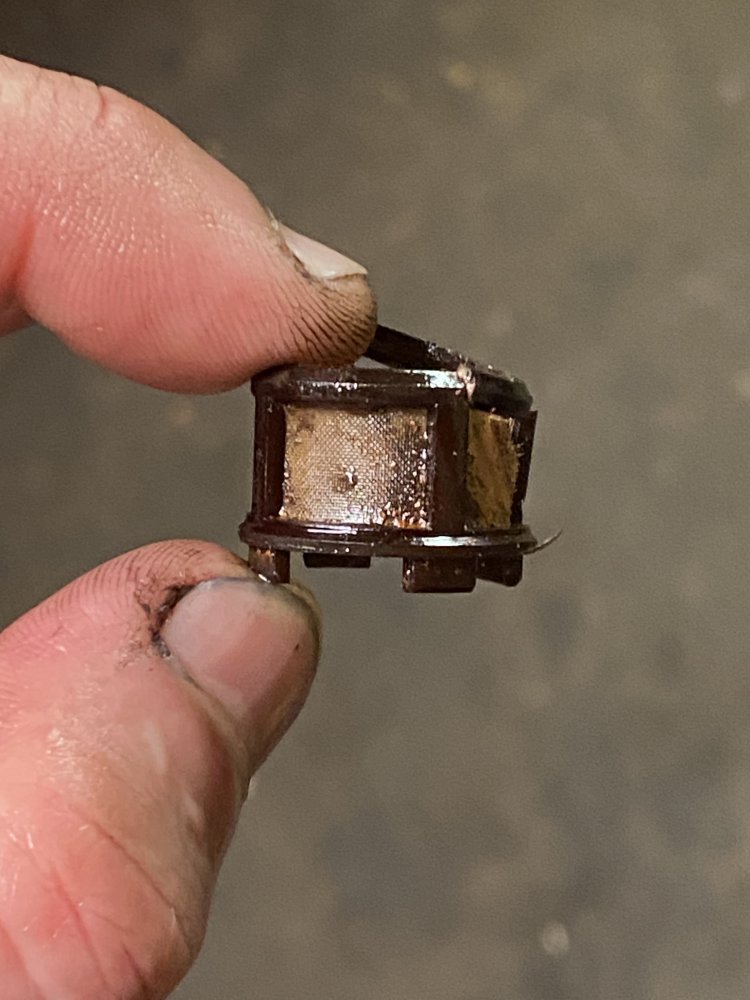
So I removed the FFM. I decided to just swap it with another one I had laying around, but I did a little tear down to see how bad it was.

55C26267-095D-46C0-8C4F-9492628D9C3C.jpegD01C268B-C8C4-4472-8507-82073A6EE391.jpeg92D6CA90-607C-4F6A-8802-47E3B2B0BFCB.jpeg

I installed a new screen filter in the other FFM in addition to the new filter element. Fuel pressure isn’t totally fixed, but it’s MUCH better - it doesn’t drop to 0 until I’m putting full load on it. With what I’ve seen today, I’m guessing the sock in the tank is also covered in junk and the tank itself may be rusty. I probably need to just drop the tank and replace it with the other parts I already have (with some upgrades). At least it’s better and usable now. I’ll have to check the FFM in a little bit and see if it has caught more junk.
 
I decided it would be simple to replace the filter in the FFM to see if that helped the fuel pressure situation. I had replaced the filter when I got the truck running earlier this year, but maybe it had caught a bunch of junk since then? I took the filter out and noticed the fuel in the ffm was kind of brown. I decided to soak it up with some paper towel. I couldn’t believe what I saw after soaking up the fuel. GROSS!!

View attachment 76256

So I removed the FFM. I decided to just swap it with another one I had laying around, but I did a little tear down to see how bad it was.

View attachment 76253View attachment 76254View attachment 76255

I installed a new screen filter in the other FFM in addition to the new filter element. Fuel pressure isn’t totally fixed, but it’s MUCH better - it doesn’t drop to 0 until I’m putting full load on it. With what I’ve seen today, I’m guessing the sock in the tank is also covered in junk and the tank itself may be rusty. I probably need to just drop the tank and replace it with the other parts I already have (with some upgrades). At least it’s better and usable now. I’ll have to check the FFM in a little bit and see if it has caught more junk.
That must be the B11 I've run all these years.
The storage tank has a 2 micron filter, so it shouldn't have much other stuff in it.
 
I just assumed it was rust from the tank. It was only 3 gallons from full so there wouldn’t have been a lot of exposure to condensation, but maybe still some? Or maybe some water that settled out at the bottom? No matter, I’ll get it straightened out in the end. I definitely don’t regret getting the truck from you, I’m still excited to have a second 2 door!
 
Yeah, looks like regular bio-mud. Just a good flushing. Your factory 5 micron should get the majority of it. You can run a finer one down to 2, but winter will have you gelling and plugging that fine. So a solution is just make a dummy filter out of the first 2 micron you take off. So it just bypasses and use that for the coldest part of winter. Then the rest of the year it is catching all the nasty stuff.
 
Yeah, looks like regular bio-mud. Just a good flushing. Your factory 5 micron should get the majority of it. You can run a finer one down to 2, but winter will have you gelling and plugging that fine. So a solution is just make a dummy filter out of the first 2 micron you take off. So it just bypasses and use that for the coldest part of winter. Then the rest of the year it is catching all the nasty stuff.
I ran the Baldwin's year round. I thought they were 2 micron.
I also added a gallon of gas to the 500 gallon tank and double dosed white Power Service in the winter
 
I’m still dealing with fuel issues and haven’t updated this thread. To try to get through the silt condition, I blew back through the fuel line connection at the lift pump inlet to blow the sock off the line. After that I installed a universal 3/8” inline fuel filter rated for diesel before the lift pump. It’s been a few months now, so my memory is a little fuzzy, but as I recall it was a little better, but still not good. I then tried installing a new factory replacement lift pump, thinking the one on the truck might be weak….surprisingly (or maybe not, given the quality of replacement parts), the pressure was actually a little worse. One last thing to try before going crazy on it: I got a Holley 12-428 pump rated for 7-10psi and 34 gal/hr. Unfortunately it was still about the same.

Time for a fuel system rehab…..and because I know what will likely happen eventually, I decided to do a whole new fuel system that would be capable of supporting some serious power in the future. I love how the fuel system on the dually works, so I’m using that as my basis for this one - the only problem with the dually’s system is it was hella expensive with all of the AN line and fittings. To try to tame the cost I looked at multiple ways to have the same size fuel lines, and then made a spreadsheet to compare costs for each method. I compared AN, hose & barbs, ni-copp and push-lock. Push-lock was nearly the cheapest, but much better quality than the cheaper option (hose and barb), so that was the option I chose to go forward with. I also saved some money by sourcing JIC hydraulic fittings instead of AN fittings.

It took me a while to do the research and make my plan, and then I waited until October to start ordering stuff. Unfortunately one of the places I ordered stuff from has been backordered on a couple of the fittings, so they held my whole order and it really put me behind on getting this reliable. I finally told them to ship what they could and I would re-source the rest. Because of that, this isn’t quite as cheap as it could have, but it’s still much better than the dually’s system. And with the dually down right now, I really need to get this on the road so I have a backup vehicle that can haul a trailer.

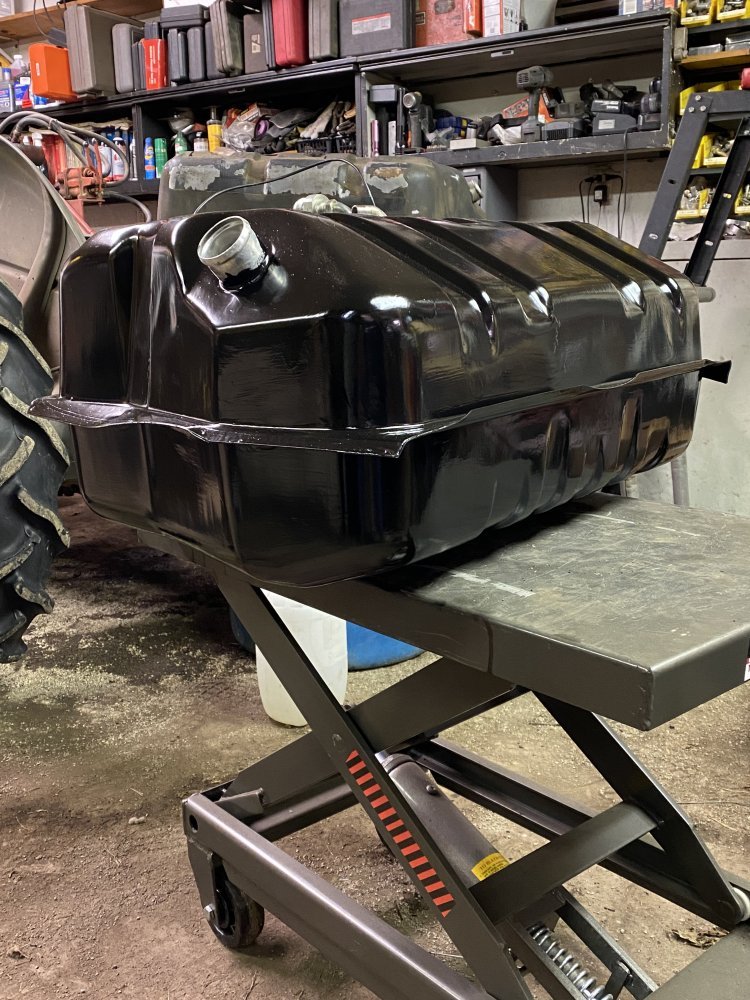
I have been on vacation this week, so I’m taking advantage of this time to finally start on the new fuel system. First thing I did was paint the new fuel tank with KBS Rust Seal paint.

4C6CC281-7775-4A8A-AB9E-7BE45AB6F543.jpeg

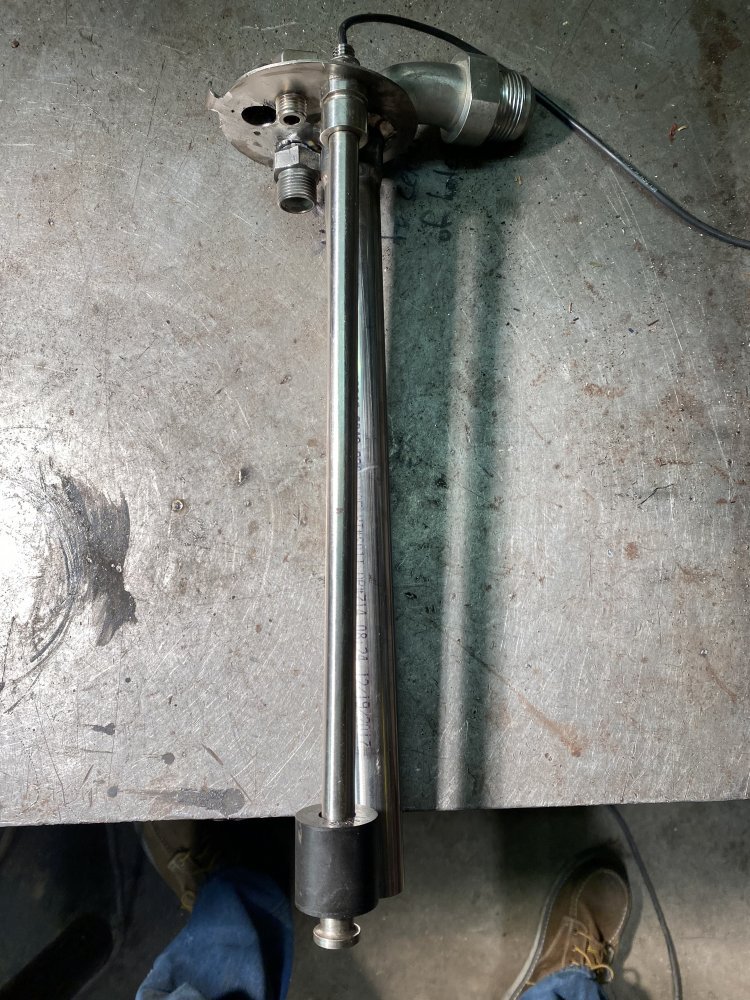
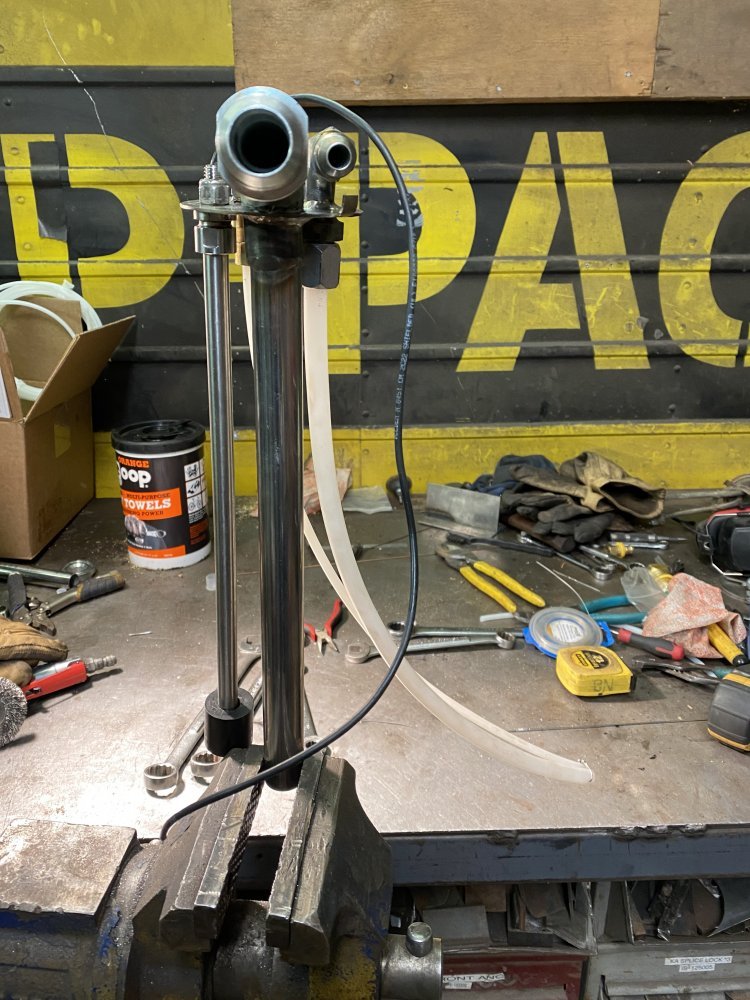
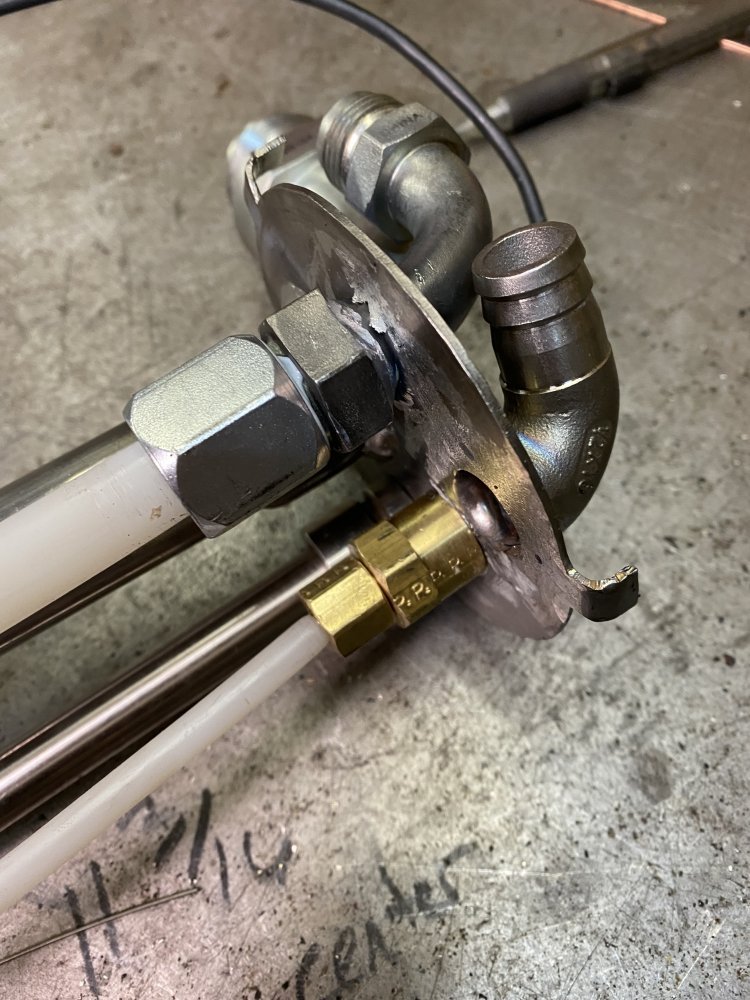
Next was time to make the sending unit. It’s the same basic design as the dually’s with 1” supply and a new 1/2” return in addition to the factory 1/4” return, plus the tank vent and a Leroy Metrum Rod. Besides the JIC fittings, I also tried something new for the return lines - I used compression fittings on the lines and then used polyethylene lines for the return lines themselves. The dually’s lines were stainless with short sections of submersible rubber hose to allow them to snake into the tank - that submersible hose is hella pricey, so I decided to try this to save a little money. So far it seems to be a good choice.

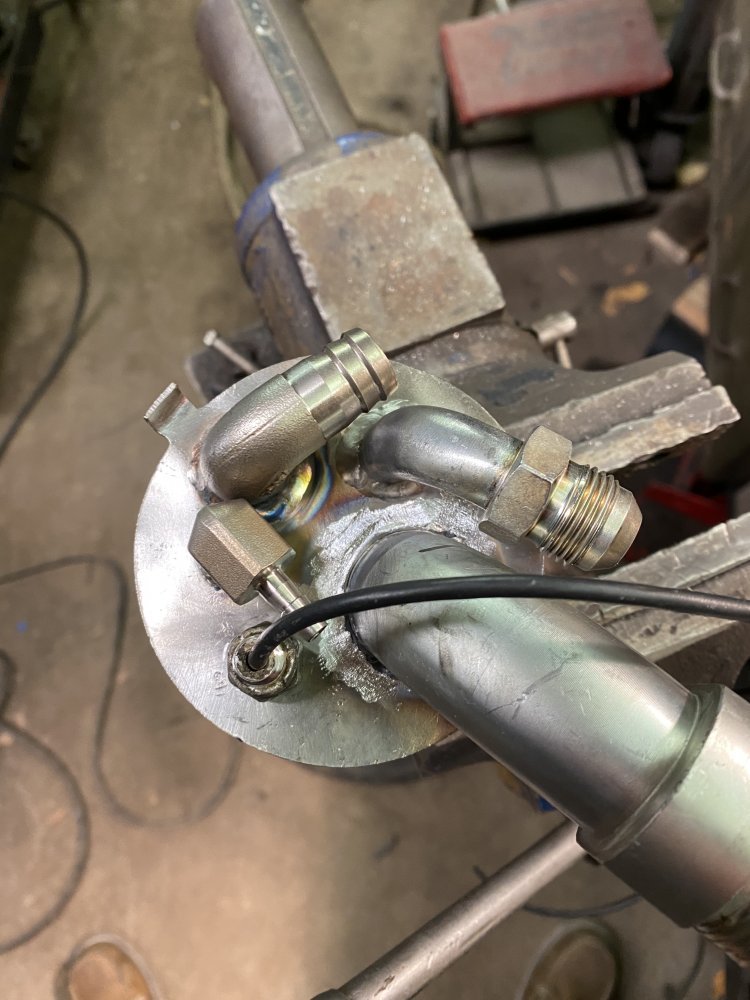
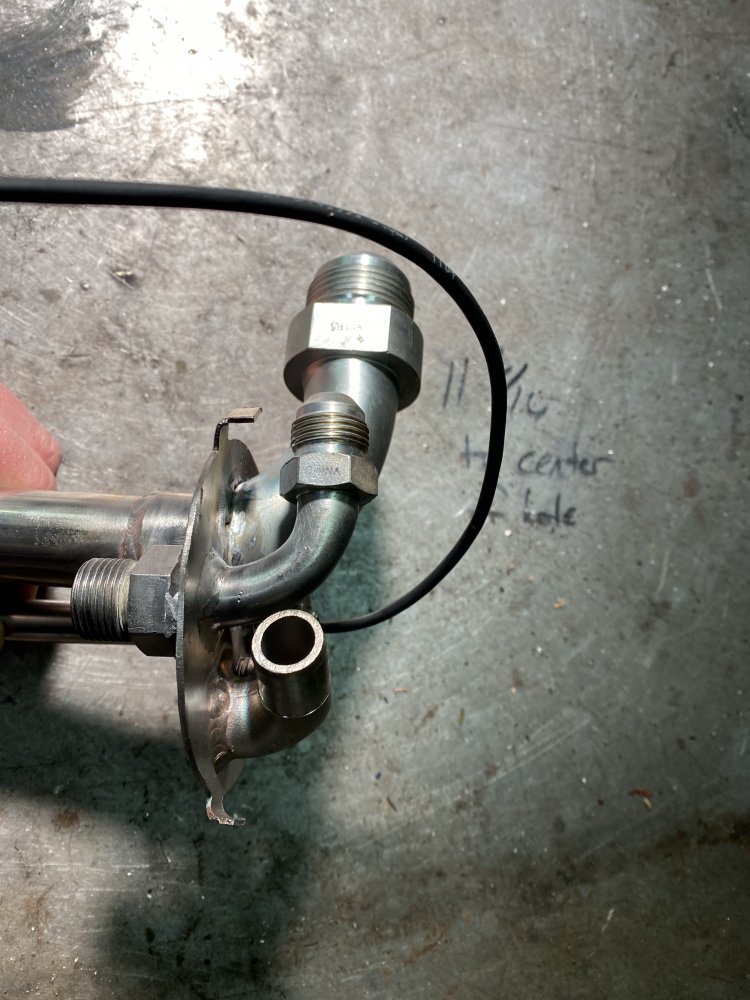
I got the sending unit all welded up today. It was definitely challenging getting it welded up with so much going on in such a small space and my limited TIG skills, but it didn’t turn out too badly.

9BF48E69-3F31-4ED9-BF1D-CDBCD5348973.jpegFF20D406-C7A7-4FF3-A323-4150DFBDAB96.jpeg3A990513-BAC6-456A-8932-6956A4C5ABD9.jpeg

I then added the return lines. I joined the lines together with some stainless wire at the end to keep them more stable.

AC0F663A-09F0-42DA-96F0-5C348900AD7E.jpeg5D6F9D8E-7538-473A-834E-140C32137767.jpeg

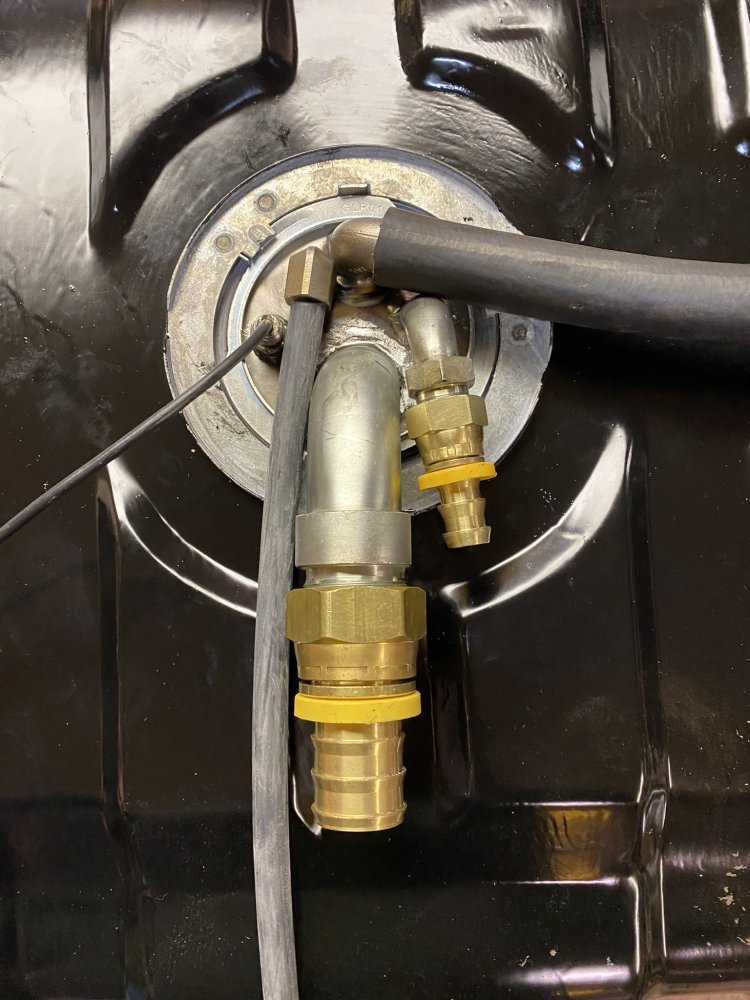
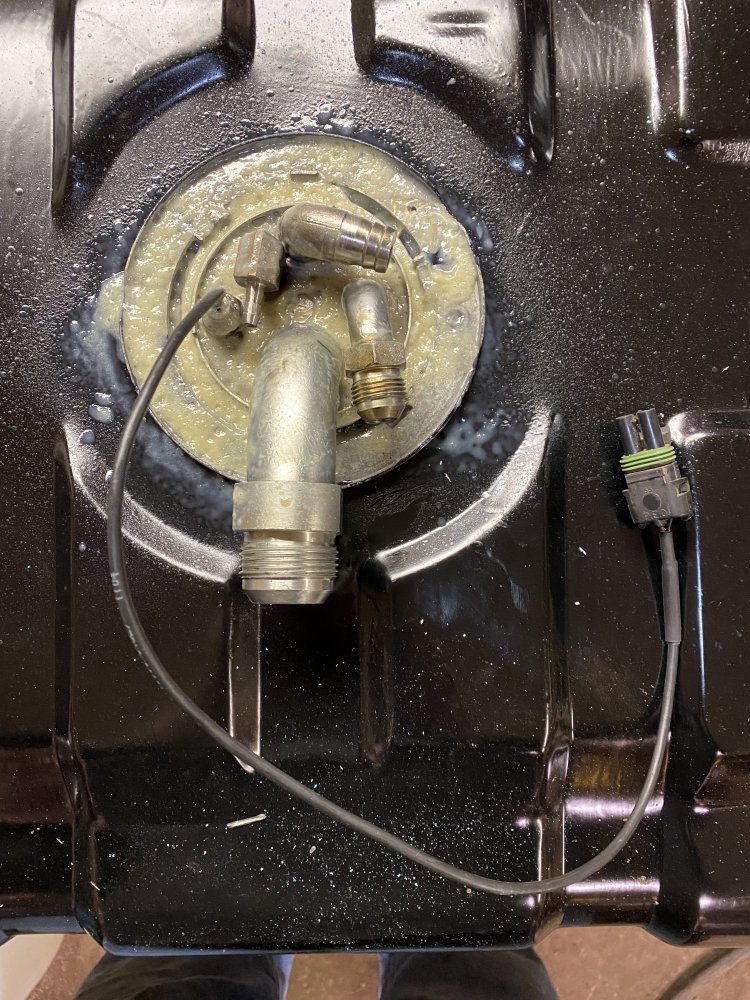
After that I installed the sender into the tank and mocked it up with hose and fittings. Then I sprayed cavity wax on it to seal the elements out.

95C64A1F-032C-4F08-9481-E6708DF9DB78.jpeg82D1A415-C2BF-4459-918B-A71BA582B8E1.jpeg


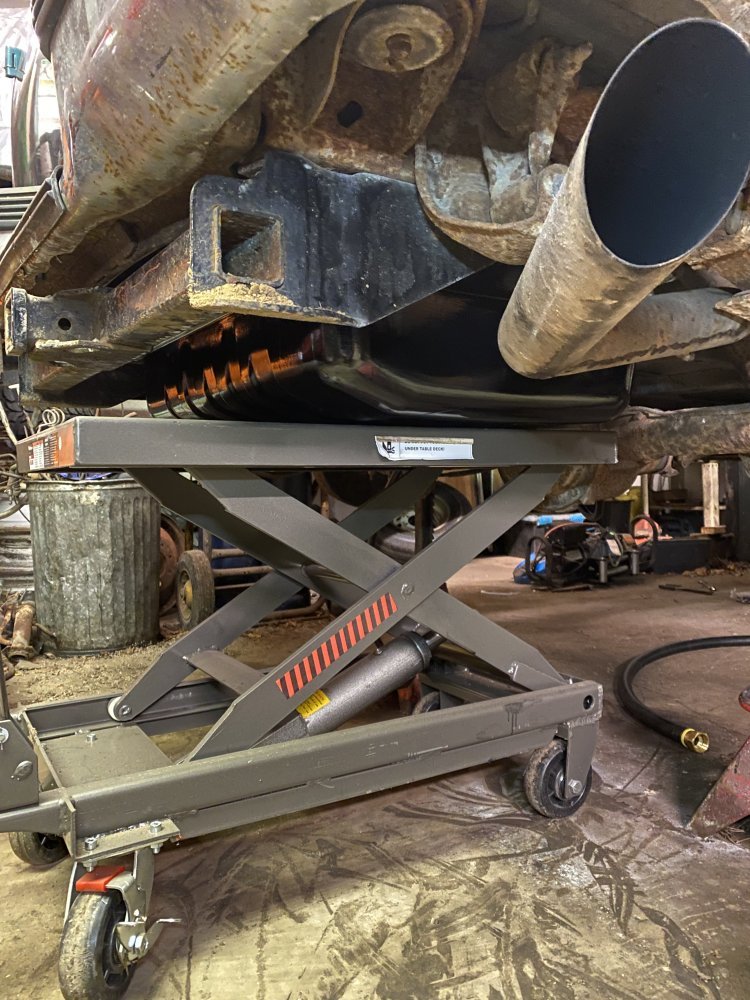
Next up is removing the old fuel system and installing the new stuff.
 
The fuel system upgrade is mostly done. I thought I had new fuel tank strap hardware, but I can’t find it, so I’m waiting for that to finish bolting in the tank. Once that’s in I’ll finish up the filler hose and vent hose connections. All of the other plumbing is done. I also have to wire the fuel pump still as well.

4E0175D8-90DD-4A72-B796-76CAAAA10E85.jpeg

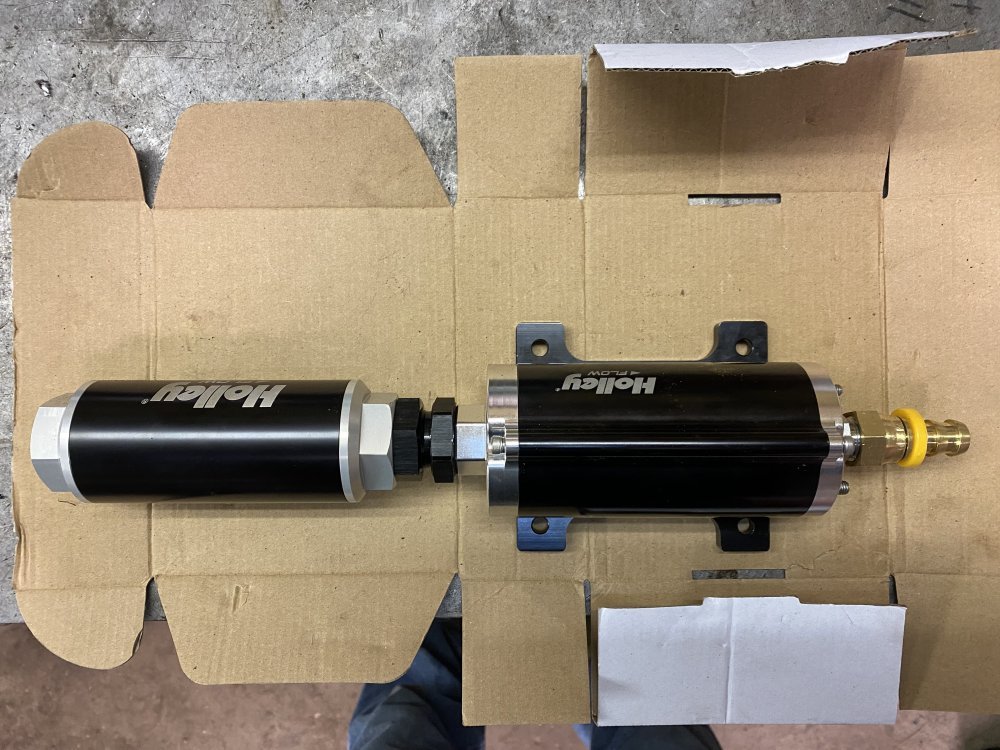
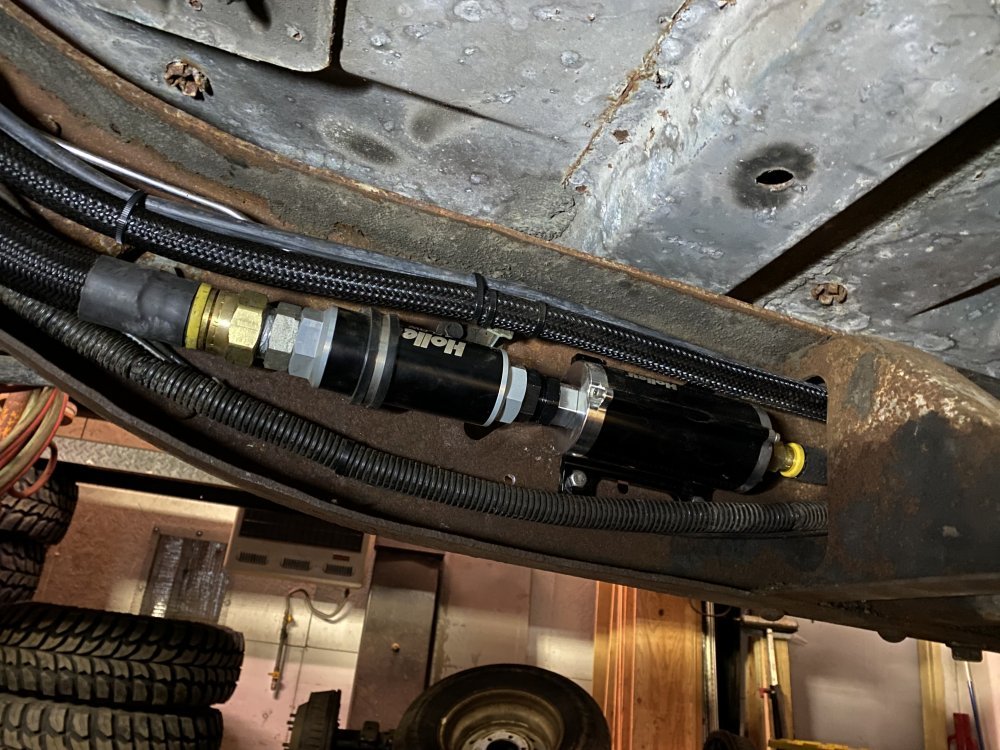
For this go-around, I decided to use a Holley inline pump. I was going to use a Raptor 150 I got a good deal on, but it’s designed as a Cummins bolt-in, so the mounting situation is funky. I’ve been wanting to try the Holley 12-170 pump for a while since it has some impressive specs, is diesel compatible and not a terrible price, so I decided this was a great opportunity to use it. I paired it with a Holley 100 micron pre-filter.

0824F167-6470-439E-8196-DBFA712D2263.jpeg

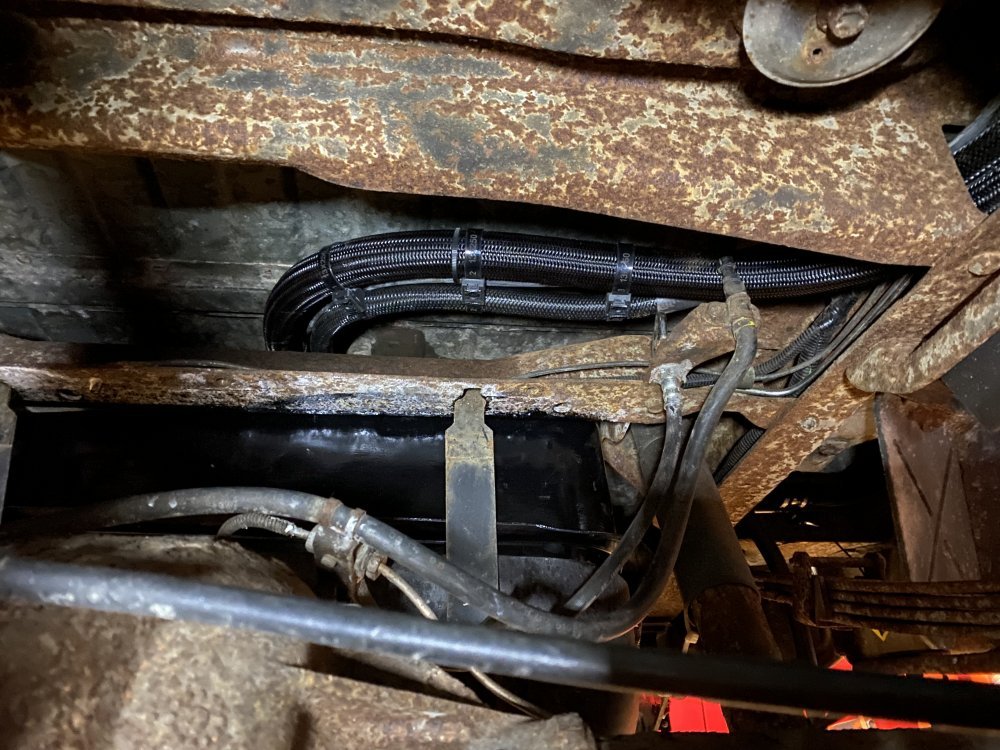
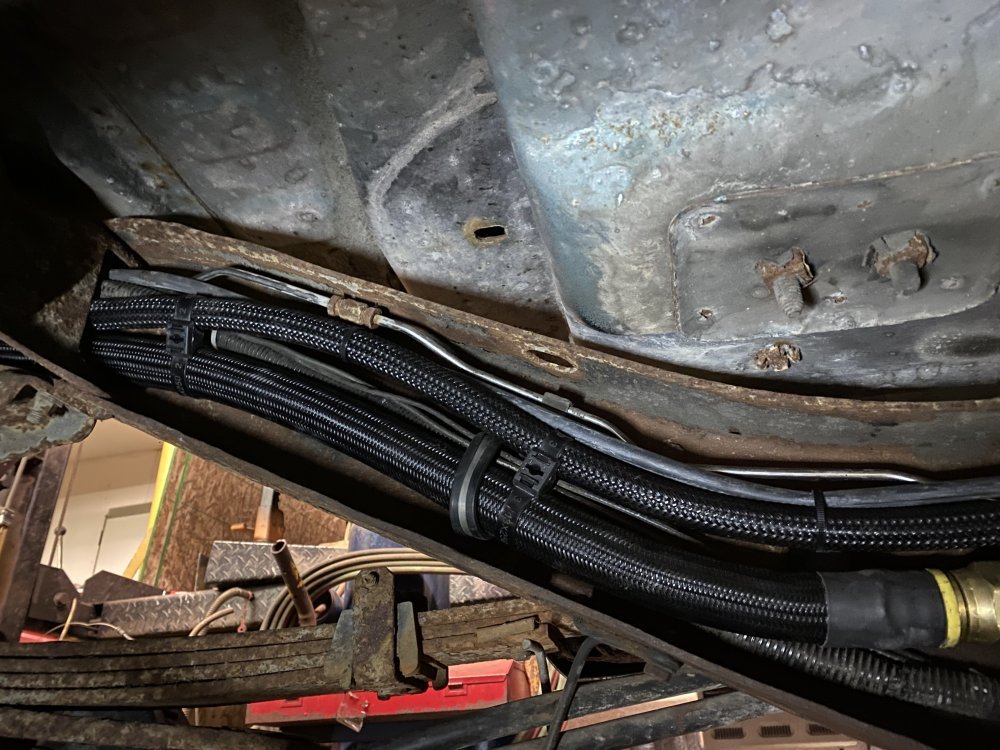
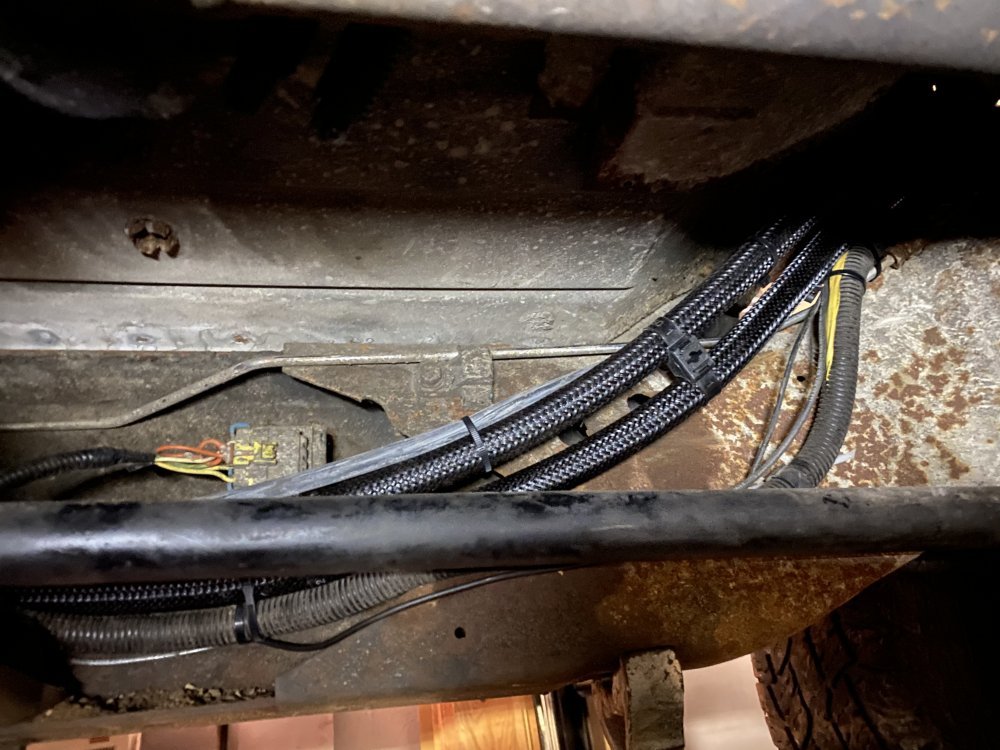
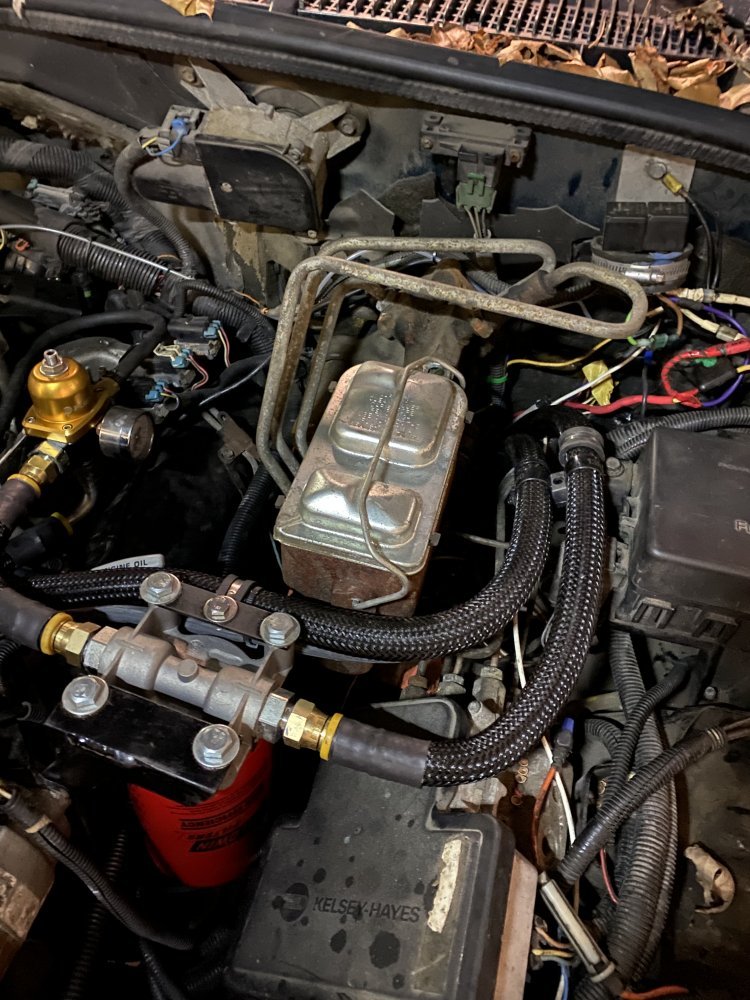
All of the 1/2” and 1” hose is Parker push-lock hose that I added a layer of Techflex Flexo Super Duty sleeving to for abrasion protection. The 1/4” IP/injector return hose is diesel rated hose from McMaster-Carr. I really liked working with the push-lock hose over the AN hose I used before - it’s really good quality, it’s easier to assemble than AN stuff and it’s also inexpensive when compared to AN hose and fittings….all good stuff in my book.

3ECE0202-83EA-466C-82EE-F979985599D9.jpeg137609FF-26D0-43BF-A1BA-19144618DF72.jpeg487F1860-ACD5-4D65-A21C-0CC76F76394A.jpegAD579016-A552-4381-BAE4-9C9E5EFEC005.jpeg

The filter base is the same Baldwin base I used on the black Tahoe and then on the Dually with a Baldwin equivalent filter of what I’ve been using on the other trucks.

E0041538-2D64-42D6-B930-072B26D22680.jpeg

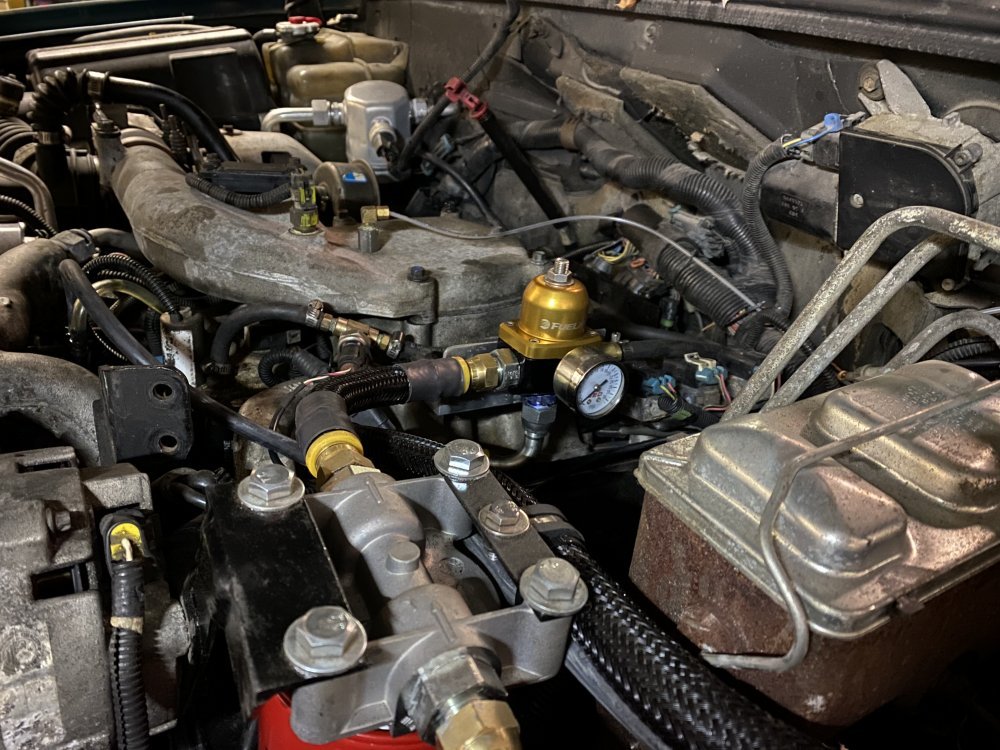
The regulator is the same Fuelab return-style regulator that I initially installed on the dually before I installed the hot rod IP since it’s set up for lower pressures (4-12 psi). When this truck gets a hot rod pump, I’ll either swap the spring in this regulator or swap out the whole regulator to get higher inlet pressures for the IP.

303A76CC-8EEA-444A-B914-CCB4223EF8EE.jpeg

While I was working under the hood, I also swapped the 1995 washer reservoir for a later model one to free up a little space under the hood.

501A5D4C-0E58-45E1-9AB9-EA833E47DB73.jpeg

The truck should be running later this week.
 
Back
Top