• Welcome to The Truck Stop! We see you haven't REGISTERED yet.

    Your truck knowledge is missing!
    • Registration is FREE , all we need is your birthday and email. (We don't share ANY data with ANYONE)
    • We have tons of knowledge here for your diesel truck!
    • Post your own topics and reply to existing threads to help others out!
    • NO ADS! The site is fully functional and ad free!
    CLICK HERE TO REGISTER!

    Problems registering? Click here to contact us!

    Already registered, but need a PASSWORD RESET? CLICK HERE TO RESET YOUR PASSWORD!

Aluma seal or bars leaks ? ? ? ?

JB Weld. The old slow cure stuff. Used it dozens of times and never a failure. Couple quick scrubs with a steel brush, rinse with a little water then let it dry.
Mix up the JB 50/50 and put it on so that its about size of a quarter. Dab it in so a bit goes into the hole.
 
I've not seen any sort of hot glue epoxy used, but have seen them solder / aluminum weld them. you have to be very careful heating those areas with a torch. I once attempted to weld up some AC fittings on my own with some low head aluminum rods. it went well until it didn't LOL all was going good and then all of a sudden the whole area just went from a solid to a blob of melted aluminum on my vice!! oopsies!!

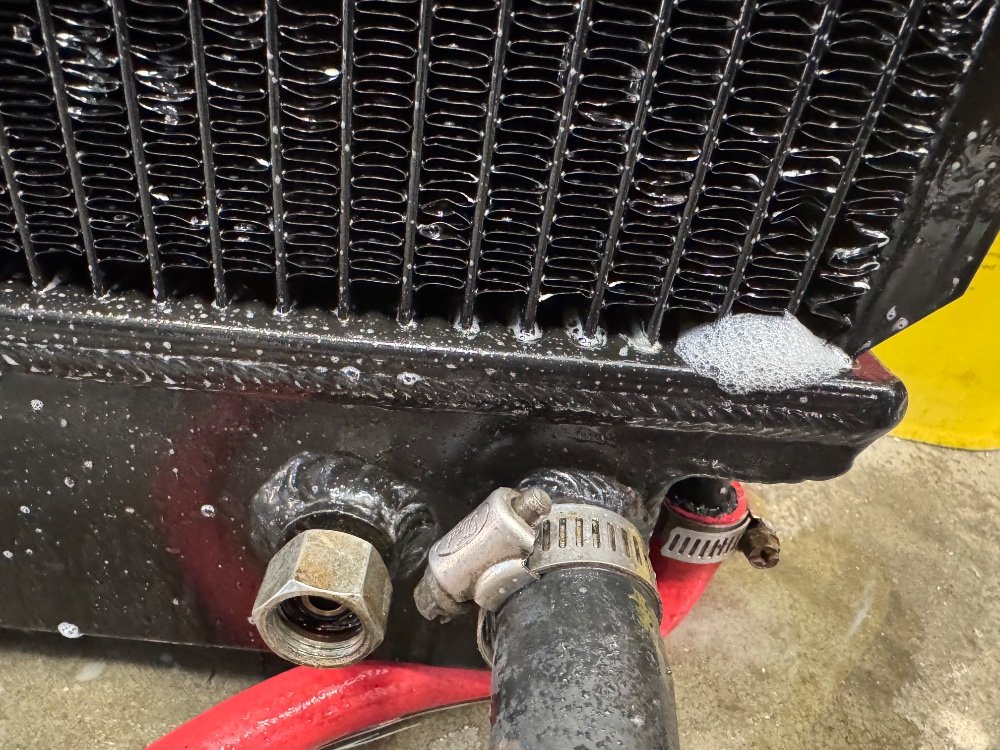
I hate that you'd have to remove the coating from the effected area, but I would try cleaning the radiator well with the garden hose and some dish soap, light brushing action not to damage any more of the fins. then after the wash and blow dry with the compressor, spray it off with some brake cleaner and blow if off again so you have it all clean dirt and grease free. get you some rubber bungs to seal off the hose nipples, have a squirt bottle of water and dish soap handy. use the pressure tester to fill with air and get it about 15 or so psi. then look and listen for leaks, bubbles from the soap. see if you can pin point exactly where the leak is.

idk if paint strip will remove the coating where the leak is to get bare clean aluminum to do the repair at or not.
I’ll have to get the proper size expandable bung plugs, get them firmly set in the hose ports, make up a barb to air hose coupler and use hose to connect that to the over flow fitting then use the pressure regulator and air it up, I do already have mixed up a spritzer bottle of dish soap and water.
If fins are in the way of the damaged area then the fins in the affected area will get clipped out.
I did have the cooling system pressurized and it then would not leeeeek.
I’m thinking the heat gun may warm the area enough to create some bubbly stuff. 🤷😹😹😹
 
JB Weld. The old slow cure stuff. Used it dozens of times and never a failure. Couple quick scrubs with a steel brush, rinse with a little water then let it dry.
Mix up the JB 50/50 and put it on so that its about size of a quarter. Dab it in so a bit goes into the hole.
I’ll attempt the fix before I unbox that new OE radiator, then it will still be in the original packaging and will be much easier to return to Oriellys. 🤷😹
 
Air pressure and dish soap… I don’t like the sounds of that. Filling full of water and using a regular pressure tester tool should generate any leak.
Parts stores usually have them available on the free rental program.

For the hose ends- sometimes you can get a hose that just connects the top to the bottom.
 
Regulated air pressure at about 10PSI
IMG_6842.jpeg

And the leakage. Same end as what I thought was damaged but on the opposite, top side, not the bottom.
This area has no damage and there is no leaks in the areas that I thought was suspect of leakage.
IDK how well the JB weld will hold as there is flexability between the tank and the tubes.
I’d think that something that would allow some movement without breaking loose would hold better.
@Will L.
Have You ever JB-Weld repaired aluminum tubes to aluminum end plates ?
 

Attachments

  • IMG_6841.jpeg
    IMG_6841.jpeg
    374.6 KB · Views: 1
Appears that the top three tubes had began to separate from the tank. This is the area that I was not suspecting of having a leak. This is where all the foamy was located.
IMG_6843.jpeg
And this is the area that I had suspected of leaking.
IMG_6844.jpeg
With the radiator still in place I seen the fins that had been somewhat distorted and figured thats where the leak was at, there was even some green coolant hanging in the fins so upon closer inspection it looks like the thermal coating has washed away from the tank where that tube also connects.
The tubes themselves has sustained no damage, just minor distortion on the fins.
And so for now, I’m going to install that OE radiator because I am really needing this truck to transport some heavy loads and then try and decide what to do with this too good to be true radiator.
I’m a tad bit disappointed in all of this.
Should just say fuggit and go back to the house, lay on the couch, maybe watch some elmer fudd or road runner, see if that’ll switch my attitude.
 
On another look at the top side of the radiator, it appears that it is actually the top four tubes that had loosed from the tank, observing the washed away thermal coating.
 
Chris going to take a run at getting the radiator under warrantee.
Sent Him some better pictures that might be a game changer.
We shalt see.
 
Back
Top