• Welcome to The Truck Stop! We see you haven't REGISTERED yet.

    Your truck knowledge is missing!
    • Registration is FREE , all we need is your birthday and email. (We don't share ANY data with ANYONE)
    • We have tons of knowledge here for your diesel truck!
    • Post your own topics and reply to existing threads to help others out!
    • NO ADS! The site is fully functional and ad free!
    CLICK HERE TO REGISTER!

    Problems registering? Click here to contact us!

    Already registered, but need a PASSWORD RESET? CLICK HERE TO RESET YOUR PASSWORD!

Adventure Vehicles NW vs Autoworld Motor Mounts

I'll do that. I'll update ya'll as I hear back from him. My other thought process was what if I could have AVNW just send me the plates, & I could take them to get welded up. That might be even better? Obviously I would try to negotiate for a better price since it was supposed to be $250 for them finished & now I'm receiving them not finished instead. I'll argue for $100 off the purchase price as a standard decent welder charges right around that as an hourly rate. Sounds fair to me. Thoughts?
If You could place the mounts You now have into position, then build a template to cover all the bolt holes like that screamin system runs, then have the fab shop build the mounts to those specs, it would probably be a lot cheaper and a pretty nice system.
 
The problem with that is the Screaminseeman mounts are actually custom custom. I'm not sure if he uses a previously made rubber sleeve or if he makes them himself, but they are like part of the mount. When I ordered them 3 years ago in my first attempt at this swap, the mounts would rotate around the bushing almost 180 degrees. Obviously once the mount is bolted to the engine & then to the frame, it's not gonna move at all & it'll just rest on the rubber.

I don't like copying someone else's design. He did the design & work, so I'll pay the money for it. His were very sturdy as well with much better welds.

I did receive an email back from AVNW. They said they would send another set of motor mounts out or I could receive a refund. I think I'm going to just go with a refund. The cost of shipping the ones I have back, to hopefully receive a better set, just doesn't sound very promising to me. I contemplated arguing to get just the plates non welded for cheaper, but even paying a welding shop is still going to run me at least another $100. So I think I'm just going to suck it up & purchase a set from screaminseeman. I like his set up, it looks beefy & it's not a 1st gen mount. Plus he has a nice gm 1 wire alternator mount that I think is going to solve my alternator issue cuz then I can just run a 6.5 alternator. So I'll probably just refund & buy different. I do appreciate ya'lls input tho!
 
Alright folks. Happy holidays! Hope ya'll had a great time!

Here's what I received from Joel today. If there is any welders here, please feel free to chime in as I don't know welding.
Screenshot_20181226-225757_Email.jpg
Please let me know what ya'll think. Honestly, all I care about is strength. If what he says is true, then screw it, I'll run em. But I just wanted to get some more opinions. Thanks
 
Have Him redo a set is best imo.

Mig is perfectly fine. He should always clean the milscale (common untrained welders error) but for this application no doing it wont kill the weld. Since he will this time- great.
Most of his welds were ok, just parts of the ones I saw is what bothered me. I believe with him taking a moment to do a good job, the ones you end up with will be great.

And he is right that seeing “dimes” doesn’t always means it a perfect weld, and the tig vs mig thing.

My concearn was not all his welds innthe pics you posted were up to snuff. For a guy doing it at home, where if one cracks in a few years and he has to fix a spot on his own work- then ok. But when charging someone for a structured component, they should all be professional quality, not just 80% of them.

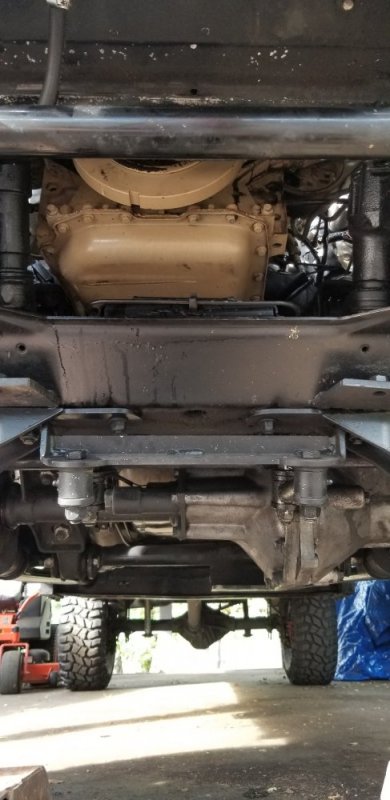
Good professional welds in the bottom:
D5D1CD19-5792-4C97-91FC-7336B04FF47C.png

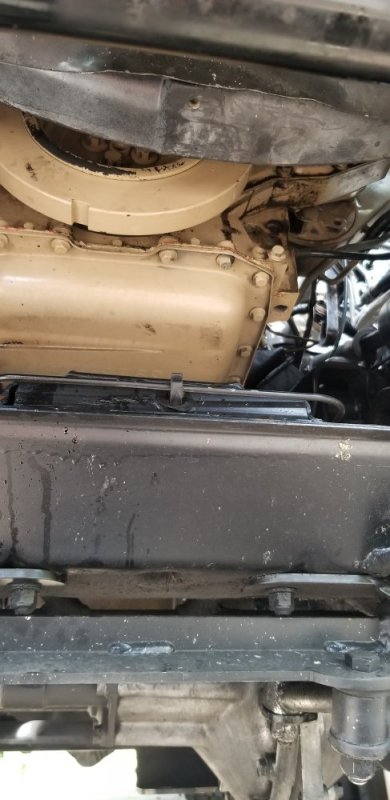
Not professional welds on top:
59F0513F-CA4E-45B5-B63B-B2EABD152171.png

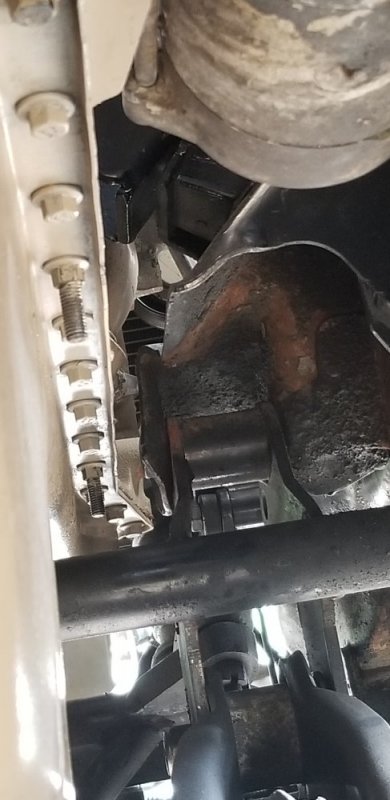
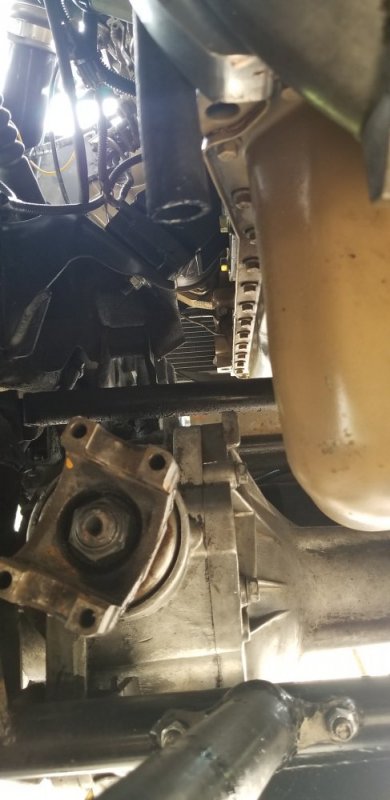
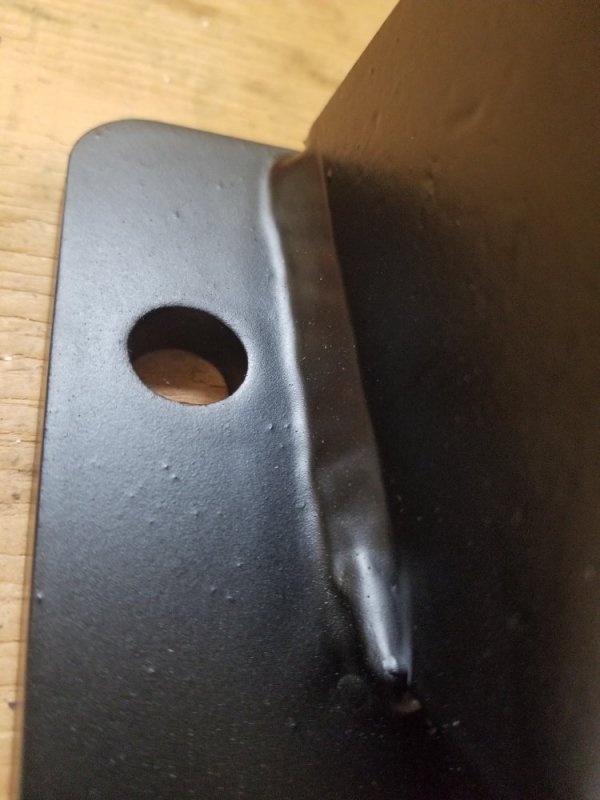
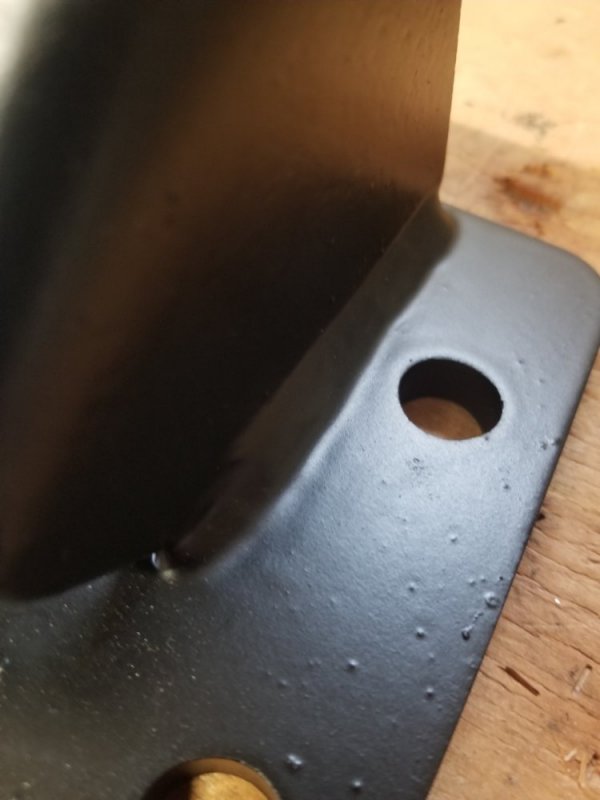
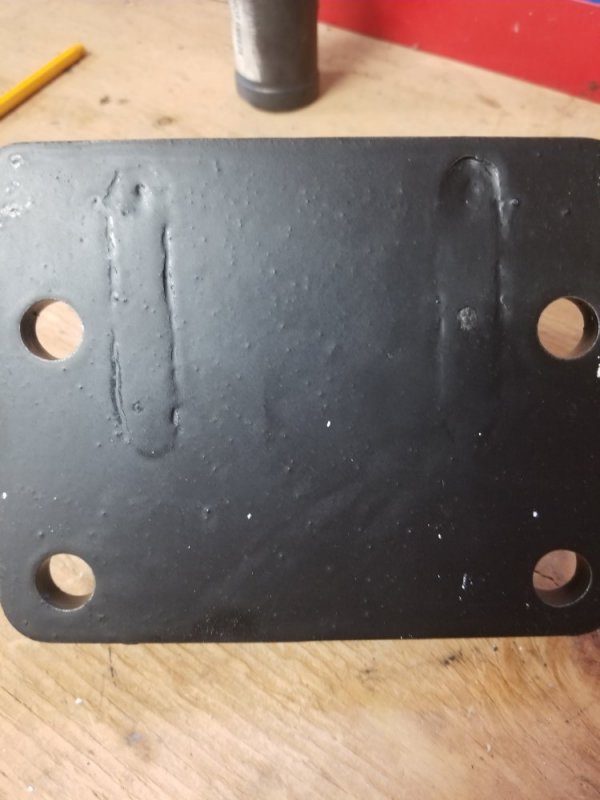
Below are no good at all and any farmer or alley way dude should grind out and redo what is below:
6C2A37C6-F228-4677-BEAC-657231945B2C.png

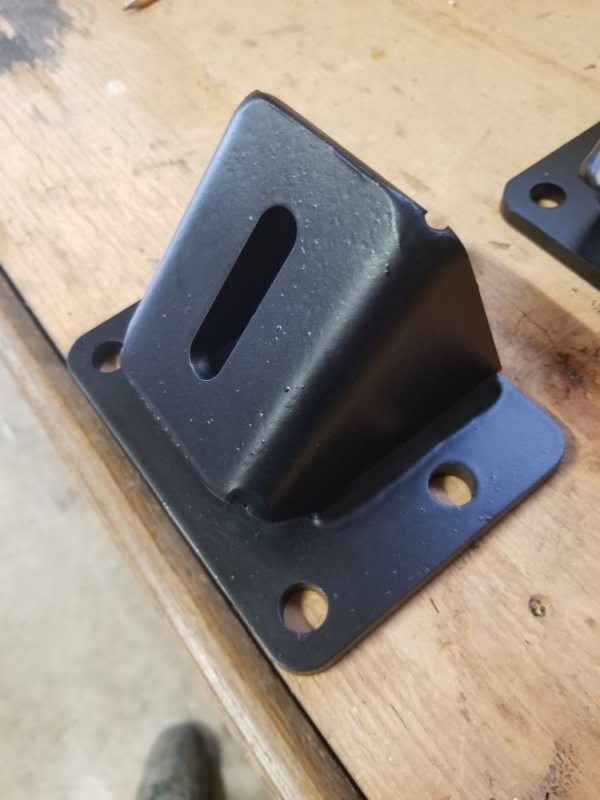
His fitment is not square, which you easily noticed, and is also lacking tapering the leading edge for the penetration he is running, so he should either be welding at a higher heat and walking his lead from one piece to the next- back and forth or if running flat like he is and at the colder temp, he should grind 45* into the end plate and be concentrating more heat onto the flat plate and drawing the end plate into it.

It is easy for any certified welder to see his penetration is lacking and those above are why, along with not removing the scale- 15* of the heat is lost to the scale, along with the porosity that is visible in it.

I understand he is trying to do things quicker for ease of labor and to keep the cost doen for the end consumer-which is perfectly fine. I just get the feeling he needs to up his game on the quality control checks here. Any product at any time should be able to be pulled out of a box and used for pictures to demonstrate the quality coming from a shop as the advertising example- and if he is honest with himself, he would not choose those last 2 pics and the one showing out of square as his advertising units.

But everyone goofs a little, and I think that is all that happened here. By what I see I think he is capable of making perfectly fine mounts, and a second chance will fix it.
 
Last edited:
I always remove the scale from steel before welding, now if I could just see good enough to keep the gun/stinger where I need the weld, that`d really help. LOL
Sometimes I have to do a couple of passes to get the welds and pieces all tied together, but no matter, the welds I do have good penetration and looks a whole lot better than what I am seeing in those pics.
keeping a light between the welding surface and the helmet really helps with the vision problem too. Most times I can not see where I`m going because of light coming in from the back of the helmet.
 
He is right to a point, but I see lots of porosity in the welds, that doesn't make it strong..

The first ones you posted are tig welded, strong and good looking, if he is in such a hurry that a few minutes spent on good looking strong welds then don't buy from him... looks do matter..

And I weld for a living... certified D1.1 & D1.2
 
Alright guys. Figured I should update yall. Got the new mounts from AVNW. I feel much better running these. New design as well. Similar to Autoworlds mounts.
 

Attachments

  • 20190114_153600.jpg
    20190114_153600.jpg
    76.6 KB · Views: 9
  • 20190114_153609.jpg
    20190114_153609.jpg
    91.9 KB · Views: 9
  • 20190114_153612.jpg
    20190114_153612.jpg
    60.6 KB · Views: 9
  • 20190114_153618.jpg
    20190114_153618.jpg
    74.1 KB · Views: 8
Yeah, they sent me a bunch of pics before even shipping them out as well. I'm happy with these mounts & very pleased with how they handled the whole situation. Joel @ AVNW has been extremely helpful with my conversion as well. Answering any question I have without hesitation, providing wiring schematics, etc, etc. Even helped me troubleshoot why the engine wouldn't start when I got it all hooked up. Turns out those 3 grounds that bolt to the back of the 6.5 passenger head are much more important that I thought!
IMG_4954(1).jpgIMG_4953(1).jpgIMG_4960(1).jpgIMG_4958(1).jpgIMG_4959(1).jpgIMG_4957(1).jpg
 
Alrighty folks. After running this setup for about 2 months or so, I had my first issue. AVNW designed these mounts for a stock truck. Stock trucks with a cummins swap have an issue with the oil pan hitting the front differential. Due to this, they designed these mounts to locate the engine much much closer to the passenger side. My truck has a 6" suspension lift. So my differential is no longer in the way. I was in a rush towards the end of the build, & honestly didn't really notice. Plus, all was well for about 2 months or so.

Well, 2 months later, I go to start the truck & as soon as the engine fires, I hear it slap the lift kit crossmember on the passenger side. The pancake style 1st gen mounts had shifted & so I had to readjust them. That's when I noticed how far off the engine was.

So, due to this I made a decision to purchase a set of Screamin Seeman Offroad mounts. These SSOR mounts use a similar design to the 2nd gen, 3rd gen, & 4th gen mount designs. The SSOR mounts use a leaf spring bushing as a mount instead of the pan cake style. This bolt & insulator design proved to be effective enough for dodge to keep it, so hopefully I'll never have to adjust my mounts again. These new mounts should also relocate the engine to center which would help with exhaust clearance & rad hose/intercooler tube routing.

I will report back once I change em out. Thanks.
 

Attachments

  • 20190531_174321.jpg
    20190531_174321.jpg
    85 KB · Views: 19
  • 20190531_174304.jpg
    20190531_174304.jpg
    83.9 KB · Views: 17
  • 20190531_174140.jpg
    20190531_174140.jpg
    78.8 KB · Views: 17
  • 20190531_174149.jpg
    20190531_174149.jpg
    77.7 KB · Views: 17
  • 20190531_174131.jpg
    20190531_174131.jpg
    70 KB · Views: 17
  • 20190531_174156.jpg
    20190531_174156.jpg
    73.8 KB · Views: 16
Gonna have a little learnin curve on any custom build.

Something that having to readjust reminded me- on the cummins Dodge trucks and generators we delt with, engine mounts like to vibrate loose. When you do the others, put a line of cross check torque seal on there. $5 tube will last a home diy guy years and years. And takes like 5 seconds. Just put on the line correctly:
From threads across nut, washers and to base plate.

Look at red “paint marks”
57233
 
Last edited:
Gonna have a little learnin curve on any custom build.

Something that having to readjust reminded me- on the cummins Dodge trucks and generators we delt with, engine mounts like to vibrate loose. When you do the others, put a line of cross check torque seal on there. $5 tube will last a home diy guy years and years. And takes like 5 seconds. Just put on the line correctly:
From threads across nut, washers and to base plate.

Look at red “paint marks”
View attachment 57233

I've always wondered what that stuff is called! Thank you!
 
I suspect you know all chevy GMT$)) & newer 4x4 truck engines are mounted off center and canted to the passenger side so looking at the engine from the front vehicle the centerline of the engine is to the passenger side passenger valve cover would be lower too.

1st Gen Cummins mounts allow the diesel to move quite a bit poly mounts fix that providing you don't mind the roughness of poly motor & transmission mounts.

Anyway, you have a 6" lift so how is it you have exhaust clearance issues? I could be wrong but running the down pipe down and under the starter would be an option unless I'm missing something here I don't see your exhaust in the images.

Nope! I had no idea that factory the engines were mounted off center. That's wild!

I will get a pic showcasing the exhaust. Here you can kinda see the routing of it & how it turns to avoid the starter.20190422_173402.jpg
 
Back
Top