- Staff
- #1
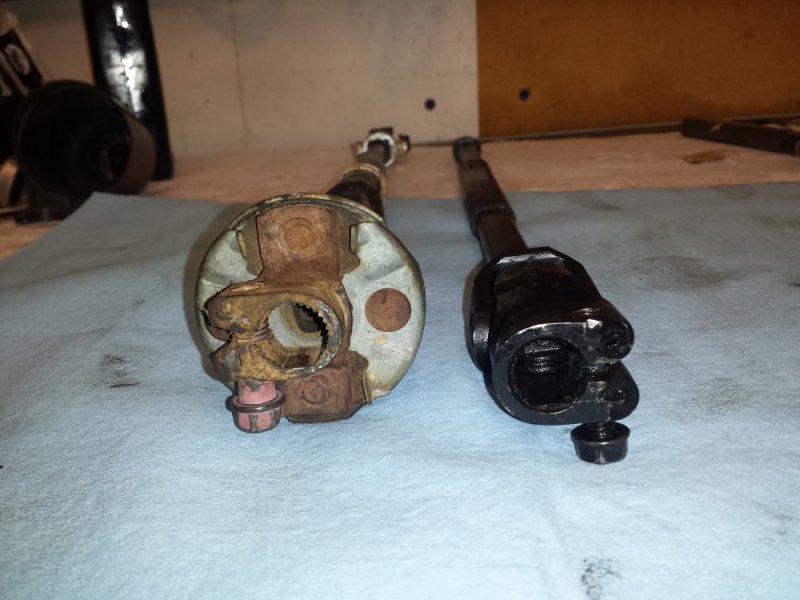
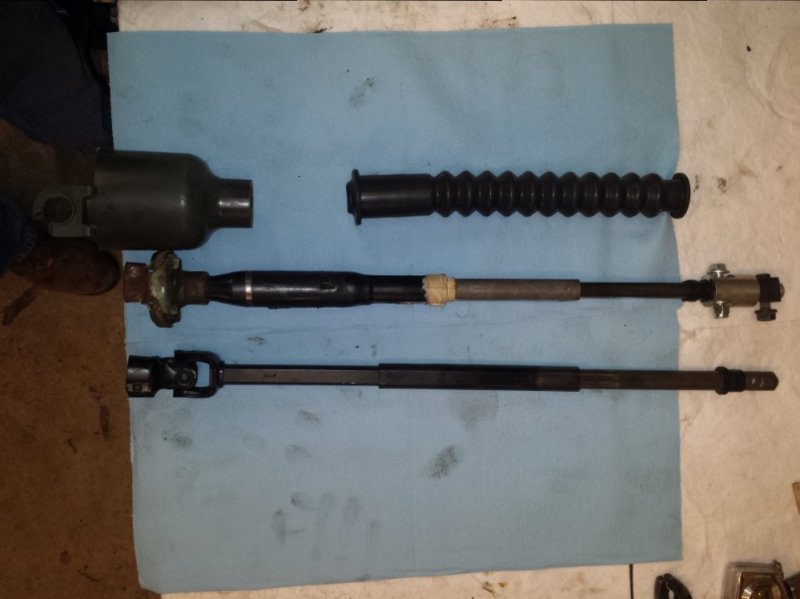
Theres been much talk of this upgrade on other forums, but the only write ups I could find are for the 88-94(some say to 96, but US models starting in 95 added in the drivers side airbag and went to the new style column so it's to 94 for US models) style shaft. First we start off with a regular run of the mill 84-94 CHEROKEE steering shaft(you can also use a grand cherokee shaft, but they are slightly different than the cherokee shaft I have pictured). First thing you need to do is get a torch(I used a hand held MAPP gas one), and burn the nylon out of the top of the shaft and the nylon portion that covers the slip shaft. Here it is after I burned out the nylon sitting next to my stock steering shaft with the covers removed.
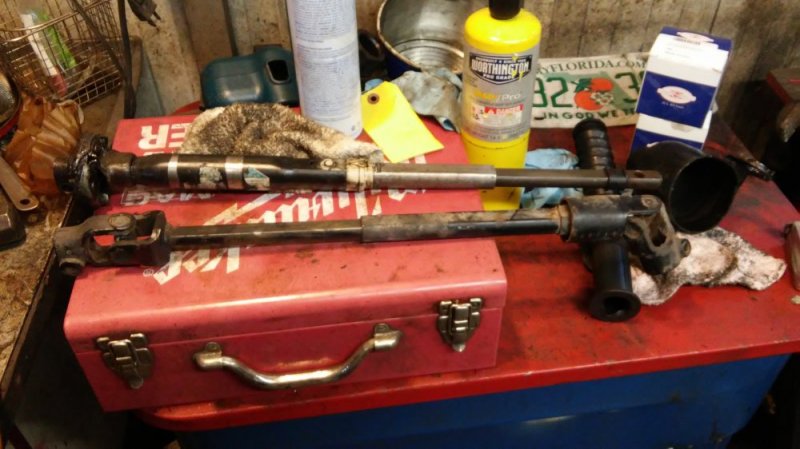
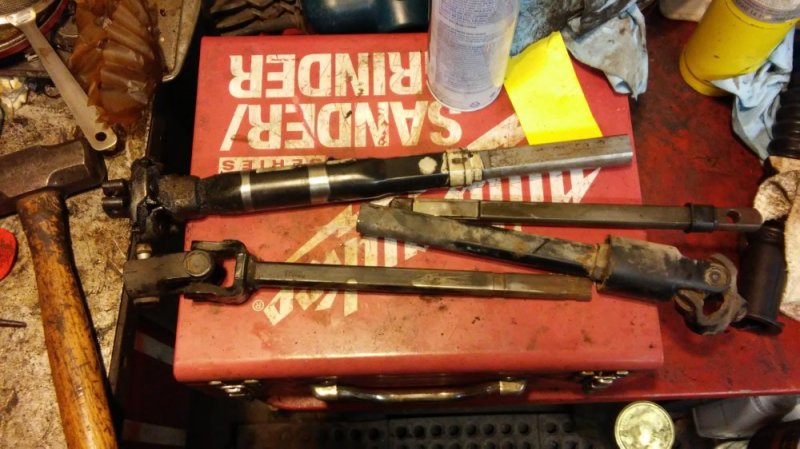
Then I disassembled the shafts and laid them out. The stock 95 shaft out of my BURB was also held together by nylon at the joint with the plastic ring, and has to be burned out. You can see how the GM shaft has a large notch in it, this is for a spring clip that holds the shaft taught at all times.
If you have have a 95+, skip this step as it is not needed, and jump past it.
If you are doing this to an 88-94 truck, all you have to do now is clean up the shaft, grease it, put it back together, and grind a notch in the upper shaft for the joint retaining bolt to go through. Heres a pic of the notch you have to grind I got from another site. Once you've done this, you can put the shaft in. It should be of note there is still a rubber coupling in the cherokee shaft, it just isn't as loose as a rag joint.
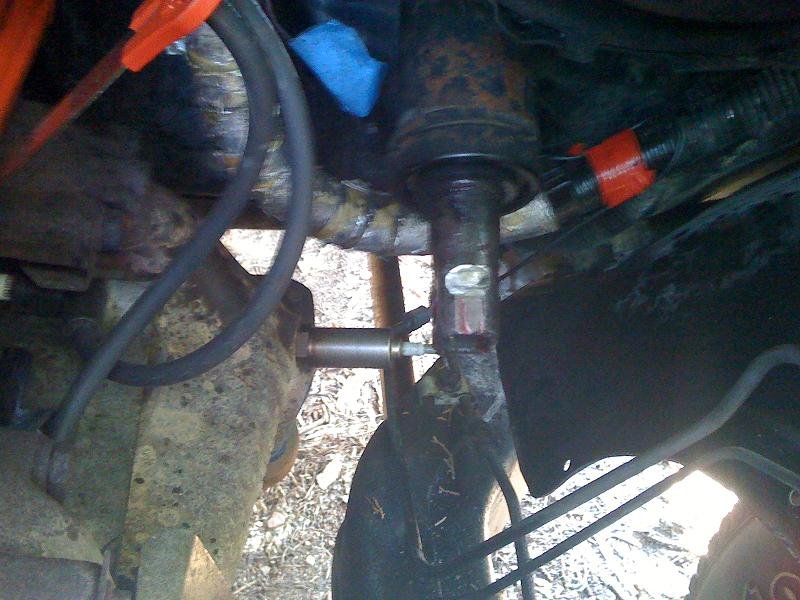
There is also a folded in tab that acts as a safety lock in the GM shaft that holds it together pictured here. I should not you don't have to do this step unless your going for an OEM look like I was. I'll go more into that later.
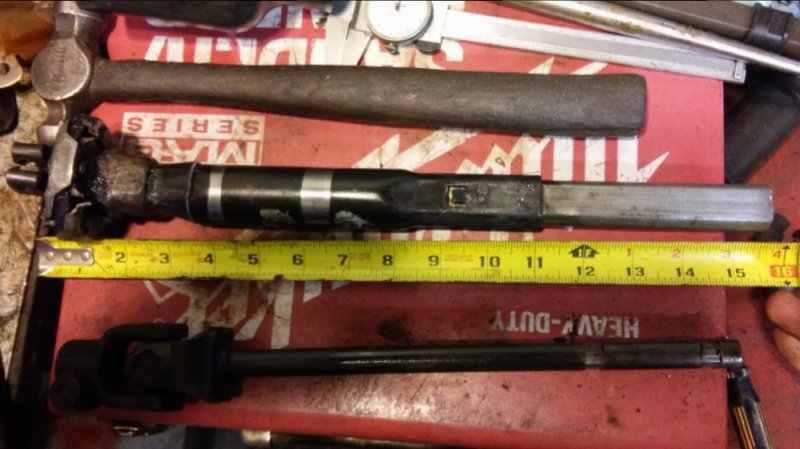
Now we have to remove the upper joint/rubber coupler. I used a die grinder, and cut it in half on both sides, and split it open to remove it.
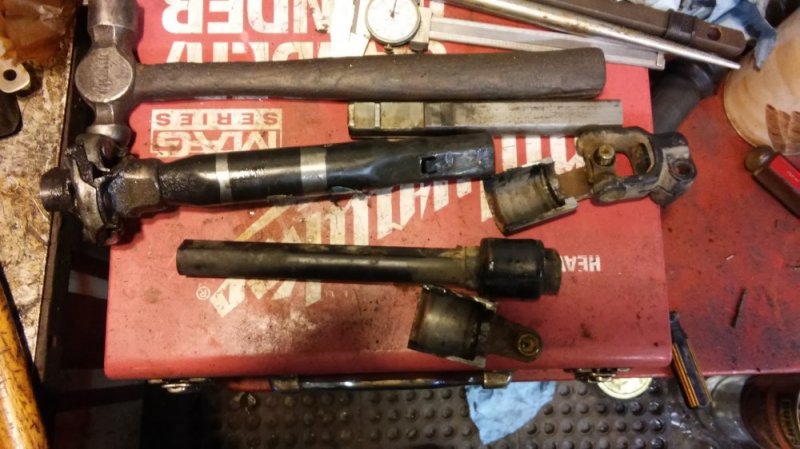
Now you have to mock things up. You will need to use the outer slip portion from the cherokee shaft as the GM one isn't long enough to allow for enough engagement of the slip portion and to slide in the joint end. I ended up cutting 4.5" off of the cherokee slip shaft to get it to the correct length, but double check yours BEFORE cutting.
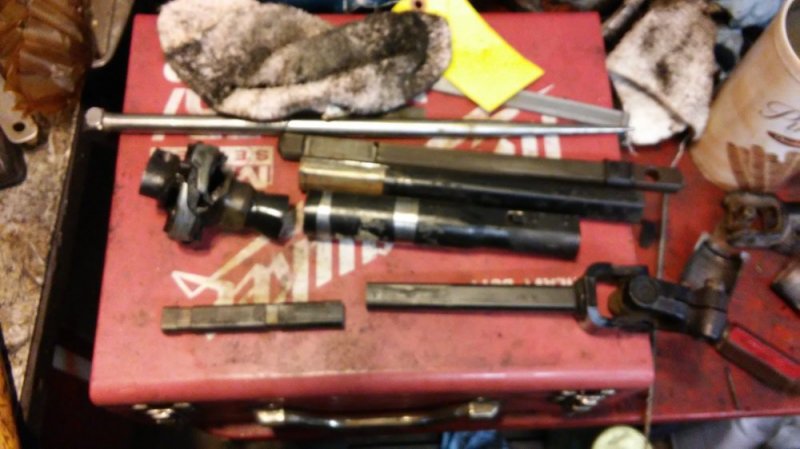
Now if your trying to do this with as little work as possible, you can slide the newly cut shaft in about 3 inches with the universal joint into the outer portion of the JEEP shaft opposite end of the rubber coupler, and either have it welded like I did, or drill it and through bolt it(I reccomend welding it to keep it as small as possible, last thing you want is a bolt sticking out and catching something as you turn the wheel). I wanted a sleek OEM look, so I burned then ground off the rubber portion, then used a cut off wheel to split the metal collar that teh rubber was atatched to, to get down to just the shaft.
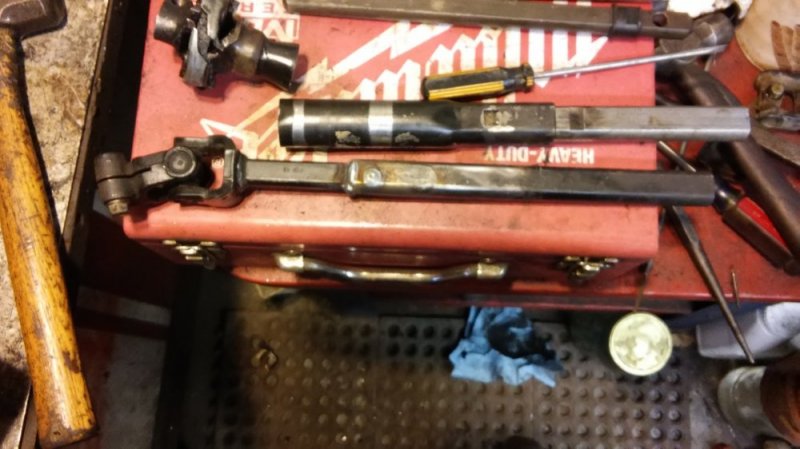
Now at this point you can grease the upper portion of the old shaft, put the spring plate back in the notch, slide it into the shaft, and put it back in the truck. I went ahead and made mine look factory so I could re-use the covers. I took the portion you see above of the lower shaft, cut the rag joint end off, there is a dimple in the bottom you have to drill out.
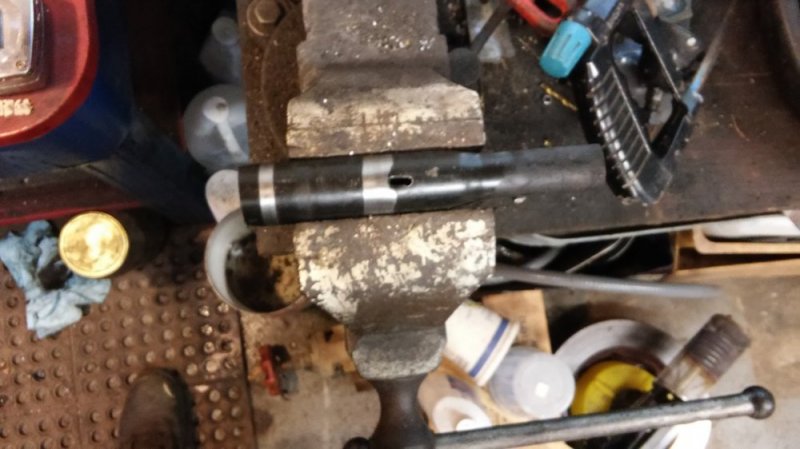
I slid it down over the welded shaft from above, and welded it in place using the hole from the locking detent earlier.
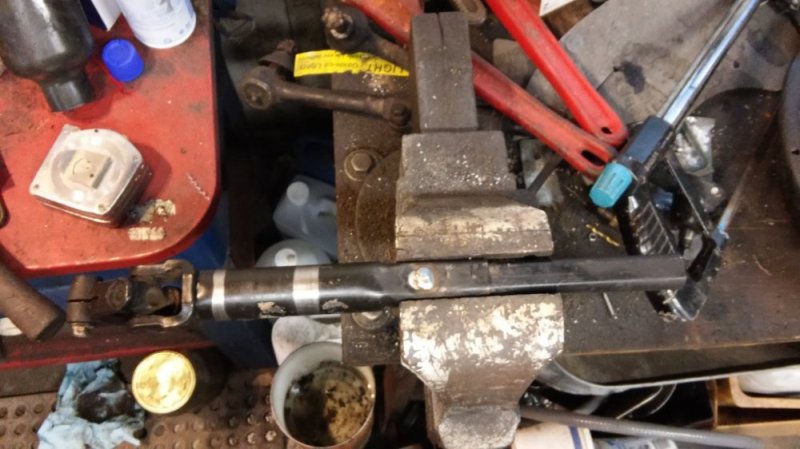
Greased the GM upper shaft, installed the spring clip, and put it all back together with the accordian cover and lower shroud leaving me with this.
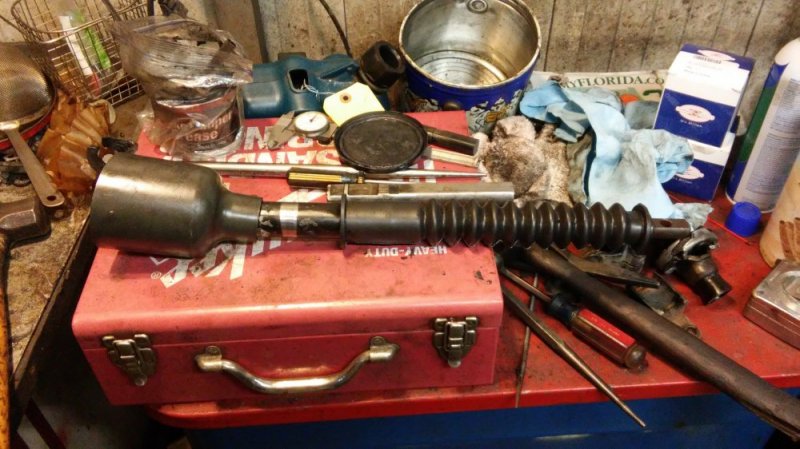
Then re-install it in the truck, and realize the folly I made. The universal joint is MUCH longer than the rag joint was, so the plastic shroud for the joint will no longer slide down over and lock to the power steering line, so most of that extra work I did was for not. On the plus side though, there is ZERO steering slack, and the 95+ trucks will have tighter steering than this mod done to the earlier trucks. For those looking for tighter steering on earlier trucks, you can buy a BORGESON universal joint to install to take all the steering play out.
Also I believe there may be another option for those of us with 95+ trucks. I believe a WRANGLER(87-95 YJ) shaft can be used. From what I could find, it looks like if you remove the intermediate shaft, one could slide the WRANGLER shaft in, in 2 pieces, and not have to do any of the fabrication. Just burn the nylon out of the WRANGLER shaft, remove the lower and intermediate shafts from the truck ,and replace them with the WRANGLER shaft. I'm not 100%, but I'm 90% sure this could be made to work from what I could find on shaft lengths. And this method would also give you a rubber coupling to help reduce some of the road noise and feedback through the wheel that my design will not reduce sincde there is no rubber coupling in it at all. Also some use the BORGESON shaft on the 95+ trucks, and install the upper universal joint to the intermediate shaft. This is a BAD IDEA! And could result in a SERIOUS accident. Many mistake the rubber firewall boot as a bearing, but is only a rubber boot, and not meant to support the shaft. 3 universal joints with a center support bearing is a recipe for DISASTER!

Then I disassembled the shafts and laid them out. The stock 95 shaft out of my BURB was also held together by nylon at the joint with the plastic ring, and has to be burned out. You can see how the GM shaft has a large notch in it, this is for a spring clip that holds the shaft taught at all times.

If you have have a 95+, skip this step as it is not needed, and jump past it.
If you are doing this to an 88-94 truck, all you have to do now is clean up the shaft, grease it, put it back together, and grind a notch in the upper shaft for the joint retaining bolt to go through. Heres a pic of the notch you have to grind I got from another site. Once you've done this, you can put the shaft in. It should be of note there is still a rubber coupling in the cherokee shaft, it just isn't as loose as a rag joint.

There is also a folded in tab that acts as a safety lock in the GM shaft that holds it together pictured here. I should not you don't have to do this step unless your going for an OEM look like I was. I'll go more into that later.

Now we have to remove the upper joint/rubber coupler. I used a die grinder, and cut it in half on both sides, and split it open to remove it.

Now you have to mock things up. You will need to use the outer slip portion from the cherokee shaft as the GM one isn't long enough to allow for enough engagement of the slip portion and to slide in the joint end. I ended up cutting 4.5" off of the cherokee slip shaft to get it to the correct length, but double check yours BEFORE cutting.

Now if your trying to do this with as little work as possible, you can slide the newly cut shaft in about 3 inches with the universal joint into the outer portion of the JEEP shaft opposite end of the rubber coupler, and either have it welded like I did, or drill it and through bolt it(I reccomend welding it to keep it as small as possible, last thing you want is a bolt sticking out and catching something as you turn the wheel). I wanted a sleek OEM look, so I burned then ground off the rubber portion, then used a cut off wheel to split the metal collar that teh rubber was atatched to, to get down to just the shaft.

Now at this point you can grease the upper portion of the old shaft, put the spring plate back in the notch, slide it into the shaft, and put it back in the truck. I went ahead and made mine look factory so I could re-use the covers. I took the portion you see above of the lower shaft, cut the rag joint end off, there is a dimple in the bottom you have to drill out.

I slid it down over the welded shaft from above, and welded it in place using the hole from the locking detent earlier.

Greased the GM upper shaft, installed the spring clip, and put it all back together with the accordian cover and lower shroud leaving me with this.

Then re-install it in the truck, and realize the folly I made. The universal joint is MUCH longer than the rag joint was, so the plastic shroud for the joint will no longer slide down over and lock to the power steering line, so most of that extra work I did was for not. On the plus side though, there is ZERO steering slack, and the 95+ trucks will have tighter steering than this mod done to the earlier trucks. For those looking for tighter steering on earlier trucks, you can buy a BORGESON universal joint to install to take all the steering play out.
Also I believe there may be another option for those of us with 95+ trucks. I believe a WRANGLER(87-95 YJ) shaft can be used. From what I could find, it looks like if you remove the intermediate shaft, one could slide the WRANGLER shaft in, in 2 pieces, and not have to do any of the fabrication. Just burn the nylon out of the WRANGLER shaft, remove the lower and intermediate shafts from the truck ,and replace them with the WRANGLER shaft. I'm not 100%, but I'm 90% sure this could be made to work from what I could find on shaft lengths. And this method would also give you a rubber coupling to help reduce some of the road noise and feedback through the wheel that my design will not reduce sincde there is no rubber coupling in it at all. Also some use the BORGESON shaft on the 95+ trucks, and install the upper universal joint to the intermediate shaft. This is a BAD IDEA! And could result in a SERIOUS accident. Many mistake the rubber firewall boot as a bearing, but is only a rubber boot, and not meant to support the shaft. 3 universal joints with a center support bearing is a recipe for DISASTER!
Last edited:

