• Welcome to The Truck Stop! We see you haven't REGISTERED yet.

    Your truck knowledge is missing!
    • Registration is FREE , all we need is your birthday and email. (We don't share ANY data with ANYONE)
    • We have tons of knowledge here for your diesel truck!
    • Post your own topics and reply to existing threads to help others out!
    • NO ADS! The site is fully functional and ad free!
    CLICK HERE TO REGISTER!

    Problems registering? Click here to contact us!

    Already registered, but need a PASSWORD RESET? CLICK HERE TO RESET YOUR PASSWORD!

1994 K3500 extended cab dually

I can relate. I changed the emoji from laughing to like and back to laughing- not really sure which is most appropriate. It’s one of those funny/ not funny things.

I want my hummer together and done, but more important stuff keeps popping up. And on days when I could go make 1 or 2 hours progress, not enjoying the wrenching anymore. Almost rather work on the house because I clearly hate that and know I will hate it going in. Working on the truck is disappointing many times now from burnout of wrench dents in my hand bones.

I think you will handle more years of it than me because your desire to jump into every aspect - frame, body, engine, trans, axle- I quickly tired of some like axles and trans. Your passion is higher than mine.
 
Last edited:
I can relate. I changed the emoji from laughing to like and back to laughing- not really sure which is most appropriate. It’s one of those funny/ not funny things.

I want my hummer together and done, but more important stuff keeps popping up. And on days when I could go make 1 or 2 hours progress, not enjoying the wrenching anymore. Almost rather work on the house because I clearly hate that and know I will hate it going in. Working on the truck is disappointing many times now from burnout of wrench dents in my hand bones.

I think you will handle more years of it than me because your desire to jump into every aspect - frame, body, engine, trans, axle- I quickly tired of some like axles and trans. Your passion is higher than mine.
I know that feeling, mostly I call it burn out. Not with the tires either.
 
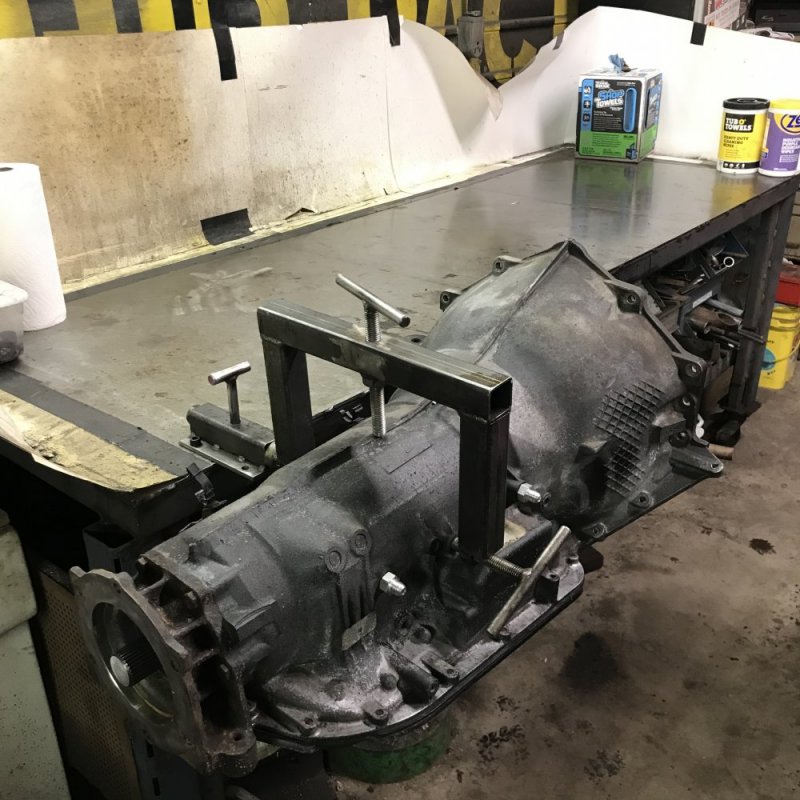
Between waiting on parts and an unexpected run across the state, the trans reassembly took a little longer than it should have, but it’s done and there aren’t any leftover parts on the workbench.
DCAA6F29-2E24-4D42-8704-E49DE46A3B4A.jpeg

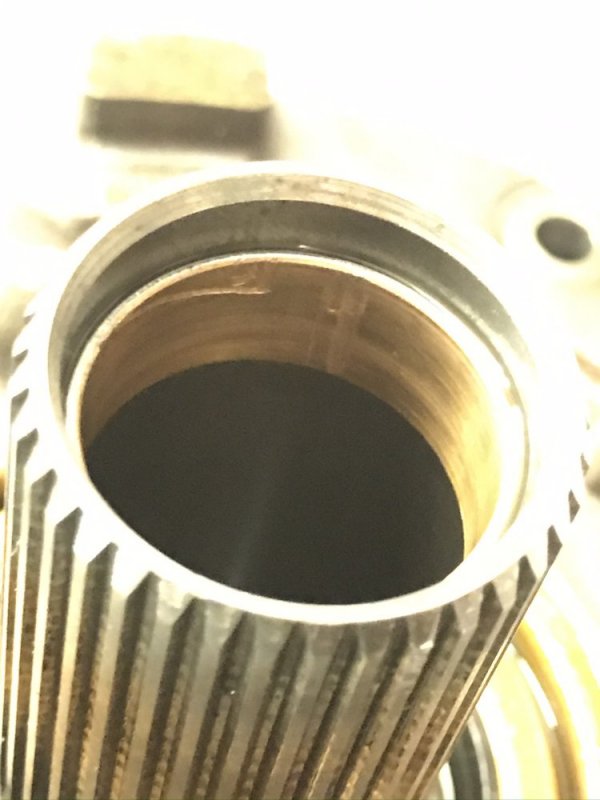
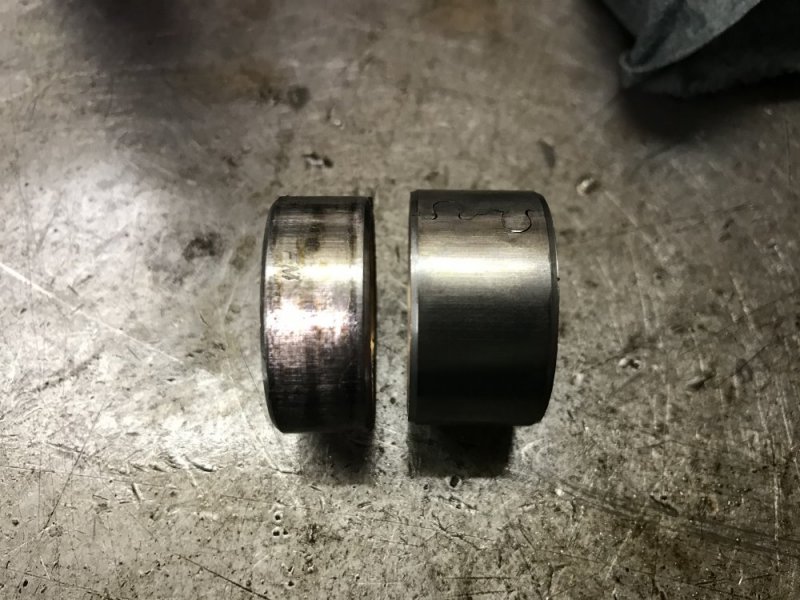
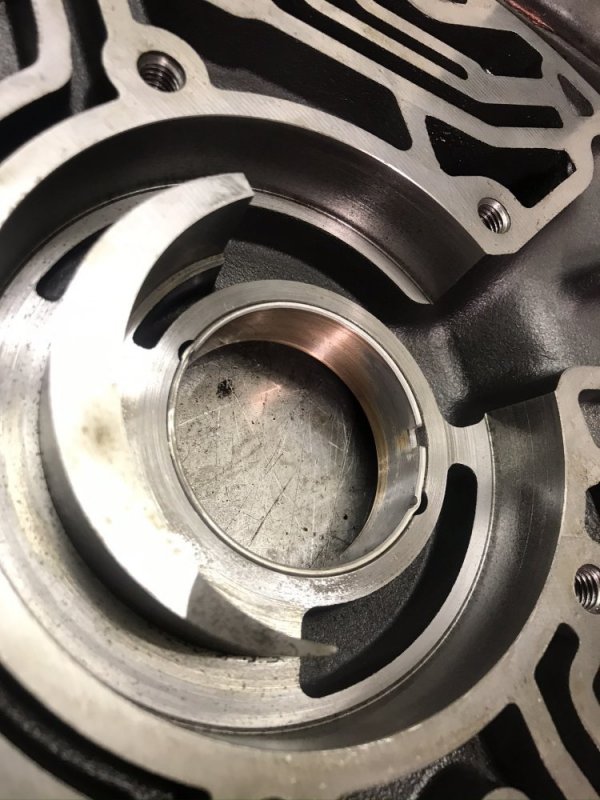
Besides the TransGo HD2 kit, I installed a Sonnax wider pump front stator bushing to replace the gouged one I found.
7D0A9F23-57EA-41BE-ABAB-CD71F3F9ED87.jpeg854DC834-2128-4465-A830-13074251A7CE.jpeg

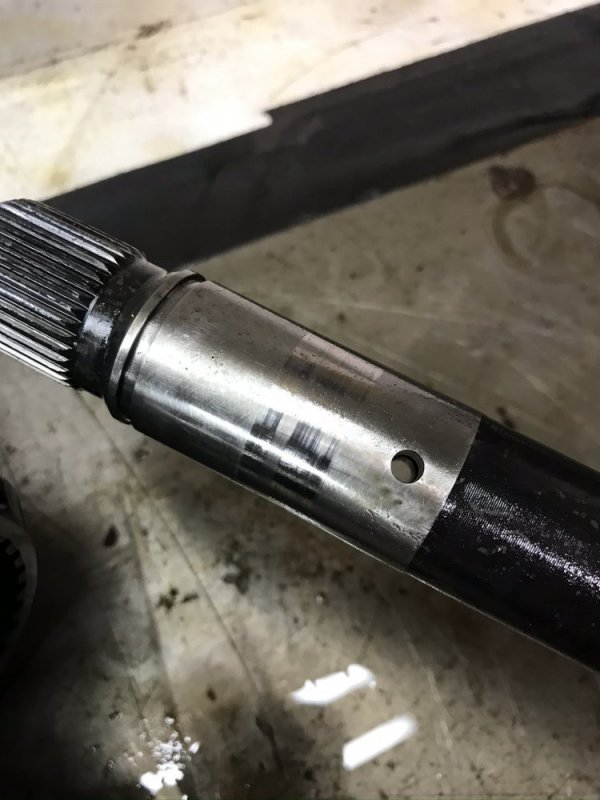
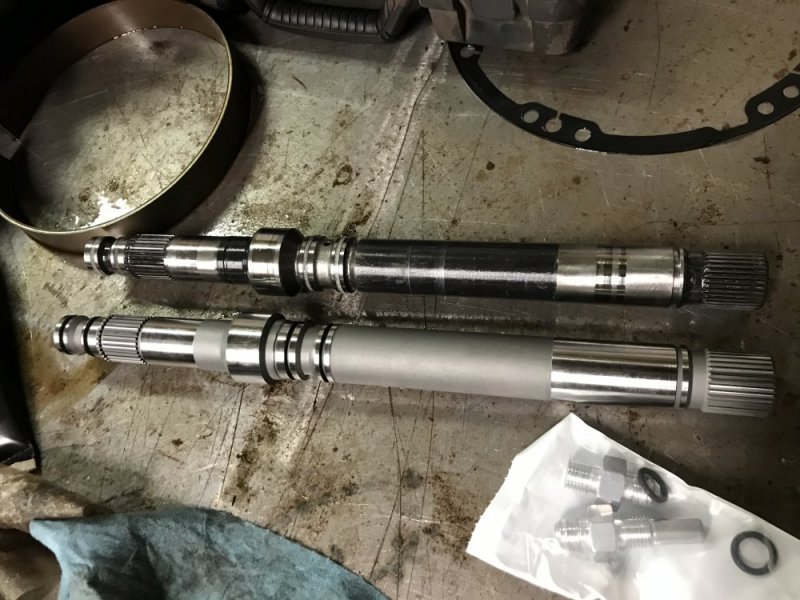
Replaced the abused pump body bushing. Installed a 300M input shaft to replace the one that had some wear.
90EC768C-9B83-4D65-977B-25974A79A4C4.jpeg54579D04-A0F8-46F5-9C93-8039D05655F3.jpeg

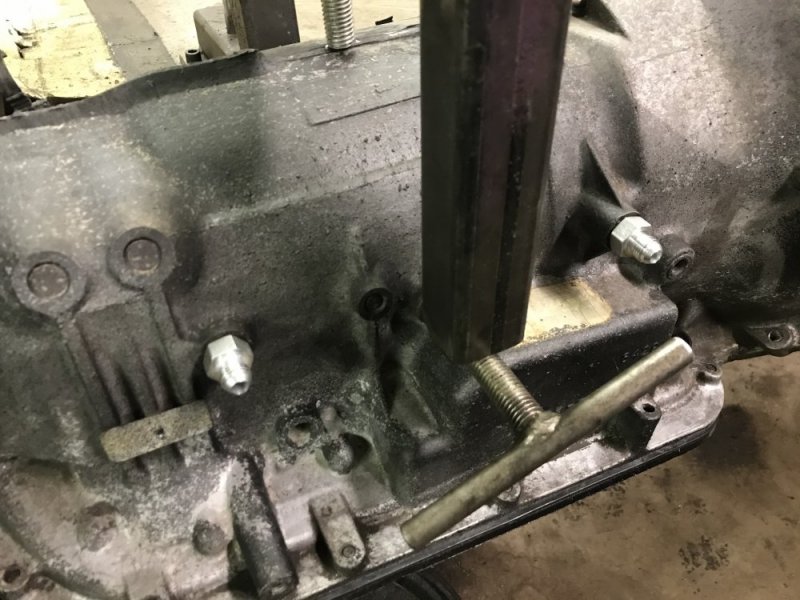
It got a high energy intermediate band and then one of the final pieces were these cooler line AN fittings so I can run my own hoses to a remote cooler.
97502D38-F581-44B6-9BD4-735AF6283A53.jpeg

Now I’ll be back to the engine.
 

Attachments

  • 18CD90A6-374B-4BE9-AF26-1AB13BD95A97.jpeg
    18CD90A6-374B-4BE9-AF26-1AB13BD95A97.jpeg
    133.8 KB · Views: 3
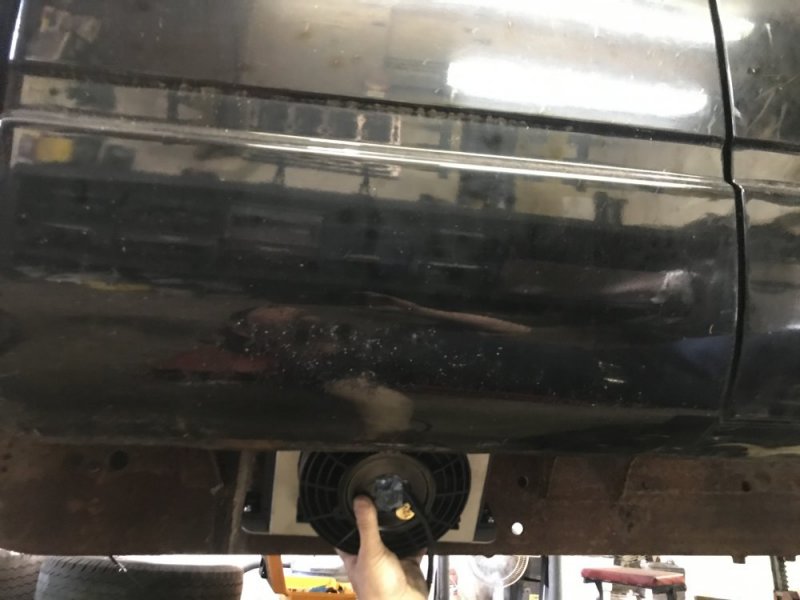
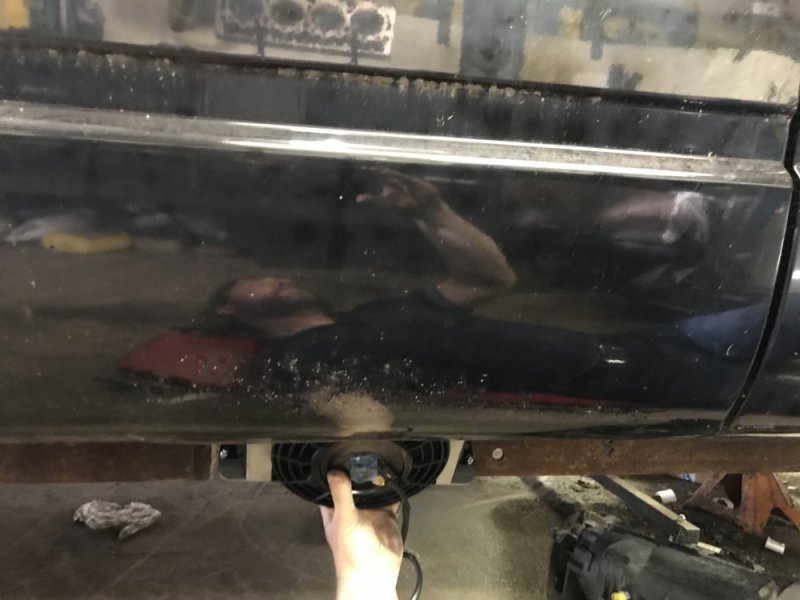
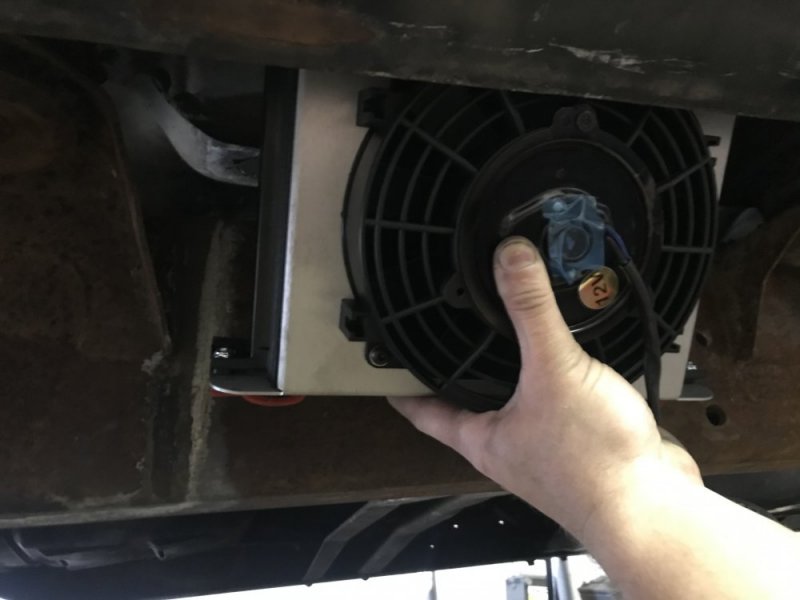
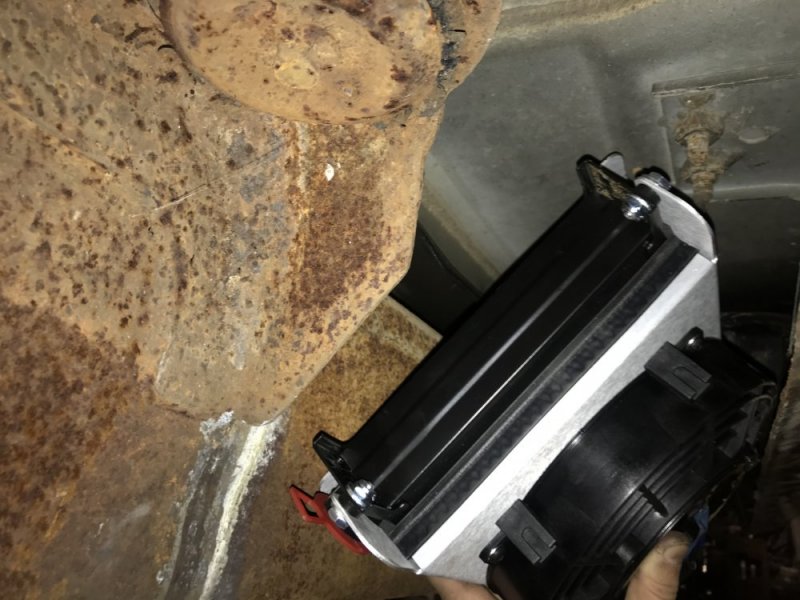
I got a good deal on a Derale remote mount cooler with built-in, thermostatically-controlled fan. I’m thinking about mounting it under the extended cab here. I plan on installing step bars which will add protection from the side. It isn’t lower than the frame so it’s pretty well protected there, and if it looks too precarious I can add a skidplate/grill under it. Of course it would be spaced away from the floor, it was just easier to hold it in place using the floor as an upper stop. Note that the pics show the cooler in the same location, I just moved the camera around for different angles. Anyone have remote trans cooler experience?

EDEB077E-BC45-4C96-B8C9-528D2AF82F28.jpeg01702B9A-0BED-4267-9870-C8B7B1FB1186.jpegFACEE447-8CC9-4C02-8426-773A560F2222.jpeg5F9432B2-C924-4468-82A6-D3DC1188E251.jpeg
 
No experience with a fan controlled unit, My feelings is, cooler is better to a certain amount, and, with transmissions, way cooler is better. LOL
 
I can relate. I changed the emoji from laughing to like and back to laughing- not really sure which is most appropriate. It’s one of those funny/ not funny things.

I want my hummer together and done, but more important stuff keeps popping up. And on days when I could go make 1 or 2 hours progress, not enjoying the wrenching anymore. Almost rather work on the house because I clearly hate that and know I will hate it going in. Working on the truck is disappointing many times now from burnout of wrench dents in my hand bones.

I think you will handle more years of it than me because your desire to jump into every aspect - frame, body, engine, trans, axle- I quickly tired of some like axles and trans. Your passion is higher than mine.
No, @Will L., I think it's called we're just getting old and don't have that puppy-energy any more.
 
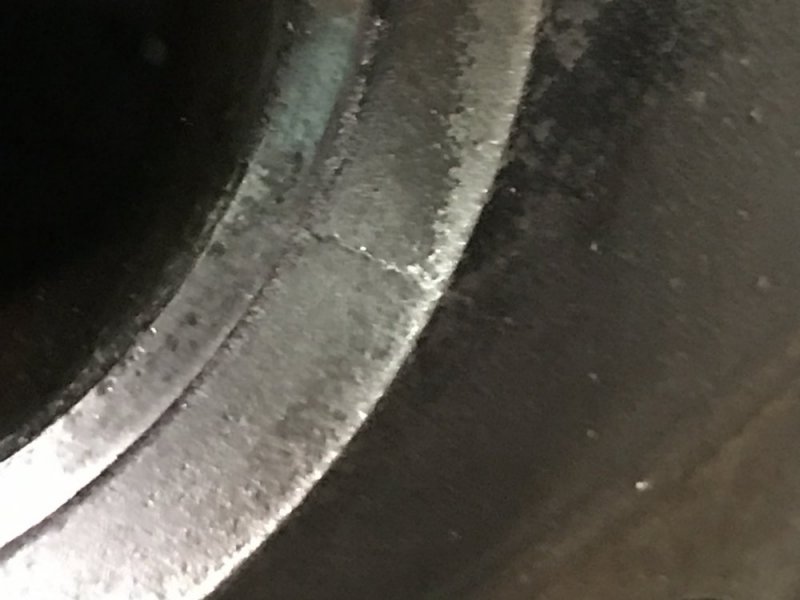
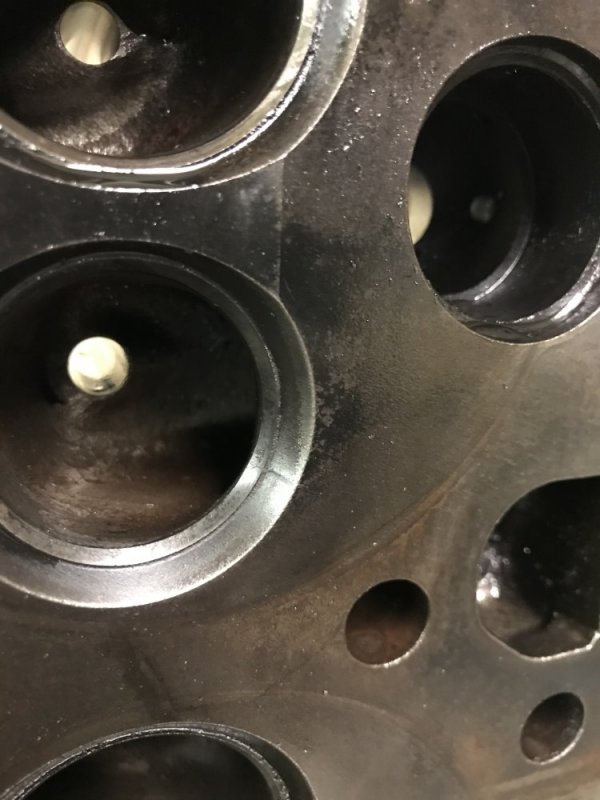
Finally have some updates to share. A couple weeks ago I started lapping the valves in the Optimizer heads I was porting. I was working on the first exhaust valve and noticed some perpendicular lines on the seat that wouldn’t go away. I look close and crap, they’re cracks!!

733A637B-3451-4BE9-9F96-C4E6134572B4.jpeg

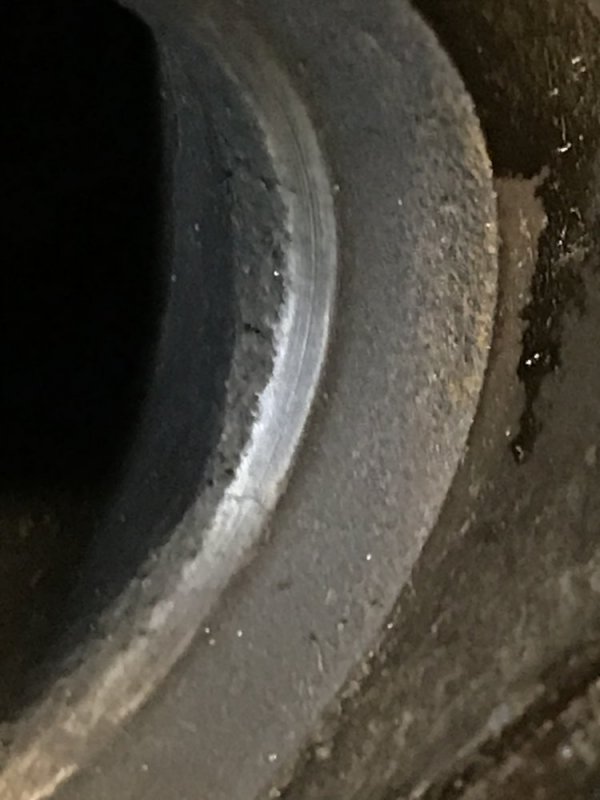
Ok I guess I’ll have a new seat put in it at the machine shop. So then I look at the others. Most of the exhaust seats have cracks! And in both heads. And then I see this in the 3rd valve down in both heads....cracks past the seat. Dammit. (I didn’t say dammit). Well these heads are done. It sucks I didn’t notice them earlier. I always look for cracks between the valves of course, but never gave a ton of attention to other places since the space between the valves is notoriously the first place they go. Notice that these are all in the seat above the short side radius of the port. Suck.

1FEAC44F-929C-49A2-B1A4-D1888952A951.jpegBCE88CD5-B88A-413E-A688-9D8F06ABD755.jpeg

Oh and BTW, these are CF casting heads. The heads that came off the Tahoe were also CF castings. The Hoe’s heads had cracks between the valves in a couple cylinders. I had the valves removed so I looked at the seats closer - same cracks above the short side radius. Blah.

D48A180F-2CCC-461E-BC50-8CAADA3918BE.jpeg

Lesson learned. I will be looking at all of the valve seats, 360 degrees from now on.

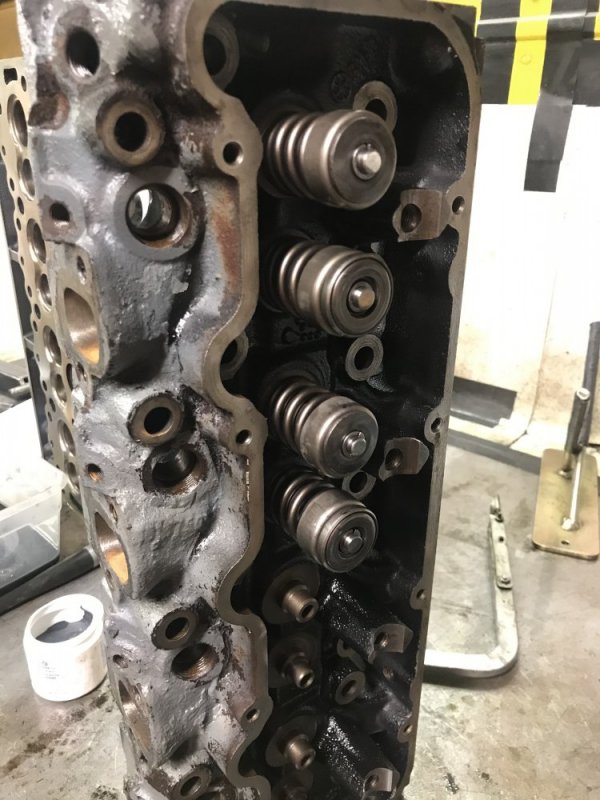
So I got the first pair of GM heads I had started on to see what I had for sure. No cracks. And then I double checked the measurements I took and it was more like .100” thick at the thinnest point. Good enough. So I went back to work on those. I had to finish the short side radius on the intake ports, which still took me a few hours, but the time I previously invested wasn’t wasted after all. Oh and these have tubes installed in the coolant passage already, so that’s a bonus (I noticed they have heat tabs on them so they must come from a rebuilder).

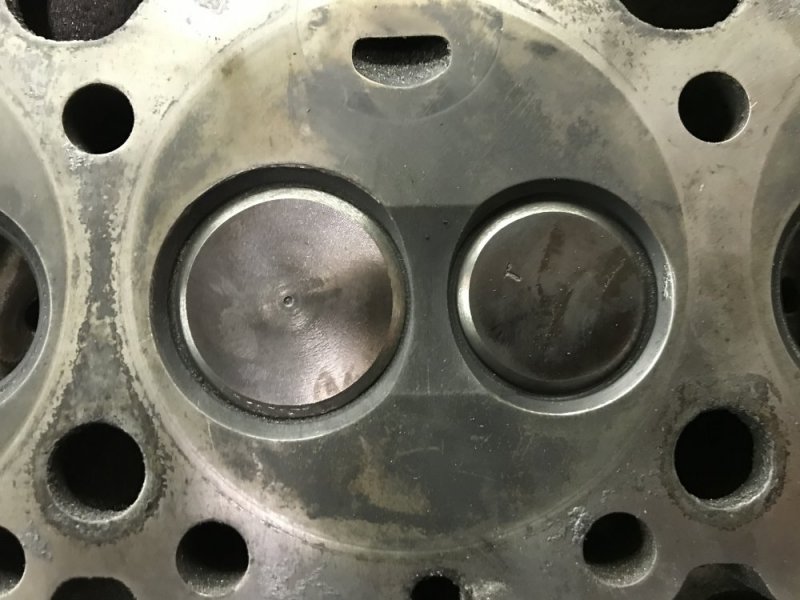
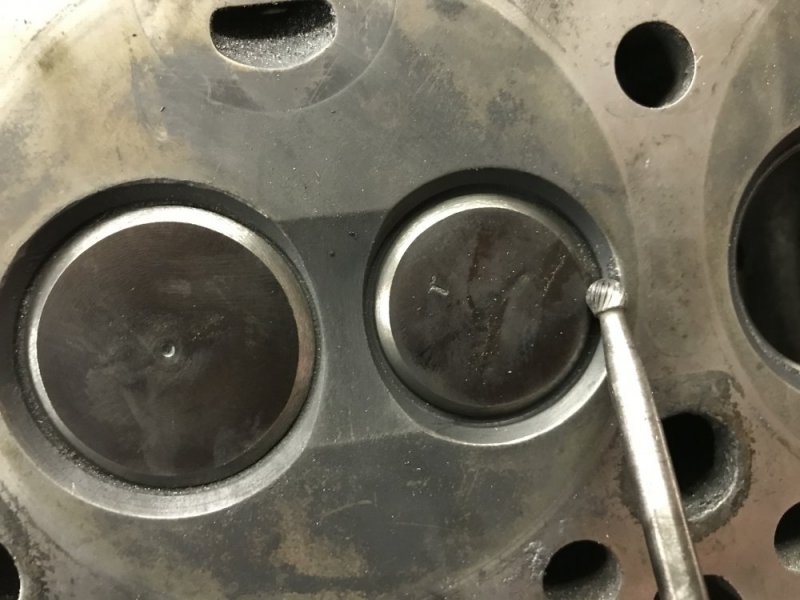
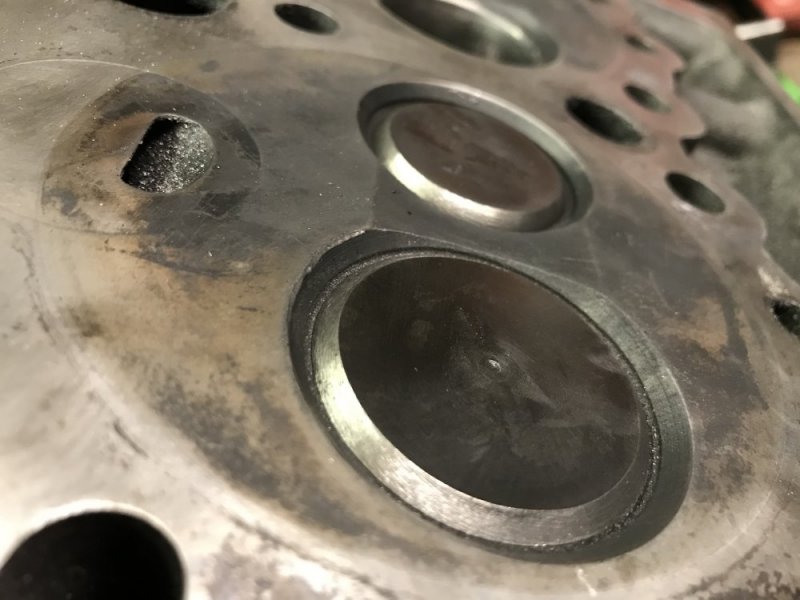
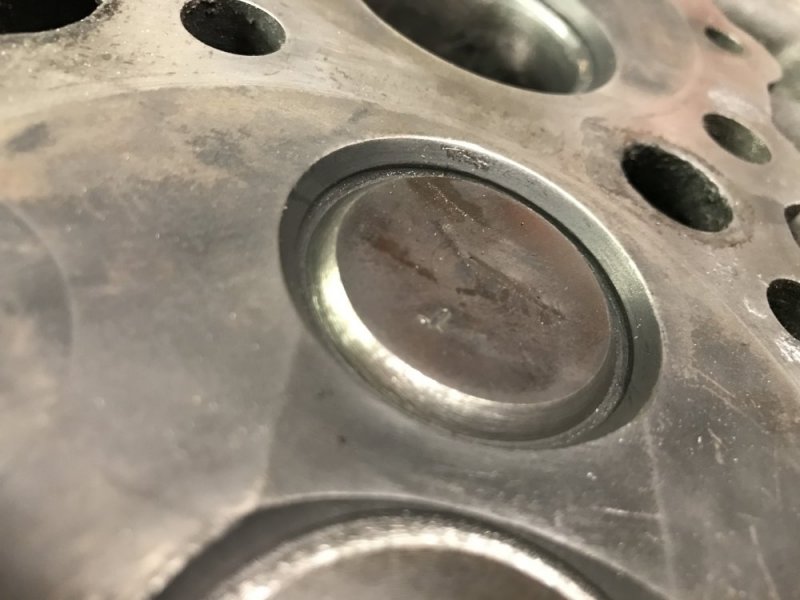
Once the porting was done I started on the next new thing to try - unshrouding the valves. I took a couple junk valves and ground a bevel on them. I did this to protect the seat and they also worked as a nice guide for the carbide.

7D527F9C-459A-4165-87CA-17CD9AF7F22E.jpeg62BCC38D-523A-4DAF-932F-62CD5E91345C.jpeg881E9766-88D0-403C-AF37-E808784DFC8E.jpeg6D6FF018-0C51-4A9B-AFA8-BBCC7789C19E.jpeg

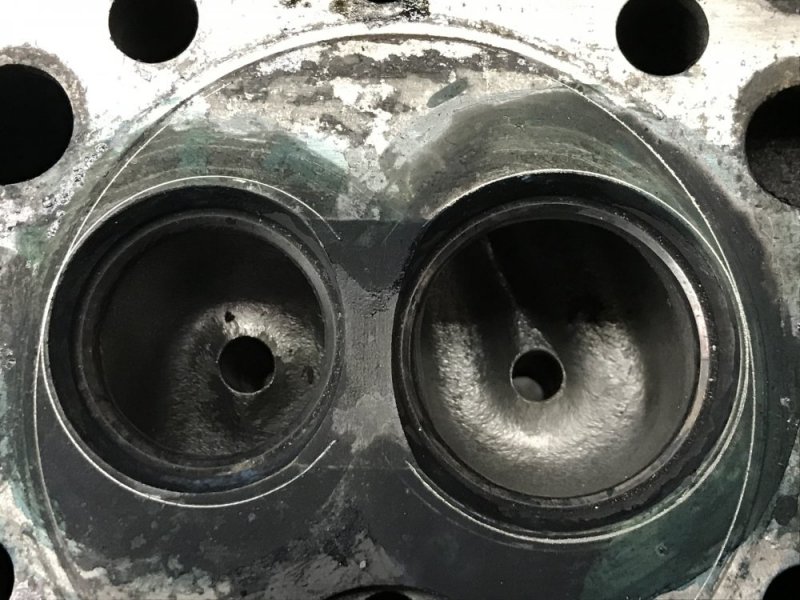
I first practiced on a bad head and it went well. So I took the heads and bolted them to a bare block so I could scribe the cylinder wall outline on the deck surface. After that I used templates to scribe concentric circles around the valve that were tangential to the cylinder outline to give me a guide for how far to grind.

2380566B-99FA-4101-9945-C2587AA6EBF2.jpeg
 
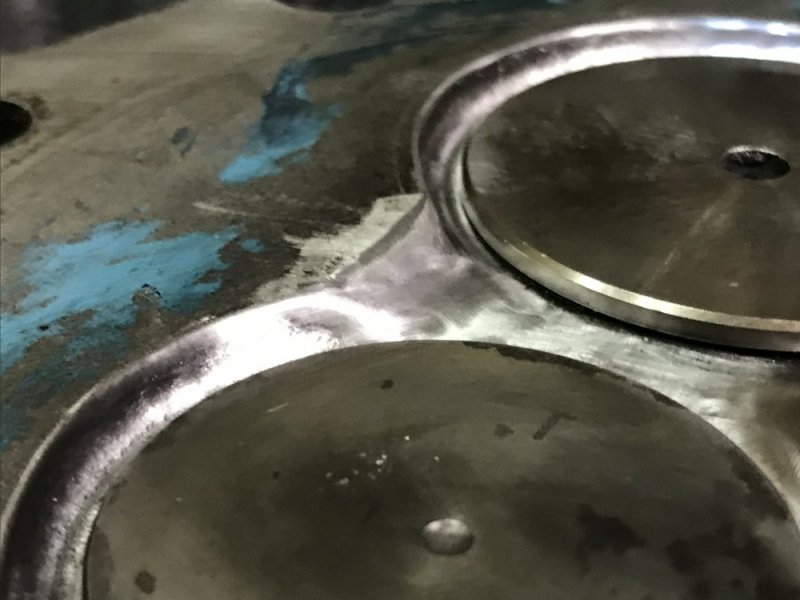
Here’s the unshrouding all done. Should help low lift flow a good amount. And it only increased the size of the combustion chamber 1.9cc, so I should be able to achieve a reasonable compression ratio still (for reference, I calculated that a +.010 head gasket adds 2.207cc to the cylinder).

5117EA89-6DDB-48BB-9BA3-2DC4408ACE6C.jpeg452F65F4-4A72-4C6F-8CA9-A66988B32977.jpegDC0CEF21-A002-41D6-B860-21E2FC0C6289.jpegB6ED18FA-F60F-48C7-88F5-40B456375A9F.jpegB9274EF0-D1A9-444C-87A3-C4471E76EA69.jpeg2C5F843F-4EAF-4F08-84BF-8B6852808B0B.jpeg

Now I have started lapping the valves. I’m also installing some upgraded valve springs I got from @Twisted Steel Performance , thanks for the nice pieces, Chris!

BE32E88A-2230-4C9E-B026-D2BA705958D2.jpeg
 
Just me but I stay away from the edge of the cylinder or fire ring, but if it doesn't cause trouble all is good right... Did you notice the difference in spring stiffness ??
This engine will be coming back apart in a couple years so I’ll be able to see how the gasket holds up at the edge.

I did notice! They sure make me want one of those fancy pneumatic compressors.
 
Am I seeing things right, Nate? You took metal off in the crack-prone area between the valves when you unshrouded them? I know these have the brass tubes installed, but isn't this tempting fate in a failure-prone area? Also, forgive my ignorance, CF heads?
 
Am I seeing things right, Nate? You took metal off in the crack-prone area between the valves when you unshrouded them? I know these have the brass tubes installed, but isn't this tempting fate in a failure-prone area? Also, forgive my ignorance, CF heads?
Yep, I did do that. It isn’t any closer to the channel than the sides so I figured I’d give it a try. Maybe it will be less of a heatsink? Maybe smoothing it will help? Maybe I effed up? I’m going to try it and find out.

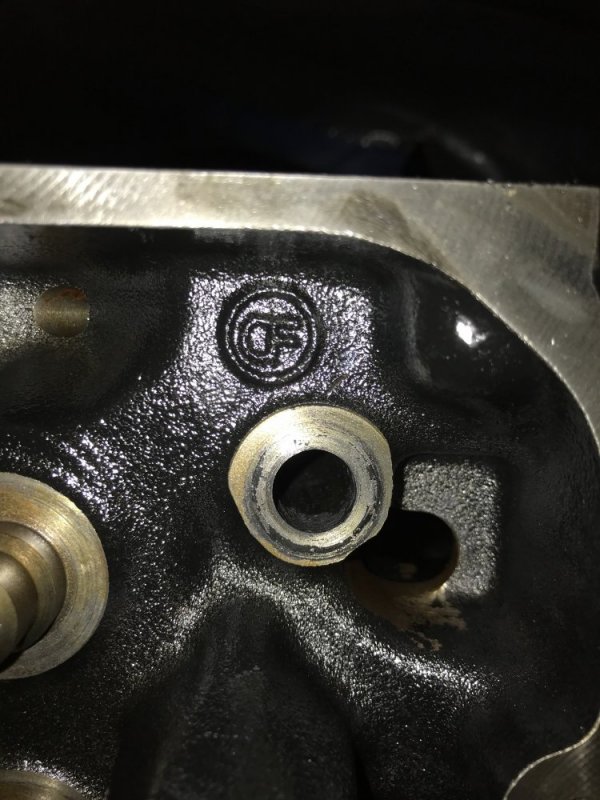
This is the casting mark that’s on the heads that came off the Hoe’s Optimizer and the one I got from the junkyard this winter.

9262393D-B780-47AE-8842-310BA1604847.jpeg

Not “GMD” like the GM heads and no Navistar mark.
 
Yep, I did do that. It isn’t any closer to the channel than the sides so I figured I’d give it a try. Maybe it will be less of a heatsink? Maybe smoothing it will help? Maybe I effed up? I’m going to try it and find out.

This is the casting mark that’s on the heads that came off the Hoe’s Optimizer and the one I got from the junkyard this winter.

View attachment 61687

Not “GMD” like the GM heads and no Navistar mark.
Yes, you are the great experimenter, aren't you? You, Will and WarWagon, the Three ExplodeItTeers!
I wonder whose foundry that is? And if this is indicative of all their heads, or if it was a bad run? Strange that the seats all cracked in essentially the same place on each set. That begs the question of is it a metallurgy issue, casting/machining issue or an operating condition issue. Hmmm.
 
Another hmmm. Does removing that section between the valves affect the flame front propagation interaction between the channel in the piston and the head and possibly the completeness of the combustion process and/or create hotspots? I guess time possibly can/will tell.
 
Yes, you are the great experimenter, aren't you? You, Will and WarWagon, the Three ExplodeItTeers!
I wonder whose foundry that is? And if this is indicative of all their heads, or if it was a bad run? Strange that the seats all cracked in essentially the same place on each set. That begs the question of is it a metallurgy issue, casting/machining issue or an operating condition issue. Hmmm.

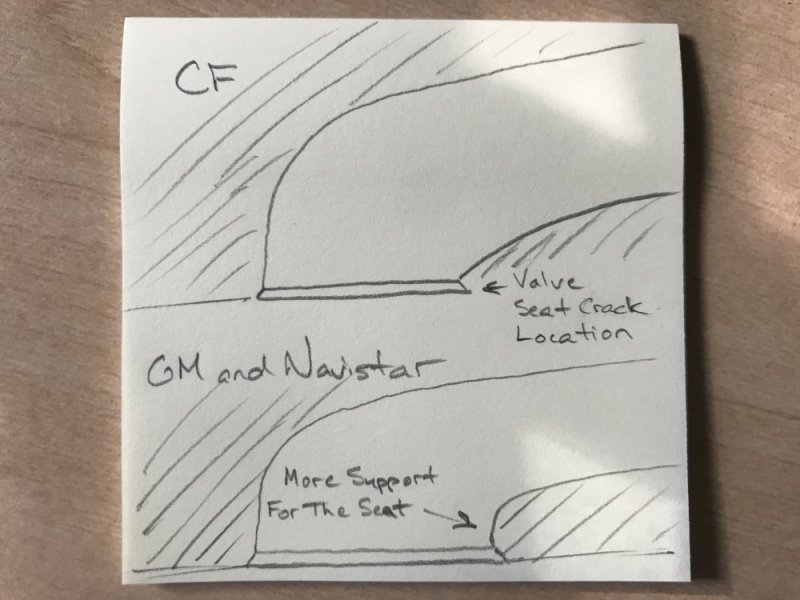
Here's my hypothesis on the CF heads: When I compared a CF head to a GM head and to a Navistar head, I noticed that the short side radius tapered away very quickly from the valve seat, whereas for the GM and Navistar heads have more meat under the seat, giving it more support. I'll attach a drawing shortly. Because of the less support and the valve seat being hardened, which makes it brittle, that could be the reason it's cracking there over time. It's just a theory.

Another hmmm. Does removing that section between the valves affect the flame front propagation interaction between the channel in the piston and the head and possibly the completeness of the combustion process and/or create hotspots? I guess time possibly can/will tell.

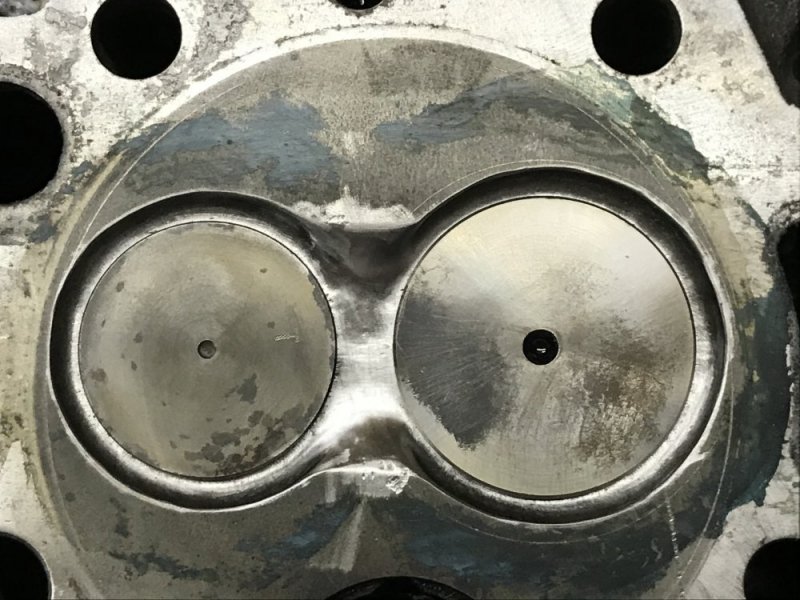
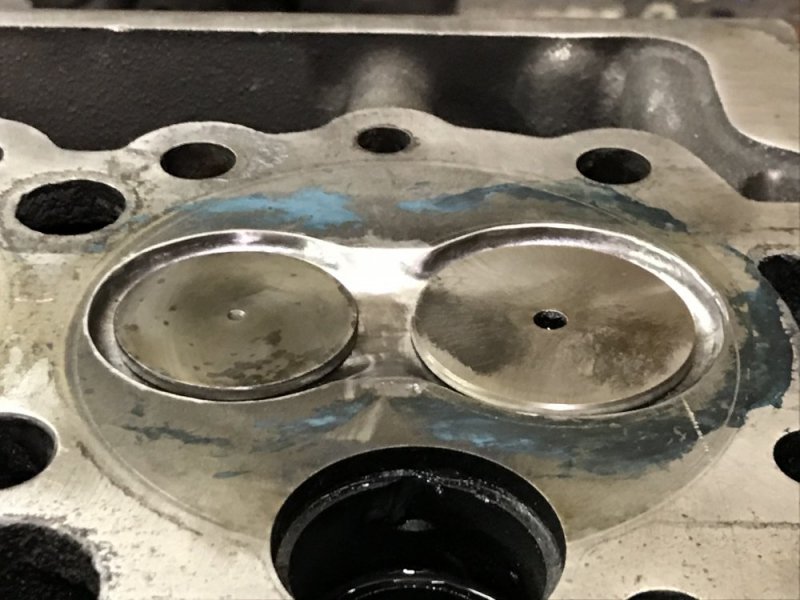
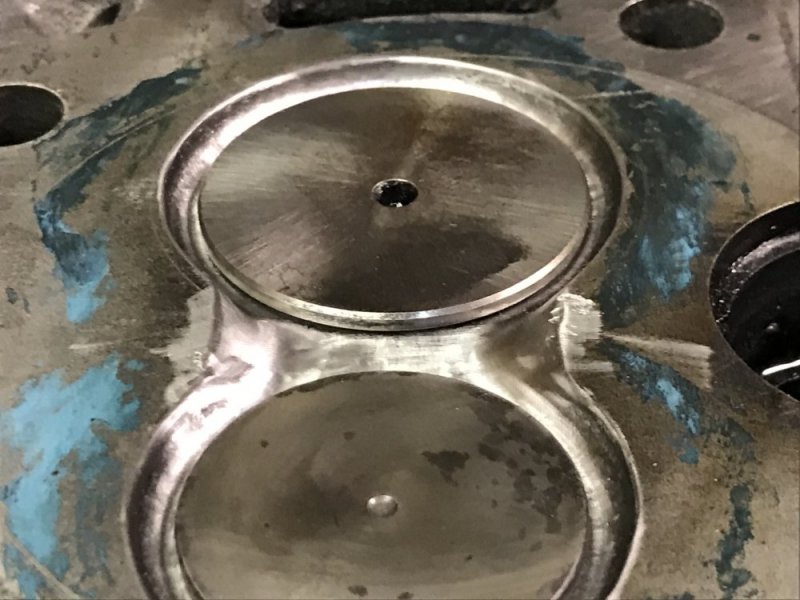
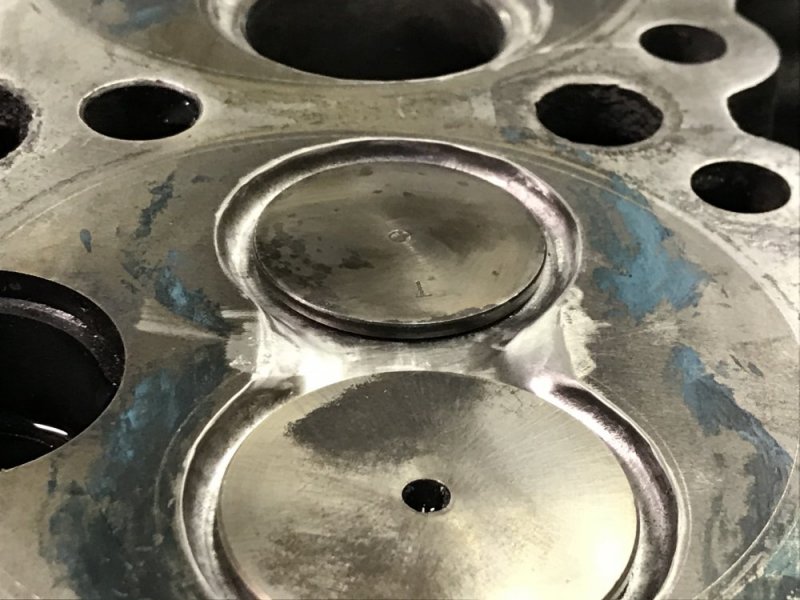
I wondered that as well. For my test chamber, I ran the unshrouding groove around 360 degrees so then I ended up with a ridge between the valves. This ridge seemed somewhat pointless, especially since it isn't a flat area of the combustion chamber when it's stock - it has a dish there from the factory for some reason. I don't know if it will make much difference either way, but since I was trying to unshroud the valves, this seemed to give it the maximum effect.
 
This is a drawing of the condition I noticed when comparing the 3 head castings. I noticed this port profile on all 4 CF castings I have. This drawing isn’t to scale, it’s just drawn to illustrate what I noticed since it’s hard to get a picture of the differences.

AAC7BA96-1472-4856-BB08-73E0EEF94688.jpeg

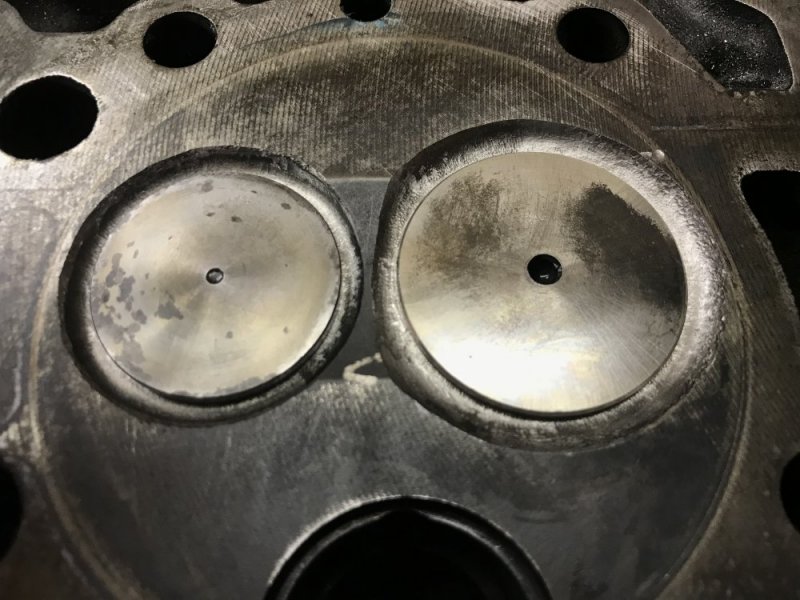
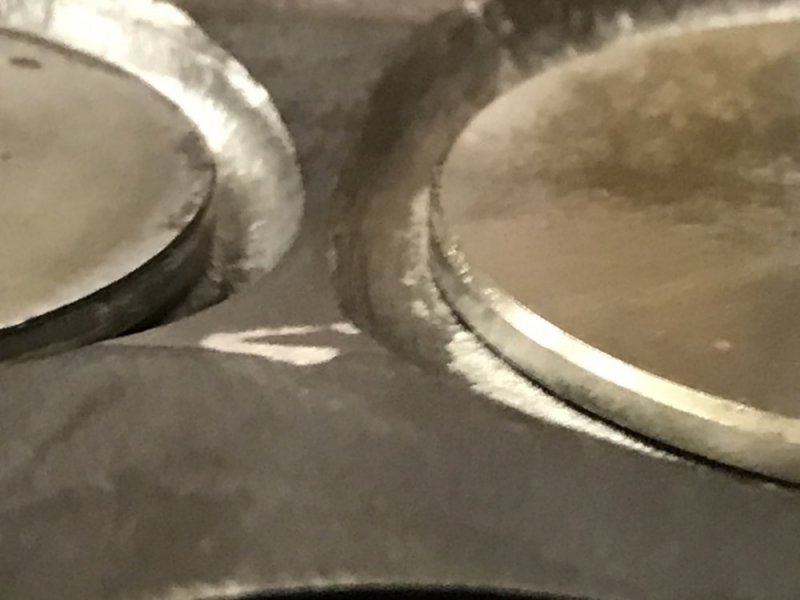
And here are pics of my test chamber where I left the ridge between the valves.

E3DA5BF8-2487-4F19-8EFA-9006F092A5AF.jpeg84CDD22D-ECC5-48FB-971C-3BF665503B57.jpeg
 
Back
Top