Paveltolz
Доверяй, но проверяй
Not a Raptor. Same company, Pure Flow AirDog makes them both though.
The Raptors have what appears to be a verticle pump and a single filter.

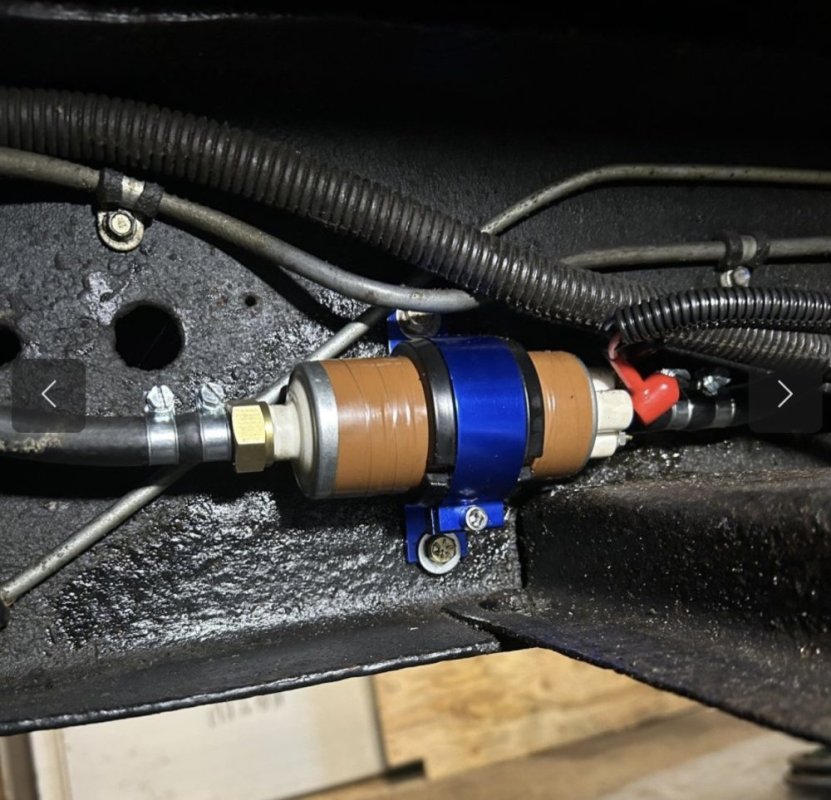
Original AirDog and the AirDog II's have what appears to be a horizontal pump and the dual filter setups with the Water Seperator and the Filter.

Pictured is the newer version of the DF-165 I'm running. Mine was probably made in 2008 and has the pressure adjustment screw on the filter mounting plate vs. the side of the motor like this one.
The Raptors have what appears to be a verticle pump and a single filter.
Original AirDog and the AirDog II's have what appears to be a horizontal pump and the dual filter setups with the Water Seperator and the Filter.
Pictured is the newer version of the DF-165 I'm running. Mine was probably made in 2008 and has the pressure adjustment screw on the filter mounting plate vs. the side of the motor like this one.