• Welcome to The Truck Stop! We see you haven't REGISTERED yet.

    Your truck knowledge is missing!
    • Registration is FREE , all we need is your birthday and email. (We don't share ANY data with ANYONE)
    • We have tons of knowledge here for your diesel truck!
    • Post your own topics and reply to existing threads to help others out!
    • NO ADS! The site is fully functional and ad free!
    CLICK HERE TO REGISTER!

    Problems registering? Click here to contact us!

    Already registered, but need a PASSWORD RESET? CLICK HERE TO RESET YOUR PASSWORD!

Pulling the ally from the 8.1l

tanman_2006

Just a farm kid...
Messages
5,694
Reaction score
935
Location
Seiling, Oklahoma
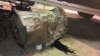
01 8.1l 5 speed Allison .

Pulled the tcase and rear housing from the Allison (gave the hired hand vague directions and paying for it).

Should I unbolt the trans from the bellhousing or go for the bellhousing from the engine?

At what point do I unbolt the torque converter from the flex plate/fly wheel?

I have never pulled an auto tranny and don't want to screw up anything worse than it is. I will also be doing engine rear main seal.

I would also be interested I any literature on how to assemble an Allison. Step by step kinda stuff.

Source Unknown
 
suru9u4y.jpg


Rear housing of trans with some Guts attached and tcase on the bench.

Source Unknown
 
It's to late now, but NEVER EVER PULL THE REAR HOUSING OFF AN ALLISON IN THE TRUCK! Now you have a REAL mess to deal with as the trans has to come out and completely disassembled to get all the torringtons back into place. As to pulling it, I know with the DURAMAX you have to pull the starter to get the torque converter bolts out, and they MUST come out before the trans. And to pull the trans you have 9 bolts, 2 going from the engine side back to the bellhousing, and 7 into the block adapter.
 
Yeah, I already explained to our comrad that now we get to learn how to assemble an allison. :mad2:

I'll work on the converter bolts today.

Thanks
 
I would strongly suggest getting a manual for it as some of the thrust washers can be confusing to get back in correctly. Also there is an error in the shop manuals for one of the thrust washer directions on one page, so you have to be extra careful when installing them to make sure that they go in so as to not make the metal go against metal in opposite directions. Also it is always a good idea to make a fixture to mount it to an engine stand as the ALLISON is pretty heavy when assembled fully.
 
What manual would you suggest? I will scour the earth for one lol. I have a buddy that is head mechanic at the dealer but he has never taken an allison apart, just removed and installed GM Goodwrench or Take outs, maybe he has a book I can borrow.

What do you mean by a fixture? I thought they went together with parts dropped in from the torque converter end, is that wrong? I have an idea for a stand that way but will need to build a stand if it needs to go together on its side.

I know I have hear you say it needs to be done in a clean environment so I am scrubbing the work bench, getting a tarp to lay out and a cover for over night. I have a parts cleaner bucket and I have plenty of ATF to lube parts while assembly. Boxes of rubber gloves too.
 
ATSG makes a decent shop manual for the ALLISON. The fixture bolts onto where one of the PTO covers bolts on. I took a piece of pipe the size of my engine stands hole, and welded on a piece of 3/16" plate to it that was drilled and sized like one of the PTO covers. The ALLISON has to be built from the rear section, then flipped over and finished from the front. The thing is it MUST be assembled standing straight up and down, any other way and the torringtons will not stay in place.
 
Just for reference for anyone wondering. We pulled 9 studs (actually 8,one was missing) going through bellhousing and threaded into engine. There were 6 torque converter bolts, 3 bolts holding the inspection plate on the front of the trans, and 2 starter bolts. Numerous lines and electrical plugs mounted to the trans. We also had to pull the pass side exhaust pipe to get more room to give Allison a reach around. What a canky Ol Beotch!

Took mostly 13mm and 15mm assorted tools.

Source Unknown
 
Back
Top