While you browse through this, keep one thing in mind, my motto is “if it's worth doing it's worth over doing”
This is my personal P400 build, this was a planed purpose built motor, this won't be a long drawn out read, I will give a short list of some of the details. This is my last planed personal build for “ Black Betty “. I decided to take the build as far as possible and update everything I knew how as well as bring a little new technology into this “ dinosaur” motor when possible and maybe put some of my past background in Alcohol motors to use and maybe inspire others to embrace new technology and think outside the box.
This build is NOT an attempt at the highest HP or the baddest 6.5 around, it's going into a 93 Dually for heavy towing and retirement travels, this will be a sustainable workhorse, I attempted to move the torque curve as well as maximize the amount of torque and maybe the HP followed.
I am publishing this merely for reading and ideas for others.
I consider the heads the lungs of a motor, the better it can breath the stronger the heart will be with less stress. I flowed a new, stock P400 head and my personal set of heads ( stage 3 ) to compare, flow data was captured every .050” lift on both heads to ensure a true comparison, charts are posted in this thread as well. NOTE – my personal set are as far from stock the castings allow.. the flowing of stock vs my stage 3 heads is only to show the possibility's that can be gained in the lungs of the motor.
Their will be more pics from me than comments so enjoy...
For those that don't know, “ Black Betty “ is a 1993 Chevy Dually long bed, 5 speed manual, black with sand interior, near perfect condition, this should be my last truck and if all goes well it will be my grandsons one day.
For starters, I sent the entire disassembled motor off and had everything Cryogenic Treated, this is said to give strength to the parts and make things more durable and stable. I purchased all new bolts due to everything being of the TTY version on this motor.
Below is the short version of what was done.
Now, I started with a new crate P400 purchased a few years ago with the intent to do exactly what I did, everything I could do and make a dependable heavy tow rig ready for retirement trips, yes, I'm close to that age...
Intake Manifold
I think the stock manifold works well for stock motors and for what it's designed for, however I wanted something a little better and being a fabricator I wanted something my hands made so I designed something different that is able to not only look good but also complement the motor.
Turbo Headers
They are in the works now but not ready, they will be shown at a later time..
The Block
After the cryogenic treatment, I had my machine shop, clean, check all the measurements even tho this was a new never run motor, and I provided new Ceramic coated cam bearings to replace the stock bearings. It was found the decks were not true with the crank bore so both decks were machined with a finish surface for MLS head gaskets.
Rods & Pistons
I spent some time on the cnc milling machine and did a little machining to lower the compression ratio a bit and include the needed valve pockets this motor would need using split ratio rockers combined with cam changes. Once that was complete I gave the rods a Thermal Dispersant/Oil Shedding coating to aid in cooling. The pistons were balanced then they got my 3 sided treatment, Thermal Barrier tops, Molybdenum Lubricant skirts, and Thermal Dispersant underside, all to keep as much heat out of the parts as possible and extend longevity, I also ditched the stock ring set and purchased a full Total Seal gapless ring set. The coating's used provide less heat growth and is a self lubricant and becomes very slick and durable.
Rotating Assembly
Back to the shop everything went, the assembly was balanced to race specs, weight was added to the crank, I did not want to go the easy path and remove weight.
Cam
I found a company that was willing and able to produce a cam to my specs. One major change was changing the LSA from 110 to 106 along with duration changes.
Heads
I consider the heads the lungs of a motor, the better it can breath the stronger the heart will be with less stress. I flowed a new, stock P400 head and my personal set of heads ( stage 3 ) to compare, flow data was captured every .050” lift on both heads to ensure a true comparison, charts are posted in this thread as well. NOTE – my personal set are as far from stock the castings allow.. the flowing of stock vs my stage 3 heads is only to show the possibility's that can be gained in the lungs of the motor.
I had the largest intake & exhaust valves installed the heads will accept, then off to the cnc, I machined around the seats to maximize flow and un-shroud the valves. A lot of time was spent on a milling machine in all the runners, then the hand work started in the runners on porting. Next I cut all the valve seal bosses so the more common size seals could be used. Once all the work was complete it was time for a 3 angle valve job and cutting the gasket surfaces to match the decks. I filled the EGR port to keep even more heat out of the head. The runners were coated in a “ TL Heat Stop Thermal Barrier “ this has been proven to prevent exhaust heat from moving into the head. The chambers were coated with CBX a Thermal Barrier that reflects heat, the lower portion of the exhaust valves also got this coating, the upper portion of the valves got a dry film lubricant/oil holding coating to make them slick. I left the precups alone but did apply a Thermal Barrier in the injector hole under the cups to reflect heat outward.
Other Internal Work
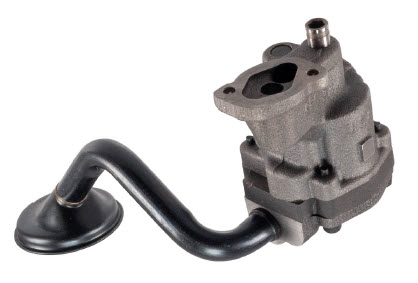
I noticed during tear down the bearing clearances were on the loose side from what I like but I had planed to use new anyway. I coated all main & rod bearings and set them aside for later. I also had a new DSG timing gear drive, it got coated as well, The oil pump was taken apart, a Molybdenum Lubricant coating went on the gears and inside while a Thermal Dispersant went on the outside as well as modifying to produce more pressure and flow. Both main & rod bearing clearances were set at .0018 - .0020”.
Crankshaft
The P400 has a forged crankshaft, it went to cryo treat with all the other parts. Before the balancing I removed the lumps & bumps and polished it to a mirror finish. After balancing I applied a Thermal Dispersant/oil shedding coating.
Rockers – Valve Springs – Pushrods – Lifters
I consulted a valve spring manufacture to find optium valve spring for this build, this motor has different springs on the intake & exhaust, I did away with the rotators, had a set of spring cups and retainers made for both intake & exhaust spring as neither have the same measurements. I coated the rocker shafts and fitted them to the heads. In the pushrod area, stock wasn't going to work, (they weren't strong enough and they weren't the correct length) I again consulted a well known pushrod manufacture to come up with a pushrod, I landed on a 7/16 pushrod that should keep the valve geometry stable. I also chose to take full advantage of the valve lift throughout the rpm range, so I purchased a set of “slow bleed” HD lifters, these are a bit different in that they act like solid lifters but are still hyd rollers, and the rocker's are 2 different ratios.
Fueling
I purchased a NEW Ceramic Injection pump, had a shop in Texas perform major internal work, the result is a DB2 that puts out 161cc's and moved the governor to 4500rpm's, a new matching set of true Bosch marine injectors compliment the system.
Turbo
A Holset HE351VE turbo and a “ Banshee “ controller will be used, the turbo has a few modifications as well, coated internally and coated veins to prevent soot buildup, and different wheels than a stock unit uses.
External
I gave as much of the external portion of the motor a Ceramic coating as possible, brackets got a chrome like coating, other parts got Thermal Dispersants, some got Heat barriers, all in a attempt to keep heat under control and keep things corrosion free for many years to come.
Further truck mods include, rear disc brakes, some frame strengthening, CAC, etc... This truck will spend most of it's time pulling a large trailer, western US, Alaska is on our bucket list, and only a few years till retirement traveling time...
So, that's a quick run down, hope you enjoy the pictures..
This is my personal P400 build, this was a planed purpose built motor, this won't be a long drawn out read, I will give a short list of some of the details. This is my last planed personal build for “ Black Betty “. I decided to take the build as far as possible and update everything I knew how as well as bring a little new technology into this “ dinosaur” motor when possible and maybe put some of my past background in Alcohol motors to use and maybe inspire others to embrace new technology and think outside the box.
This build is NOT an attempt at the highest HP or the baddest 6.5 around, it's going into a 93 Dually for heavy towing and retirement travels, this will be a sustainable workhorse, I attempted to move the torque curve as well as maximize the amount of torque and maybe the HP followed.
I am publishing this merely for reading and ideas for others.
I consider the heads the lungs of a motor, the better it can breath the stronger the heart will be with less stress. I flowed a new, stock P400 head and my personal set of heads ( stage 3 ) to compare, flow data was captured every .050” lift on both heads to ensure a true comparison, charts are posted in this thread as well. NOTE – my personal set are as far from stock the castings allow.. the flowing of stock vs my stage 3 heads is only to show the possibility's that can be gained in the lungs of the motor.
Their will be more pics from me than comments so enjoy...
For those that don't know, “ Black Betty “ is a 1993 Chevy Dually long bed, 5 speed manual, black with sand interior, near perfect condition, this should be my last truck and if all goes well it will be my grandsons one day.
For starters, I sent the entire disassembled motor off and had everything Cryogenic Treated, this is said to give strength to the parts and make things more durable and stable. I purchased all new bolts due to everything being of the TTY version on this motor.
Below is the short version of what was done.
Now, I started with a new crate P400 purchased a few years ago with the intent to do exactly what I did, everything I could do and make a dependable heavy tow rig ready for retirement trips, yes, I'm close to that age...
Intake Manifold
I think the stock manifold works well for stock motors and for what it's designed for, however I wanted something a little better and being a fabricator I wanted something my hands made so I designed something different that is able to not only look good but also complement the motor.
Turbo Headers
They are in the works now but not ready, they will be shown at a later time..
The Block
After the cryogenic treatment, I had my machine shop, clean, check all the measurements even tho this was a new never run motor, and I provided new Ceramic coated cam bearings to replace the stock bearings. It was found the decks were not true with the crank bore so both decks were machined with a finish surface for MLS head gaskets.
Rods & Pistons
I spent some time on the cnc milling machine and did a little machining to lower the compression ratio a bit and include the needed valve pockets this motor would need using split ratio rockers combined with cam changes. Once that was complete I gave the rods a Thermal Dispersant/Oil Shedding coating to aid in cooling. The pistons were balanced then they got my 3 sided treatment, Thermal Barrier tops, Molybdenum Lubricant skirts, and Thermal Dispersant underside, all to keep as much heat out of the parts as possible and extend longevity, I also ditched the stock ring set and purchased a full Total Seal gapless ring set. The coating's used provide less heat growth and is a self lubricant and becomes very slick and durable.
Rotating Assembly
Back to the shop everything went, the assembly was balanced to race specs, weight was added to the crank, I did not want to go the easy path and remove weight.
Cam
I found a company that was willing and able to produce a cam to my specs. One major change was changing the LSA from 110 to 106 along with duration changes.
Heads
I consider the heads the lungs of a motor, the better it can breath the stronger the heart will be with less stress. I flowed a new, stock P400 head and my personal set of heads ( stage 3 ) to compare, flow data was captured every .050” lift on both heads to ensure a true comparison, charts are posted in this thread as well. NOTE – my personal set are as far from stock the castings allow.. the flowing of stock vs my stage 3 heads is only to show the possibility's that can be gained in the lungs of the motor.
I had the largest intake & exhaust valves installed the heads will accept, then off to the cnc, I machined around the seats to maximize flow and un-shroud the valves. A lot of time was spent on a milling machine in all the runners, then the hand work started in the runners on porting. Next I cut all the valve seal bosses so the more common size seals could be used. Once all the work was complete it was time for a 3 angle valve job and cutting the gasket surfaces to match the decks. I filled the EGR port to keep even more heat out of the head. The runners were coated in a “ TL Heat Stop Thermal Barrier “ this has been proven to prevent exhaust heat from moving into the head. The chambers were coated with CBX a Thermal Barrier that reflects heat, the lower portion of the exhaust valves also got this coating, the upper portion of the valves got a dry film lubricant/oil holding coating to make them slick. I left the precups alone but did apply a Thermal Barrier in the injector hole under the cups to reflect heat outward.
Other Internal Work
I noticed during tear down the bearing clearances were on the loose side from what I like but I had planed to use new anyway. I coated all main & rod bearings and set them aside for later. I also had a new DSG timing gear drive, it got coated as well, The oil pump was taken apart, a Molybdenum Lubricant coating went on the gears and inside while a Thermal Dispersant went on the outside as well as modifying to produce more pressure and flow. Both main & rod bearing clearances were set at .0018 - .0020”.
Crankshaft
The P400 has a forged crankshaft, it went to cryo treat with all the other parts. Before the balancing I removed the lumps & bumps and polished it to a mirror finish. After balancing I applied a Thermal Dispersant/oil shedding coating.
Rockers – Valve Springs – Pushrods – Lifters
I consulted a valve spring manufacture to find optium valve spring for this build, this motor has different springs on the intake & exhaust, I did away with the rotators, had a set of spring cups and retainers made for both intake & exhaust spring as neither have the same measurements. I coated the rocker shafts and fitted them to the heads. In the pushrod area, stock wasn't going to work, (they weren't strong enough and they weren't the correct length) I again consulted a well known pushrod manufacture to come up with a pushrod, I landed on a 7/16 pushrod that should keep the valve geometry stable. I also chose to take full advantage of the valve lift throughout the rpm range, so I purchased a set of “slow bleed” HD lifters, these are a bit different in that they act like solid lifters but are still hyd rollers, and the rocker's are 2 different ratios.
Fueling
I purchased a NEW Ceramic Injection pump, had a shop in Texas perform major internal work, the result is a DB2 that puts out 161cc's and moved the governor to 4500rpm's, a new matching set of true Bosch marine injectors compliment the system.
Turbo
A Holset HE351VE turbo and a “ Banshee “ controller will be used, the turbo has a few modifications as well, coated internally and coated veins to prevent soot buildup, and different wheels than a stock unit uses.
External
I gave as much of the external portion of the motor a Ceramic coating as possible, brackets got a chrome like coating, other parts got Thermal Dispersants, some got Heat barriers, all in a attempt to keep heat under control and keep things corrosion free for many years to come.
Further truck mods include, rear disc brakes, some frame strengthening, CAC, etc... This truck will spend most of it's time pulling a large trailer, western US, Alaska is on our bucket list, and only a few years till retirement traveling time...
So, that's a quick run down, hope you enjoy the pictures..
.jpeg")
.jpeg")
.jpeg")
.jpeg")
.jpeg")
.jpeg")

.jpeg")
.jpeg")
.jpeg")
.jpeg")
.jpeg")

.jpeg")
.jpeg")
.jpeg")
.jpeg")

.jpeg")
.jpeg")

.jpeg")
.jpeg")

.jpeg")