stacks04
McLovin
here are the pics. OK this is for floor shift t-case. also i noticed we never got the actual pics of the plate. it simply drops on the pump. it has the cut outs to match the pump cut outs and you cant screw it up. if you put it on backwards you will know it. see a pic of the plate here. any questions please ask and i will respond promptly. if you need immediate assistance check the emergency contact list for my number. only call if your in the middle of the job and are confused. i will not answer unknown numbers so leave a message and i will call you right back. the captions are for the photos below them.
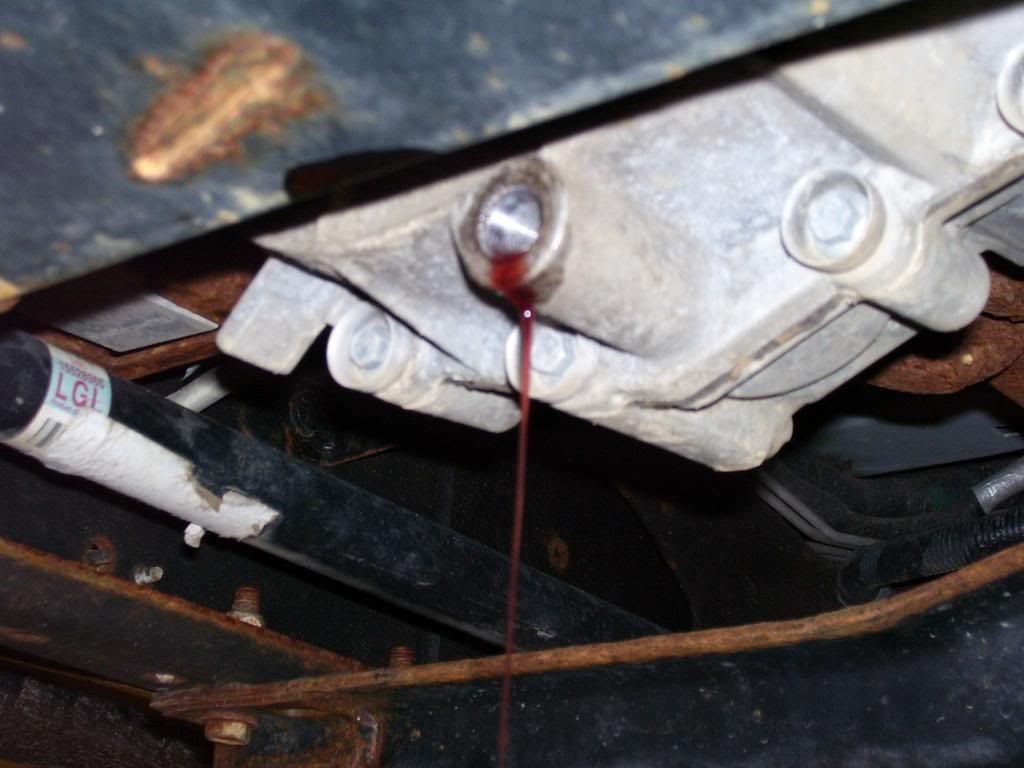
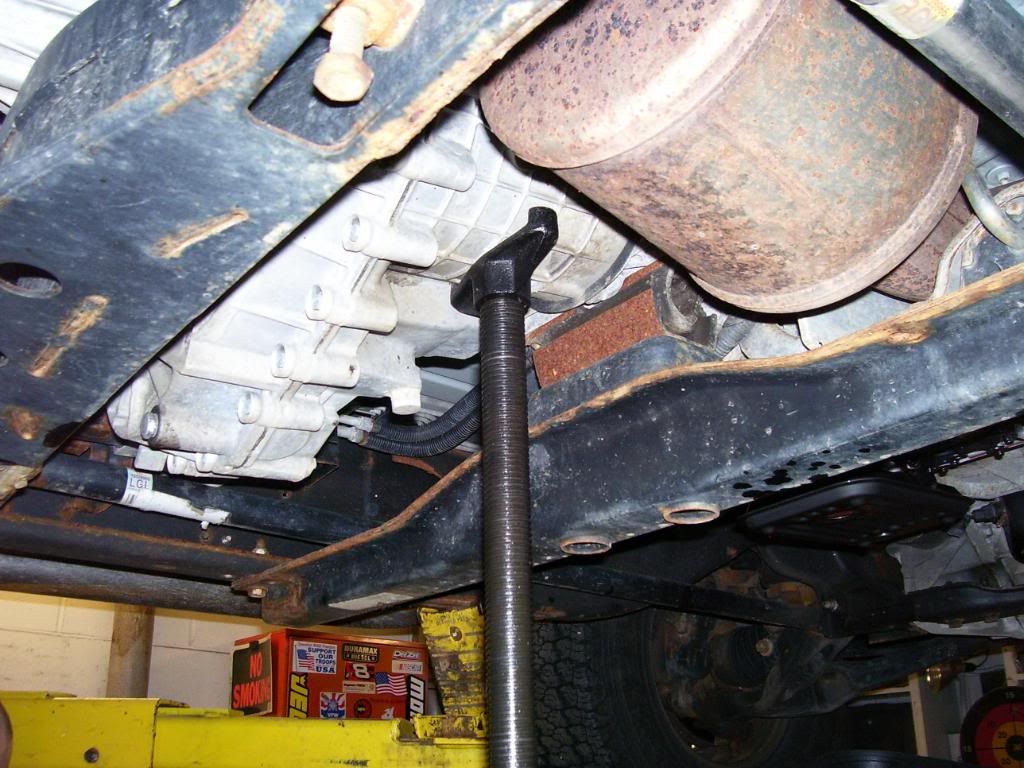
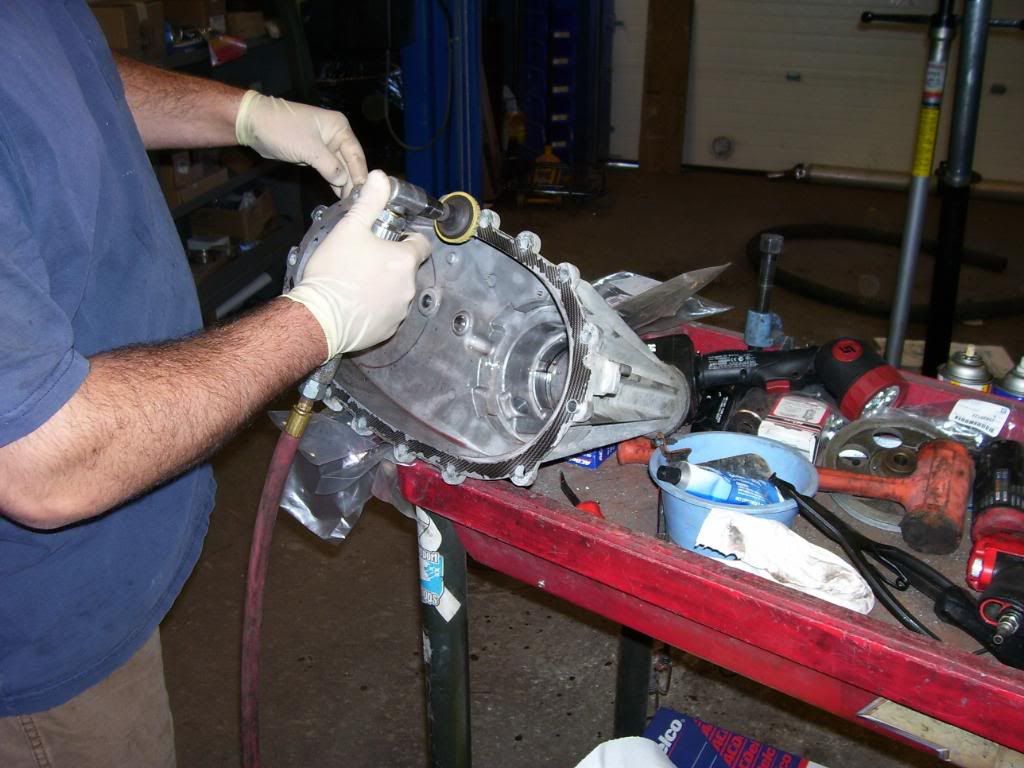
this is the fluid draining. use an 18mm wrench to remove. i usually use some pipe tape to reseal it although it is not needed. they are a pipe style fitting and seal on compression. don't over tighten them though. very soft.
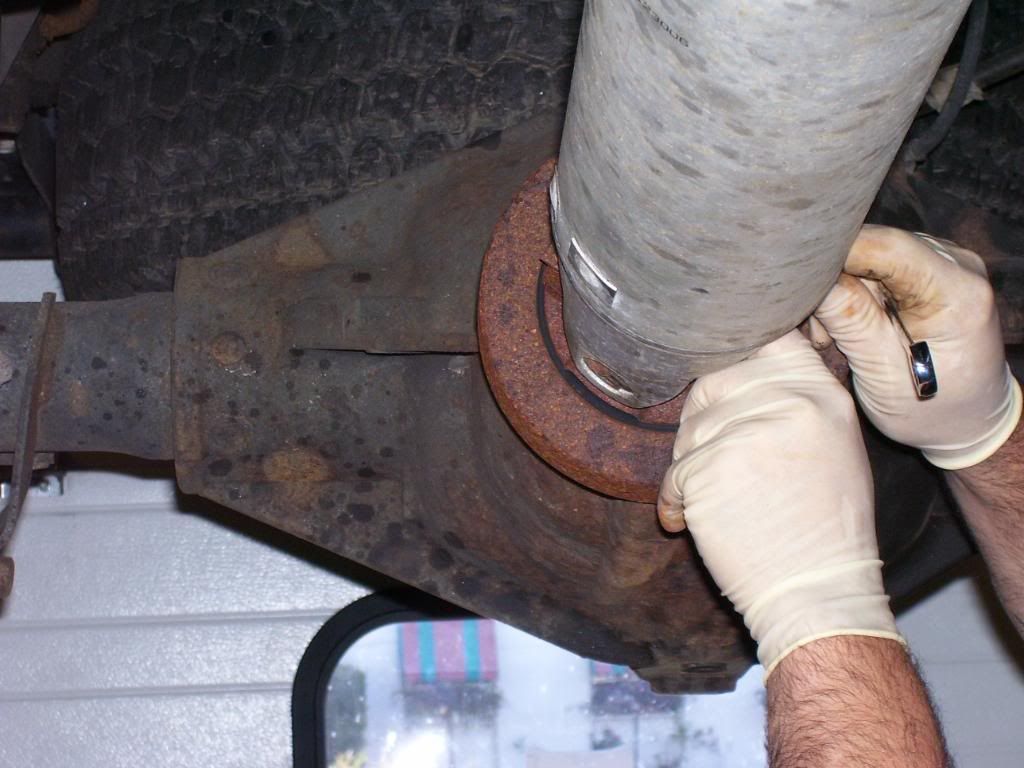
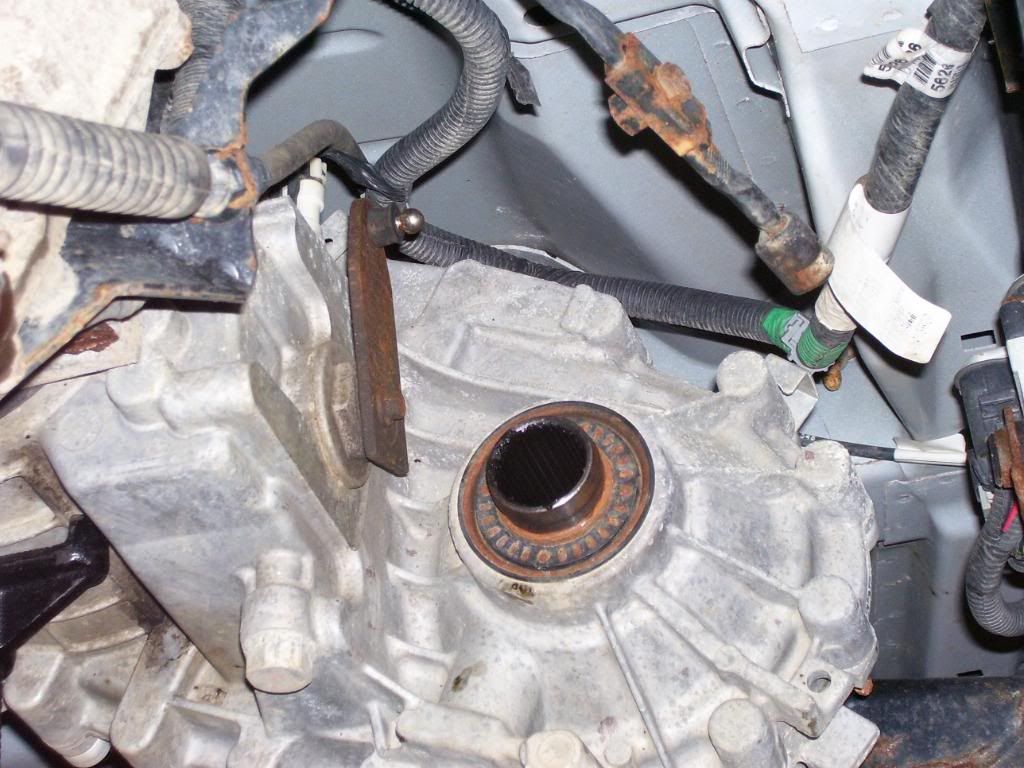
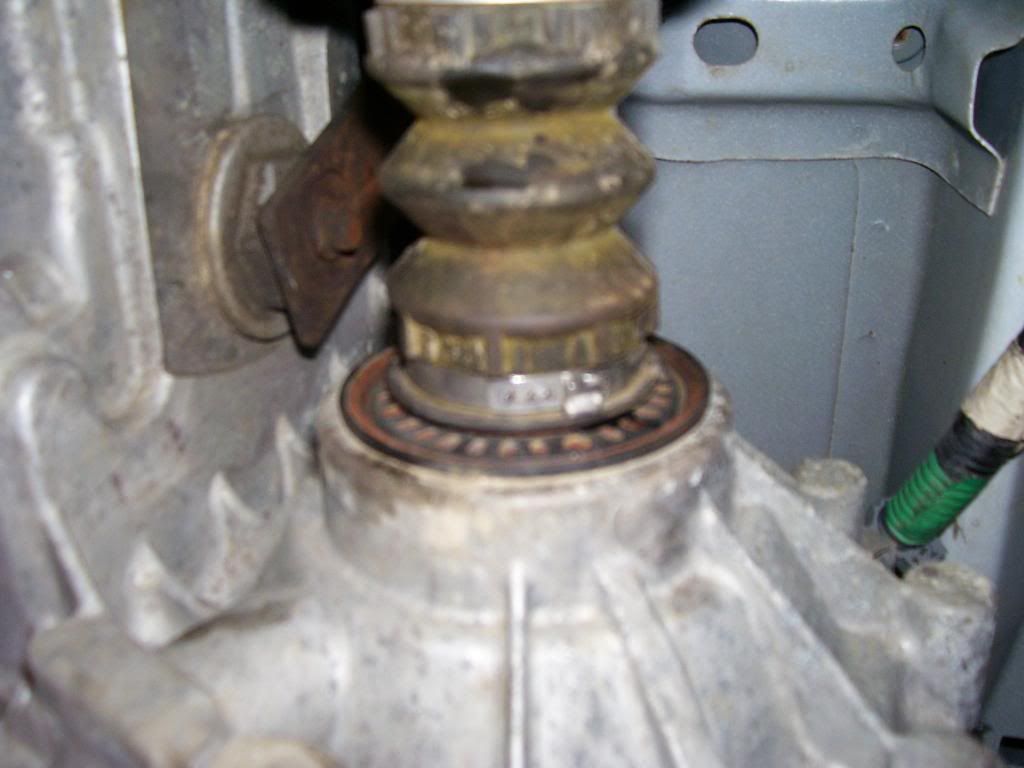
this is the removal of the 4-11mm bolts holding the front driveshaft to the front pinion. once you have them out use a prybar to pop the ujoint out of the pinion. be careful not to pop the caps off and lose all the needle bearings.

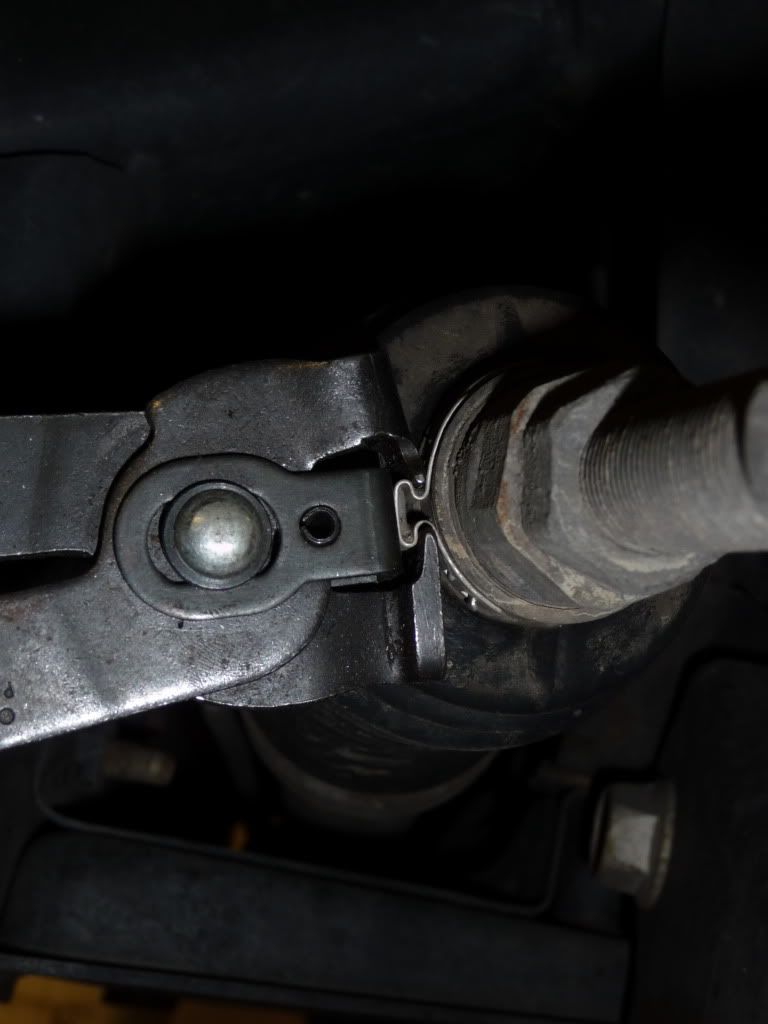
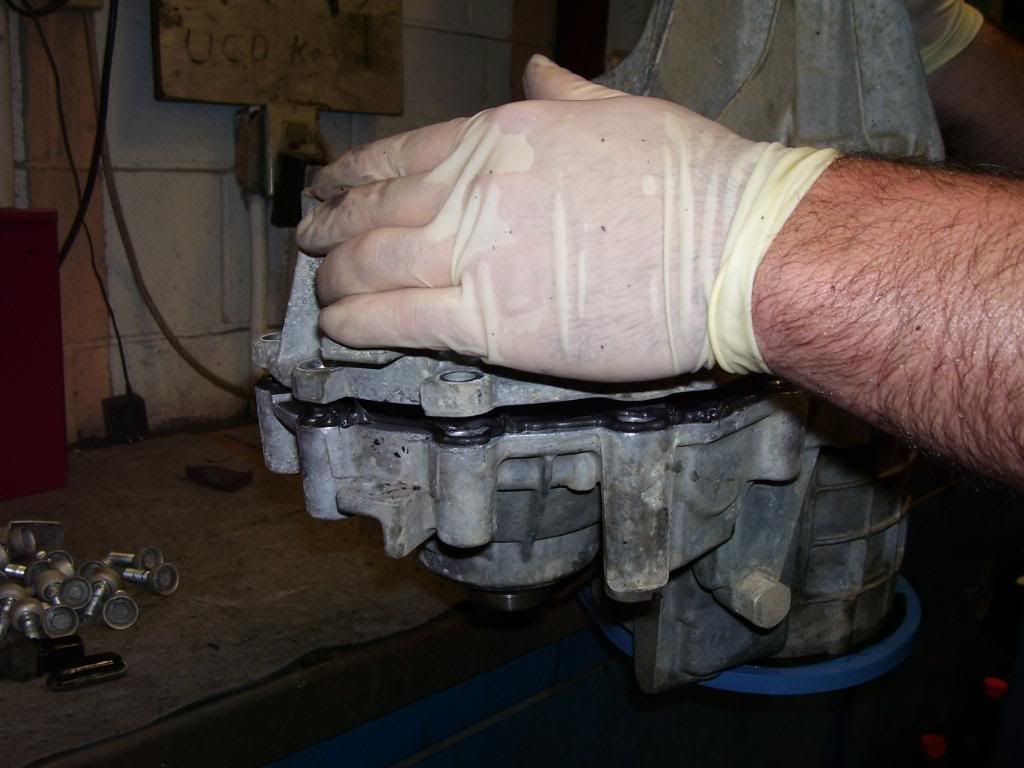
this is the clamp which holds the boot on the output shaft of the t case. the clamp is reusable if you take it off nicely and have the tool to re tighten it.
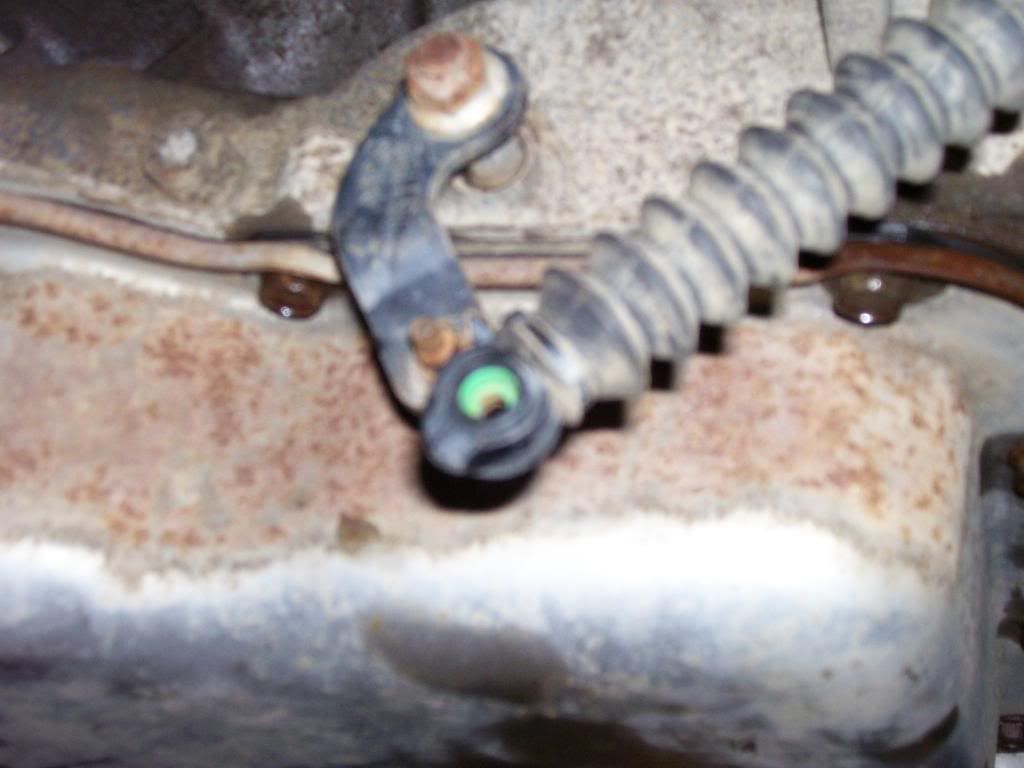
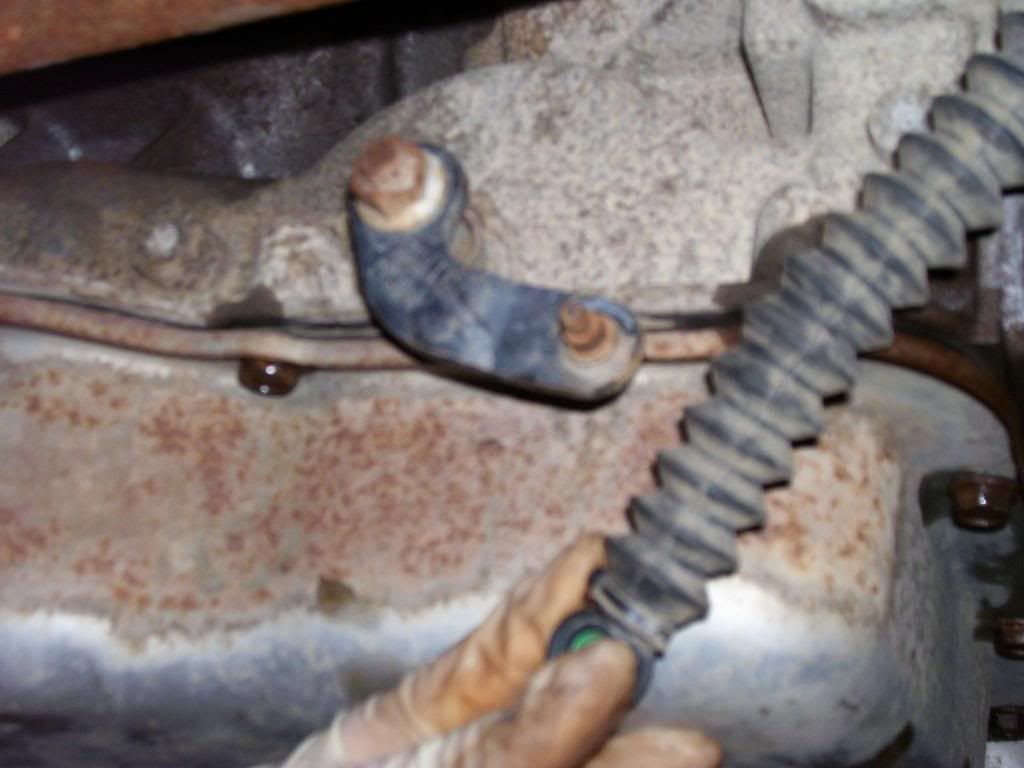
just a view of the shift cable off the gear selector lever on the trans. it is a clip type so a simple pry tool to pop it off. once you move the cable, move the selector back 2 clicks to get the trans in neutral. it aids in removal of the rear driveshaft bolts.
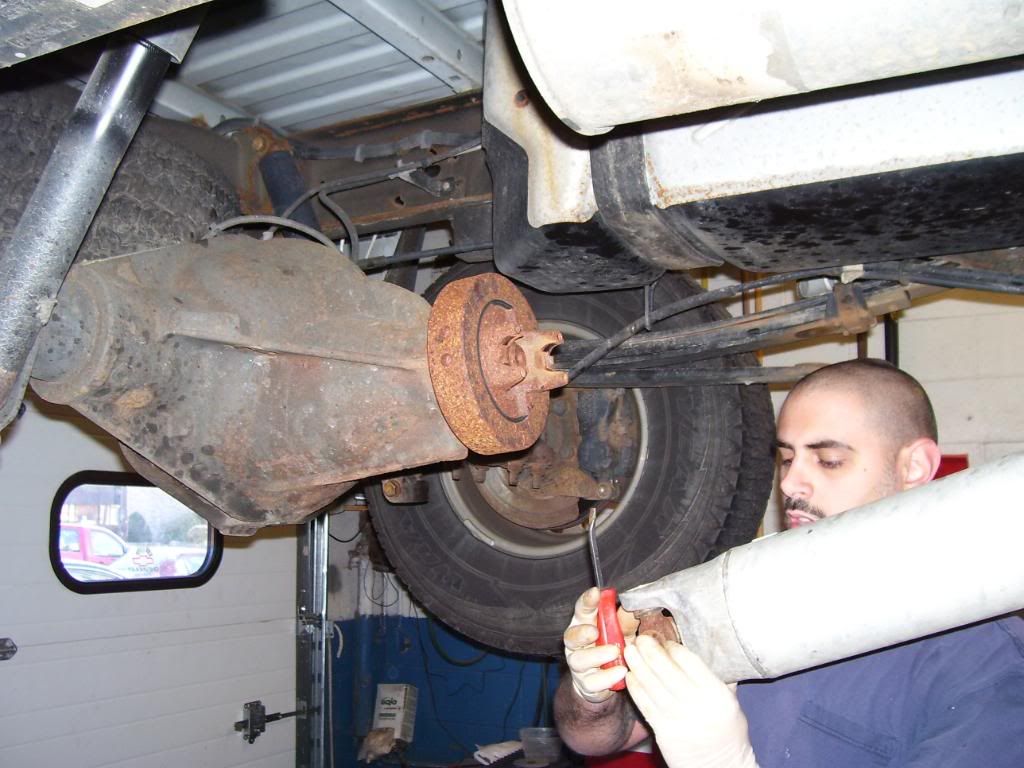
removal of the rear driveshaft. same principal applies as the front d-shaft, just bigger. same 4-11 mm bolts though.
my ugly mug , but the driveshaft out of the pinion. this one was a bit prickish. i need the big bar
t-case rear half no driveshaft.
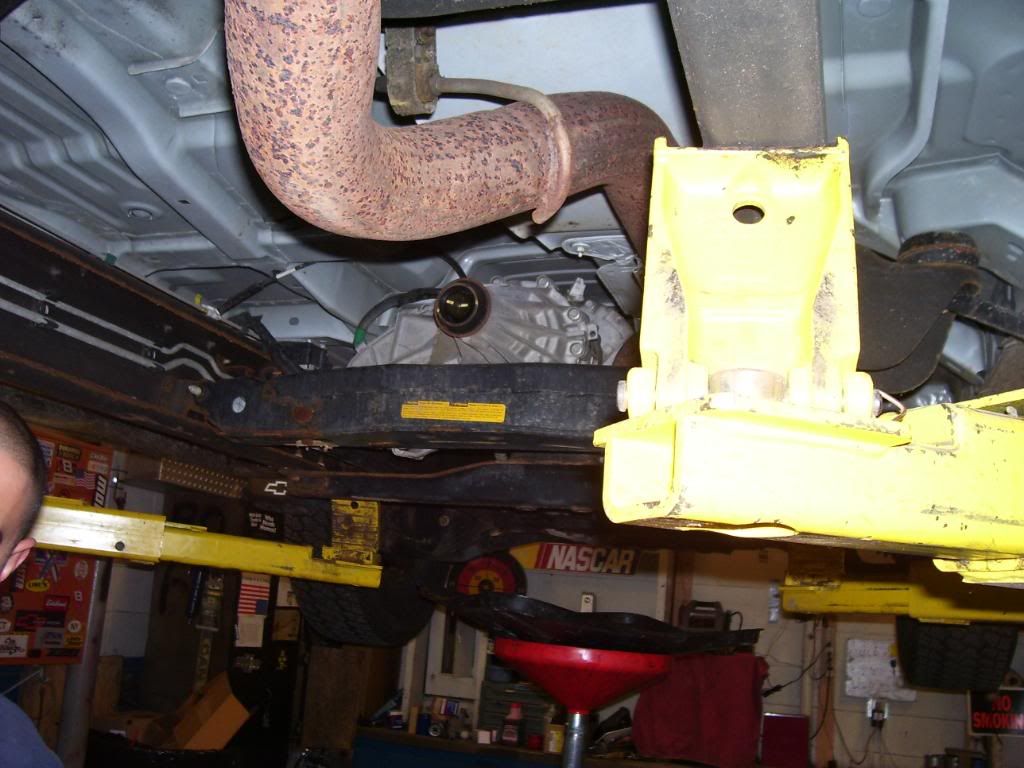
just a photo of jack placement to remove the trans crossmember. either there or on the trans adapter housing. if you put it on the t-case you will have to move it in order to remove the case. so it is preferable if you have the option first to put it on the trans adapter. i guess it depends on your specific situation while doing the job.
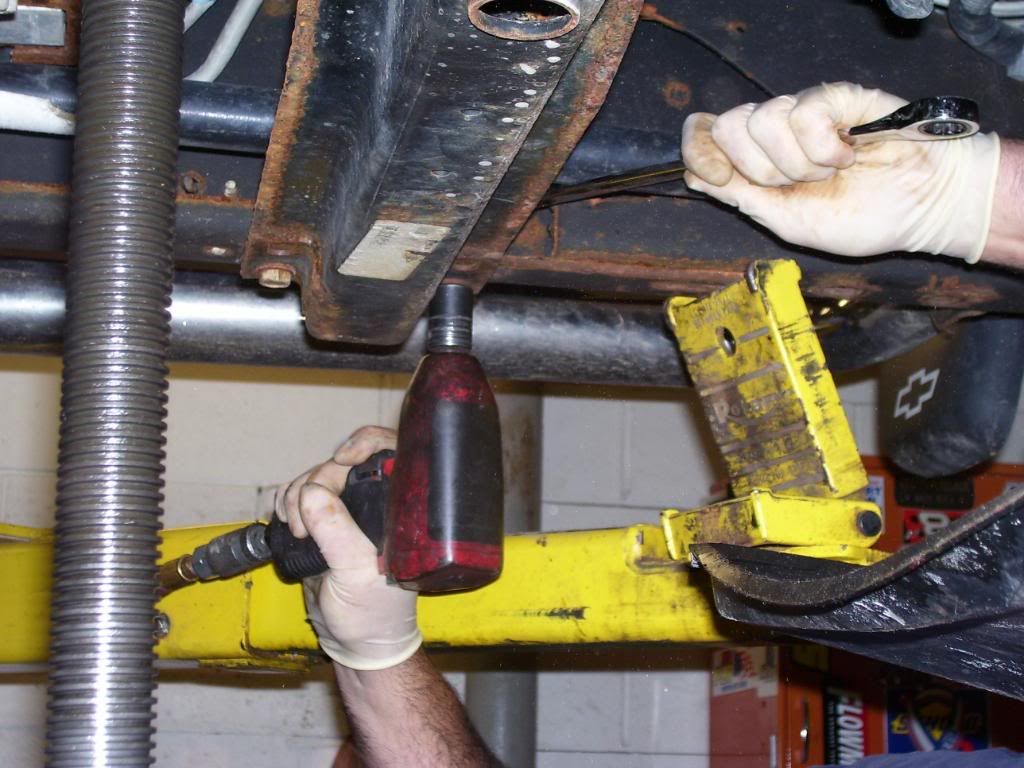
i am loosening the 2 15mm nuts holding the cross member to the trans mt. it is best to remove the 4 outer 18mm bolts/nuts hold the member to the frame first then these 2. it aids in holding it in place. it gets heavy. reinstall this way also. finger start these 2 nuts first then do the 4 big bolts/nuts.

the 4-18mm bolt/nuts holding the crossmember to the frame. take these out completely then finish removing the 2-15mm in the middle.
crossmember removed.
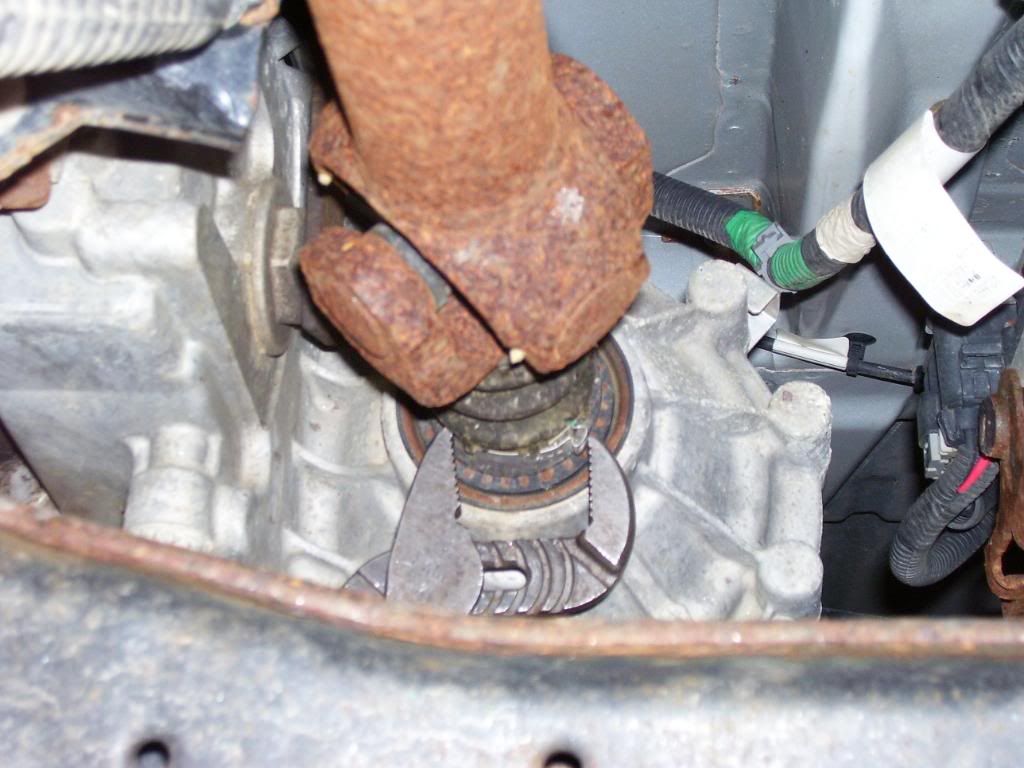
removing the 2-15mm bolts holding the trans mount to the trans. you need to remove this to gain access to the t-case nuts.
this pic only applies to the trucks with the floor shifter 4wd. this is the lever and shift rod. you need to pop out the silver clip holding the rod to the ball on the lever. push button 4wd skip this step. you also see the harness going across the top of the t-case. you need to unclip it and unplug the connectors it is going to. don't break the clips or it will lead to problems.
you can see the output shaft speed sensor unplugged, there is 2 other connectors on the front top section. the electric shift models also have another connector for the module/motor.
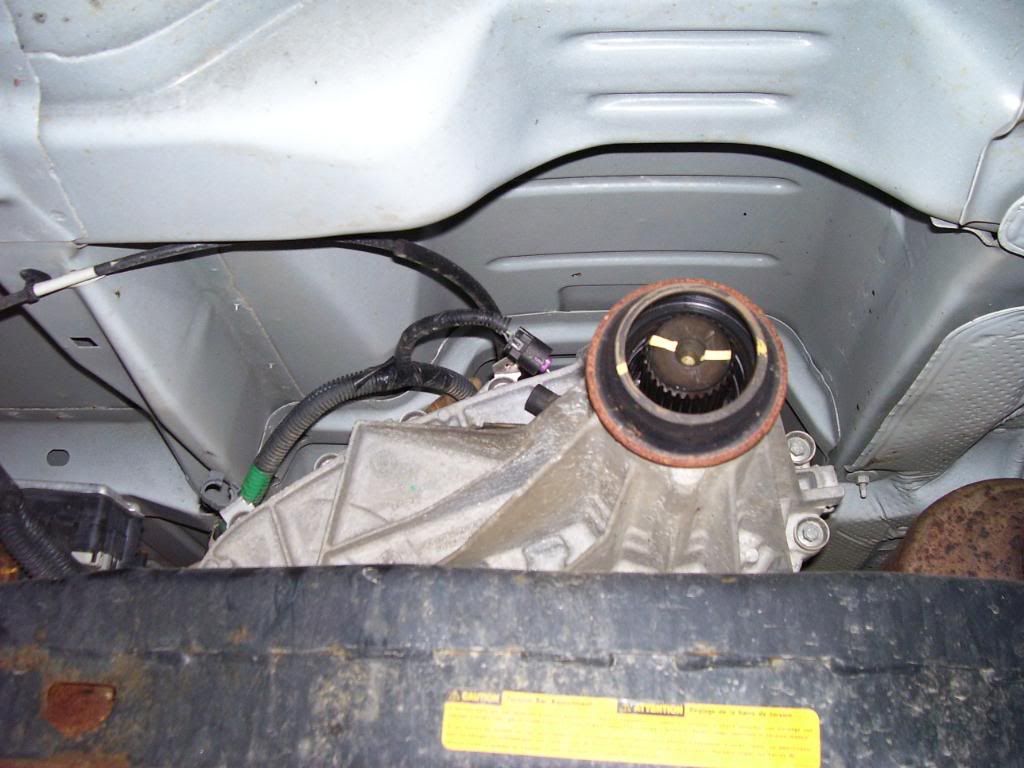
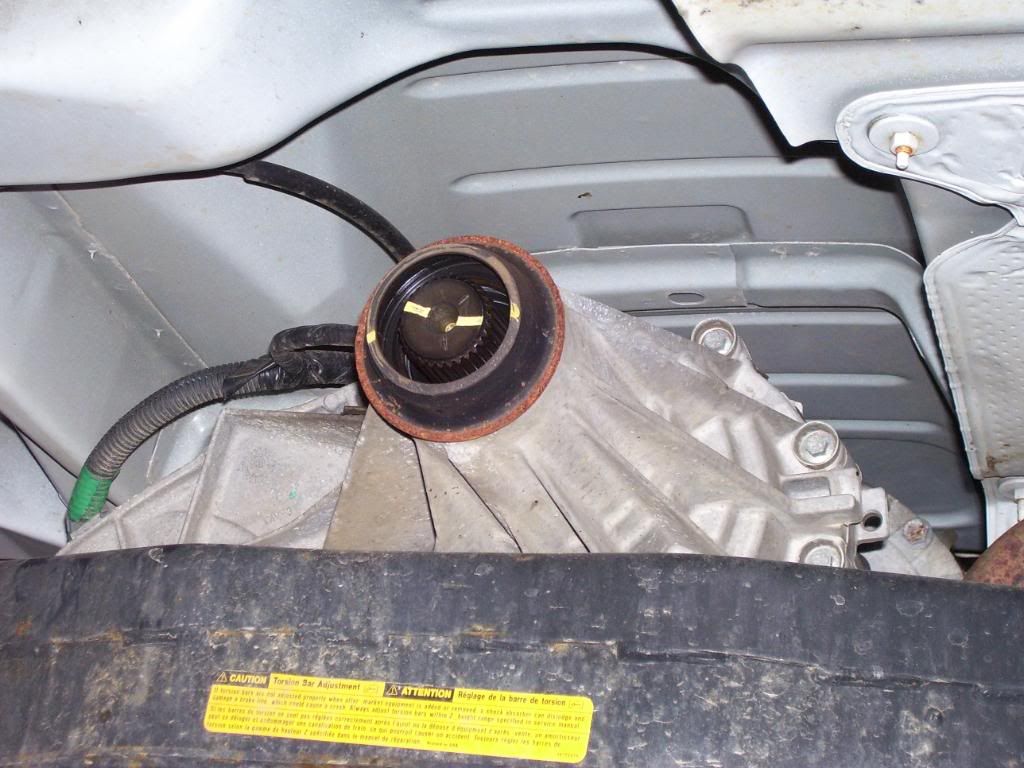
this pic shows a couple things. first the other electrical connector, which is the indicator lamp switch. there is also another where the t case meets the trans attached to a bracket along with the vent line. not seen in this pic. the other item in this pic is the t-case vent, as you can see it is plastic, it is very fragile, take care to not break it or buy the new and improved metal one from gm prior to doing the job. the vent hose needs to come off also.
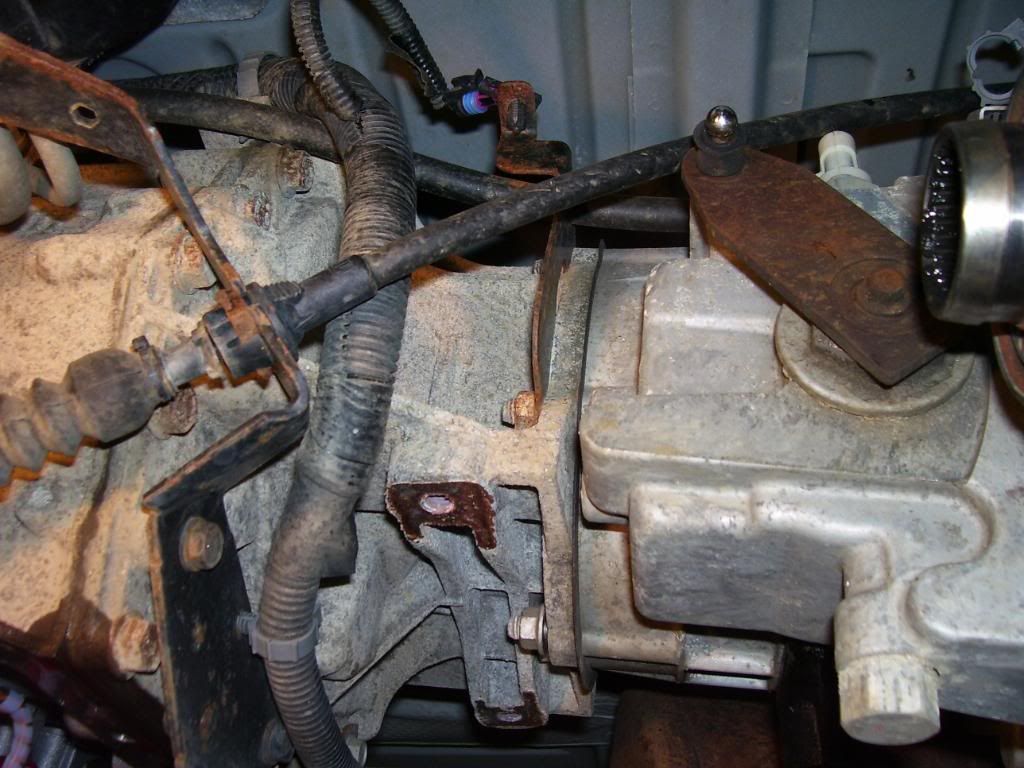
this pic shows the last electrical connector perfect. top of the bracket. along with the vent hose. the big cable in the forefront of the pic is the trans shift cable.
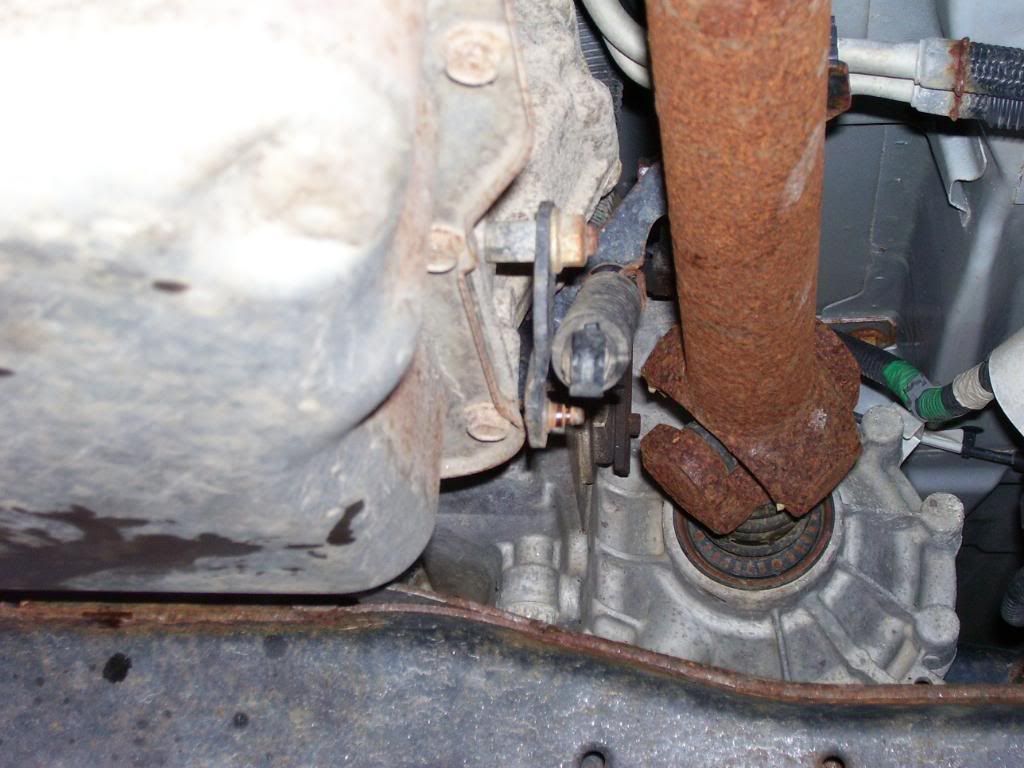
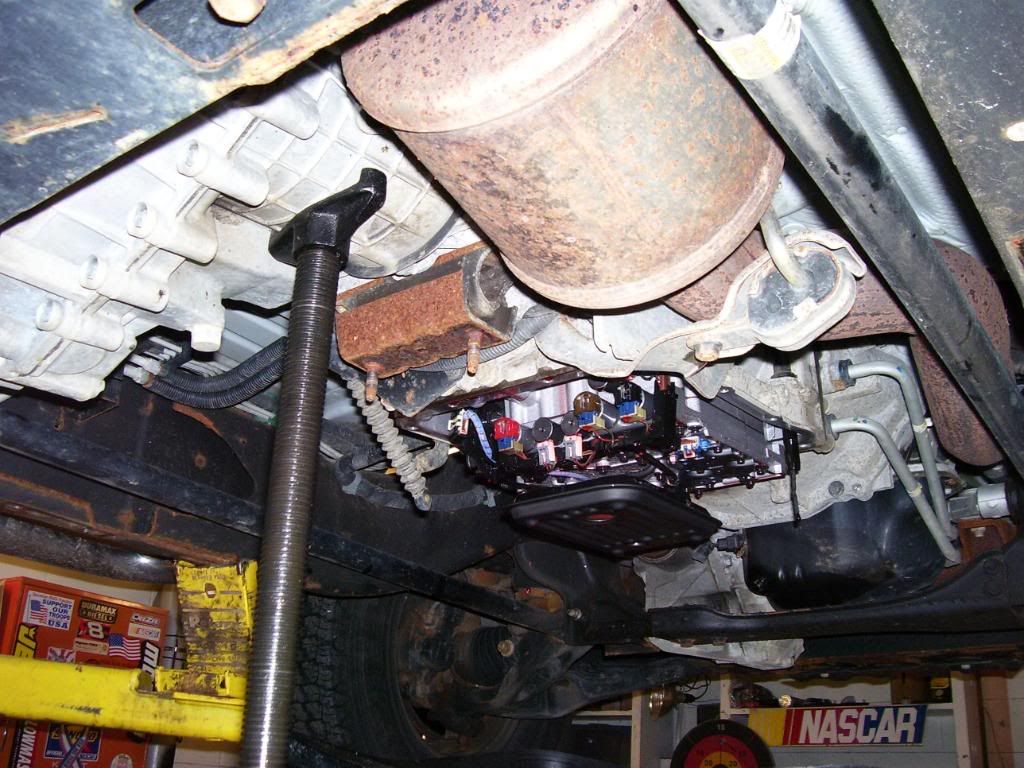
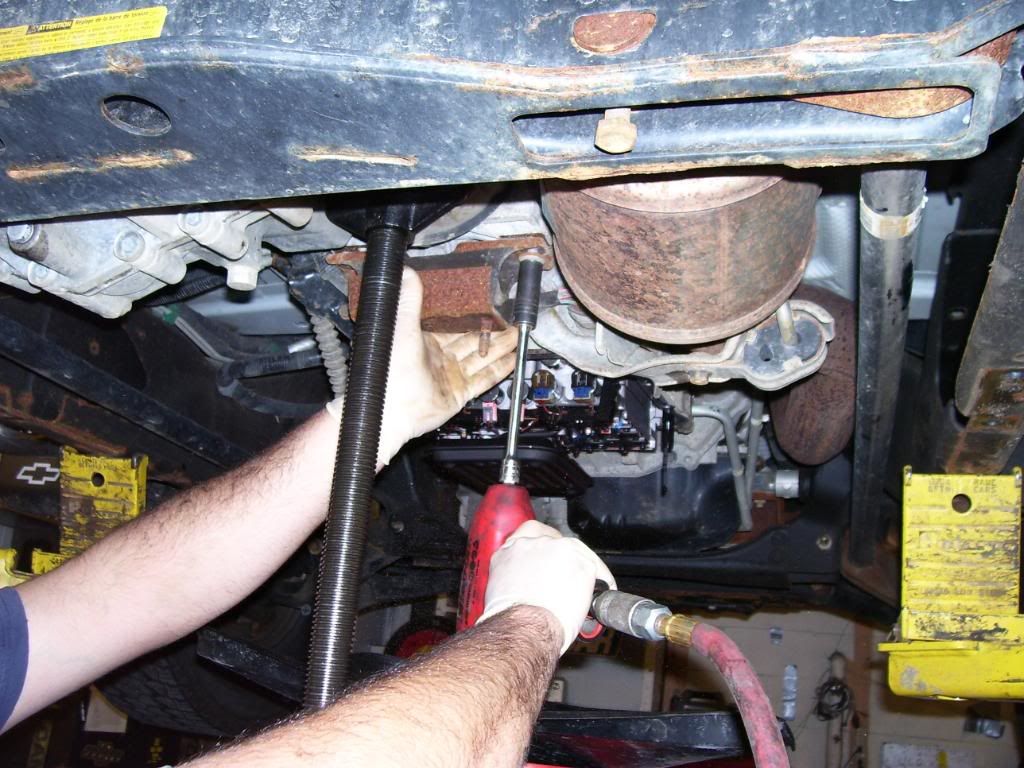
this pic is the bottom of the t-case with trans mount removed. i am ready to loosen all the bolts and move the pole jack to the trans mount location. you can also see the bottom nut you need to remove that the mount was blocking. there are six of them. kind of a ball buster to get at the top ones. lower the trans as much as possible and there is enough room.
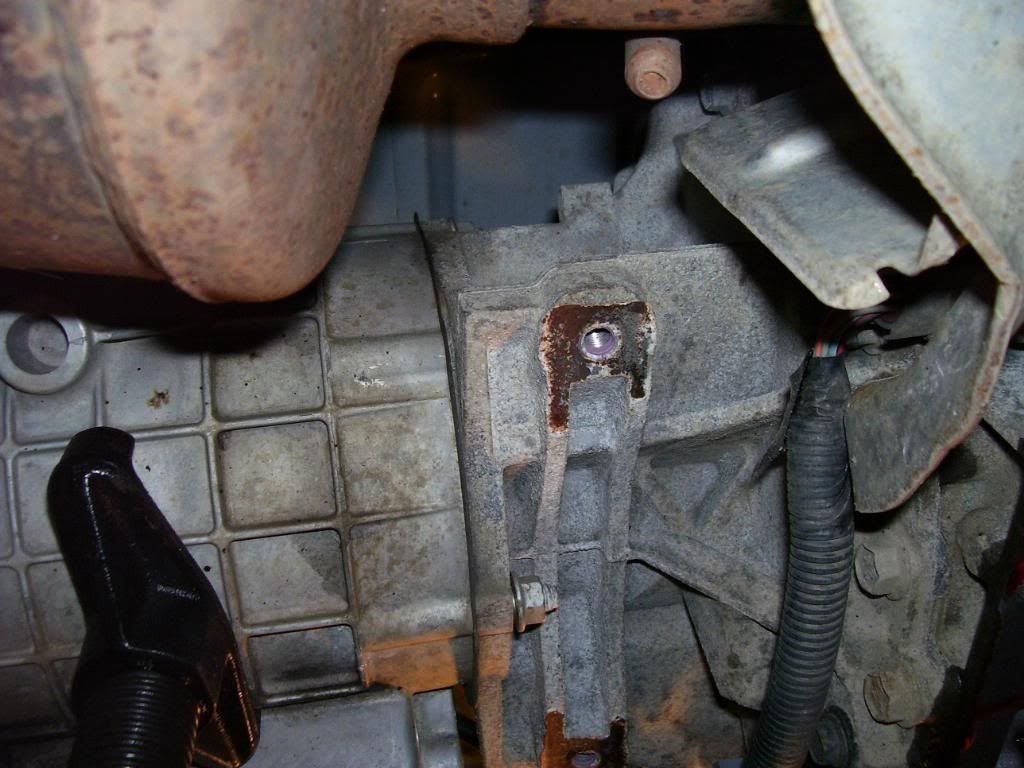
t-case now removed. your looking at the housing that commonly breaks in higher horsepower trucks. must clean the gasket material off the mounting surface.
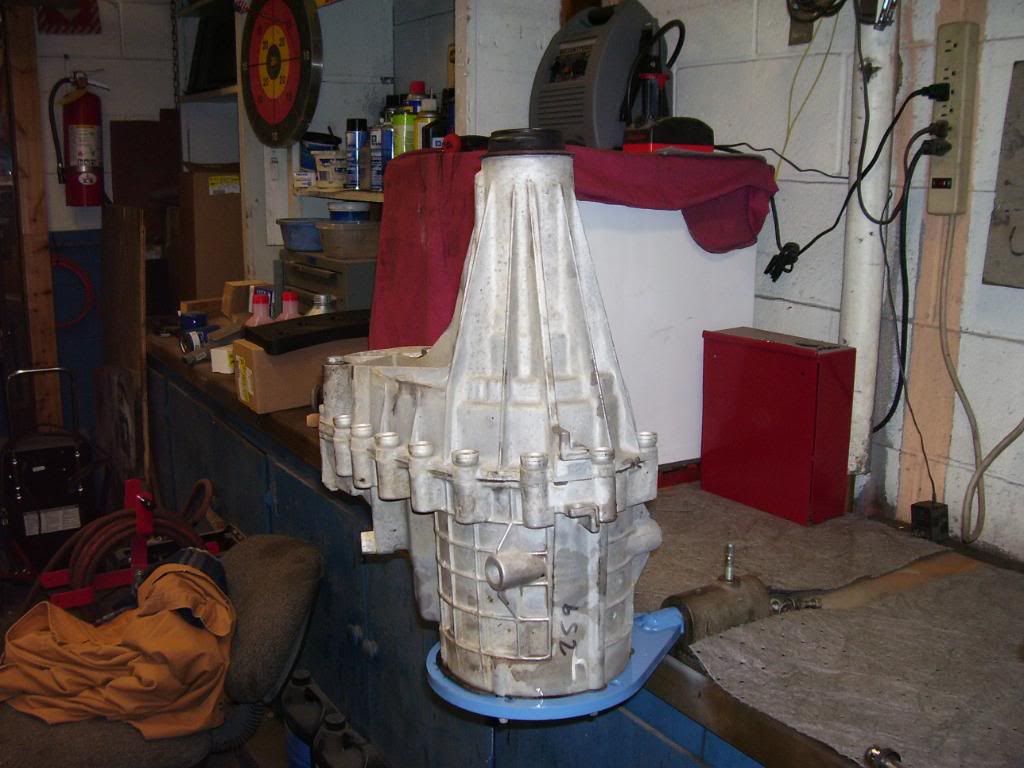
transfer case on the stand.
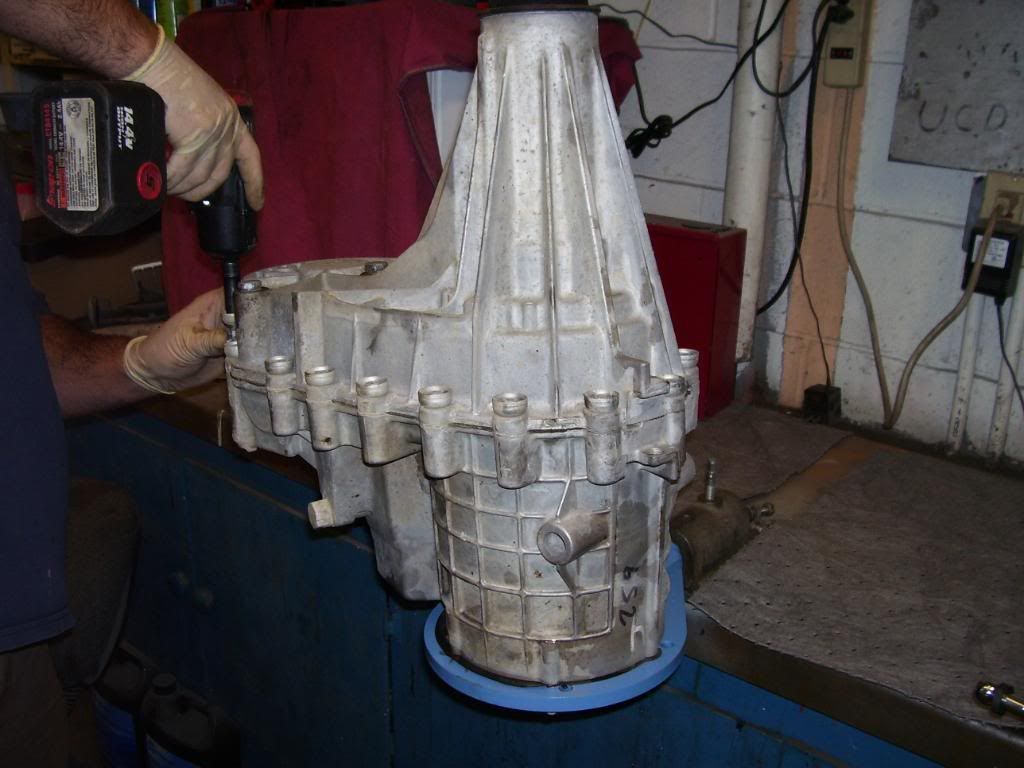
removing the case bolts. they are 10mm and also 2-15mm bolts that hold brackets. mark there location you don't want to remove them after. also don't lose the big cup washer they are there to separate the 2 different metals from corroding. not in these pics yet is the rubber plug you have on the top side of the rear case half. remove it and you will see a snap ring in there that needs to be opened with snap ring pliers in order to take the case apart. you will see it more clearly in a future pic.
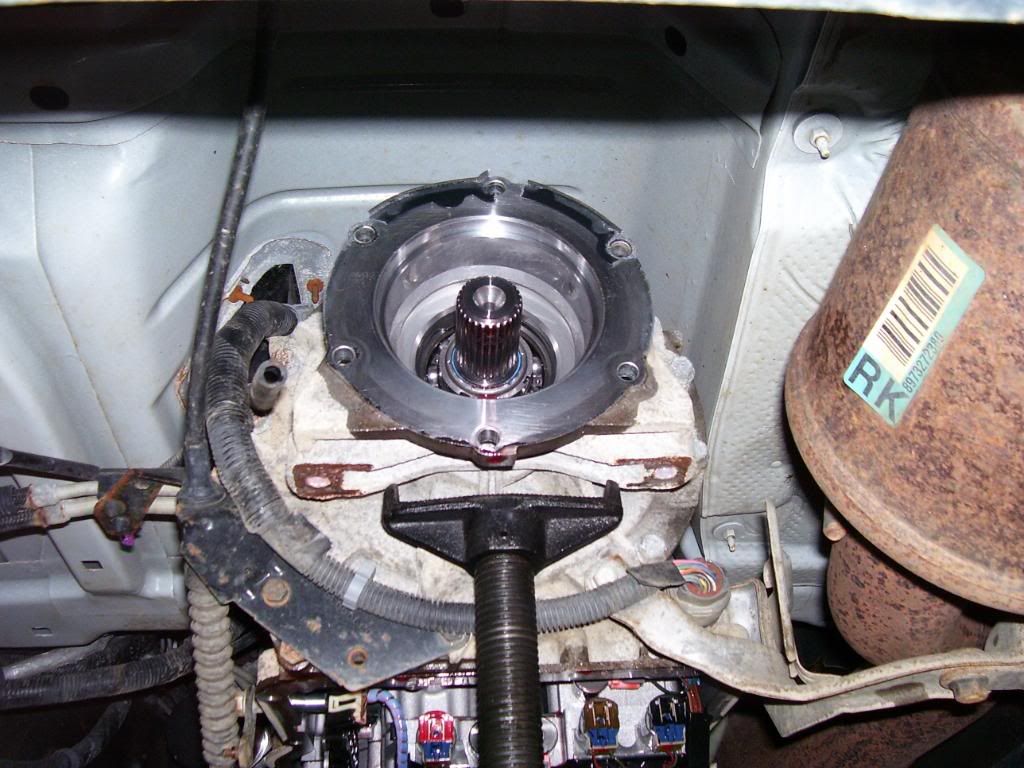
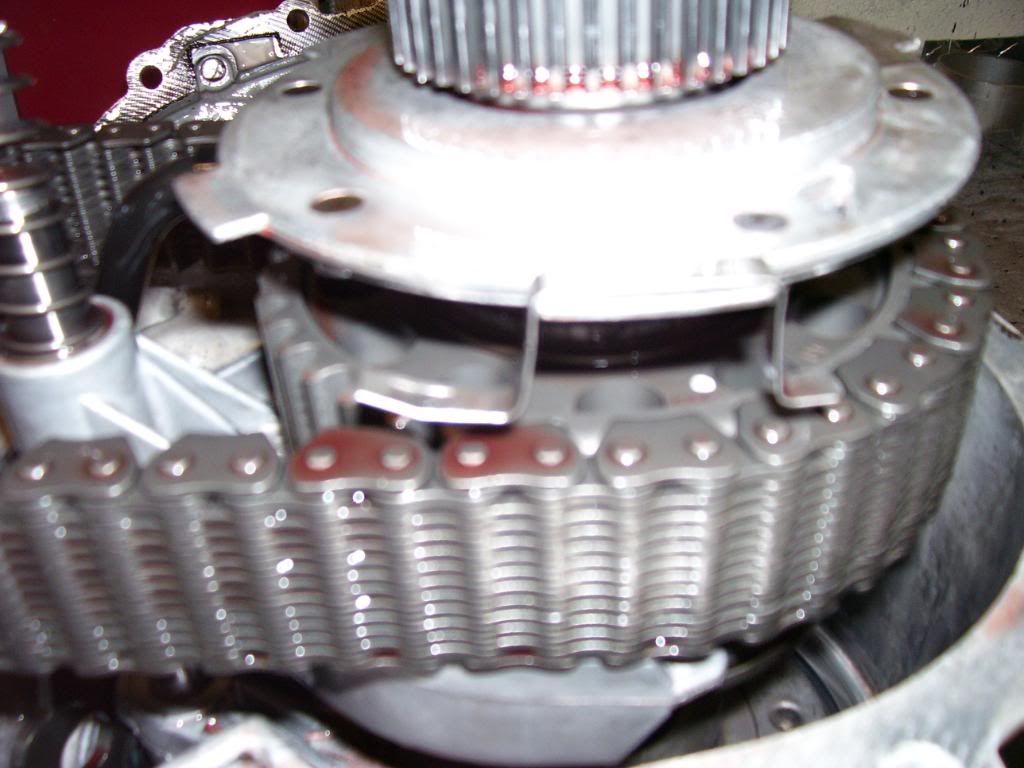
this and the next pic have the pump and the suspect bad clip. this is the clip that falls off the case and causes the pump rub.
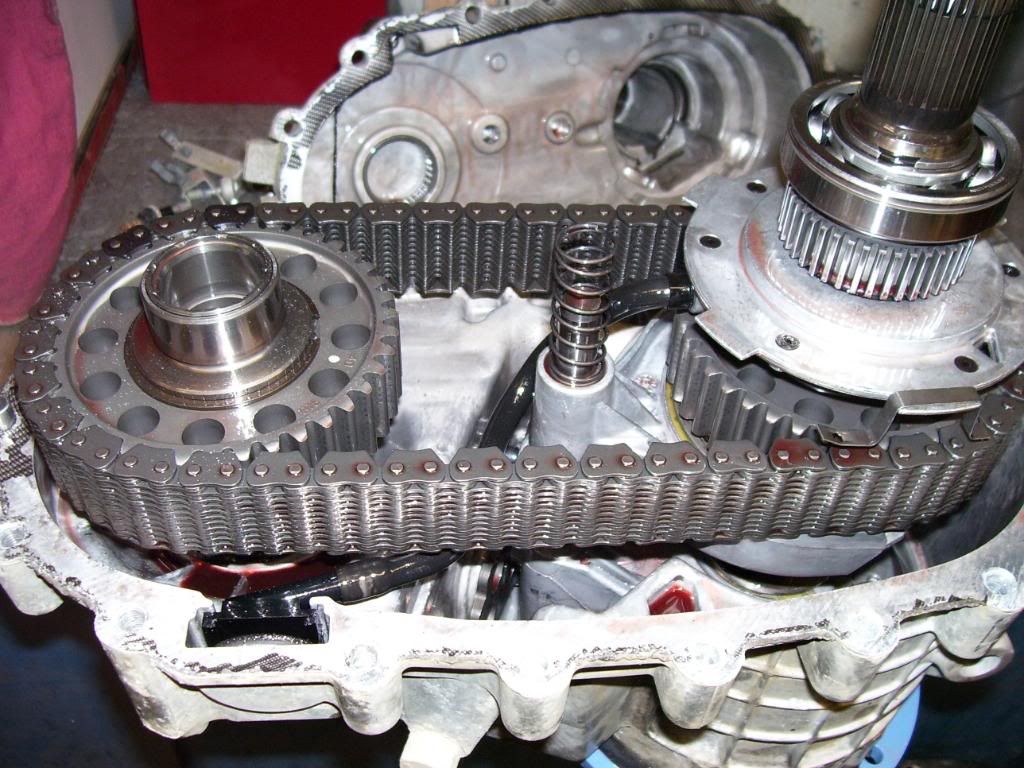
here you can see it better. you can also see the bearing stacked above the pump. if you look closely you can see the slot in the bearing race the holds the snap ring from above.
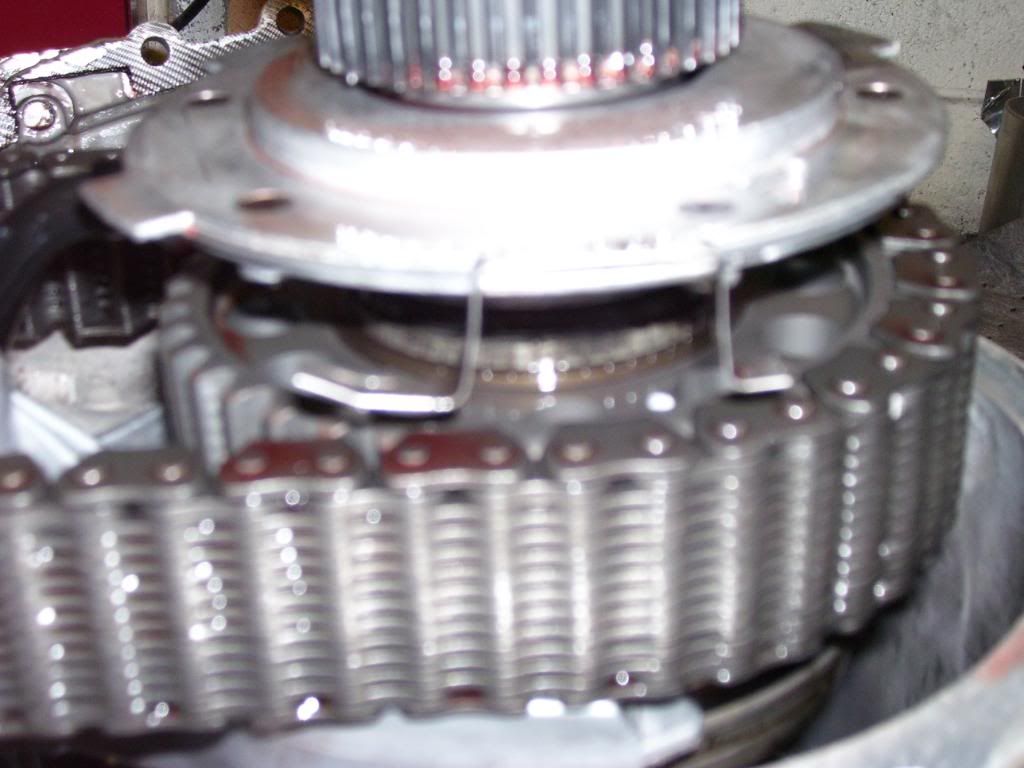
this is the spot where the pump sits and rubs through. to the left of the slot you can see the little pin that holds the "suspect clip".

another of the clip on the pump.
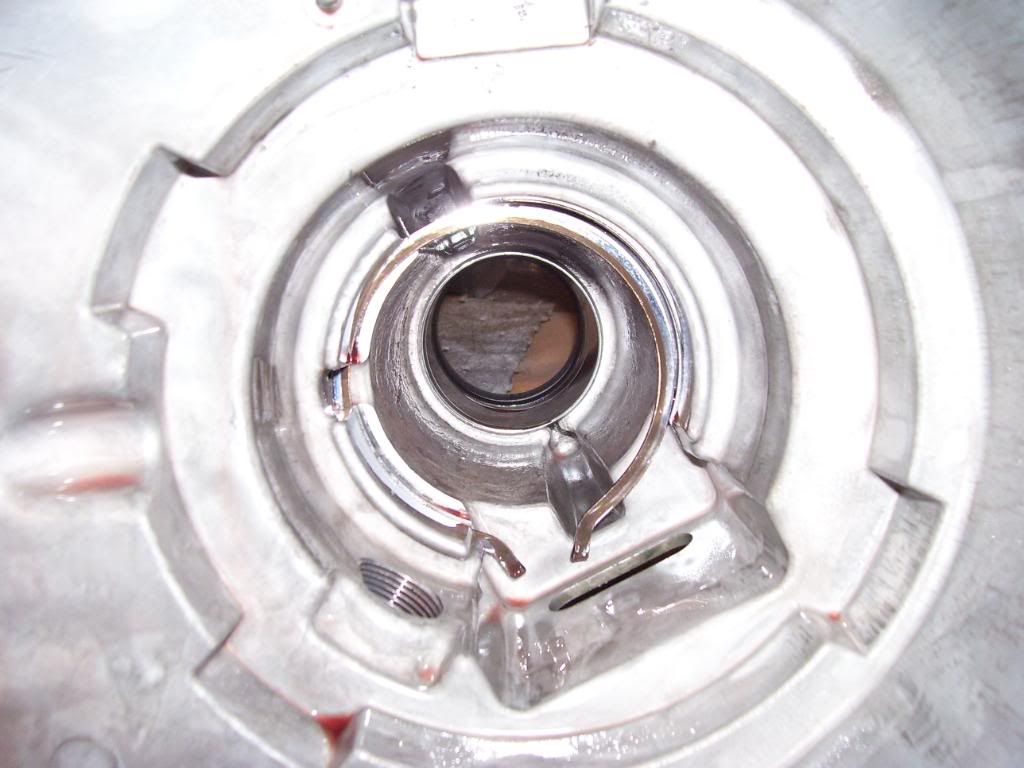
this pic is the snap ring i talked of earlier. also the access hole.
cleaning the old rtv sealer. use caution in the other half, you don't want sealer everywhere. i used some scotch pad and brake cleaner and did it by hand.
putting the case back together. don't forget the dowel pins if you take them out during cleaning. don't ask why i know this. also use new rtv 2mm bead all the way around and around the bolt holes. you can bolt the case together before doing the snap ring. to do the snap ring you need to open the snap ring, lift up on the bearing with a prybar, then release the snap ring into the slot in the bearing.
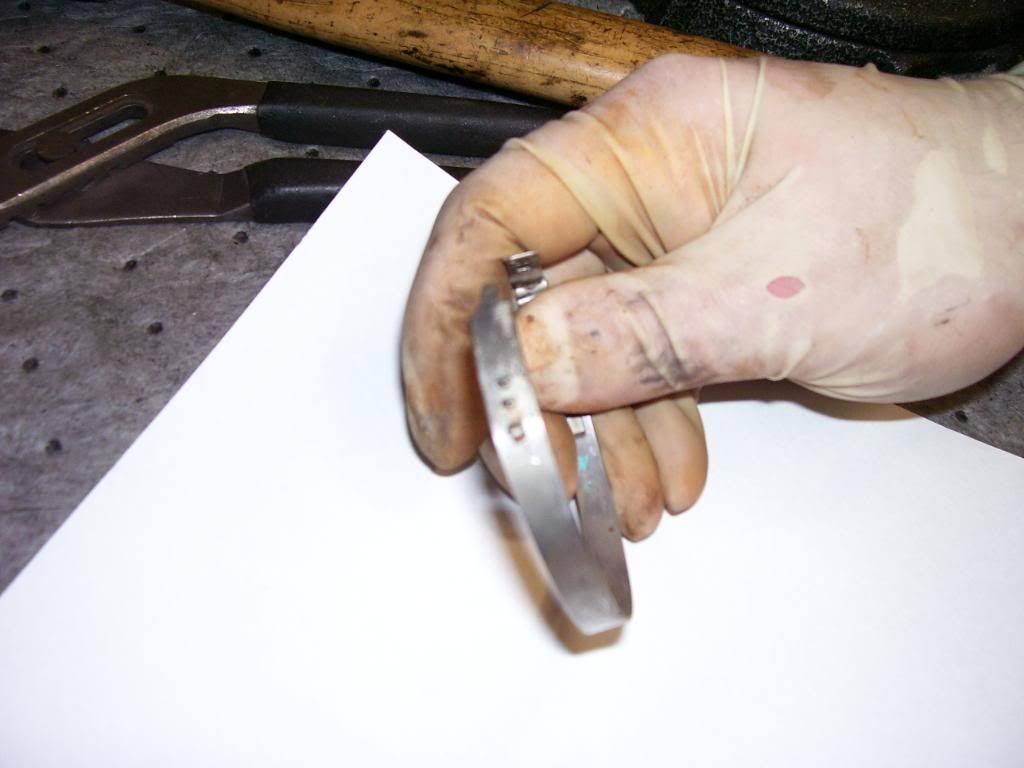
here is the clamp from the front drive shaft close up.
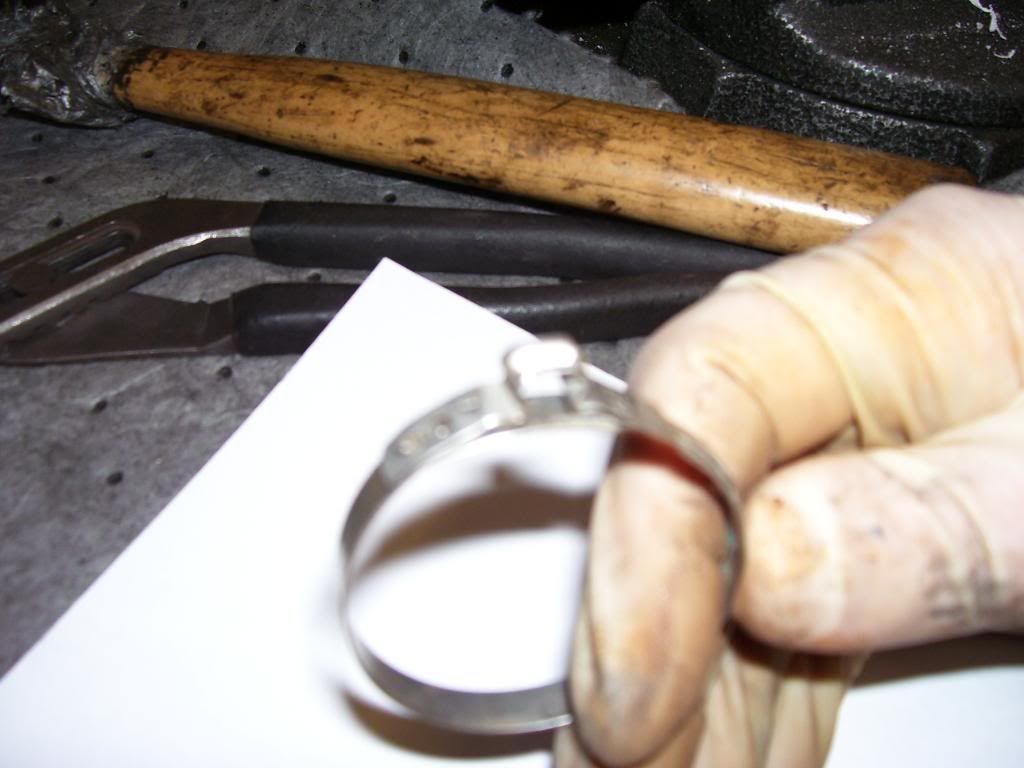
here it is closed. you need a special tool for this. you need to tighten the bump persay on the top of the clamp.
clamp on and squeezed.
shift cable attached to the trans, close up.
close up of cable off, and lever moved 2 clicks.
this is the fluid draining. use an 18mm wrench to remove. i usually use some pipe tape to reseal it although it is not needed. they are a pipe style fitting and seal on compression. don't over tighten them though. very soft.
this is the removal of the 4-11mm bolts holding the front driveshaft to the front pinion. once you have them out use a prybar to pop the ujoint out of the pinion. be careful not to pop the caps off and lose all the needle bearings.
this is the clamp which holds the boot on the output shaft of the t case. the clamp is reusable if you take it off nicely and have the tool to re tighten it.
just a view of the shift cable off the gear selector lever on the trans. it is a clip type so a simple pry tool to pop it off. once you move the cable, move the selector back 2 clicks to get the trans in neutral. it aids in removal of the rear driveshaft bolts.
removal of the rear driveshaft. same principal applies as the front d-shaft, just bigger. same 4-11 mm bolts though.
my ugly mug
, but the driveshaft out of the pinion. this one was a bit prickish. i need the big bar
t-case rear half no driveshaft.
just a photo of jack placement to remove the trans crossmember. either there or on the trans adapter housing. if you put it on the t-case you will have to move it in order to remove the case. so it is preferable if you have the option first to put it on the trans adapter. i guess it depends on your specific situation while doing the job.
i am loosening the 2 15mm nuts holding the cross member to the trans mt. it is best to remove the 4 outer 18mm bolts/nuts hold the member to the frame first then these 2. it aids in holding it in place. it gets heavy. reinstall this way also. finger start these 2 nuts first then do the 4 big bolts/nuts.
the 4-18mm bolt/nuts holding the crossmember to the frame. take these out completely then finish removing the 2-15mm in the middle.
crossmember removed.
removing the 2-15mm bolts holding the trans mount to the trans. you need to remove this to gain access to the t-case nuts.
this pic only applies to the trucks with the floor shifter 4wd. this is the lever and shift rod. you need to pop out the silver clip holding the rod to the ball on the lever. push button 4wd skip this step. you also see the harness going across the top of the t-case. you need to unclip it and unplug the connectors it is going to. don't break the clips or it will lead to problems.
you can see the output shaft speed sensor unplugged, there is 2 other connectors on the front top section. the electric shift models also have another connector for the module/motor.
this pic shows a couple things. first the other electrical connector, which is the indicator lamp switch. there is also another where the t case meets the trans attached to a bracket along with the vent line. not seen in this pic. the other item in this pic is the t-case vent, as you can see it is plastic, it is very fragile, take care to not break it or buy the new and improved metal one from gm prior to doing the job. the vent hose needs to come off also.
this pic shows the last electrical connector perfect. top of the bracket. along with the vent hose. the big cable in the forefront of the pic is the trans shift cable.
this pic is the bottom of the t-case with trans mount removed. i am ready to loosen all the bolts and move the pole jack to the trans mount location. you can also see the bottom nut you need to remove that the mount was blocking. there are six of them. kind of a ball buster to get at the top ones. lower the trans as much as possible and there is enough room.
t-case now removed. your looking at the housing that commonly breaks in higher horsepower trucks. must clean the gasket material off the mounting surface.
transfer case on the stand.
removing the case bolts. they are 10mm and also 2-15mm bolts that hold brackets. mark there location you don't want to remove them after. also don't lose the big cup washer they are there to separate the 2 different metals from corroding. not in these pics yet is the rubber plug you have on the top side of the rear case half. remove it and you will see a snap ring in there that needs to be opened with snap ring pliers in order to take the case apart. you will see it more clearly in a future pic.
this and the next pic have the pump and the suspect bad clip. this is the clip that falls off the case and causes the pump rub.
here you can see it better. you can also see the bearing stacked above the pump. if you look closely you can see the slot in the bearing race the holds the snap ring from above.
this is the spot where the pump sits and rubs through. to the left of the slot you can see the little pin that holds the "suspect clip".
another of the clip on the pump.
this pic is the snap ring i talked of earlier. also the access hole.
cleaning the old rtv sealer. use caution in the other half, you don't want sealer everywhere. i used some scotch pad and brake cleaner and did it by hand.
putting the case back together. don't forget the dowel pins if you take them out during cleaning. don't ask why i know this. also use new rtv 2mm bead all the way around and around the bolt holes. you can bolt the case together before doing the snap ring. to do the snap ring you need to open the snap ring, lift up on the bearing with a prybar, then release the snap ring into the slot in the bearing.
here is the clamp from the front drive shaft close up.
here it is closed. you need a special tool for this. you need to tighten the bump persay on the top of the clamp.
clamp on and squeezed.
shift cable attached to the trans, close up.
close up of cable off, and lever moved 2 clicks.
Last edited by a moderator: