Matt Bachand
Depends on the 6.5
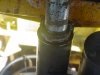
ITs half on half off, last year it was off a little, now its half on the piston half inside the pack. Will this just weap or will it cause lift failure?

Follow along with the video below to see how to install our site as a web app on your home screen.
Note: This feature may not be available in some browsers.
Will also let moisture in, bad things then happen.
Matt, is this your power unit?
http://www.fisherplows.com/pdf/20751_031203.pdf
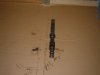
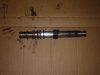
Matt, Normaly comes right off, need a BIG wrench though LOL I replace the rod when I do the seals, then you are back to OEM fit and you should get many more years of service out of the unit.
Yep, might pull it apart just for grins but that normally all you need to replace.
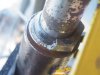
") LOL... broke the nut. No turning back now boys. Help me out!!
LOL... broke the nut. No turning back now boys. Help me out!!Oh Crap Matt, If it wasn't for bad luck you have none. The seal is junk any way, PB blaster is a good start, the use a small torch, heat the area around the nut, might also use a drift pin and hammer and lightly tap on the nut to jar it lose. What size is the rod?
Matt, I once was told to use wax to get out a stuck bolt. Never did try but was able to find this. Good luck getting it off.
Use a regular propane torch to heat the bolts (be careful not to melt anything else in the process) then melt gulf wax onto the bolt. you will see the wax sucked into the rust, and bolt housing. the gulf wax does an amazing job to free up stuck bolts because of the way it permeates the rust. then while the bolt is still warm loosen it. you can get gulf way at any hobby store or candle making place.
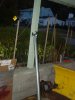
Matt, I think the Pipe was over the top ):h Keep at it sounds like you are on the right track.
Yep, I rarely fail....
Before I forget, on re-assembly, how tight do I tighten the packing nut?
If you can turn it in by hand, then hand tight plus 1 to 1 1/4 turns to start, it will weep fluid the first few times you work it, then recheck and add up to 3/4turn with a normal size wrench ):h
Glad it worked out for you.