
88gmctruck
02GMCtruck
Here is an install of steering wheel audio controls I did on my 2002 Sierra, and subsequently my old roommates 95 Silverado. It requires very minimal parts surprisingly. The procedures for both the OBS and NBS trucks are VERY similar, and most pictures of my NBS.
Parts:
- Audio Controls & Steering Wheel trim (you can buy the buttons and steering wheel trim from GM separately or just find a Denali/Escalade/Jimmy Steering Wheel) Also note that the controls come in both grey and black. Both grey and black were used in the S-Series trucks, while only black was used in Denali and Escalades.
- Denali SIR Clockspring Part # 26087300
- Misc Wire
- PAC adapter (if you have an aftermarket stereo)\
- NOTE: If you have an OBS, 98 was the only year with the correct steering wheel. If you have a 95-97 or a higher GVWR truck with no airbag, you will need a new steering wheel and airbag. For higher GVWR trucks without an airbag, the SIR coil will still be required, however will remain disconnected.
Tools:
- Steering Wheel puller
- Small flat screwdriver
- Torx bits
- The usual wiring "stuff"
Start by disconnecting your battery AND pulling the airbag fuse un the door jamb. THIS IS IMPORTANT. Let the truck sit for 15+ mins to allow for the electrical system to discharge. You don't want your airbag to go off in your face!
Start by first removing the dash bezel and lower dash panel. Under the lower dash panel also remove the metal shield with a 10MM socket. You'll need these out of the way part way into the project (found that out the hard way)
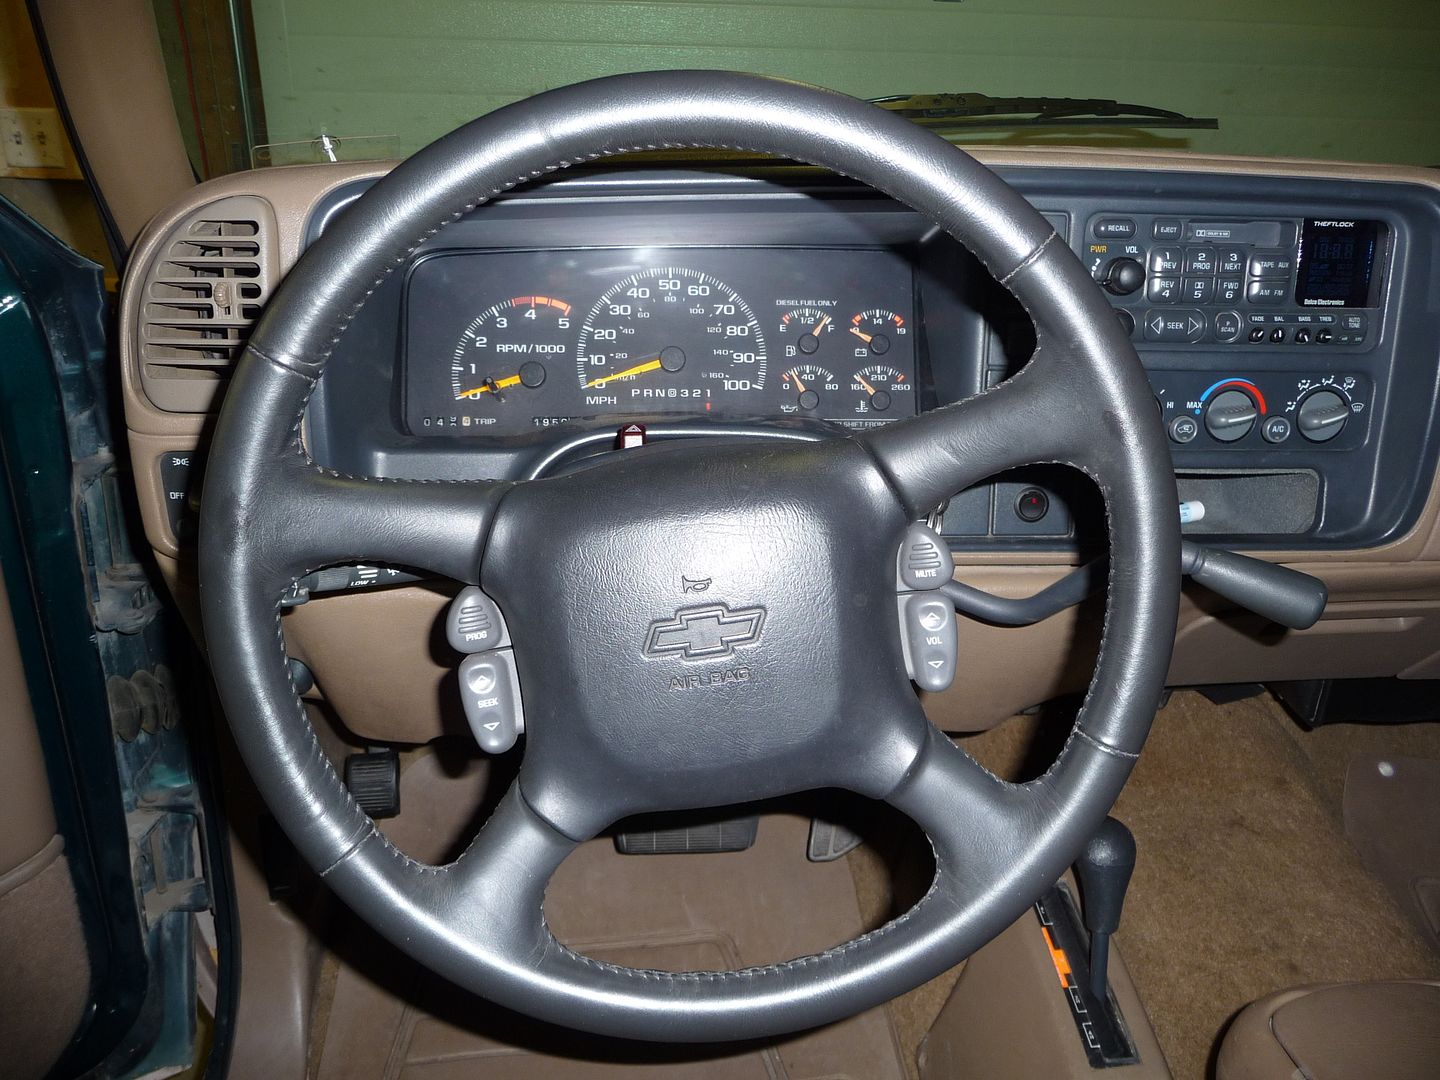
Now, removing the airbag. There are two small openings in the back, use a small screwdriver to release the clips holding it in. You'll figure it out after awhile.
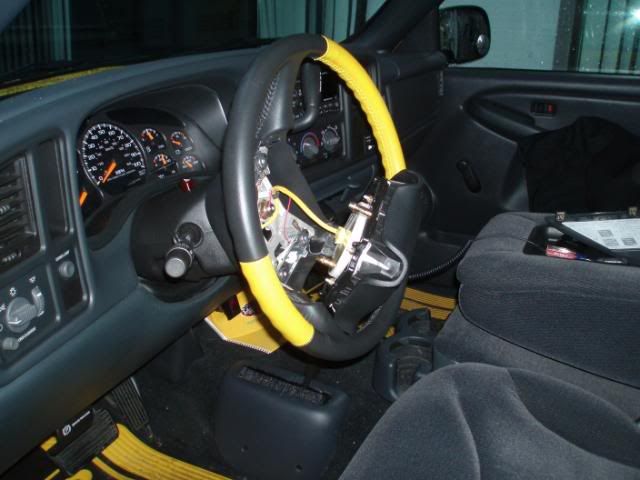
Once the bag is released, unclip the electrical connector and carefully set the bag aside. Un-hook your horn wire (red) by turning counter clockwise. Then take the steering wheel puller and remove the wheel.
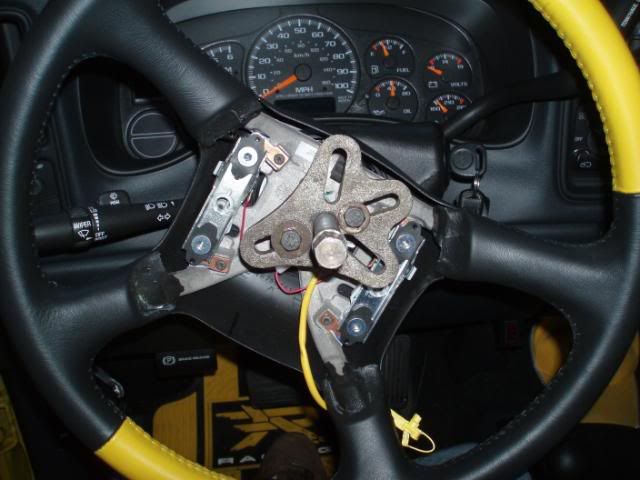
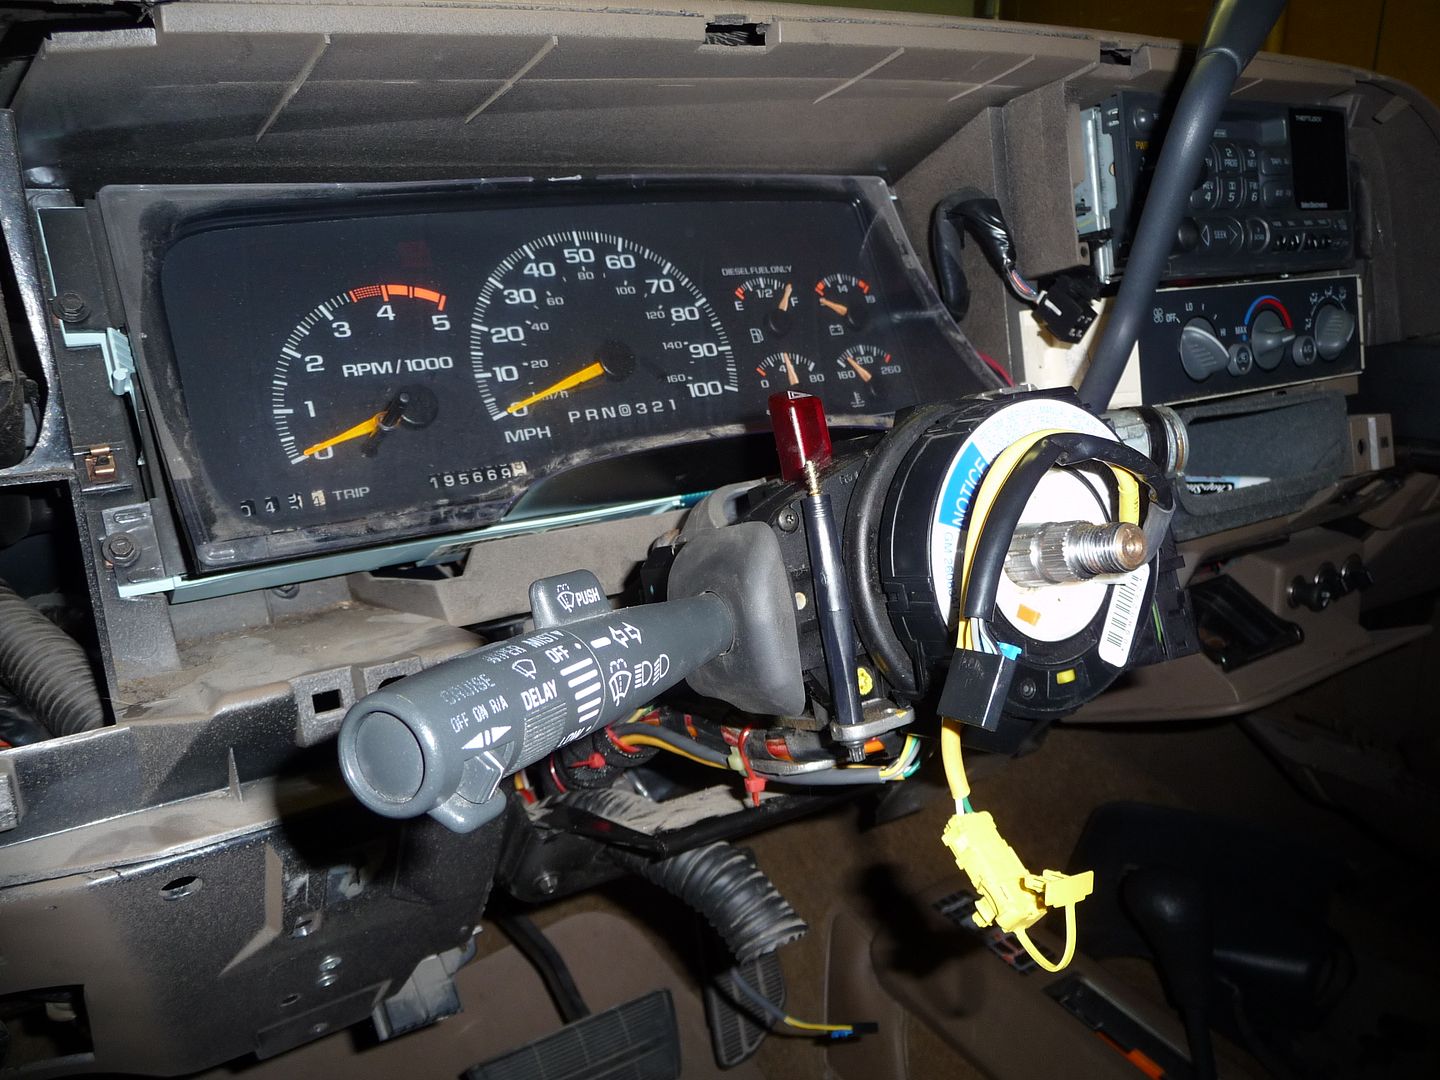
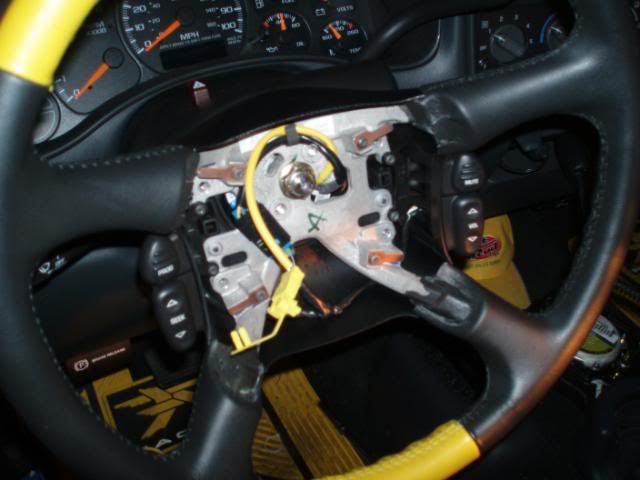
Now your wheel is gone and you have this left.
 ’
’
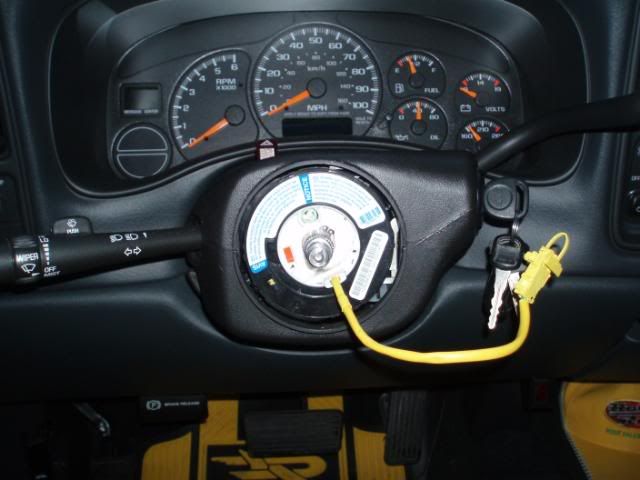
Now take the cover off the column by simply pulling it apart (I think older models had torx screws). You’ll also have to unclip the tilt lever (I think I used a small screwdriver on this too). No you are going to take the old SIR coil out of the column (the black thing with the airbag wire) and unhook it under the dash. You’ll have to cut some zip-ties and such. Take the new SIR coil and route the new wires and plug it all in. NOTE: If you have a 95-97 OBS, you will have to cut the airbag plug off your new coil and swap it from your old coil.
OBS plug splice
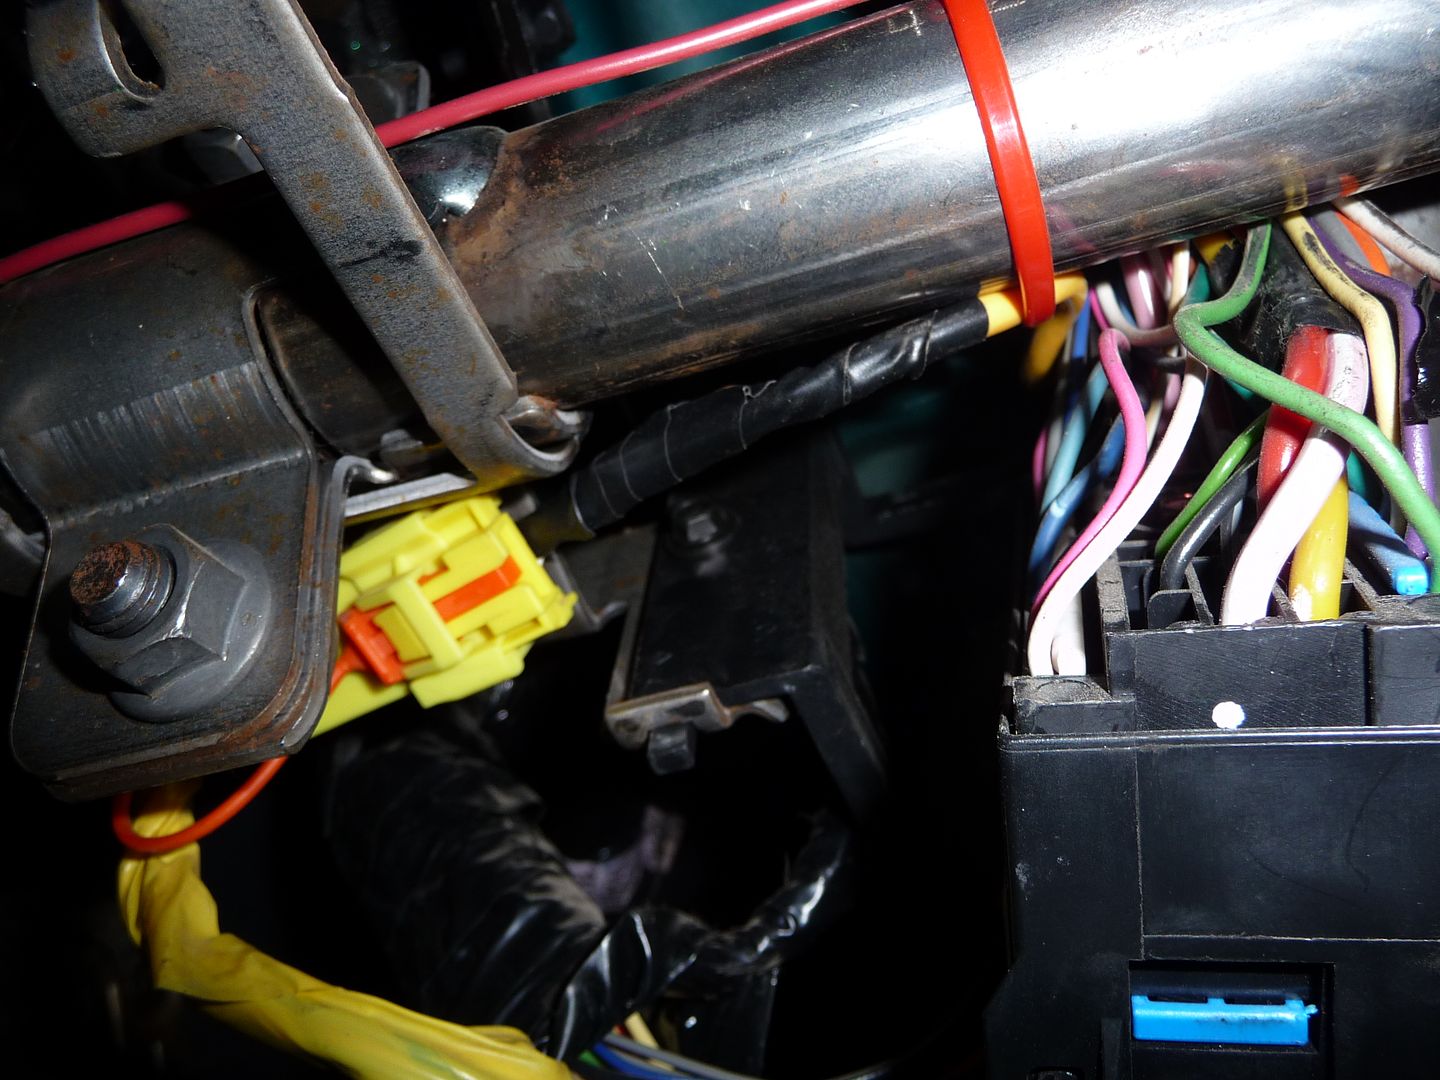
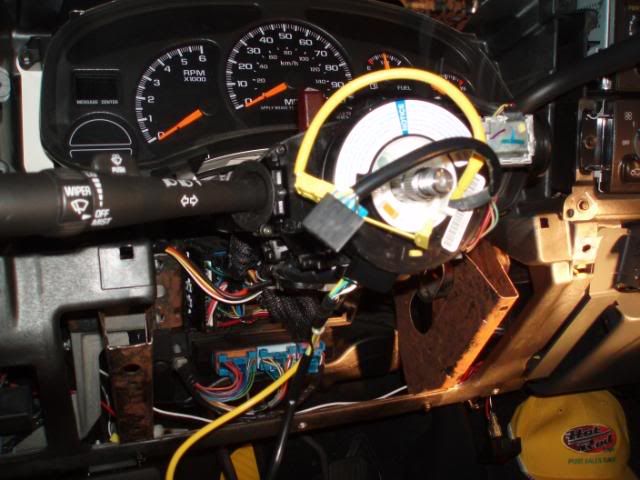
Route the new 4 wire plug for the audio controls where you can easily work on it later. Now, If you have a new SIR coil, follow the GM instructions that came with it and install it on the column. If you have a used coil, be sure it is centered on the column and you can see the orange thing in the window indicating it's centered. If you don’t install it correctly it will become damaged and your air bag will not function, along with your horn and new radio controls.
OBS
NBS
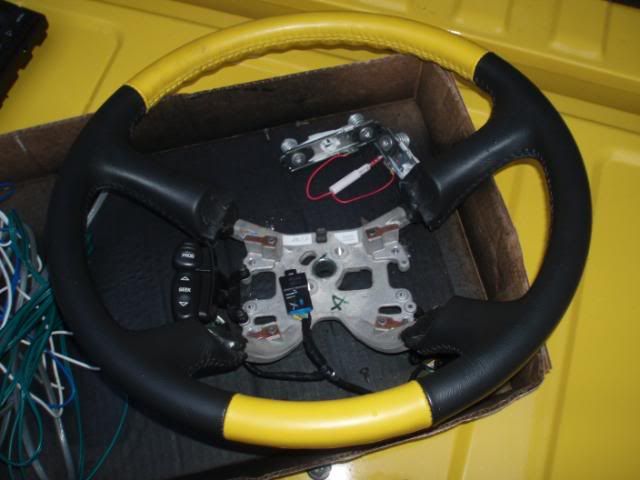
Now move on to your steering wheel. If you bought a complete Denali/Escalade/Jimmy wheel and want to keep your factory wheel like I did (mines factory yellow, plus the Denali one I bought was very light grey) You will have to remove the controls and trim cover from the back, the re-install on your existing wheel. These all take torx bits. The back trim piece will also need painted if it doesn't match your interior color.
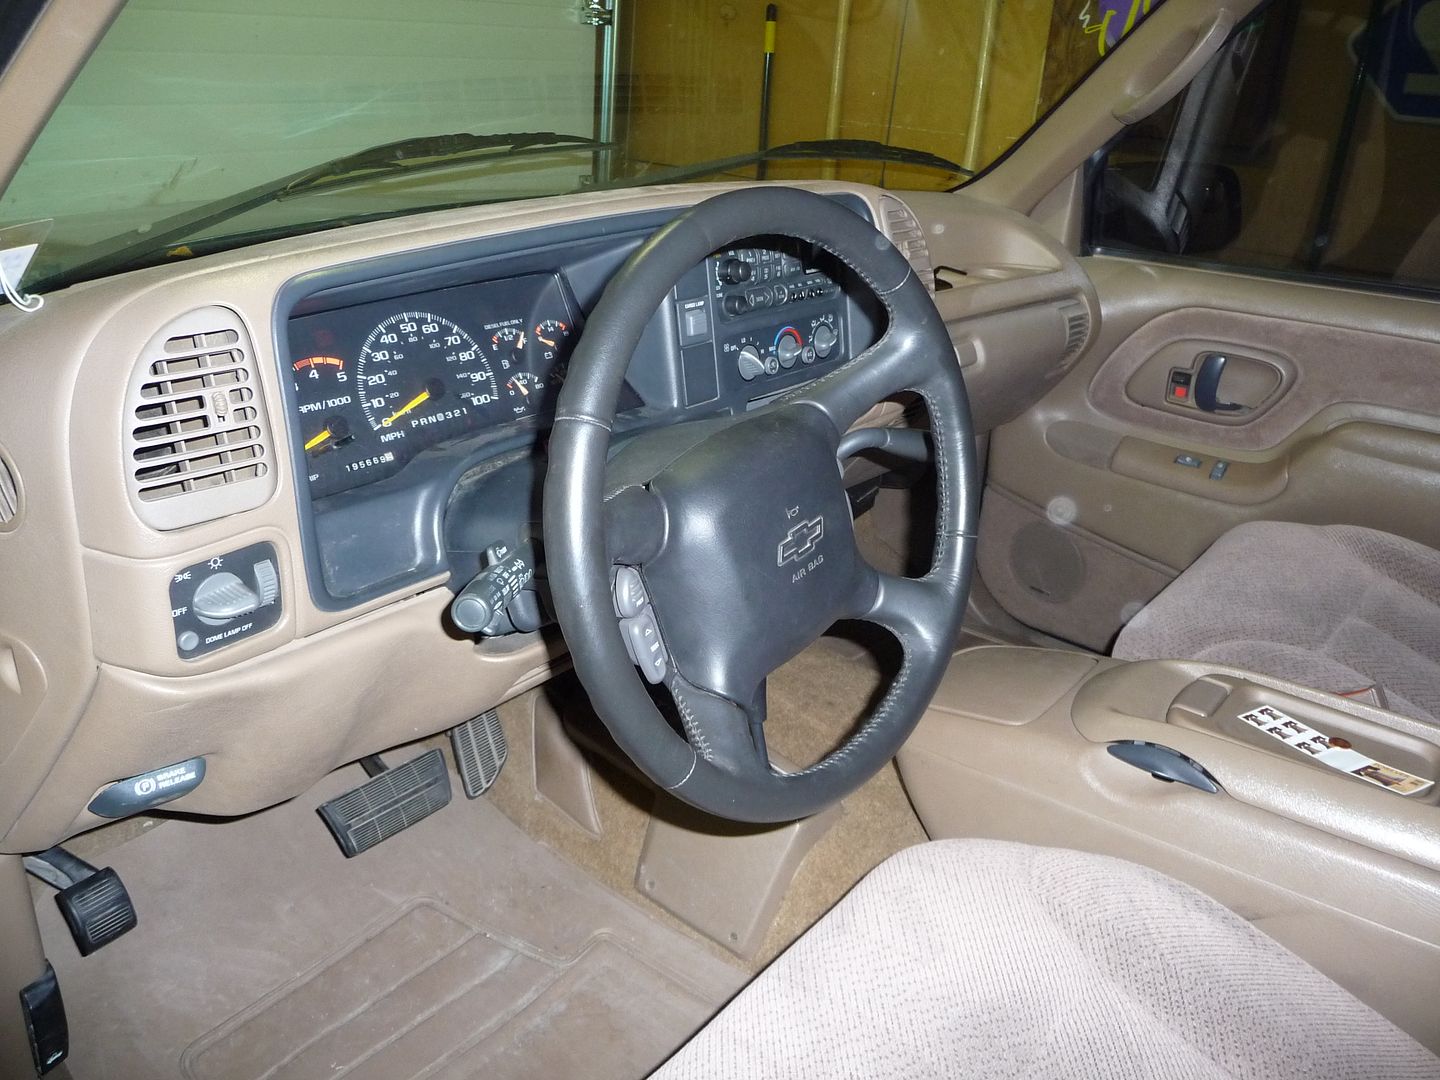
Put the trim back on the column, and then install the steering wheel. Install is reverse of removal. Be sure you plug your airbag back in, and it just pushes back onto the wheel.
OBS
NBS
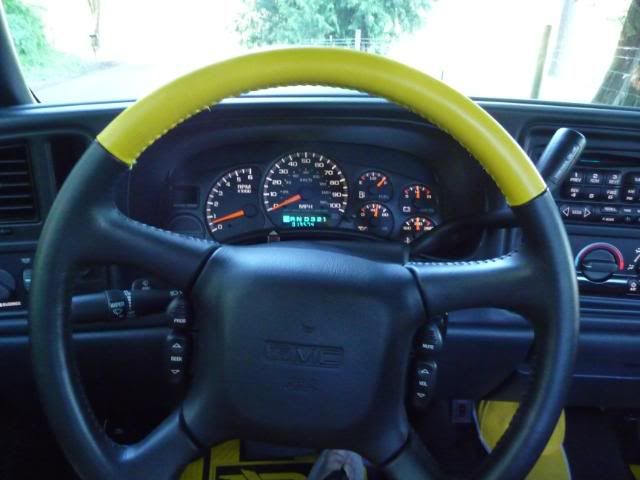
At this point you can re-connect your battery and put your airbag fuse back. Before going any further test for proper horn and airbag functioning. I suggest standing out of the truck the first time you start it. You can also (while still standing outside) cycle the wheels back and forth to make sure your SIR coil is installed correctly.
If the airbag light is off and it didn't deploy, you’re ready to hook the controls up!
Wiring Info:
Black - Ground
Grey - Dash light dimmer +12v
Green - Keyed power
Yellow - Data wire - Connect to #15 of grey stereo connector.
1. Cut the plug from the SIR coil and connect 4 wires to it, long enough to run to your stereo. I used OEM colors for simplicity.
2. Splice your ground, power and lights into your radio harness wiring however you choose. The Yellow signal wire goes to a pin in the radio plug that is empty. I shoved it in the socket and taped it in. It was on the bottom left of the connector next to the left most wire. (I’m going to get the pin number later).
Test out your new controls!!! If everything is wired correctly, the controls will do what they say on them (consequently, if they aren't they will do other things, such as not work or change channels with the mute switch). Be sure to check them at night to see if the backlighting works as well!!!
Parts:
- Audio Controls & Steering Wheel trim (you can buy the buttons and steering wheel trim from GM separately or just find a Denali/Escalade/Jimmy Steering Wheel) Also note that the controls come in both grey and black. Both grey and black were used in the S-Series trucks, while only black was used in Denali and Escalades.
- Denali SIR Clockspring Part # 26087300
- Misc Wire
- PAC adapter (if you have an aftermarket stereo)\
- NOTE: If you have an OBS, 98 was the only year with the correct steering wheel. If you have a 95-97 or a higher GVWR truck with no airbag, you will need a new steering wheel and airbag. For higher GVWR trucks without an airbag, the SIR coil will still be required, however will remain disconnected.
Tools:
- Steering Wheel puller
- Small flat screwdriver
- Torx bits
- The usual wiring "stuff"
Start by disconnecting your battery AND pulling the airbag fuse un the door jamb. THIS IS IMPORTANT. Let the truck sit for 15+ mins to allow for the electrical system to discharge. You don't want your airbag to go off in your face!
Start by first removing the dash bezel and lower dash panel. Under the lower dash panel also remove the metal shield with a 10MM socket. You'll need these out of the way part way into the project (found that out the hard way)
Now, removing the airbag. There are two small openings in the back, use a small screwdriver to release the clips holding it in. You'll figure it out after awhile.
Once the bag is released, unclip the electrical connector and carefully set the bag aside. Un-hook your horn wire (red) by turning counter clockwise. Then take the steering wheel puller and remove the wheel.
Now your wheel is gone and you have this left.
Now take the cover off the column by simply pulling it apart (I think older models had torx screws). You’ll also have to unclip the tilt lever (I think I used a small screwdriver on this too). No you are going to take the old SIR coil out of the column (the black thing with the airbag wire) and unhook it under the dash. You’ll have to cut some zip-ties and such. Take the new SIR coil and route the new wires and plug it all in. NOTE: If you have a 95-97 OBS, you will have to cut the airbag plug off your new coil and swap it from your old coil.
OBS plug splice
Route the new 4 wire plug for the audio controls where you can easily work on it later. Now, If you have a new SIR coil, follow the GM instructions that came with it and install it on the column. If you have a used coil, be sure it is centered on the column and you can see the orange thing in the window indicating it's centered. If you don’t install it correctly it will become damaged and your air bag will not function, along with your horn and new radio controls.
OBS
NBS
Now move on to your steering wheel. If you bought a complete Denali/Escalade/Jimmy wheel and want to keep your factory wheel like I did (mines factory yellow, plus the Denali one I bought was very light grey) You will have to remove the controls and trim cover from the back, the re-install on your existing wheel. These all take torx bits. The back trim piece will also need painted if it doesn't match your interior color.
Put the trim back on the column, and then install the steering wheel. Install is reverse of removal. Be sure you plug your airbag back in, and it just pushes back onto the wheel.
OBS
NBS
At this point you can re-connect your battery and put your airbag fuse back. Before going any further test for proper horn and airbag functioning. I suggest standing out of the truck the first time you start it. You can also (while still standing outside) cycle the wheels back and forth to make sure your SIR coil is installed correctly.
If the airbag light is off and it didn't deploy, you’re ready to hook the controls up!
Wiring Info:
Black - Ground
Grey - Dash light dimmer +12v
Green - Keyed power
Yellow - Data wire - Connect to #15 of grey stereo connector.
1. Cut the plug from the SIR coil and connect 4 wires to it, long enough to run to your stereo. I used OEM colors for simplicity.
2. Splice your ground, power and lights into your radio harness wiring however you choose. The Yellow signal wire goes to a pin in the radio plug that is empty. I shoved it in the socket and taped it in. It was on the bottom left of the connector next to the left most wire. (I’m going to get the pin number later).
Test out your new controls!!! If everything is wired correctly, the controls will do what they say on them (consequently, if they aren't they will do other things, such as not work or change channels with the mute switch). Be sure to check them at night to see if the backlighting works as well!!!
Last edited: