• Welcome to The Truck Stop! We see you haven't REGISTERED yet.

    Your truck knowledge is missing!
    • Registration is FREE , all we need is your birthday and email. (We don't share ANY data with ANYONE)
    • We have tons of knowledge here for your diesel truck!
    • Post your own topics and reply to existing threads to help others out!
    • NO ADS! The site is fully functional and ad free!
    CLICK HERE TO REGISTER!

    Problems registering? Click here to contact us!

    Already registered, but need a PASSWORD RESET? CLICK HERE TO RESET YOUR PASSWORD!

Fun with Ted, Todd, Bill and Paul…Resurrecting an Ultimate Rebuild.

Status
Not open for further replies.
You just might have a promising career writing for Diesel Power, or perhaps Car and Driver!:rolleyes5::rofl::lol::rof::lmao:
 
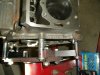
I am sure people on this site will come up with a better idea about the head work with of their expert knowledge of intake and exhaust flow capabilities because the wrong valves were used! Probably say the pistons are not the right ones to use, the coating is all wrong either too much or too little, wrong engine block because it just isn't strong enough, precups aren't going to work well because of the bowl flow isn't enough, or why aren't the skirts coated, or the wrong turbo is being used, the camshaft won't work, the wrist pins are not going to work, cross hatching isn't enough or it is too much, wrong bearing used, wrong rings used, the extrude-hone work wasn't done right on the intake and exhaust manifolds.

Come on all you expert engine builders let the rest of know what should off been done to your specs and with your money!

No problem. All in due time. ;)
 
Thanks for the engine porn.
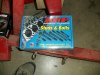
You like that huh? Check out these Jugs.:thumbsup:
DSC01850.jpg


This is why I don't put motors together.
DSC01848.jpg
I mean, I know they go in there somehow but...:???:
 

Attachments

  • DSC01837.jpg
    DSC01837.jpg
    91.7 KB · Views: 10
  • DSC01839.jpg
    DSC01839.jpg
    90.1 KB · Views: 11
  • DSC01840.jpg
    DSC01840.jpg
    89 KB · Views: 11
  • DSC01841.jpg
    DSC01841.jpg
    72.7 KB · Views: 8
  • DSC01846.jpg
    DSC01846.jpg
    61.1 KB · Views: 10
  • IMG_0538.jpg
    IMG_0538.jpg
    65.8 KB · Views: 11
Dyno Day in Meridian ID.

In the spirit of "I wish I had a base line of comparison" before making any marked improvements, I stopped in Boise to link up with jhornsby and Jamin6.5 at the Idaho Turbo Diesels 32'nd Diesel Pickup “Dyno Day at MOTOR MAYHEM who's been hosting these GTGs two or three times a year since 2002.

DSC_0004.jpg 
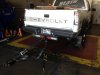
John's stacked truck and Ben's 96 HX40II equipped 2500.

Today's event was held in conjunction with an Open Carry awareness event as there's a move to change the laws here. Anyway, to get in the spirit of things I noticed the plethora of firearms on display so I figured if they were going to show me their's, I'd show them mine and I put the Glock on the belt as well.

After that, I figured I might as well get the WALL-E strapped on too. How many of you have had to have your WALL-E strapped down in public?
View attachment 34329


John got a lot of pictures and so I'll let him post those up as desired in the Dyno Day thread in the regional section, North West. Ben posted a good run with his HX40II equipped truck.
Here's a couple shots of Ben going in for his run and as well as a couple of mine.
DSC_0005.jpg
DSC_0008.jpg
DSC_0290.jpg
"Big wheels keep on turnin..."

I spiked on a TC Lock/Unlock in 3rd but averaged 160 hp & 317 tq with the spike helping a bunch. The machine they use, Dynojet WINEP7, is supposed to 'sense' tire size, rear end ratio etc. Not sure I understand that one but have to take their word for it. It also doesn't like TCC lock up so one has to adjust for that. I'll post the sheet after I get it scanned but here is the data.
Run Conditions: 100.7* Air Temp, 27.03in-Hg. 13% humidity. SAE 1.14

My first two runs 145.26 / 315.66 and 156.06 / 301.27 respectively were started at 45 mph and I 'fed' the throttle up to 3500 rpm. The last run I fed it to 55 and stabbed it. Truck accelerated slowly and hesitated at 75ish and spiked the run at 178.67 / 334.86. So, that 160 average is a bit high. Until the spike, it was paralleling the 2nd... 156. run.

Not very impressive but that's life with a GM-5, larger tires, older motor and, right now, a 'comfortable tune' designed for unloaded road rolling and it works just fine for that. Still rolled up Cabbage Patch hill at 70mph, 1100 EGT, 14PSI boost without issues and after three hits at 3500rpm in 3rd, it seemed to run a little easier/smoother on the road afterwords (fig-newton of my imagination?).

So I have a base line and I'll set another one using the Palmer Dyno tool the software provides to see what the delta is between the machine and do-it youself program. I'll compare with the same tune and the new motor and then again with a new tune. At least I'll have a comparison.

I also have a big thanks to John for the great day, a wonderful time at his home afterwards talking trucks, rockets, guns, computers, $#%^&* computer programs that delet photos instead of copying them to disc, more truck talk etc. A real big thanks to him for his generosity and his wife's culinary talent as that was an awesome dinner. Hope to return the favor soon.
Big apology to Ben, I was going to follow him back to Salt Lake City tonight but he's young...I'm not...I got puppy tummy and that turned into a heavy case of GBNT (Green Beret Nap Time) all before we were 45 miles out of Boise. I quit! I pulled over to crash in a bed instead of a ditch. Safe journey and I'll see you again soon too.
 
Nice posts guys! Entertaining as usual. :hihi: I will definately be doing some different things to the next motor I build...:agreed:
 
1. You need to use the intake valves off a 79 Datsun B210 for the exhaust valves, they allow "extra clearance" to allow the valve to wiggle closed for an optimum seal.
2. The pistons were incorrect for this application because they are not the ones supplied be the "experts" at Damaged Diesel.
3. The best piston coating to use is Rhino Liner because the liner seals against the cylinder walls better when warm.
4. You have the wrong block as well, everybody knows that the best blocks were from the 350 olds engines circa 1983.
5. Your precups would have better flow if you welded a stainless sink strainer to them, the strainers align the fuel molecules to double their effective flow.
6. The best flowing bowls are made by Corelle.
7. Coated skirts are the best. Have you ever seen a chick in a skirt straight from a mud pit?
8. Your turbo blows. A better combination can be had with a proper mating for Kerby, Rainbow and Hoover vacuum cleaner parts. Everybody knows that a turbos that sucks is perfect for your application.
9. Your camshaft won't work because of it's egg shaped lobes. Round lobes have less friction.
10. Wrist pins? Really your using those? If you install a rubber shaft through the rod to retain the piston it allows for high RPM displacement increase. It uses the fuel of a 4 cylinder until you mash the throttle, then the pistons help the valves close faster.
11. Nobody crosshatches anymore. You need compression relief grooves in the cylinder walls with the high compression ratios of these engines.
12. Your bearings are correct! Congratulations, you have done something right.
13 Multi gap rings are the best, they expand in the heat, usually right into the cylinder walls.
14. Extrude honing is old tech, you need to create pressure ridges with hard rolls and a dremel. You also need pressure relief holes so that won't need a wastegate.

As you can see, I'm an expert in bull crap.

Thank you. That was very entertaining!

A nice change from some of the other threads that have been getting kinda "heavy" around here.

To Pav/Ted:

I'm curious, what does "turbo honed" mean?

It looks as if the compressor exit that has been enlarged, is that it?


Oooooo, such a curious kitty........
 
So I have a base line and I'll set another one using the Palmer Dyno tool the software provides to see what the delta is between the machine and do-it youself program. I'll compare with the same tune and the new motor and then again with a new tune. At least I'll have a comparison.

Palmer makes good stuff.

I'm currently using ScanXL with the GM add on extension.

But it's like any other program that calculates from data; garbage in, garbage out.

Ya gotta get things like vehicle weight at the time of the run correct or the numbers won't be valid.

I'm not sure which version or program you're using, but Palmer stuff usually will give you graphs and print outs of your data log.

I'd like to see how it compares to the data logs I've run on my old hack also.

;)
 
GW

In the write up, in MaxxTorque, the engine builder posted pictures of the upper and lower intake manifold, the exhaust manifold, and the turbo charger. All these items had been extruded-honed. The cost of those items, along with the Peninsular upper intake, getting the extrude-hone process done was just a little over $3,000!

Housing wasn't enlarged, just smoothed a little!

At the time of the build I had been talking to a friend of mine, Dan Ferraro, of Clear Image Automotive, in Auburn, Washington about making headers for the 6.5l turbo. Something he still wants to do!

Paul showed a picture of the GM8 with the still smooth housing.

Paul showed a couple of the guys the manifolds, yesterday. The exhaust manifolds had, of course, a lot of soot but they don't have and ridges in them. That part I do know. The lower intake needs a little internal polishing refinement to get the mirror finish back. But who gets to see that part when the engine is assembled.

I do remember the MAxxtorque article, but it was pretty thin on the turbo IIRC.

Was the entire compressor housing extrude honed?

Compressor housings are pretty precise pieces, even a few thou can change it.

I'd be very curious to see specifics of inside the housing and how it performs.

Did you run that GM8 on the engine before it...umm...ate itself?

You impressions of it would be appreciated.

My apologies for the bombardment of questions, I run GM8's and am very curious as to what alterations might have done to your particular one...

Too bad I'm one the other side of the continent, wouldn't mind dropping by Bill's again for a little meet, pressing a few palms and chewing on a few ideas. Maybe even trying a few more of the local eateries in Ellensburg.....
 
I just mentioned MaxxTorque to have the pictures of the parts shown. The GM8 turbo was taken apart, to be rebuilt, and just the housing was honed. I don't really know if having that part done did any good with the air pressure being so intense at the start but I don't believe it could hurt it either.

The GM8 was on there after all the trouble with the 'extras' I had put on the engine. A bolt or nut got into the ATT and did a lot of noticeable bouncing around along with blade damage, but Slim cleaned those problems up real nice. Had the GM8 on during the road trip. Both turbos could and did pump out over 23 pounds of boost. With the 8 on I could adjust the waste gate, with the ATT I had to keep backing out of the loud pedal. The higher boost numbers were fun to see but could of been a little tough on the engine in the long run. The ATT would push you back in the seat in my 4x4 dually, really hard when it came up on the boost. The 8 just sort of walked you back in the seat.

Can't really say anything about performance with the 8, but Pauls pickup is close to 3,000 pounds lighter and my former engine should make his really 'haul the mail', so to speak! Riding in Paul's pickup Friday felt like a being in a diesel hot rod after all this time driving my 81 SB with a 250 6.

The head work was extensive, along with expensive. Port matching and gasket matching wasn't cheap either. But those heads had some great numbers on the flow chart, very impressive numbers to me! And those numbers were printed and published.

This new engine builder, Paul knows, I am quite sure he will be using just one type of bearing on that newly balanced Scat crank! I have been told he knows a little about the 6.2 and 6.5 diesel engines.
 
Was the entire compressor housing extrude honed?

Compressor housings are pretty precise pieces, even a few thou can change it.

Not sure about the specs.

Pictures being worth a thousand words and my penchant for the words, here's a couple of shots. One each of the outlets for the GM-8 and 'the ATT'
DSC01829.jpg GM-8:thumbsup:
DSC01857.jpg My ATT:rolleyes5:

The advantages of the honing are at least aesthetically pleasing but the "preciseness" of the machining done for the ATT is questionable, at least to me.
Disclaimer: That's strictly the opinion of a rank amateur going off of observations.

Here's two shots of the housing's interior and intake passage ways showing what might be the scoring done by the debris Ian allowed to pass through it.

Repeat, these are pictures of an ATT that was damaged by an "expert" doing "improvements" to 635's truck, not what is sold by Slim or Walking J (Dennis, I've sent you the full sized shots for your inspection and input. I don't know if these are areas of concern or not so your input after review would be appreciated).
DSC01855.jpg

DSC01856.jpg
On the polished surfaces, one can see a scoring line about 1.5 inches long from blade contact and a lot of scratches that can be seen which I have not theory on. Thanks again Ian?

Not sure how well it will all show up on the reduced pictures but our observations of the eight main blades show pitting in the leading edges of seven of them with a corner missing on one. True, they are small pits and pieces but what the effects are on performance given the rates of rotation...
DSC01853.jpg
 
The pics are kind of small, but it looks OK to me.

My comments about a few thou making a difference was in reference to the extrude honing. If the blade to housing dimension is changed across the entire housing it changes the characteristics of the compressor as an assembly. Scratches are a different animal all together.

We would routinely send compressors (axial flow though, not radial) back to service with "scratching" such as I can see in the pictures. Light scratching is just part of operation in a jet engine. A turbocharger leads and even easier life as it lives behind an air filter.

Deep gouges would be a different story. Depending on depth, quantity and location it may or may not be serviceable.

Those are specs given by a manufacturer. In this case, I guess you would have to use ones from MHI. If they even give tolerances for damage.

The compressor wheel "looks" ok. The damage looks minimal. Certainly no worse than the damage usually seen in normal service on a 1st stage compressor blade.

What I would recommend is that you get in there with a magnifying glass and make sure that none of the "chips" run into a crack.

Cracks are bad.

Assuming there are no cracks, run you finger across the face of the blade. If you feel it "pick" your skin, take a swiss file and dress the rough edge down. What you are feeling is where the impact has bent the metal at the chip. This small bit of metal "standing proud" disturbs the flow across the blade. Dressing it off sets it back to normal. Don't take too much, you're not trying to enlarge the "chip" just dress off the roughness that is parallel the blade face.

Hopefully you understood that, I tried to make it a "layman" as possible without being insulting.....
 
Not sure why the pictures are so small, but the site does tend to compress a 1MB picture to about 80KB and I appreciate the advice on touching up the blades. I'll look closer one of these days to see if I can spot any cracking. I sent the 4MB pictures to Dennis and haven't heard back yet but, with two friends battling the big "C", he's got other higher priorities. Besides, I'm not in a hurry and my impatience meter is pegged at zero these days. One day you'll get PCS orders to Vancouver and you can swing in to Heath's and eat great food in Ellensburg. I liked the Red Horse Diner for lunch and the Palace is fine for Breakfast and "Supper."
 
Paul, have not gotten the pictures yet . The internal scratches look odd be interesting to see how deep they are the face and radius should be polished surfaces. I dressed the leading edges of the turbine wheel before sending it back to Ted. It was done with a diamond file and then polished with a dremel buffing wheel they were shiny when it left here. I have a used compressor housing that I can send you. Just been so dam busy and a third friend (close) may be having the same problems as my other friends. Four people in less than 2 years. Enough to make you scream, all under 50.

You have my contact info let me know when to look for them.
 
The other thing I'd be concerned with, since you mentioned one blade had a corner "chip" missing, would be any imbalance in the impeller, as scratching and pitting is one thing, but at 15,000 rpm an imbalance would quickly lead to a catastrophic failure of the compressor blade and resultant grenading with little metal bits winding up in the intake, cylinders and exhaust system with even more catastrophic damage to follow as those little metal bits scored cylinder walls, fouled valve seats, etc.
 
Not sure why the pictures are so small, but the site does tend to compress a 1MB picture to about 80KB and I appreciate the advice on touching up the blades. I'll look closer one of these days to see if I can spot any cracking. I sent the 4MB pictures to Dennis and haven't heard back yet but, with two friends battling the big "C", he's got other higher priorities. Besides, I'm not in a hurry and my impatience meter is pegged at zero these days. One day you'll get PCS orders to Vancouver and you can swing in to Heath's and eat great food in Ellensburg. I liked the Red Horse Diner for lunch and the Palace is fine for Breakfast and "Supper."

Oh, I'm not in BC any more.

Just a touch further away......Newfoundland......:rolleyes5:
 
Status
Not open for further replies.
Back
Top