• Welcome to The Truck Stop! We see you haven't REGISTERED yet.

    Your truck knowledge is missing!
    • Registration is FREE , all we need is your birthday and email. (We don't share ANY data with ANYONE)
    • We have tons of knowledge here for your diesel truck!
    • Post your own topics and reply to existing threads to help others out!
    • NO ADS! The site is fully functional and ad free!
    CLICK HERE TO REGISTER!

    Problems registering? Click here to contact us!

    Already registered, but need a PASSWORD RESET? CLICK HERE TO RESET YOUR PASSWORD!

1996 K2500 “Krovvy”

Feel for you who have to deal with rust. For me, so not worth it.

I’m afraid it’s my lot in life as I don’t think moving far enough away so I no longer have to deal with the stuff is in the cards for me.

If the condition of the front diff is unknown, do yourself a favor and replace the front axle seals while it's out of the truck. The driver's side is incredibly frustrating to do in frame. Wish I had done the same when I swapped mine

What seals did you use? And you were able to get it together without it leaking? Years ago Fellow Traveller said he had a heck of a time getting front axle seals to not leak, so after reading that I’ve always been leery about changing them. It would definitely be nice to change them while it’s out since I’ve gone through everything else on this truck so far.
 
I actually paid a shop to do mine...and it still leaks. Not because of the seal I believe; I was told that there was actually a groove worn in the shaft where the seal rode on it, but the mechanic put the shaft back in. I was told this after the job was done and I was billed for it. Frustrating to say the least. Now that I think of it, I should check the vent hose and see if that is working properly and not forcing oil out the seal.

I'm unsure of what seal to recommend, but in a quick search GM 22761722 looks like it may be a 2 piece seal for the front.

Rock Auto shows Timken 450094 as the replacement for the 9.25" front diff

In looking at Fellow Traveler's thread it appears the newer seal design may be more problematic, and the older style with metal lip is most desirable. Yukon Gear makes what looks like the old style here, this is what I think I'd use in the future


And speaking of stub axles, for whatever reason the driver side stub axle that I need to replace is 38% off on Amazon right now, also made by Yukon which seems like a good deal. Probably going to scoop this up and replace in several years, seems to be how long it takes to get projects scratched off my list 🤷‍♂️

Thanks for the info. I guess I’ll take mine apart and see what I’m working with before I put it back in.
 
I have found that using those speedy sleeves is not such a good fix.
Okay if a person wants to get by for a short while but, the seal will cut the sleeve then be worser than ever.
If i have a shaft that got a groove cut in it, figure a way to spin it, if possible, then emery cloth into the groove just a little to remove seal cutting ridges, install a new seal and run it.
Seal will be a little loose but they usually hold up well
 
Just caught up on this thread. Nothing sweeter than seeing really a really nice brake line job!
Thank you. That nickel-copper tubing bends and forms so nicely that it's much easier to do a nice job with it.....but thank you for noticing, I did take some extra time with it to make sure it turned out well. The straight parts were actually some of the hardest parts to get right because I don't have a tubing straightener and it's hard to get the tube perfectly straight after it's been coiled.
 
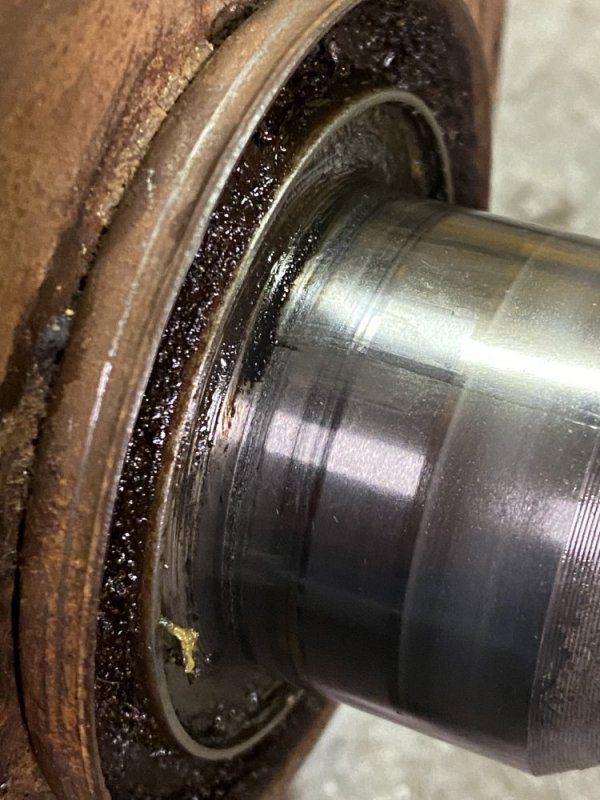
Took the diff apart tonight. The stub axle had some slight grooving. It would probably be ok, but I decided to not risk it…..I found an open box stub axle on eBay for $100 and ordered it. Thanks for the part number @DieselAmateur, that saved me some searching. I’ll save the old one in case I need it in a pinch in the future for one that’s worn much more.

6D6DE6C7-45D9-4886-A897-D44CC5B4EDD7.jpeg

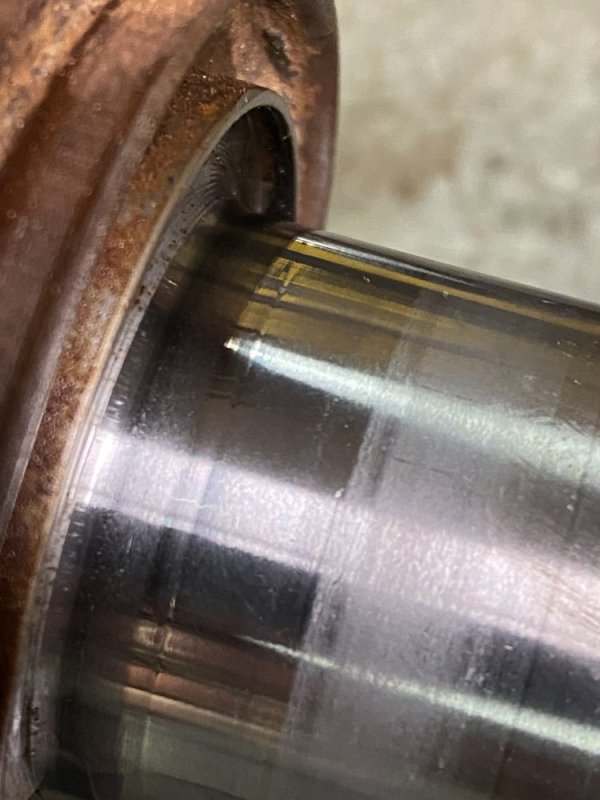
The longer axle had a visible ring, but you couldn’t really feel it so that one is ok to reuse.

D65CDEB4-8C06-40E2-B810-4F58276030C0.jpeg

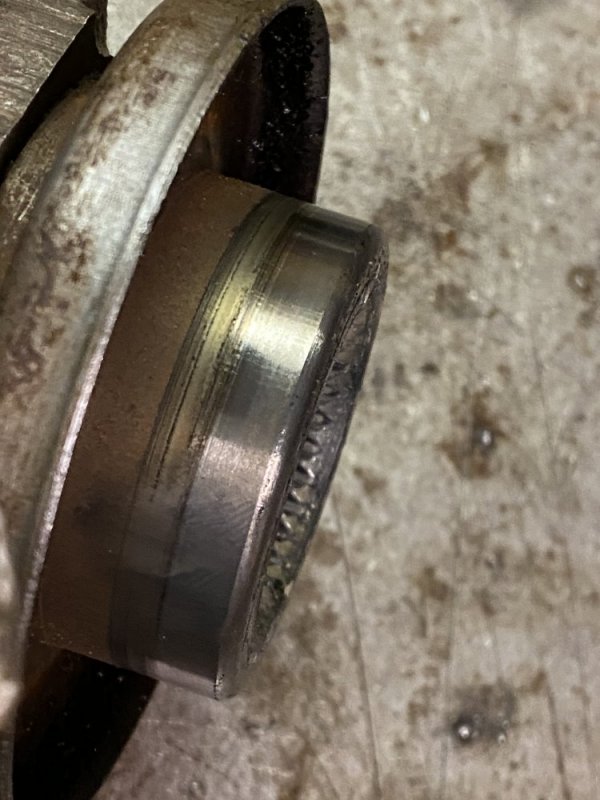
I pulled the pinion yoke and that also has a visible ring, but it can’t be felt, so that is also ok to reuse.

45C3D089-06DE-4205-868D-610736BB840D.jpeg

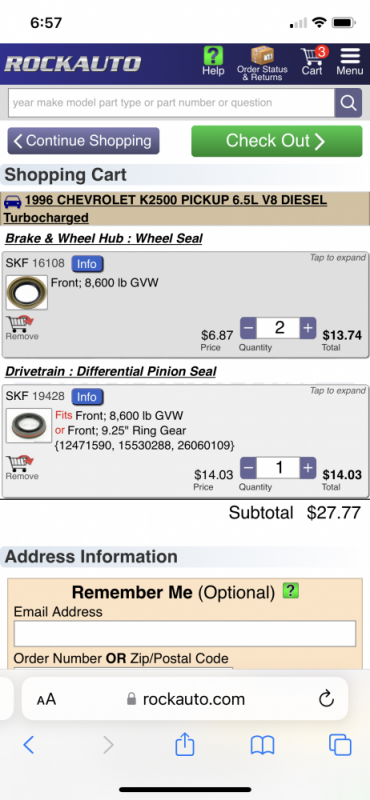
I went to Rock Auto and ordered SKF pinion and axle seals. The axle seals are the old design by the picture, so I should be good to go there.

4CF86A5F-591C-4E10-BD36-E64665EFE9C1.png
 

Attachments

  • 6B9D2866-4154-498E-94DF-E4BF36566EE6.png
    6B9D2866-4154-498E-94DF-E4BF36566EE6.png
    84.6 KB · Views: 0
Glad you found a good deal on the 'bay. Did you remove the driver side shaft by splitting the case or prying and hammering on it? All videos I've seen on removing the driver side make it seem like a nightmare in frame, which is why I outsourced the pain and suffering. Since it wasn't done right though looks like I'll end up having to do it myself after all.
 
Glad you found a good deal on the 'bay. Did you remove the driver side shaft by splitting the case or prying and hammering on it? All videos I've seen on removing the driver side make it seem like a nightmare in frame, which is why I outsourced the pain and suffering. Since it wasn't done right though looks like I'll end up having to do it myself after all.
The factory manual said to use a slide hammer to yank it. The Chilton manual said to use pry bars. Pry bars didn’t work. Before I tried coming up with an adapter for the slide hammer since I didn’t have the right one, I noticed that I could get some clear hits with a hammer from the back side, so I started easily rapping on it while rotating it and it popped out, no problem. I may have gotten lucky.
 
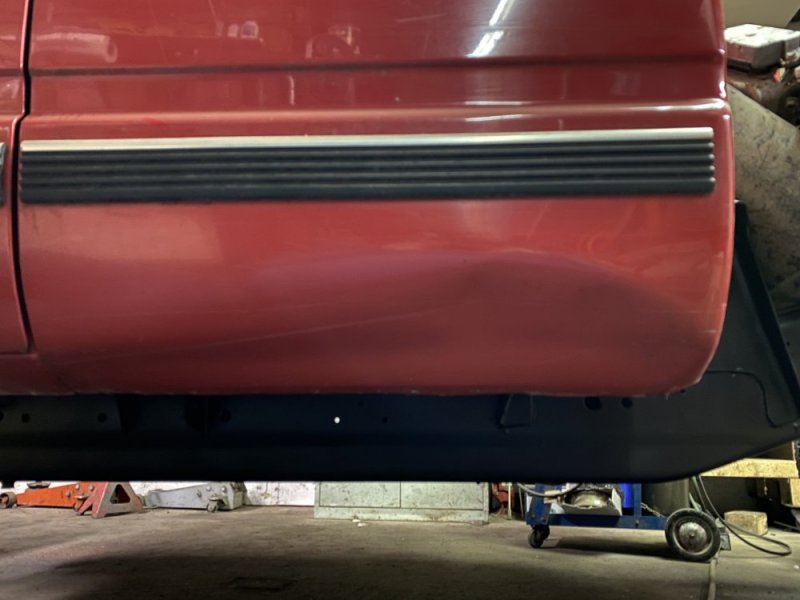
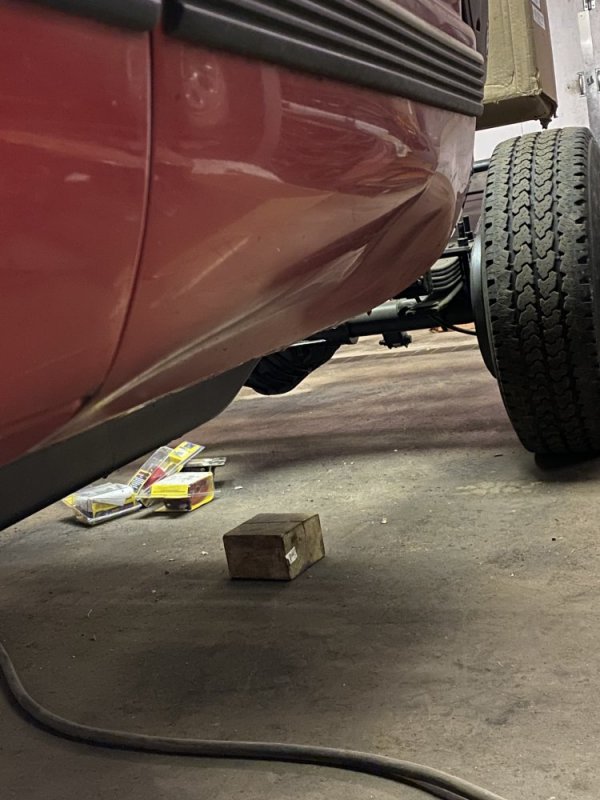
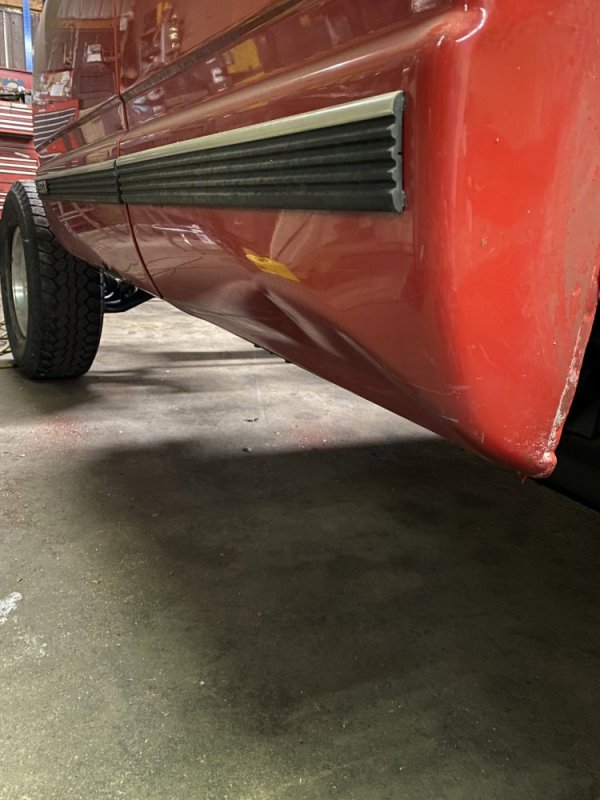
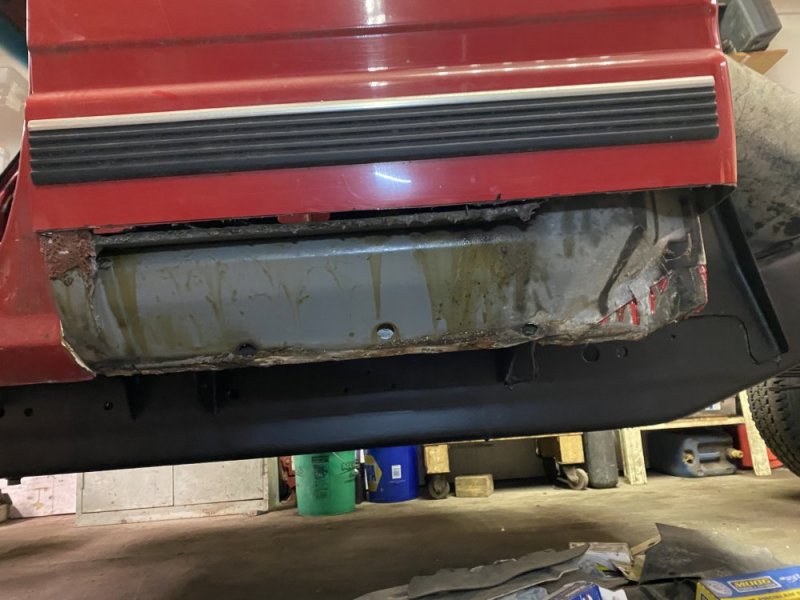
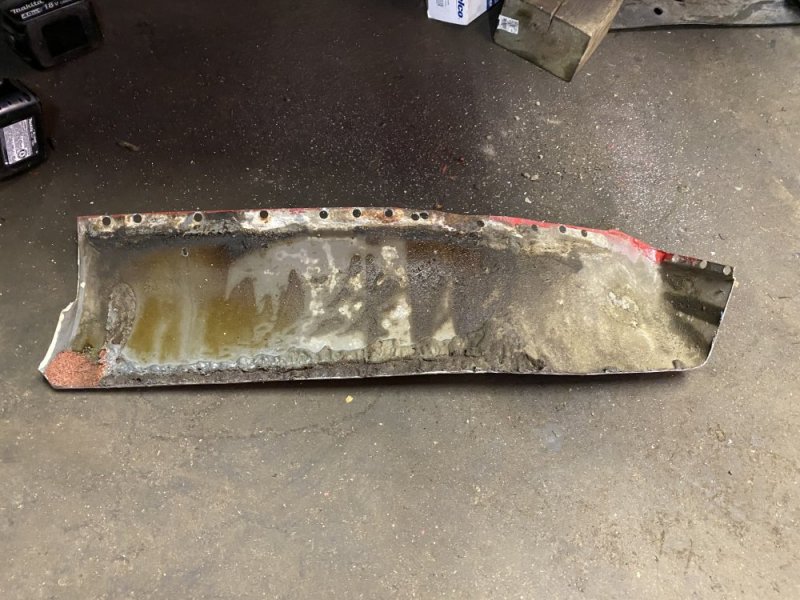
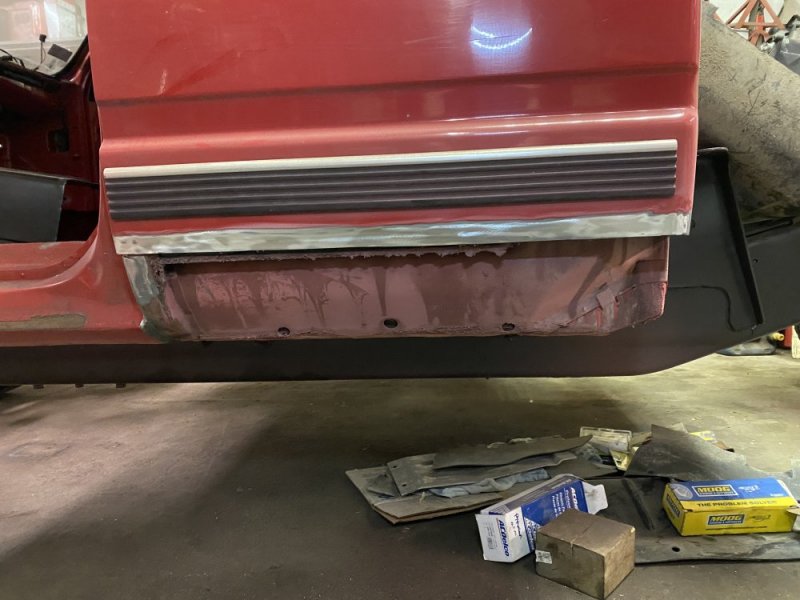
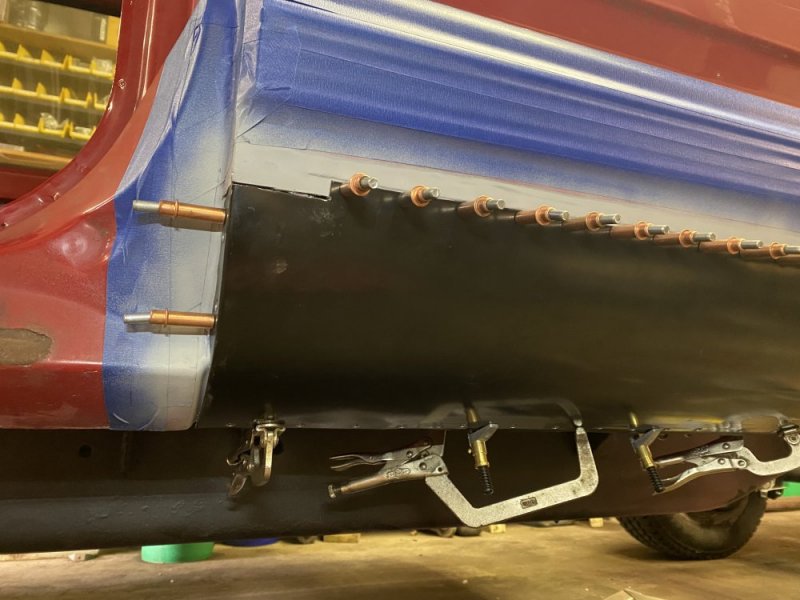
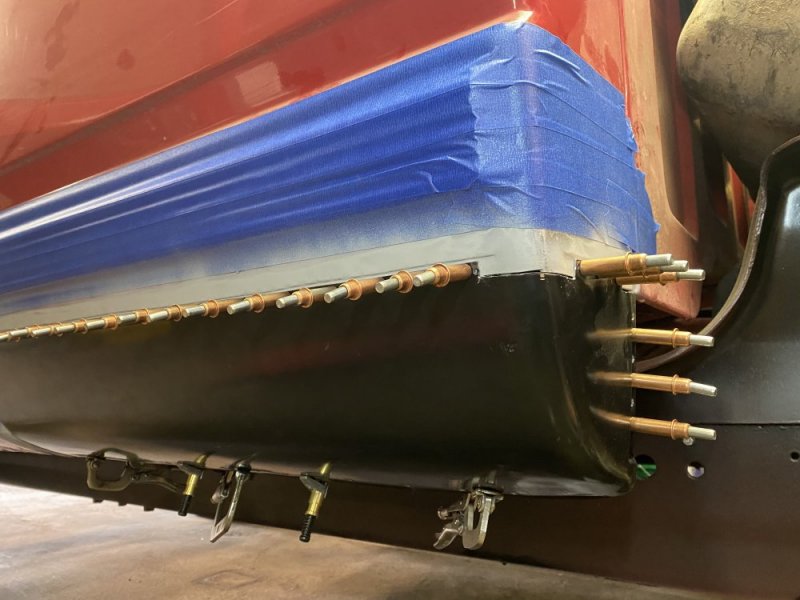
One of the reasons I bought this truck was because of how solid the cab was, though the driver side cab corner was crushed in. I wasn’t planning on doing anything with it, but I changed my mind - with the truck torn down there’s no better time to fix it and since I’ve done so much to the rest of the truck I wasn’t liking this obvious, visible defect. I contacted a local paintless dent repair company and they didn’t think they’d be able to fix it, which is what I expected, but I wanted to check before I took more drastic measures. I started the drastic measures today. I got to where it’s ready for me to make the flange on the cab, but wasn’t really motivated to go any further today so that’s where I stopped. I’m impressed with how little rust is in here, it will be nice to have solid metal to work with for a change.

76BA306F-E83A-4E20-A241-434EBA4D5685.jpegD70A3F8C-08B5-4D8D-A8FB-E6D7108E218B.jpeg0CA4C2BC-0093-4182-BDD9-1B3D23C84F56.jpeg964ED942-63A0-41BE-BD21-06EC9992A636.jpegC4ACBA3F-CA1D-49FB-AC7E-3FB89DE53B82.jpegF3018240-DD48-449B-89AD-AC36AF482728.jpeg
 
When can I book you to do my cab corners? 🤣

Joking aside, is it possible to paint the inside of the new metal to stop it from rusting from the inside out and not have it catch on fire when welding it in place? The cab corners on my truck are damn near rusted up to the trim piece, boy do I hate living in the salt belt...
I paint the inside of the weld surfaces with weld-through primer. Then once they’re installed, I drip paint down the back side from the inside of the cab (making sure to not plug the drains) and then finally I spray inside through the holes in the inner rocker with cavity wax. I can’t say if all the works since I’ve only had the ones on the dually repaired for a year, but I honestly don’t know what else I could do other than move in with Will or WarWagon in the desert. I too hate living in the rust belt, last weekend I had to repair my little utility trailer for the third time due to rust. The stuff really ticks me off.
 
How much weld do You apply to a panel ?
I have done very little body types of work and am not real familiar with the process.
The attempts that I had made, I would throw down a short spot then hit it with a wet rag to cool it.
It has been a very long time ago so I dont remember the results.
 
How much weld do You apply to a panel ?
I have done very little body types of work and am not real familiar with the process.
The attempts that I had made, I would throw down a short spot then hit it with a wet rag to cool it.
It has been a very long time ago so I dont remember the results.
It depends on each panel/situation. With the cab corner, I can usually get away with just taking my time and spacing the tacks far apart and I don't need to cool the panel. If I start rushing it or laying more weld at a time I'll cool it though. It also helps that I have the panels lapped rather than butted - it gives reinforcement to the panel due to the stacking of the layers and it also gives more material for the heat to disperse to, so it isn't as much of a problem, but it's still a time-consuming process.
 
It depends on each panel/situation. With the cab corner, I can usually get away with just taking my time and spacing the tacks far apart and I don't need to cool the panel. If I start rushing it or laying more weld at a time I'll cool it though. It also helps that I have the panels lapped rather than butted - it gives reinforcement to the panel due to the stacking of the layers and it also gives more material for the heat to disperse to, so it isn't as much of a problem, but it's still a time-consuming process.
Thank You very much for the reply.
I have seen those tools that kind of bends the panel inwards slightly so that a panel can be laid over that portion and then the patch panel lays on kind of flat to the rest of the body.
I have thought of buying one of those tools but I just dont think I would use it too much.
I did buy a bunch of those panel clamps that gives the patch a slight bit of space and holds the patch firmly in place. Those is a pretty cool little item and dont cost much from HF. I thought they was of a fair quality too, even though they is made of chinesium. 😹😹😹
Yeah, I also have those panel spacers. I'll use those depending on the application, but for patches like these I have tended to prefer using the overlap method. I'm pretty sure my panel flanging tool is from HF, but I can't recall off the top of my head and I don't have it in front of me. I've used it enough that it's been worth the investment, but I have a lot of rusty turds laying around here, so my situation isn't like most people's I guess.
 
Yeah. Not many rusty panels on vehicles in these parts, not unless it is an import from another state. Then most times those are bought for an engine, transmission, etc becuase there are so many non rusted units that good bodys is not a problem.
 
Left turn alert!!!

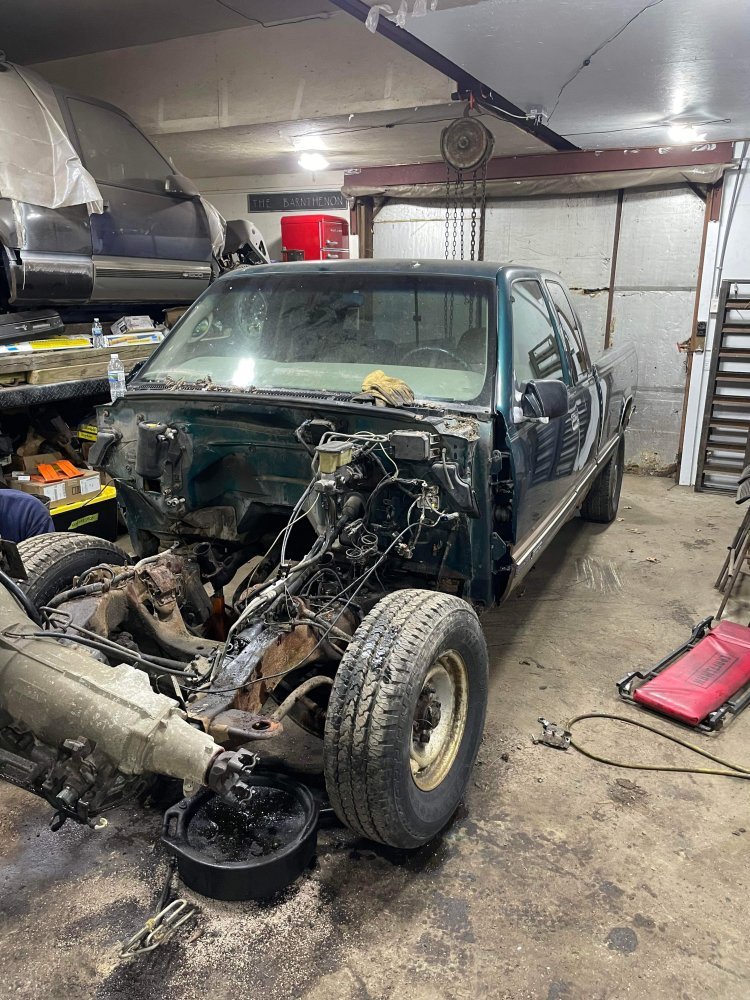
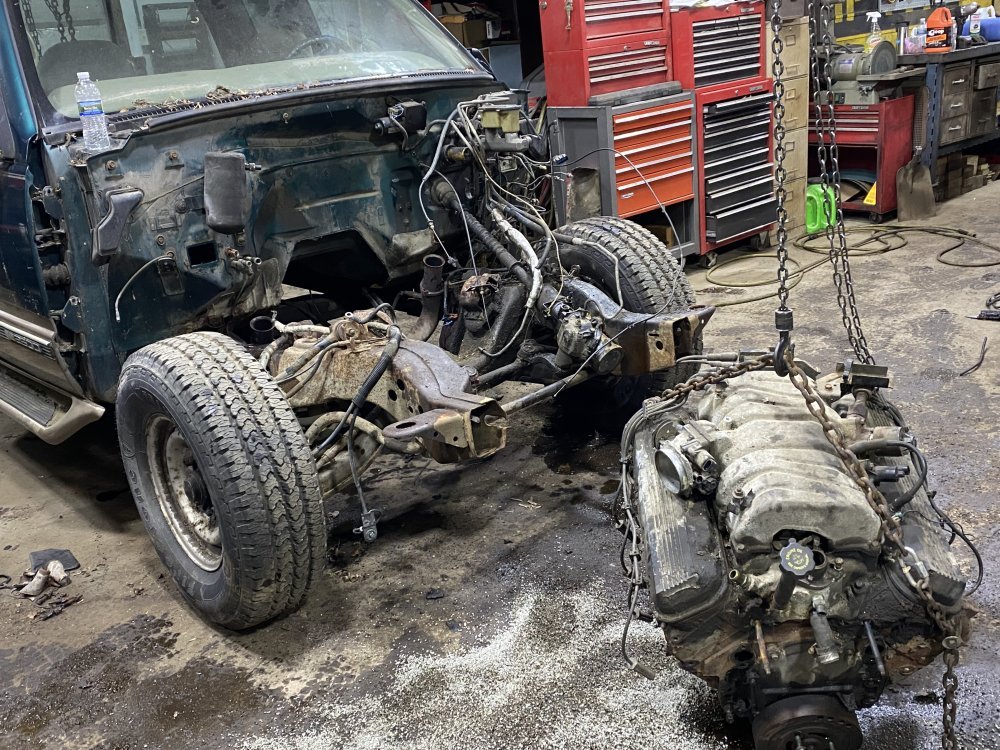
For a while now I’ve been wrestling with what exactly to do with this truck now that I have acquired a couple more trucks since starting this one. I hated to get rid of it because of the work I put into it, but I also wasn’t excited to work on it due to me not having a real use for it. And on top of that, it’s in the way of getting other stuff done.

I finally figured out what to do with it: my dad has had a 1998 C2500 ECLB for years and it’s falling apart……it’s probably about time I do something for him after all he’s done for me, so I’m finishing the truck and giving it to him. Now here’s where the left turn comes……his truck is a 454 truck, and he really likes that engine, so the truck is going to go from a 6.5 diesel to a 454 gasser. I hope you guys don’t boot me from the forum for this heresy 😂

My dad and brother came over today and we got the engine and trans pulled. It’s nice having a father and sons project going on, though I’m hoping we can get through it fast so I can get back to my projects that I’ve been putting off (and no, I’m not talking about the skid steer….).

IMG_8952.jpegIMG_8953.jpegIMG_8951.jpegIMG_8950.jpegIMG_8948.jpeg
 
Back
Top