
Diesel Dually
awaiting your return...signed... your friends
Preface: If you are running oversized tires, high hp, or subjecting your truck to extreme shocks on the front, like drag racing or sled pulling, your front wheel bearings will not last much past the 36k mi warranty.
You can tell if the wheel bearing is shot by jacking the truck up til the wheel is off the ground, grabbing the top and bottom of the tire and try to pry it in and out. ANY movement is wear. A stocker will not move. Ours were worn to the point of more than 2" slop at the tire with 50,000mi on the truck. You can drive pretty far worn bearings without fear of the wheel departing the truck due to the captive design of the unit.
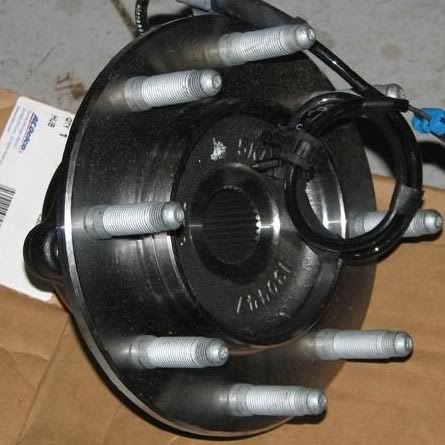
This is a sealed bearing assy that includes the hub, lug bolts, bearings, axle spline, wheel speed sensor, and cable. GM has recently updated the part number to #15225770 or AC Delco #FW289. Retail for the unit can be as high as $450 ea, to a low of $150 ea, so it pays to shop around.
Let's Begin/
What you will need:
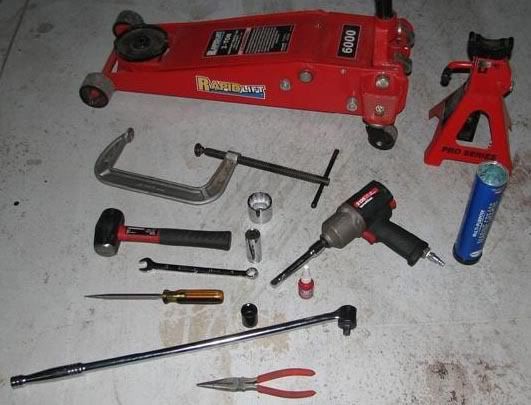
You will need:
Floor jack
Jack stand
15mm socket and ratchet, wrench will work if you are strong.
21mm socket and BIG ASS breaker bar. Cutting torch will have better luck than a wrench on this *****.
36mm socket and breaker bar. Nut is actually 35.5mm, so a 1 3/8" socket can be beaten on it.
Sharp flat blade screwdriver.
Hammer.
Pliers.
Large C-Clamp.
Grease.
Loctite - Blue. Unless you're selling it, then use red. Blue allows for removal in the future, red is REALLY aggressive.
In picture, not absolutely necessary - impact wrench.
Not in picture, something a foot tall and will support 20lb, like a toolbox. And about 3 beers per side.
Step 1:
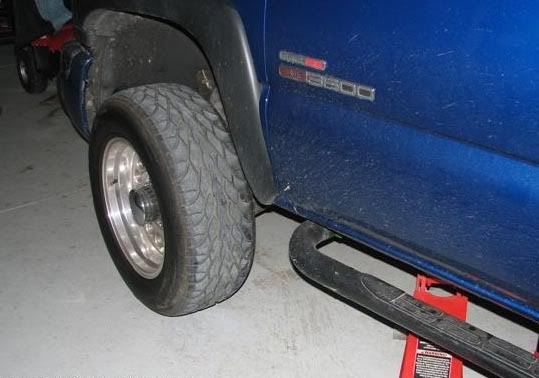
Jack side of truck up, and put a jackstand under it. Use frame rail.
Turn ignition to ON position and put in 4wd Hi, and set parking brake.
Remove Wheel.
Step 2:
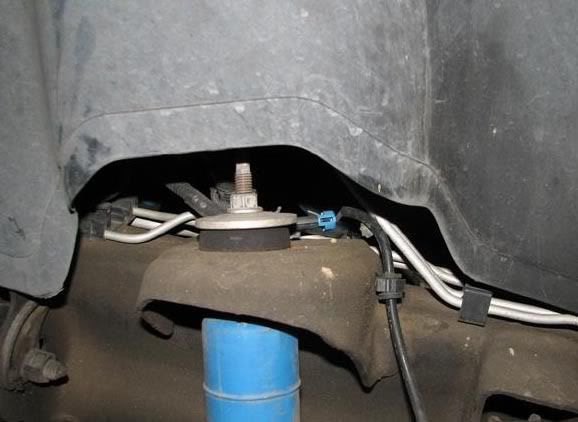
Unplug the wheel sensor wire near the top of the shock. There are 4 push in wire retainers, you will not save them, so rip them out with pliers. You can cut off the wire if you think it will get in your way.
Step 3:
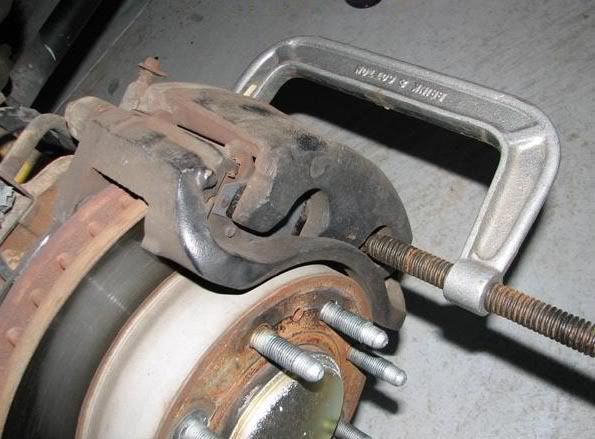
Use C-Clamp to compress the brake pistons so it will be easy to reinstall.
Step 4:
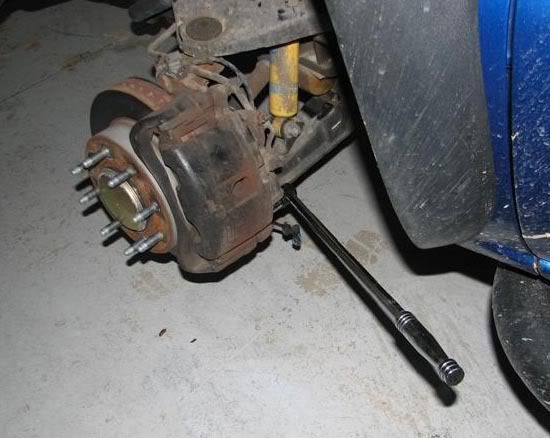
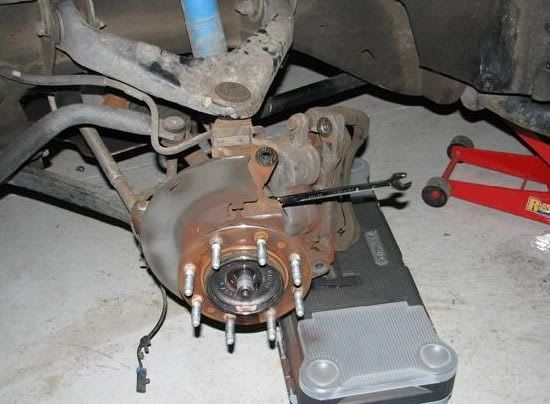
There are 2 loctited 21mm head bolts that hold the brake caliper frame to the axle support. THESE ARE TIGHT!!! Rotate the steering to get to them easier. Remove the bottom, then loosen the top one so you can remove it with your fingers. You will need to have something ready to support it when you remove the brake assy.
Step 5:
Pull the top bolt and set the brake assy on something that will not stress the brake line. You can destroy a brake line by hanging that much weight on it.
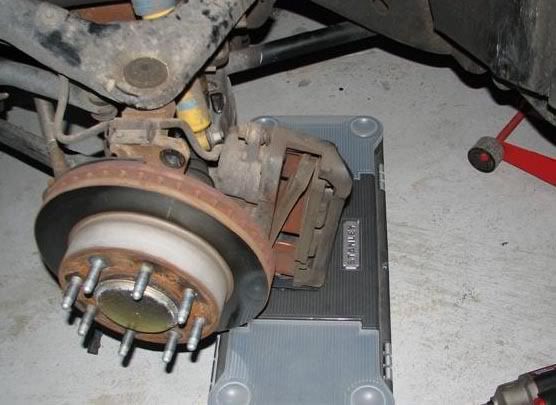
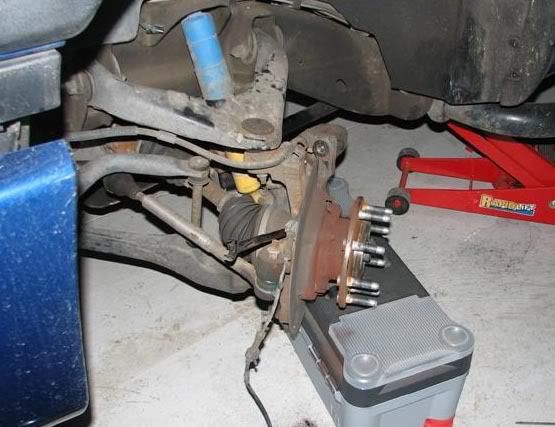
Step 6:
In this picture, the lug at 11 o'clock and 5 o'clock have a retaining washer that holds the disc on the hub for assembly purposes. Remove these by rotating them with a screwdriver, then pry them off. You do not need these, I suggest you throw them away. Once they are removed, you can pull the disc off the hub. If it does NOT come off easy? Torch and a mallet. Do not hit the rotor with a steel hammer or you can burr it up.
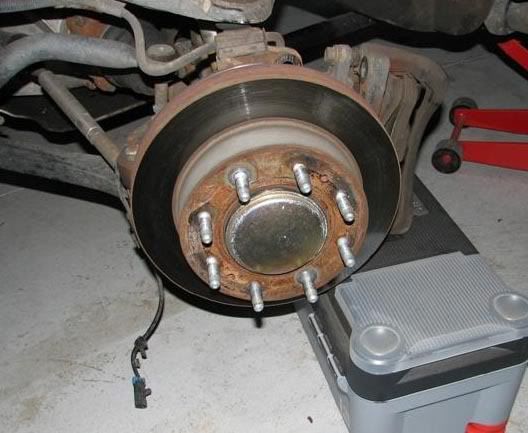
Step 7:
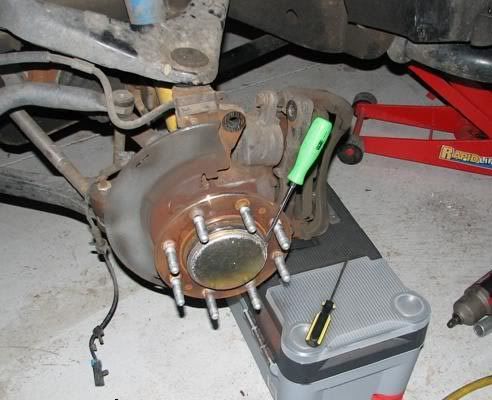
Pry the center dust cover off with a sharp flat blade screwdriver. Be fairly gentle as you will reuse this. It's not REALLY necessary, and serves no function whatsoever, but it looks prettier than the axle nut.
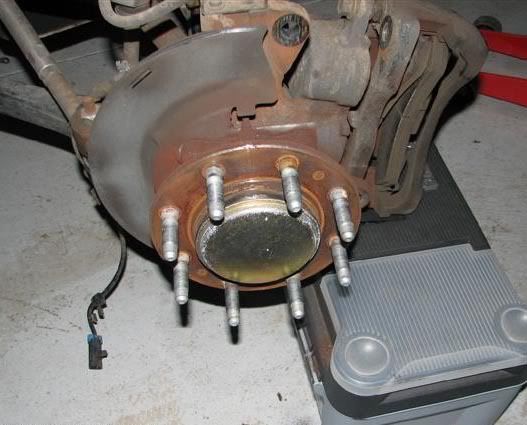
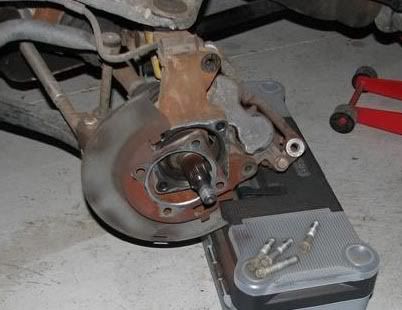
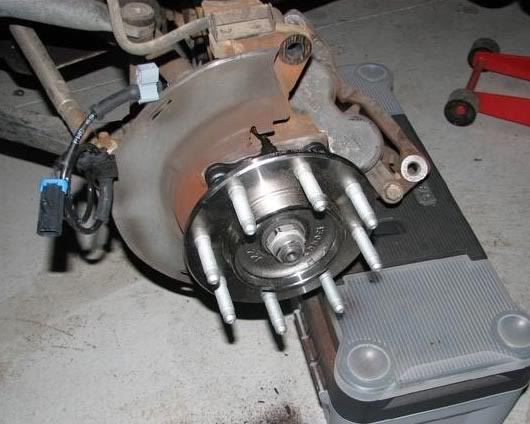
Step 8:
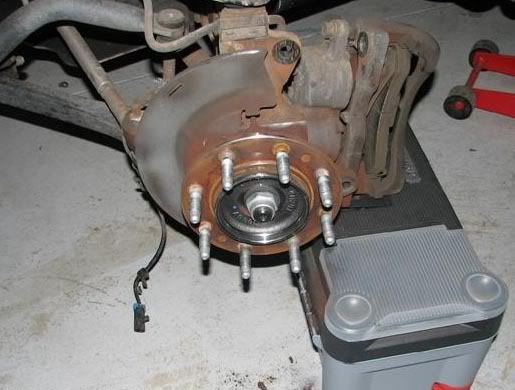
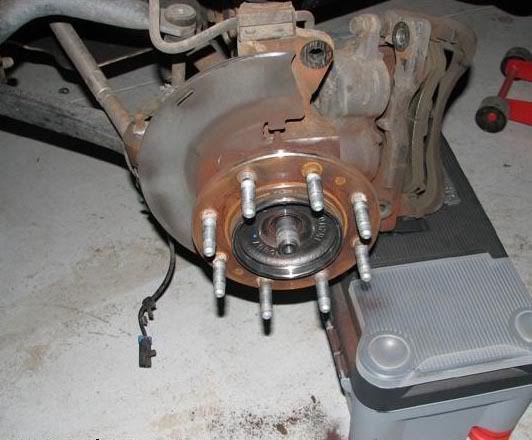
That nut in the center keeps the axle from wandering too deep into the differential. Other than that, it does nothing. It is not a load component. It measures 35.5mm, you can remove it with a 36mm socket and breaker bar or tap a 1 3/8" socket onto it. If the truck is in 4WD with the truck in park, it will not spin the hub. The nut is a locking nut, so it will be tight most the way off.
Part Two in next post
You can tell if the wheel bearing is shot by jacking the truck up til the wheel is off the ground, grabbing the top and bottom of the tire and try to pry it in and out. ANY movement is wear. A stocker will not move. Ours were worn to the point of more than 2" slop at the tire with 50,000mi on the truck. You can drive pretty far worn bearings without fear of the wheel departing the truck due to the captive design of the unit.
This is a sealed bearing assy that includes the hub, lug bolts, bearings, axle spline, wheel speed sensor, and cable. GM has recently updated the part number to #15225770 or AC Delco #FW289. Retail for the unit can be as high as $450 ea, to a low of $150 ea, so it pays to shop around.
Let's Begin/
What you will need:
You will need:
Floor jack
Jack stand
15mm socket and ratchet, wrench will work if you are strong.
21mm socket and BIG ASS breaker bar. Cutting torch will have better luck than a wrench on this *****.
36mm socket and breaker bar. Nut is actually 35.5mm, so a 1 3/8" socket can be beaten on it.
Sharp flat blade screwdriver.
Hammer.
Pliers.
Large C-Clamp.
Grease.
Loctite - Blue. Unless you're selling it, then use red. Blue allows for removal in the future, red is REALLY aggressive.
In picture, not absolutely necessary - impact wrench.
Not in picture, something a foot tall and will support 20lb, like a toolbox. And about 3 beers per side.
Step 1:
Jack side of truck up, and put a jackstand under it. Use frame rail.
Turn ignition to ON position and put in 4wd Hi, and set parking brake.
Remove Wheel.
Step 2:
Unplug the wheel sensor wire near the top of the shock. There are 4 push in wire retainers, you will not save them, so rip them out with pliers. You can cut off the wire if you think it will get in your way.
Step 3:
Use C-Clamp to compress the brake pistons so it will be easy to reinstall.
Step 4:
There are 2 loctited 21mm head bolts that hold the brake caliper frame to the axle support. THESE ARE TIGHT!!! Rotate the steering to get to them easier. Remove the bottom, then loosen the top one so you can remove it with your fingers. You will need to have something ready to support it when you remove the brake assy.
Step 5:
Pull the top bolt and set the brake assy on something that will not stress the brake line. You can destroy a brake line by hanging that much weight on it.
Step 6:
In this picture, the lug at 11 o'clock and 5 o'clock have a retaining washer that holds the disc on the hub for assembly purposes. Remove these by rotating them with a screwdriver, then pry them off. You do not need these, I suggest you throw them away. Once they are removed, you can pull the disc off the hub. If it does NOT come off easy? Torch and a mallet. Do not hit the rotor with a steel hammer or you can burr it up.
Step 7:
Pry the center dust cover off with a sharp flat blade screwdriver. Be fairly gentle as you will reuse this. It's not REALLY necessary, and serves no function whatsoever, but it looks prettier than the axle nut.
Step 8:
That nut in the center keeps the axle from wandering too deep into the differential. Other than that, it does nothing. It is not a load component. It measures 35.5mm, you can remove it with a 36mm socket and breaker bar or tap a 1 3/8" socket onto it. If the truck is in 4WD with the truck in park, it will not spin the hub. The nut is a locking nut, so it will be tight most the way off.
Part Two in next post
")

