• Welcome to The Truck Stop! We see you haven't REGISTERED yet.

    Your truck knowledge is missing!
    • Registration is FREE , all we need is your birthday and email. (We don't share ANY data with ANYONE)
    • We have tons of knowledge here for your diesel truck!
    • Post your own topics and reply to existing threads to help others out!
    • NO ADS! The site is fully functional and ad free!
    CLICK HERE TO REGISTER!

    Problems registering? Click here to contact us!

    Already registered, but need a PASSWORD RESET? CLICK HERE TO RESET YOUR PASSWORD!

Engine assembly

Rodd

Recruit
Messages
1,723
Reaction score
1,018
Location
Antelope, CA
My son and I have finally started the engine assembly for my 95 sierra. I have the military humv 6.5 repair manual. We went through the steps of the initial install off the crank and the mains. The funny thing is the instructions don't give an order as to which order to torque in just do the longs first then the shorts. I know in gassers there is an order. Now the next step says to take off all the mains and install the rear main sill with adhesive. What type of adhesive do I use?
 
On the OD of seals I usually use No.1 Permatex in the squeeze tube.
Right, wrong, or indifferent. It has always worked for Me.
Where it calls for sealant between the main cap and block, I use that same sealer there too.
 
I am slowly but surely getting getting this engine assembled. I have completed the crank, mains, and rear main seal. The next step in the book is to install the fly wheel. My issue is I have it on an engine stand and there is no way to install it while it is on the engine stand. I'm assuming it is because it is used to turn the crank when installing the pistons and rods. Not sure though. Do I have to install it now or can it wait?
 
You should be able to turn the crank with a bolt in the end of the crankshaft. I usually shove a pipe couple over the bolt so it leaves an inch or so of threads showing then screw it down.
Or else if there is holes drilled in the counter weights of the crank, use a end of a ratched handle or a piece of pipe and rotate the crank with something like that.
Crank does not rotate too difficult during assembly procedure.
I figured as much. I can turn it by hand but I know once I add the pistons and rods I wont be able to do it by hand.
 
On the OD of seals I usually use No.1 Permatex in the squeeze tube.
Right, wrong, or indifferent. It has always worked for Me.
Where it calls for sealant between the main cap and block, I use that same sealer there too.
The instructions I have don't say anything about putting sealant between the main caps and block. Is that standard?
 
No place local had an install tool for it, so I used a block of wood that was plained flat and tapped it in with that. I was able to get it flush with the block. The cap sits about 1/64 or so back/off set from the block. The book said to use a strait edge razor blade to trim off the excess to make it flush with the cap. Never seen that before but that's what the book says.
 
Never heard of that before.
I have heard of trimming the two piece seals so that they are just above the block surface, to get a squish affect but, not so much that the seal squishes out between the block and cap.
Since the newer two piece rubber seals came out, I would install one end so it is down into the block a ways, other end out of the block the same distance, a slight dab of sealer to each end of protruding portions in the cap and block, then, install the cap. Perfect fit every time.
New one piece seals shore makes it nice.
I just went back and read the instructions on the rear main Seal and realized it was for the 6.2.
 
Oh, for the flywheel:
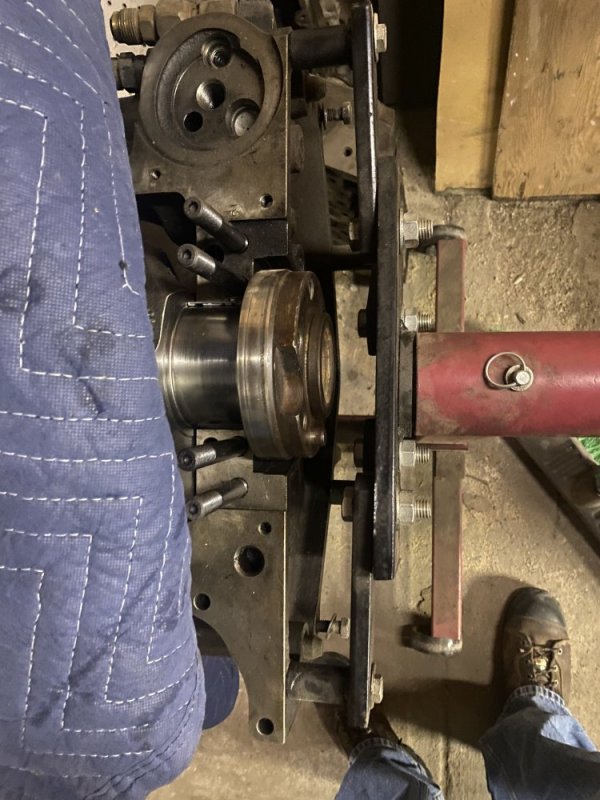
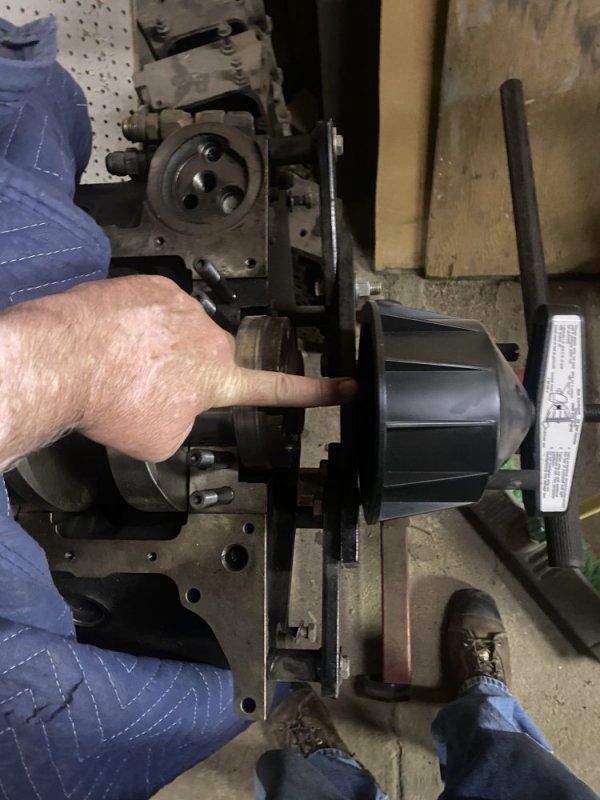
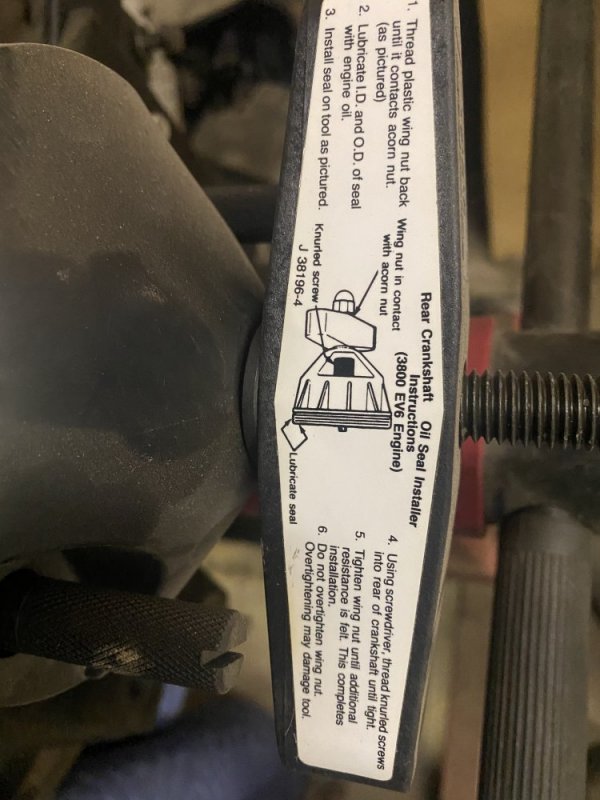
If you have it on an engine stand and the arms are adjusted so they are in the way- use engine hoist and take it off the stand, unbolt and re arrange the arms to clear the flywheel. Install the new seal while hanging, you wont be able to reach it while on the engine stand.E3B6BA2F-436A-4135-BE4D-C9866359C49A.jpeg15F0E080-AB3A-442C-9FE6-9C76DEE5E8C0.jpeg6EA53E70-756F-4DE9-A142-A4FC850EC1C0.jpeg
 
Oh, for the flywheel:
If you have it on an engine stand and the arms are adjusted so they are in the way- use engine hoist and take it off the stand, unbolt and re arrange the arms to clear the flywheel. Install the new seal while hanging, you wont be able to reach it while on the engine stand.View attachment 66842View attachment 66843
Thanks for the pictures will.
 
The young feller I bought my truck from, He is doing a rebuild on a 6.5 enjun. I just sent him a ebay add thats selling one of those rear seal installation tools. Told Him I have read cautions about installing a rear main seal without one of these tools.
The other day I sent him the GM8 turbo from My truck. It has a new kit and the WW installed in it.
Told him if his turbo is not cracked that he could pull this turbo down amd insert the guts into another GM8 that he has. If it aint cracked.
I dont quite remember whare the crack was, somewhere that didnt make much difference. I posted in a pic of it and was advized to just run it. 🤷‍♂️😹😹😹😹
 
Back
Top