• Welcome to The Truck Stop! We see you haven't REGISTERED yet.

    Your truck knowledge is missing!
    • Registration is FREE , all we need is your birthday and email. (We don't share ANY data with ANYONE)
    • We have tons of knowledge here for your diesel truck!
    • Post your own topics and reply to existing threads to help others out!
    • NO ADS! The site is fully functional and ad free!
    CLICK HERE TO REGISTER!

    Problems registering? Click here to contact us!

    Already registered, but need a PASSWORD RESET? CLICK HERE TO RESET YOUR PASSWORD!

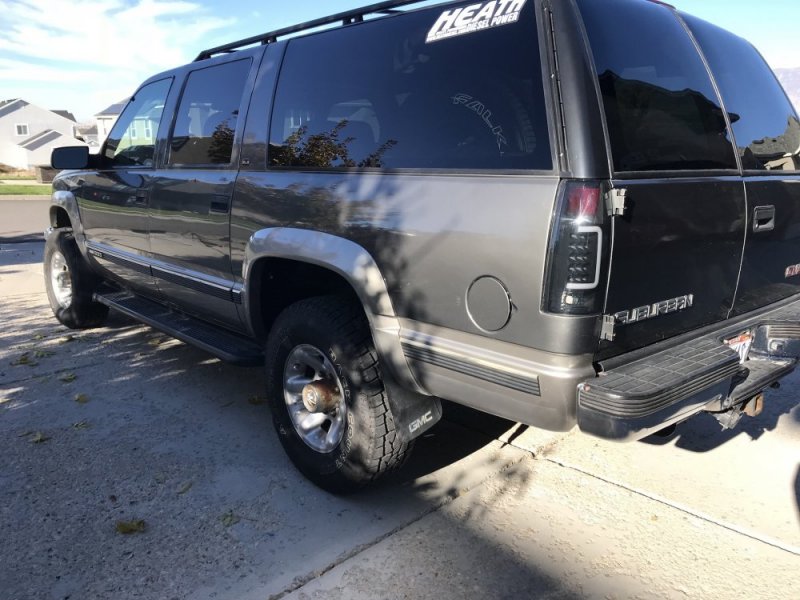
1999 Suburban. What "I want to _______" really means!

Paveltolz

Доверяй, но проверяй
Messages
2,869
Reaction score
2,247
Location
Saratoga Springs, UT
I was awake early and bored so you get the choice of suffering with me or not. I've been mussing about the Suburban and about putting into one place the mad ramblings that go through one's mind when a big project starts, continues and never really seems to end (Brother's Red (M816wrecker), N8in8or and 88GMCTruck are great examples too).
I'm a 'punch list' guy because I tend to wander around the garage looking for a 15mm wrench and end up re-arranging the nuts and bolts...gotta stay on track. Punch lists help, some, not a lot really but, they do help get back on track.

Most of the work has been captured here and there in 'what have you done to your 6.5 and the initial rust issues had its own thread. I just thought I'd capture it in one place...what I should have done from the outset.

Here's whats been done so far with subsequent posts containing the punch lists for the main jobs.


Exterior

o Rear Brakes fixed by Hosmer’s Garage, 100 W. Jackson, Ellensburg, WA 98926
o Front Brakes & Calipers replaced at Les Schwab in Mountain Home ID
o Tires Replaced 265 x 75 x 16 Les Schwab’s Back Country Touring H/Ts (OEM is 245 x 75 x 16).
o Alignment performed along with tires and front brakes
o Cab Lights replaced w/Clear Lenses and Amber LED Bulbs
o Tail Light Units Replaced with LED Units
o Gille Repaired/Painted
o Headlights: Self Restore job…better; Profesionally restored in October 2017 but, still not the best plus, they don’t adjust so, Replaced with ANZO units w/Halo LED
o Turn Signal Lenses replaced
o LED Turn Signal, Parking and Side Marker Light Bulbs
o Painless Wiring Solutions HD Headlight Harness
o Painless Wiring Solutions Four HI Harness (low beams stay on when Hi-Beams engaged)

Interior
o Professionally Cleaned Carpets after multiple vacuuming attempts but…
o New Carpet
o Installed Pioneer Radio Head w/back up camera – Best Buy (great job too)
o More hay/dirt after Camera install found on cargo area carpet
§ Result of installer pulling back panel, driver’s side for wiring
§ Chased down camera wire under door sills and kick panels
o Replace Front Door Speaker, Driver’s Side
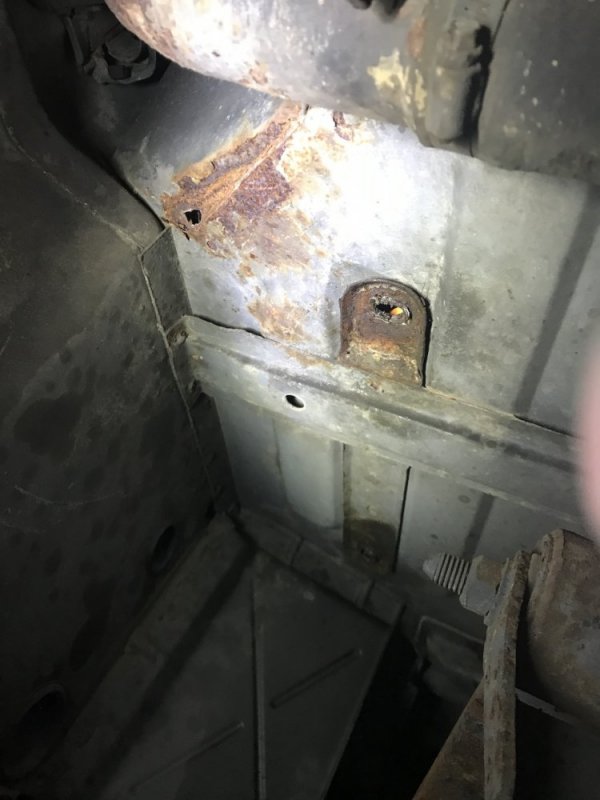
o Found a lot more dirt and RUST under the carpet on the floor pans
o During the following dirt, gravel and rust removal, re-ran camera wires ‘correctly’
o Replaced Courtesy lights, Dome Lights and Map lights with LED units
o Repaired/Replaced Door Lock actuators

Engine
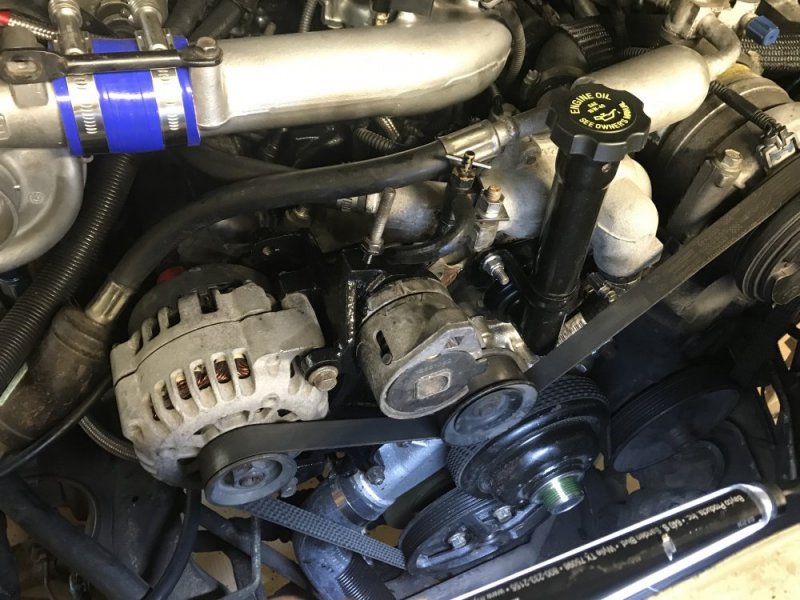
o New Water Pump
o New Radiator Fan & Clutch
o New Harmonic Balancer Pulley
o New Fluid Dampner Harmonic Balancer
o New Oil Cooler Assembly
o Cleaned Radiator
o Cleaned bugs from A/C Condensor
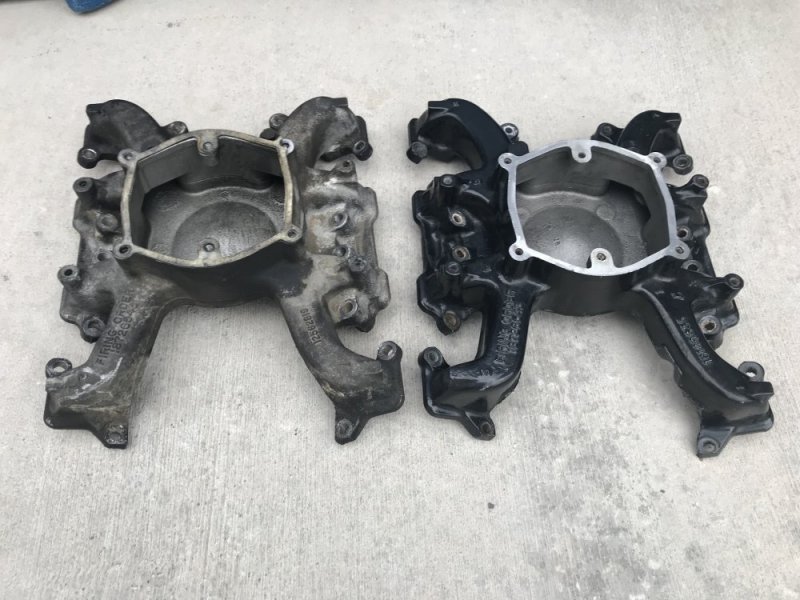
o Upper and Lower Intake Manifolds swapped for the powder coated units from Silverado
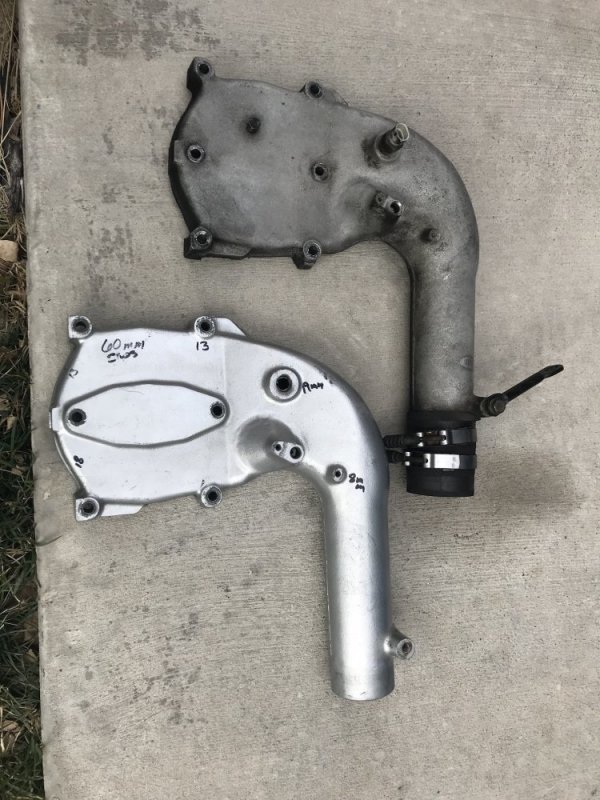
o Pre-1998 flat panel Air Cleaner replaced w/Heath’s first edition unit (S&B Bill designed)
o Turbo swapped out for Hurricane 7 (Modified Heath Diesel GM-8)
o Bruce’s PT Wiring Solutions Battery Cable Kit (0-Gauge Battery and 4-Gauge Alternator and auxiliary cables
o A lot of grease and oil removal
 
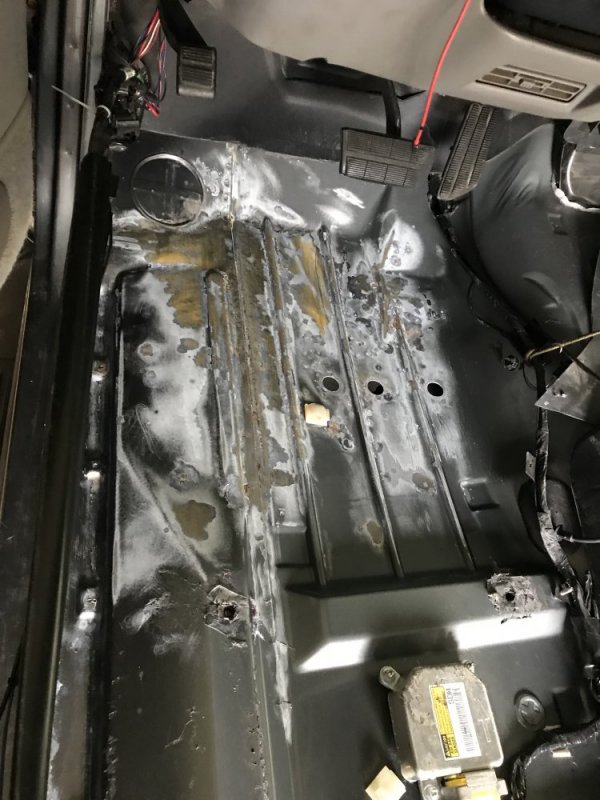
The Rust Removal Project (with lots of pictures) was previously addressed in a separate thread. But, here's the punch list anyway:

Interior
o Remove Seats & Seatbelts
o Remove Door Sill plastic covers
o Remove interior panels
§ Kick Panels
§ B-Pillars
§ Cargo area
o Remove Old Weather Striping from front and rear Doors.
o Remove Carpet-save for template of new carpet (seat, seatbelt mounting holes may not be pre-cut [they weren't])
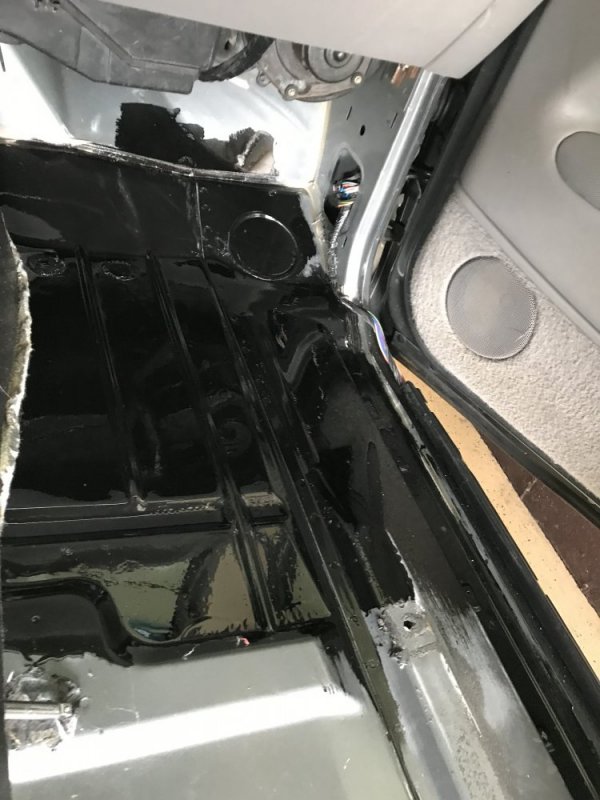
o Address Rust on Floor boards

WORK IN ZONES!
1. Drivers Front Seat floor pan and wiring channel
2. Drivers Back Seat
3. Passenger Back Seat
4. Passenger Front Seat
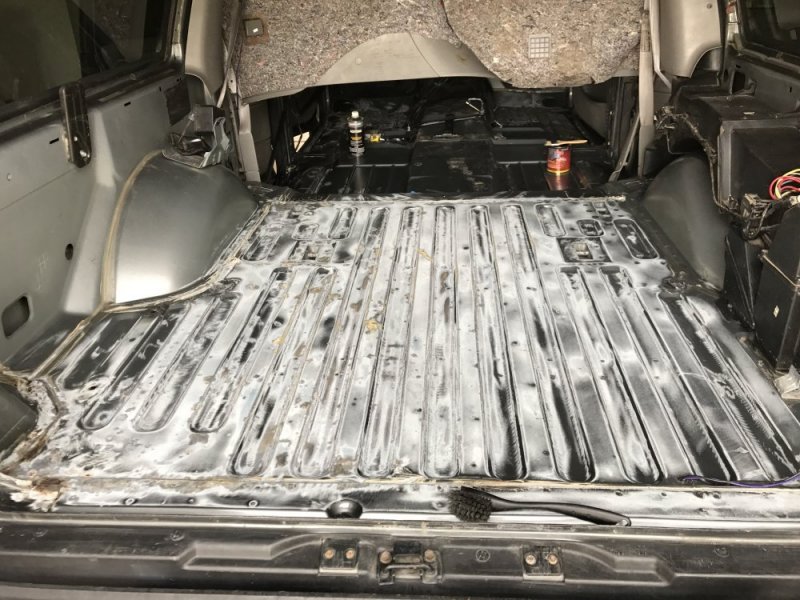
5. Cargo area
o Front Left
o Front Right
o Back Right
o Back left Driver’s
"POR 15 Treatment" Simplified Procedures:
o As Needed: Scrapers, Wire Brush, Wire Wheel, Angle Sander, DA Sander
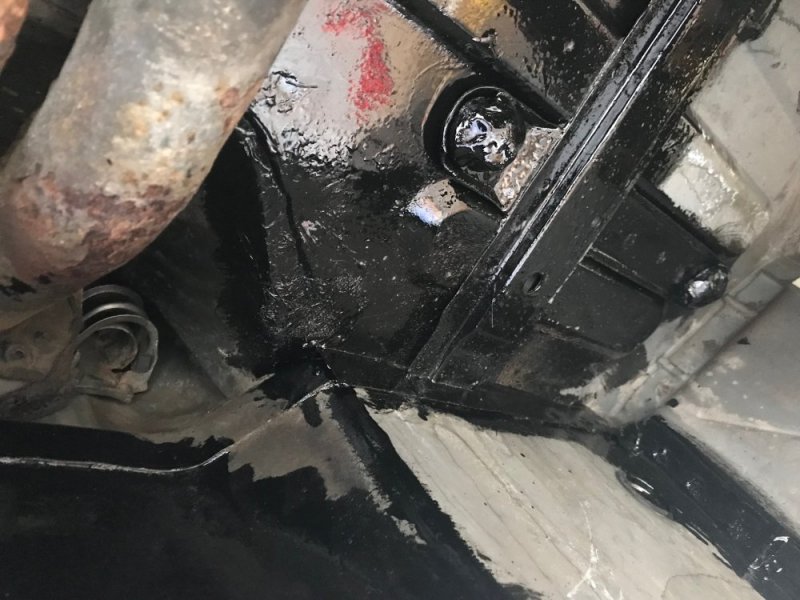
o Treat w/ POR-15 System 3 step same steps for each area
· Degreaser
· Metal Treatment
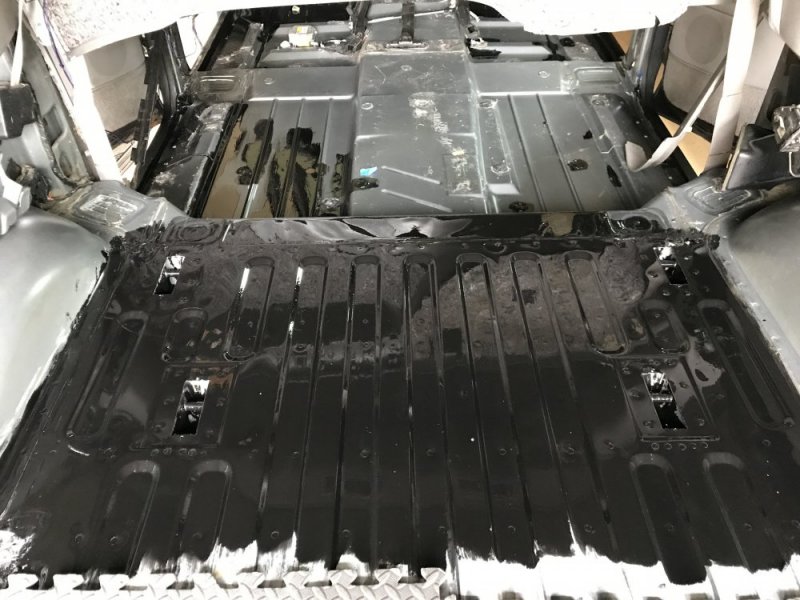
· POR-15 Rust Preventative "Paint"
· Two Coats. Apply second when surface is tacky/finger drags (3-5hrs)
· Then, before second coat dries, TOP COAT areas subject to direct sunlight (under carpet, not a big deal but, exterior surfaces etc. ....)

6. Fuel Filler area (HOLE).
o Sand etc.
o POR-15 Putty
o POR-15 sealer & Fiberglass
o POR-15 treatment
o Top Coat w/Rubber Undercoating

7. Treat Rust at Spare tire mounts w/ POR15 (factory nuts welded spun and fell off)
o Fill bolt holes with POR15 Epoxy Putty
o Drill, tap for M-10 Heli-Coil…SUCCESS
o Re Rout Backup Camera wiring

8. Front Seats Mounting Brackets
o Remove Rust
o POR-15
o Repaint

9. REASSEMBLE
o Replace Carpet and Carpet Foam w/new material
o Replace Door Weather striping
o Replace Panels
o Replace Seats & Seatbelts

Exterior: Doors & Quarter Panels (Fenders are separate tasks w/rust included)
o Sand Lower Edges on Driver’s, Passenger & Barn Doors
§ POR-15 treatment (Degrease etc.)
§ Paint

o Fuel Filler area, Underneath
§ Sand
§ POR-15 treatment
· Degreaser & Metal Prep
· POR-15 Putty
· POR-15 'Paint'
· Top Coat w/Rubber Undercoating

o Rocker Panels and Wheel Wells/Inner Fenders
§ POR-15 treatment
§ Paint

Some Pictures just because....
20170928 POR15 Floor4.JPG 20170928 POR15 Floor6.JPG 20170928 POR15 Floor3.JPG 20170928 POR15 Floor8.JPG 20170922 Rust3.JPG 20171003 Por15-Left Rear underside.jpg 20171007 Top Coat1.JPG 20171007 Top Coat2.JPG
 
Water Pump:

o Disassemble or, "out with the old"
o Fan Shroud
o Pull Radiator
o Alternator
o Pull Thermostats and replace with new units
o Fan - Toss
o Clutch - Toss
o Water Pump - Toss
o HB Pulley
o Harmonic Balancer
o Oil Seal (Crank Shaft)


o Clean Back side of A/C Condenser
o Clean Frame under Radiator & Treat for any Rust
o Clean Timing Cover
o Clean Backing Plate; POR-15 and Black Ceramic Coat Paint
o Clean frame Cross Member
o Scrape / remove built up grease
o Degrease
o Pressure Wash

o Replace or, "In with the New"
o Oil Seal
o Fluid Damper Harmonic Balancer
o New HB Pulley
o Water Pump and backing plate using Copper Coat gasket sealant.
o Replace Fan and Clutch
o Replace Radiator
o Replace Radiator Shroud but…
o Trim Fan Shroud
o Re-replace Fan Shroud
IMG_9721.JPG

While I'm In here:
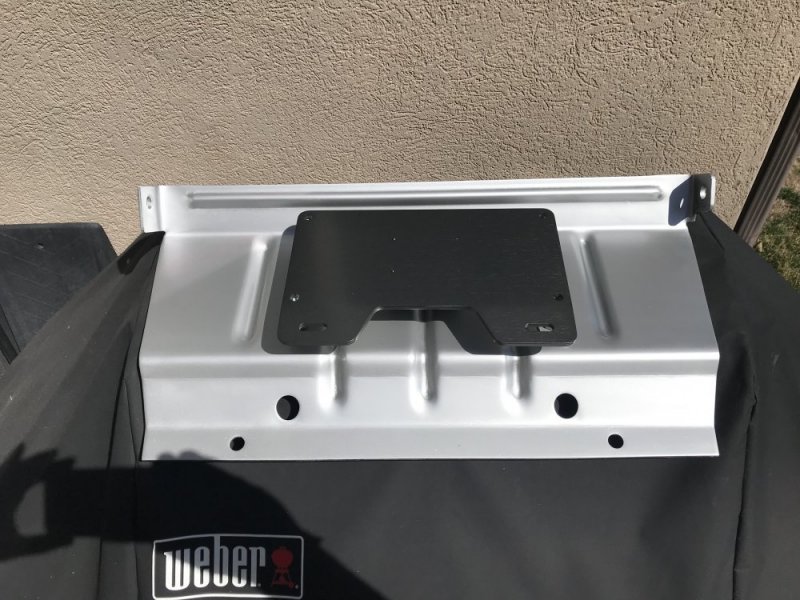
o Swap out plastic splash guard for Aluminum unit and re-install FMD Kit
o PT Wiring Solutions Battery Cable Kit installed
o Swap out Intake manifolds for shiny powderoated units.
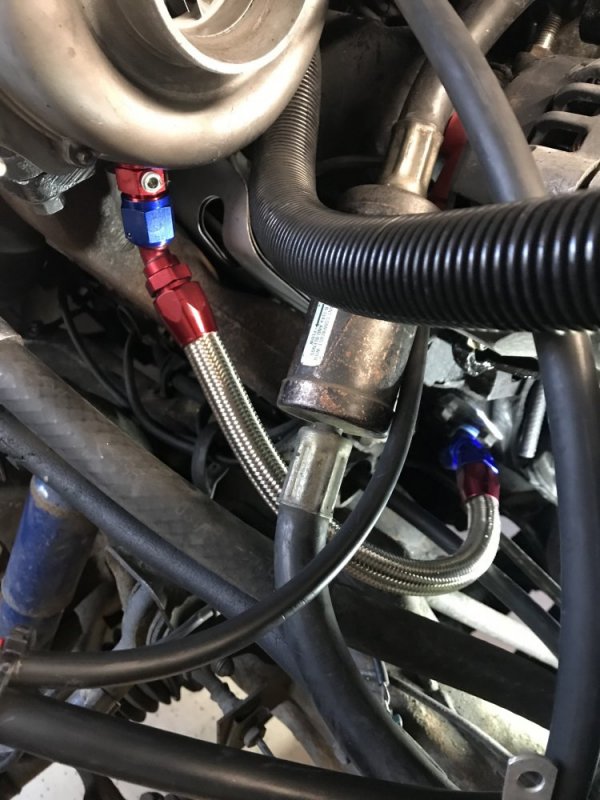
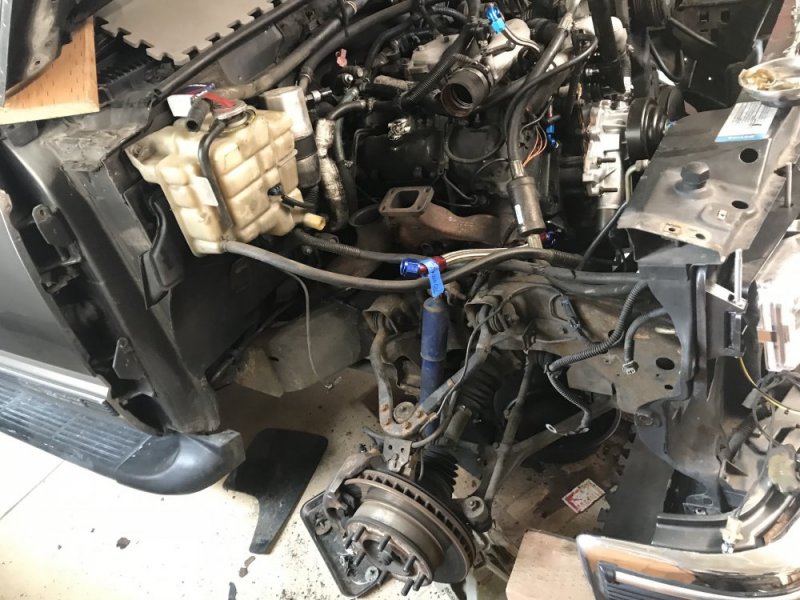
o Upgrade Turbo oil feed & return lines
IMG_9729.JPG IMG_9709.JPG IMG_9711.JPG IMG_9732.JPG
 
Oil Cooler Kit. Original owner removed the whole kit because the lines were leaking. He'd had an issue with them before when they blew out and took the motor with them. GM replaced the motor as he was 5K miles under the 100K warranty.
"I never towed with it." We'll see, saving money for OPTIMIZER or P-400 just the same.

Oil Cooler Job list.

o Remove Grille
o Sand Chipped out areas (GMC,)
o Repaint
o Swap in ANZO Headlights
o Swap in LMC Turn Signal Lenses and LED Bulbs
o Painless Headlight Harness
o Painless “Four High” Harness
o Side Marker light bulbs replace w/ LEDs
o Clean front of A/C Condenser
o Source Lower Oil Cooler Bracket from Recycled Parts Yard from Gasser
o Source Upper Oil Cooler Bracket from Recycled Parts Yard (Transmission Cooler)
o Cut to size (Oil Cooler is larger than Transmission cooler so the bracket’s ‘arms’ are longer)
o Drill new holes in Radiator Core Support
o Paint
o Remove Oil Filter 4x4 adaptor
o Remove Exhaust Manifold
o Install Oil Cooler Connectors at Block
o Re-inspect lines at block and correct the output one to the actual output port.
o Oil Cooler Lines
o Oil Cooler to the front brackets where old unit should still be
o Re-install Oil Filter 4x4 adaptor with new O Rings (x3)
o Re-install Exhaust Manifold with bolts anti-siezed
o Wire in ANZO HALO LED wiring to Parking Light Circuit
o Replace Grille
o Replace Turn Signal Lenses
o Aim Headlights
 
Fenders. Initial plan was to pull them both but, the driver's side fender is 'good enough' for now. I know this will shock some of ya'll but, yea, I left the thing in there.

Here's the plan though:


Fender – Passenger Side
o Remove Upper and lower Intakes (if not already done)
o Pull Battery and Discard
o Remove Air Cleaner and discard
o Replace with Heath "Gen I" Air Cleaner
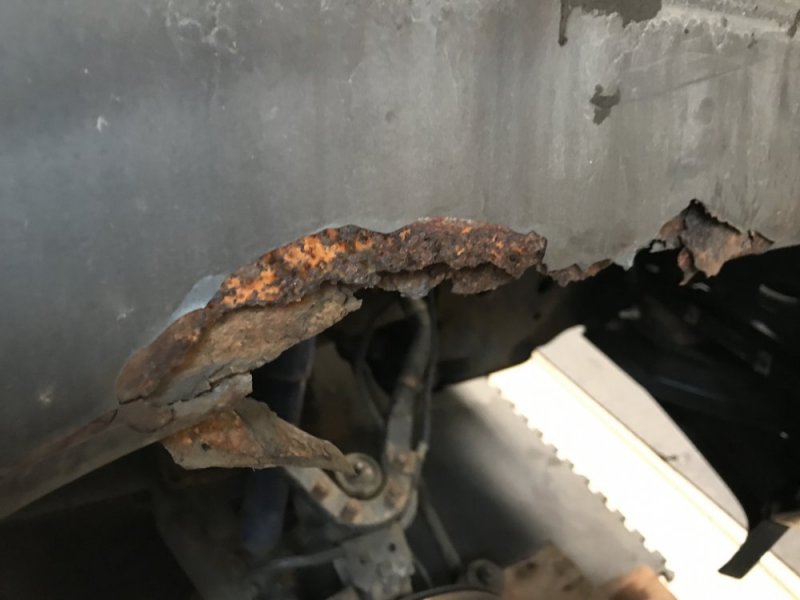
o Pull Inner Fender and discard (Rusted out edges)
o New Inner Fender
§ Prime
§ Paint
§ Rubberized Undercoating
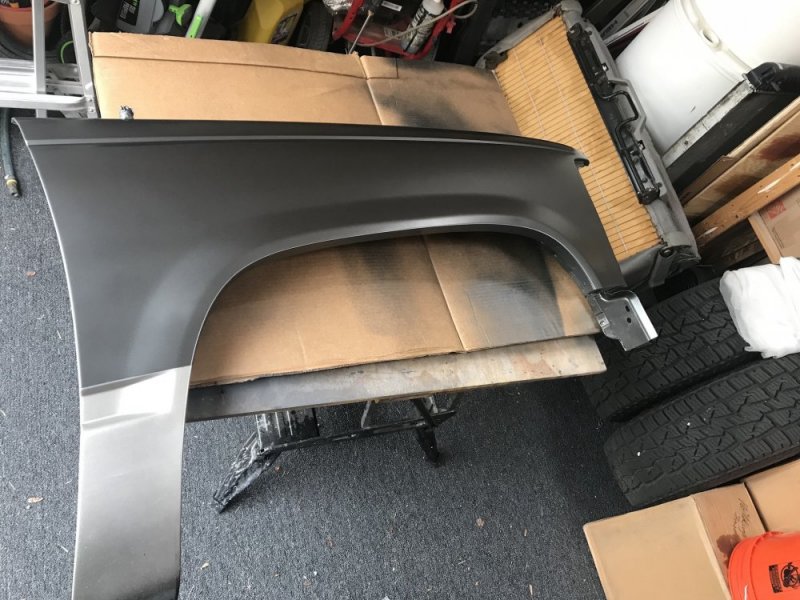
o Pull Fender and REPLACE
o Remove Flare and repair gouge
o Sand, Prime, and Repaint in Storm Grey and Pewter
§ Color Sand w/ 800 Grit
§ Clear Coat
§ Color Sand 800, 1000, 2000 and Polish
o Template Fender Flare Holes and Drill front and reverse side holes
o Re-install
o Glow Plugs
o Inspect…good enough
o Glow Plug Wires
o Pull old harness
o Install PT Wiring Solutions Glow Plug Harness
o Inspect for exhaust leak at Turbo Down Pipe
o Remove Turbo (HURRICANE 7 Swap in)
o Pop Test Injectors at Bill’s - Good to go; great spray patterns and lots of chatter.
o These were replaced recently but, as the vehicle had been only run occasionally in the years since they were put in....
o Pop tested a "New" rebuilt set from a local shop, 5000 miles on them...pissing at 1800, no pop until well over 2800 and then, horrible spray pattern.
o Clean Grounds at back of Intake
o Clean Ground at Fire Wall
o Clean Ground at Frame
o Replace Batter w/new OPTIMA RED TOP
o Replace Inner Fender


Fender – Driver’s Side

o Pull Battery and Discard - Dead
o Pull Inner Fender and discard (Rusted out edges)
o New Inner Fender
§ Prime
§ Paint
§ Rubberized Undercoating
o Clean Inside Fender surfaces of salt and rust
o Treat w/ POR-15
o Coat with Rubber Undercoat Spray
o Pull aftermarket Windshield washer tank and motor
o Install OEM (LMC) Washer Tank, motor and lines
o Glow Plugs – Inspect, good enough for now
o Glow Plug Wires
o Pull old harness
o Finish Install of PT Wiring Solutions Harness
o Replace Inner fender (wheel well)

IMG_9702.JPG
IMG_9699.JPG IMG_9704.JPG
 
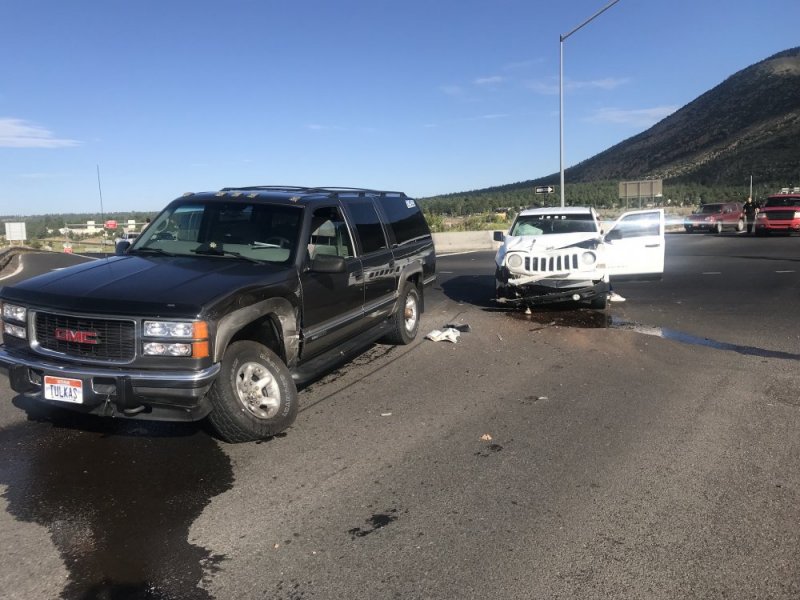
With the Burb being totaled by a red-light-running-no-braking Jeep patriot on 14 July 2019...
IMG_1612.jpg

...the list of new shocks, rear A/C, rear heating, steering box, steering shaft rag joints, continued undercarriage and differential rust issues along with the myriad of other little things I needed and/or wanted to do has been blessedly cancelled. It has now turned into a list of cannibalization items. In one day, even a high elevation AZ desert hot one, I could strip it of:

Sunglasses I left in the Ceiling Storage
Cup Holder from Center Console (sorry Ted, very rare and it will fit my truck)
Aluminum (OEM) Splash Plate and Heath PMD Kit
Stereo & Back Up Camera, Microphone
Water Pump and Fan, Lower and Upper Hoses
Serpentine Belt
Heath's Generation One Cold Air Intake Kit (practically came off in the impact anyway)
Turbo Charger
Turbo Charger oil feed and return
Upper and Lower Air Intakes
Batteries (new optima Red Tops)
Battery Cables (PT Wiring Solution Upgrade
Glow Pug Harness (PT Wiring again)
Four way and turn signal relays (LED Resistored)
Painless HD Headlight Harness
Painless Four-High Harness
Turn Signals (New w/ LEDs)
Head Lights (New Anzios)
Tail Lights (New LED units)
Door Courtesy Lights and LEDs
Interior LEDS
Instrument Panel, Dome & Map Lights, Doors
Hood because my truck's unit fell off a saw horse and crushed the leading edge and I suck at body work
Air Conditioning Compressor?
This list totals about $4700 worth of stuff.

Ted (635) has a Burb and wanted some stuff. That would be a second day given the AZ heat.
Front Seats
New Carpet
Ceiling Console / Storage
Map Lights and Fixtures
Tires and Wheels?
Running Boards?
Speakers
Chrome Door Handles

More than One Day:
Motor (can't have too many <100K units laying around with a fluid dampener HB and new HB pulley on 'em)
Oil Cooler cause it's attached to the motor
Doors for Big-T (these do have rust damage along the bottom that's been repaired)

First things first. Insurance Settlement, buy back the wreck, move it to a place to cannibalize it near where Ted lives in southern AZ as the wife has definitely given me "the look" and we all know what that means.
For those that don't, allow me to post a You Tube link for a blast from the past
 
Back
Top