
Pruittx2
Been around a bit
With one mirror glass broke and one mirror not fully working, on my 1995 Suburban, I decided to order a new set.
So I ordered a 99 factory set with Power and Heated glass. https://smile.amazon.com/gp/product/B008G1ZIOI/ref=oh_aui_detailpage_o01_s00?ie=UTF8&psc=1 for under $51.
My 95 had power but not heat, So here's how that went!

This is the plug that came on new mirrors,, 6 wires in a 8 hole plug.
the stock mirrors had a 4wire/4hole plug.
First thing is to pull these 2 grey wire retention plugs out,,,

Then with a filed down flat edged paper clip,,, you slip the pin end into the cavity
to release the hold tab to be able to slide the wires out of the black plastic block

to get this:

Now all the wires on the new mirror have the same color as the old mirror,, so just match them up and all set NOT!!!!
doing that got me right is up, and up is left,, and down is,,,, well you get it. It couldn't be that easy. So with some trial and
error,, we finally got the magic match up. Re inserted the wires back in the 4 hole plug, leaving the 2 black wires out for the
heated mirror, and plugged her in. and Viola!

and on the passenger side,, 2 of the wires were completely different color than the Driver side.
So decode them again, via guess work, and get it right.
From this,,,,

To This!

The 2 blacks were for the defrost ,, so one grounds to mirror stud,, other ran thru door
down thru firewall, with the help of removing door panels, and home made snake tool

Pulled up to mirror.

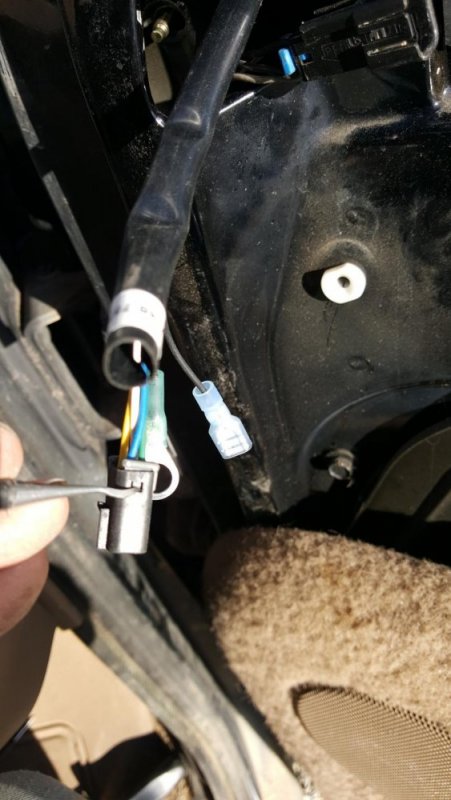
Tied them both together, and after some searching found this plug in the lower driver area, that was live on the rear
defrost button on HVAC control panel.

Now we're all set.
So I ordered a 99 factory set with Power and Heated glass. https://smile.amazon.com/gp/product/B008G1ZIOI/ref=oh_aui_detailpage_o01_s00?ie=UTF8&psc=1 for under $51.
My 95 had power but not heat, So here's how that went!
This is the plug that came on new mirrors,, 6 wires in a 8 hole plug.
the stock mirrors had a 4wire/4hole plug.
First thing is to pull these 2 grey wire retention plugs out,,,
Then with a filed down flat edged paper clip,,, you slip the pin end into the cavity
to release the hold tab to be able to slide the wires out of the black plastic block
to get this:
Now all the wires on the new mirror have the same color as the old mirror,, so just match them up and all set NOT!!!!
doing that got me right is up, and up is left,, and down is,,,, well you get it. It couldn't be that easy. So with some trial and
error,, we finally got the magic match up. Re inserted the wires back in the 4 hole plug, leaving the 2 black wires out for the
heated mirror, and plugged her in. and Viola!
and on the passenger side,, 2 of the wires were completely different color than the Driver side.
So decode them again, via guess work, and get it right.
From this,,,,
To This!
The 2 blacks were for the defrost ,, so one grounds to mirror stud,, other ran thru door
down thru firewall, with the help of removing door panels, and home made snake tool
Pulled up to mirror.
Tied them both together, and after some searching found this plug in the lower driver area, that was live on the rear
defrost button on HVAC control panel.
Now we're all set.
Attachments
Last edited:
